element14 Community
element14 Community
    Register Log In
  • Site
  • Search
  • Log In Register
  • Community Hub
    Community Hub
    • What's New on element14
    • Feedback and Support
    • Benefits of Membership
    • Personal Blogs
    • Members Area
    • Achievement Levels
  • Learn
    Learn
    • Ask an Expert
    • eBooks
    • element14 presents
    • Learning Center
    • Tech Spotlight
    • STEM Academy
    • Webinars, Training and Events
    • Learning Groups
  • Technologies
    Technologies
    • 3D Printing
    • FPGA
    • Industrial Automation
    • Internet of Things
    • Power & Energy
    • Sensors
    • Technology Groups
  • Challenges & Projects
    Challenges & Projects
    • Design Challenges
    • element14 presents Projects
    • Project14
    • Arduino Projects
    • Raspberry Pi Projects
    • Project Groups
  • Products
    Products
    • Arduino
    • Avnet Boards Community
    • Dev Tools
    • Manufacturers
    • Multicomp Pro
    • Product Groups
    • Raspberry Pi
    • RoadTests & Reviews
  • About Us
  • Store
    Store
    • Visit Your Store
    • Choose another store...
      • Europe
      •  Austria (German)
      •  Belgium (Dutch, French)
      •  Bulgaria (Bulgarian)
      •  Czech Republic (Czech)
      •  Denmark (Danish)
      •  Estonia (Estonian)
      •  Finland (Finnish)
      •  France (French)
      •  Germany (German)
      •  Hungary (Hungarian)
      •  Ireland
      •  Israel
      •  Italy (Italian)
      •  Latvia (Latvian)
      •  
      •  Lithuania (Lithuanian)
      •  Netherlands (Dutch)
      •  Norway (Norwegian)
      •  Poland (Polish)
      •  Portugal (Portuguese)
      •  Romania (Romanian)
      •  Russia (Russian)
      •  Slovakia (Slovak)
      •  Slovenia (Slovenian)
      •  Spain (Spanish)
      •  Sweden (Swedish)
      •  Switzerland(German, French)
      •  Turkey (Turkish)
      •  United Kingdom
      • Asia Pacific
      •  Australia
      •  China
      •  Hong Kong
      •  India
      •  Korea (Korean)
      •  Malaysia
      •  New Zealand
      •  Philippines
      •  Singapore
      •  Taiwan
      •  Thailand (Thai)
      • Americas
      •  Brazil (Portuguese)
      •  Canada
      •  Mexico (Spanish)
      •  United States
      Can't find the country/region you're looking for? Visit our export site or find a local distributor.
  • Translate
  • Profile
  • Settings
Embedded and Microcontrollers
  • Technologies
  • More
Embedded and Microcontrollers
Blog Taiyo Yuden BLE EVK : Wireless LED Control
  • Blog
  • Forum
  • Documents
  • Quiz
  • Polls
  • Files
  • Members
  • Mentions
  • Sub-Groups
  • Tags
  • More
  • Cancel
  • New
Join Embedded and Microcontrollers to participate - click to join for free!
  • Share
  • More
  • Cancel
Group Actions
  • Group RSS
  • More
  • Cancel
Engagement
  • Author Author: navadeepganeshu
  • Date Created: 21 Aug 2020 5:29 PM Date Created
  • Views 1587 views
  • Likes 0 likes
  • Comments 3 comments
  • ble
  • taiyo yuden
  • wireless
  • embedded system
  • bluetooth®
Related
Recommended

Taiyo Yuden BLE EVK : Wireless LED Control

navadeepganeshu
navadeepganeshu
21 Aug 2020

Taiyo Yuden BLE EVK : Toggling GPIOs , explains and gives insights on basic configuration, setting up and toggling GPIOs by interacting with MPU core of Taiyo Yuden BluetoothRegistered Low Energy EYSNSNZWW Evaluation Kit . This blog will be all about configuring, setting up and wirelessly controlling LED over BLE. For this, I downloaded the following software tools.


  • Segger Embedded Studio V5.10.
  • Nordic Semi nRF52 SDK with Soft Device 12,13.
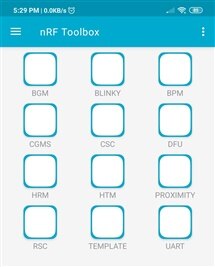
  • nRF Toolbox Android Application
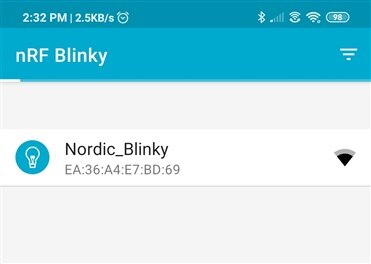
  • nRF Blinky Android Application


Taiyo Yuden EYSNSNZWW comes with ARMRegistered Cortex M4 32bit processor and 192KB Flash + 24KB RAM having SPI, UART, I2C, PDM and 12bit ADC GPIO interphases. It is also integrated with Bluetooth 5.2 totally said to be Nordic nRF52811 / ARMRegistered CortexTm-M4 32-bit processor.


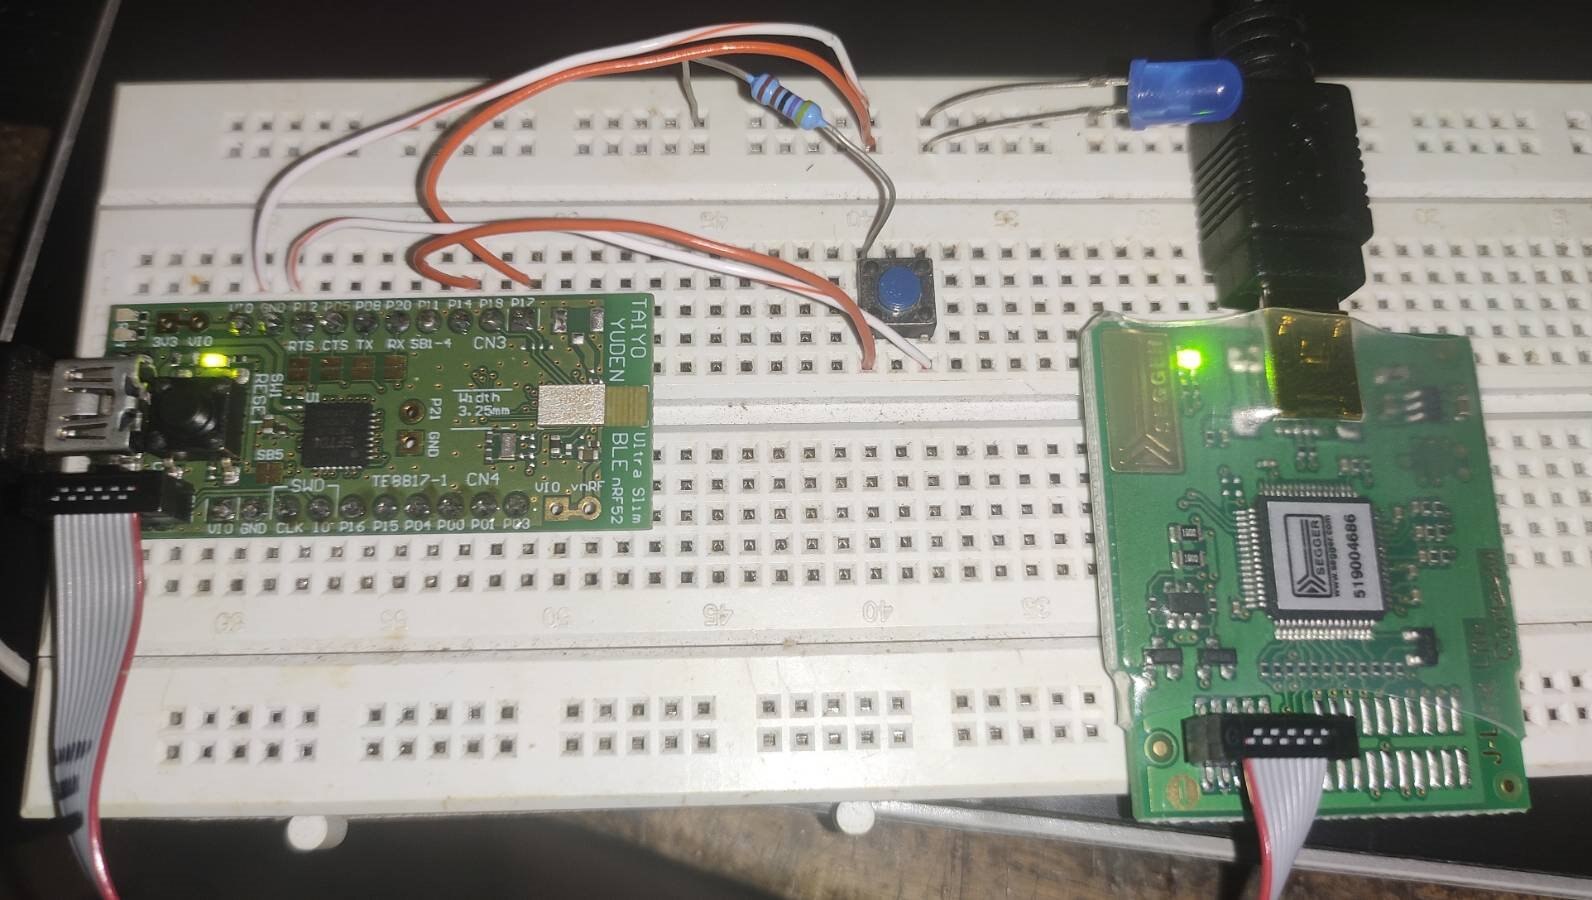
To control the LED over BLE, access to the processor core layer and soft device must be implemented (used Soft Device 12). First, I connected debugger to BLE module with SWD cable. Then on, USB  interphase to the computer running Segger Embedded IDE. With connections being planned, I interphased LED to GPIO 17 and Pushbutton to GPIO 14 which is pulled up with 4K7 resistor.


image


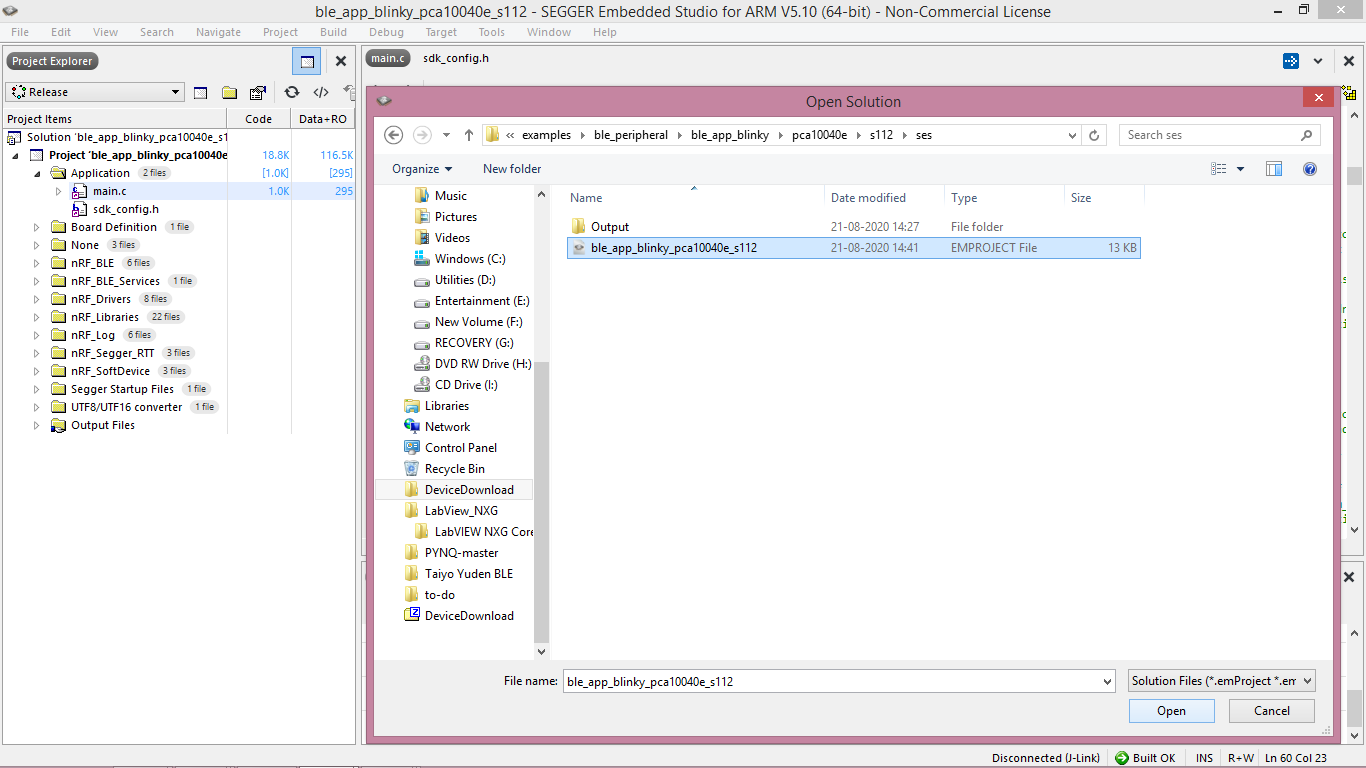
Now, in Segger Studio go to "File" >> "Open Solution" to open sample project from nRF52 SDK at "<location>" >> "examples" >> "ble_peripheral" >> "PCA10040e" >> "s112" >> "ses" >> "ble_app_blinky". Sample projects are made for Nordic development boards which supports Taiyo Yuden BLE kit too with some modifications since they have same nRF5281x core. (files are also attached below)

image


This image depicts what exactly are we doing and why?


image

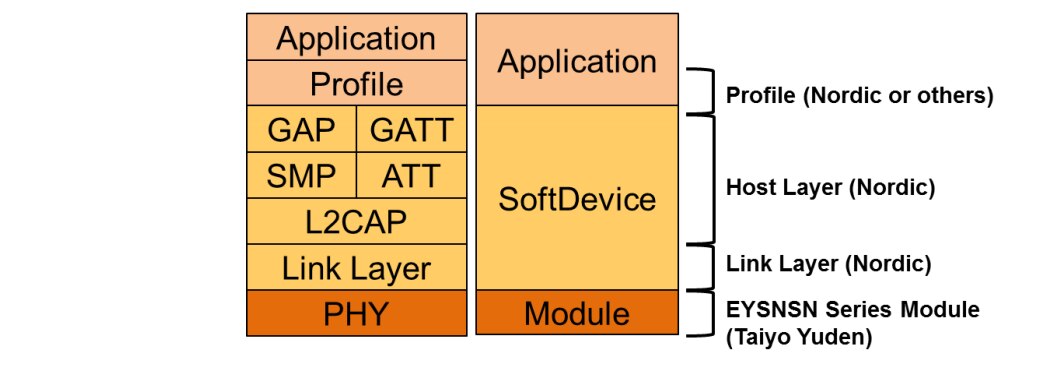
There is a processor module in the base which is just like MCU can be barely operated by simple C programming. To operate Bluetooth Low Energy, a separate stack is placed above so called SoftDevice (SD) which performs authentication, crypto, connectivity and some backend operations for Bluetooth protocol. Here, I am using the s12 version. Moving on,


image


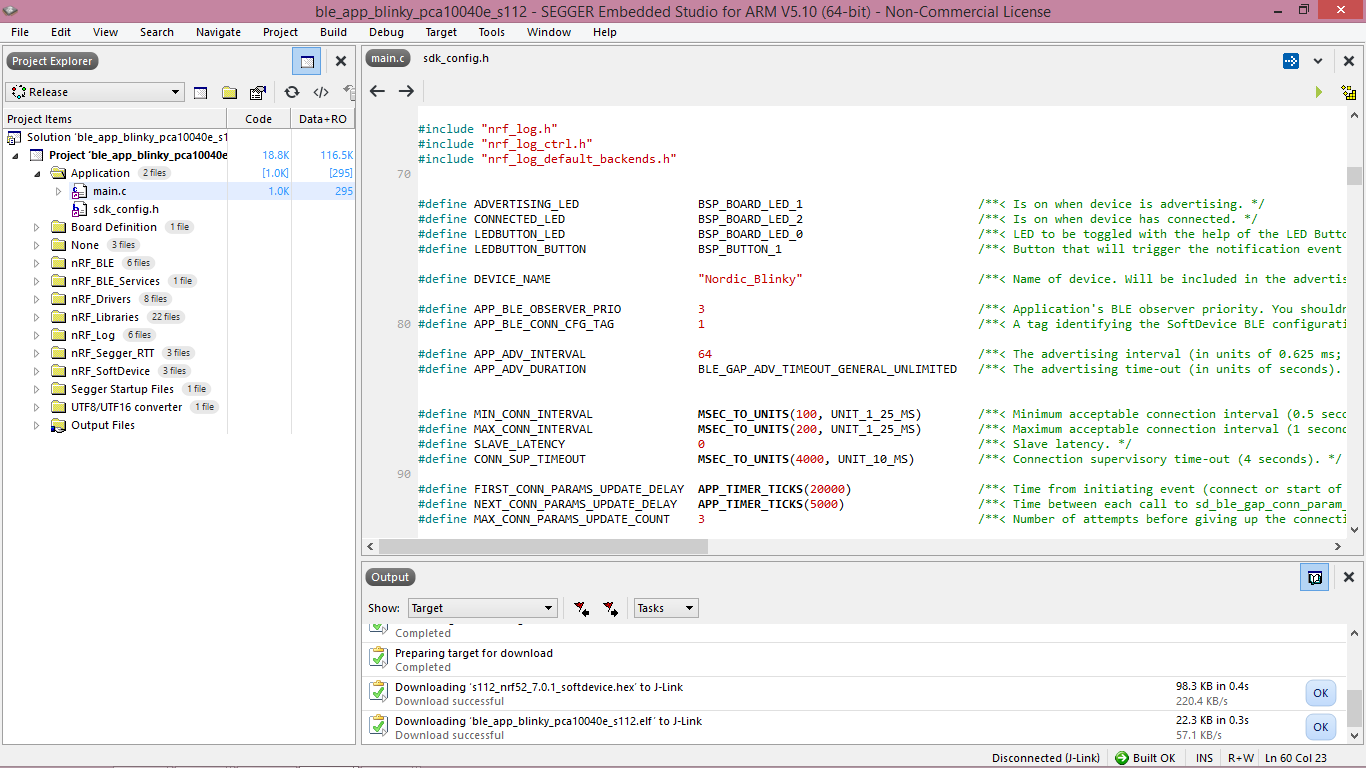
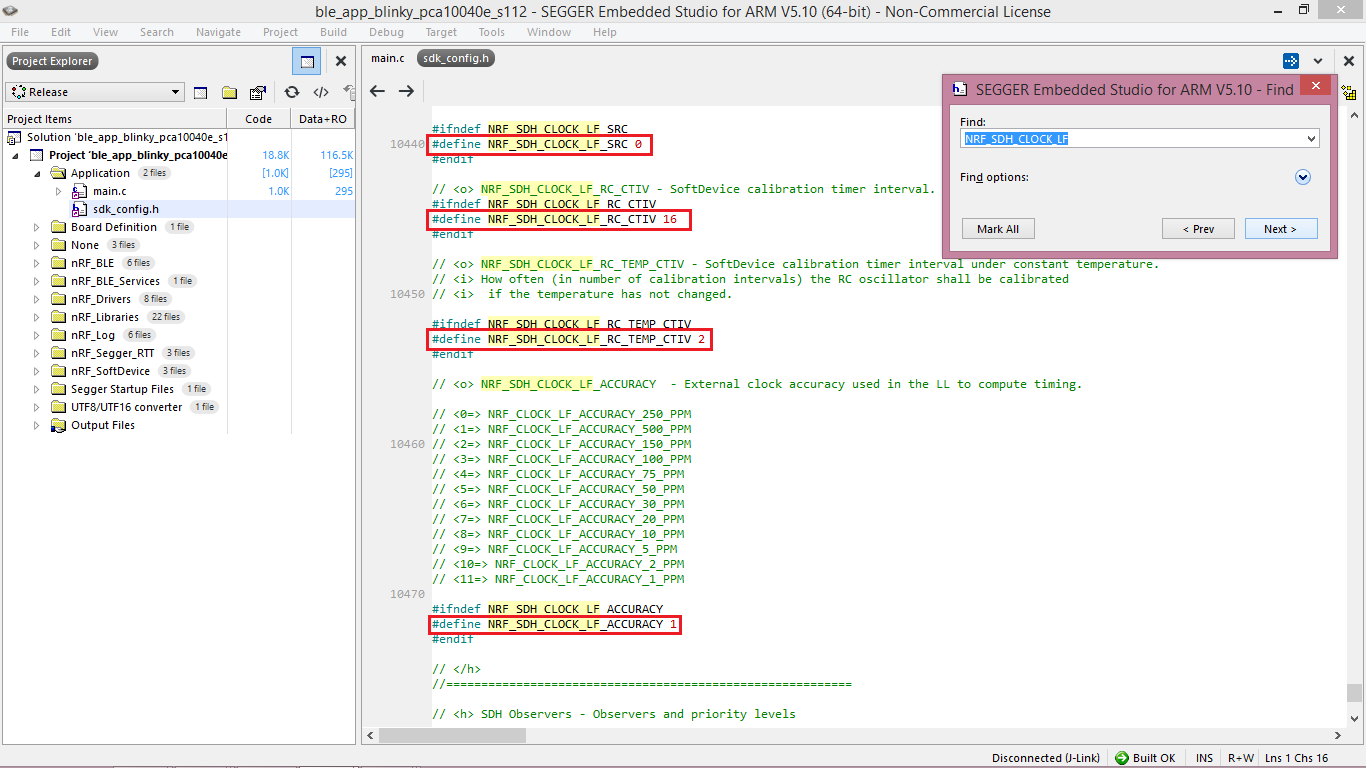
This being opened, there are some modifications to be done in order to support Taiyo Yuden EYSNSNZWW. Go to "sdk_config.h" in the left file-navigation window and change the clock configuration. By default, the firmware is configured to 32kHz external crystal oscillator(XTAL) which is not actually present in this module. Following is the updated image with clock values set as per.


image


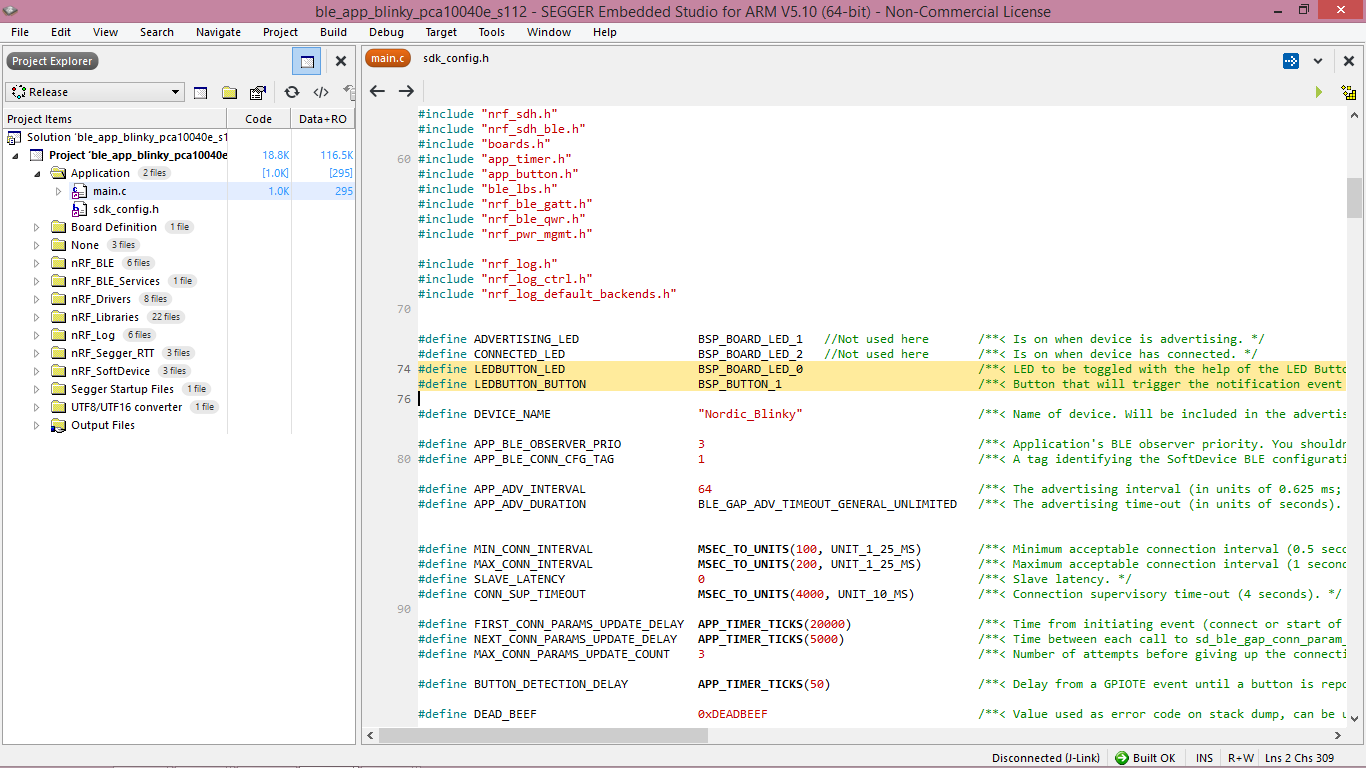
Next step is to configure the LED and Switch pins which again, come by default as per Nordic BLE development Kit. If respective modifications are done as shown in the below image, it's done program is ready to build.

But why?

There is a small anomaly in pin definitions of nRF BLE and Taiyo Yuden BLE. In firmware, LED Pin declaration number starts from LED1, LED2, LED3 and Button1, Button2,......etc which is as LED0, LED1, LED2 and Button0, Button1,...etc for Taiyo Yuden modules. This is a major point to be noted because of which you can save a few hours in figuring out stuff( I spent an hour though image )


image


Pin configuration documentation is as follows :

https://infocenter.nordicsemi.com/index.jsp?topic=%2Fug_nrf52832_dk%2FUG%2Fnrf52_DK%2Fintro.html

https://www.yuden.co.jp/jp/product/category/module/lineup/cms/wp-content/uploads/2020/05/TY_BLE_EYSNSNZWW_DataReport_V1_…


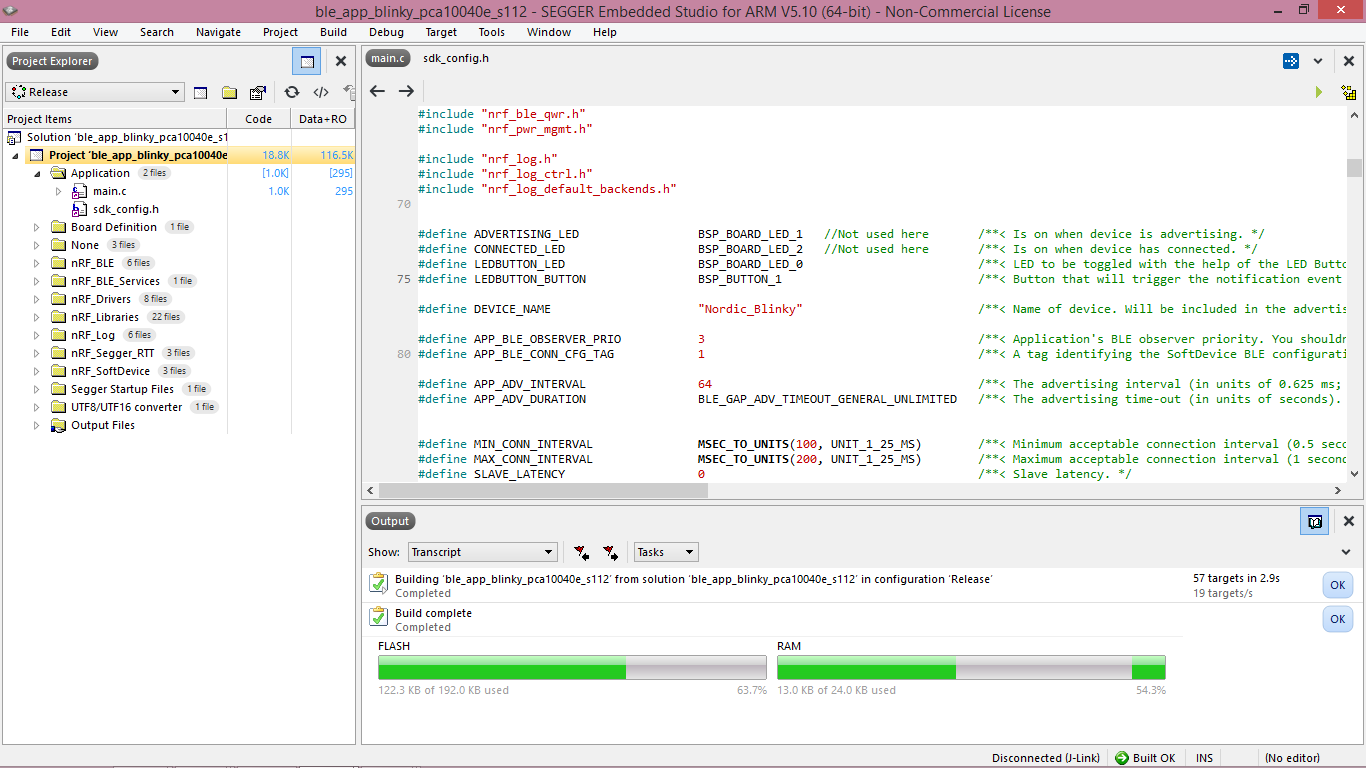
All these being done, its time to build.


image


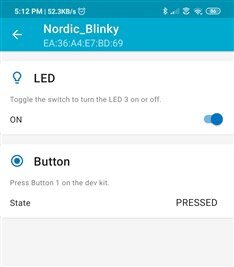
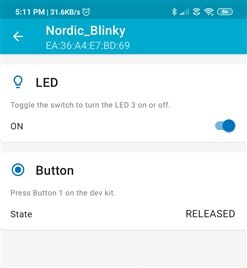
Built? Upload and its done. The module must start streaming BLE and accessing the nRF Toolkit app, the connection can be established through which wireless control works!


imageimageimageimage


Here is a quick video on working. Hope this will encapsulate things.


You don't have permission to edit metadata of this video.
Edit media
x
image
Upload Preview
image

* sorry for the wiggles and degraded quality. I hope this helps always.


P.S: This post is subjected to change and have a timely update. Do let me know for improvements and suggestions in the comments.


Cheers!!!

Happy Making.

Attachments:
BLE_LED_Control.zip
  • Sign in to reply

Top Comments

  • DAB
    DAB over 5 years ago +1
    Nice basic test. You could take it up a notch by entering multiple button pushes and have the device blink the light the same number of inputs or change the blink rate, set up complex morse code outputs…
  • navadeepganeshu
    navadeepganeshu over 5 years ago in reply to DAB

    DAB image,


    Taiyo Yuden BLE EVK : Miniature BLE Automation. Here is what I tried on multiple IO BLE control implementation. Not with switches morse code though, its UART command controlled.

    • Cancel
    • Vote Up 0 Vote Down
    • Sign in to reply
    • More
    • Cancel
  • navadeepganeshu
    navadeepganeshu over 5 years ago in reply to DAB

    Thanks.


    Interesting implementation. Will try that out !

    • Cancel
    • Vote Up 0 Vote Down
    • Sign in to reply
    • More
    • Cancel
  • DAB
    DAB over 5 years ago

    Nice basic test.


    You could take it up a notch by entering multiple button  pushes and have the device blink the light the same number of inputs or change the blink rate, set up complex morse code outputs with the LED. Consider it a secret knock sequence to turn on the light.


    All kinds of options with this basic I/O capability.


    DAB

    • Cancel
    • Vote Up +1 Vote Down
    • Sign in to reply
    • More
    • Cancel
element14 Community

element14 is the first online community specifically for engineers. Connect with your peers and get expert answers to your questions.

  • Members
  • Learn
  • Technologies
  • Challenges & Projects
  • Products
  • Store
  • About Us
  • Feedback & Support
  • FAQs
  • Terms of Use
  • Privacy Policy
  • Legal and Copyright Notices
  • Sitemap
  • Cookies

An Avnet Company © 2025 Premier Farnell Limited. All Rights Reserved.

Premier Farnell Ltd, registered in England and Wales (no 00876412), registered office: Farnell House, Forge Lane, Leeds LS12 2NE.

ICP 备案号 10220084.

Follow element14

  • X
  • Facebook
  • linkedin
  • YouTube