


Taiyo Yuden BLE EVK : Toggling GPIOs and Taiyo Yuden BLE EVK : Wireless LED Control gives insights on basic configuration, setting up, toggling GPIOs and wireless LED control by interacting with MPU core + SoftDevice of Taiyo Yuden Bluetooth Low Energy EYSNSNZWW Evaluation Kit . This blog will be all about building a 1miniaturised home automation system using BLE with UART communication with Arduino Nano. For this, I downloaded the following software tools
- Segger Embedded Studio V5.10.
- Nordic Semi nRF52 SDK with Soft Device 12,13.
- nRF Toolbox Android Application
Taiyo Yuden EYSNSNZWW comes with ARM Cortex M4 32bit processor and 192KB Flash + 24KB RAM having SPI, UART, I2C, PDM and 12bit ADC GPIO interphases. It is also integrated with Bluetooth 5.2 totally said to be Nordic nRF52811 / ARM Cortex -M4 32-bit processor. To control the appliances over BLE, access to the processor core layer and soft device must be implemented (used Soft Device 13 here). First, I connected debugger to BLE module with SWD cable. Then on, USB interphase to the computer running Segger Embedded IDE. With connections being planned, I interphased Pin8(Tx) and Pin20(Rx) of Taiyo Yuden module with respective Rx and Tx of Arduino Nano. Since I needed 5 digital IO's and easy implementation, I chose to add Arduino Nano.
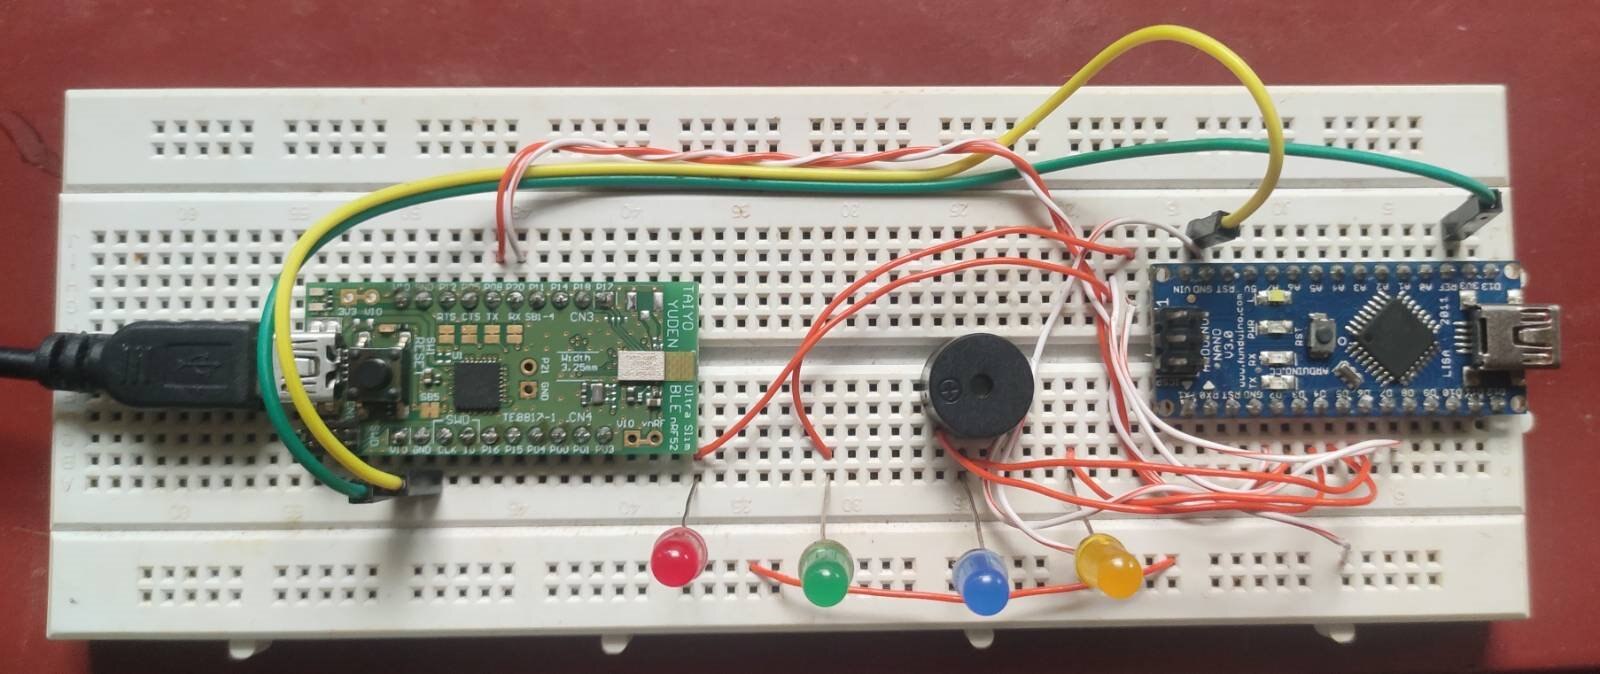
Basically, Arduino Nano receives all the serial commands from the BLE module and accordingly controls the LEDs and a buzzer connected to it. There can be "n" number of unique commands and any number of IO's can be controlled. Nano makes this job handy. To do it, first, UART transmission must be implemented in Taiyo Yuden BLE module which is already given as an example.
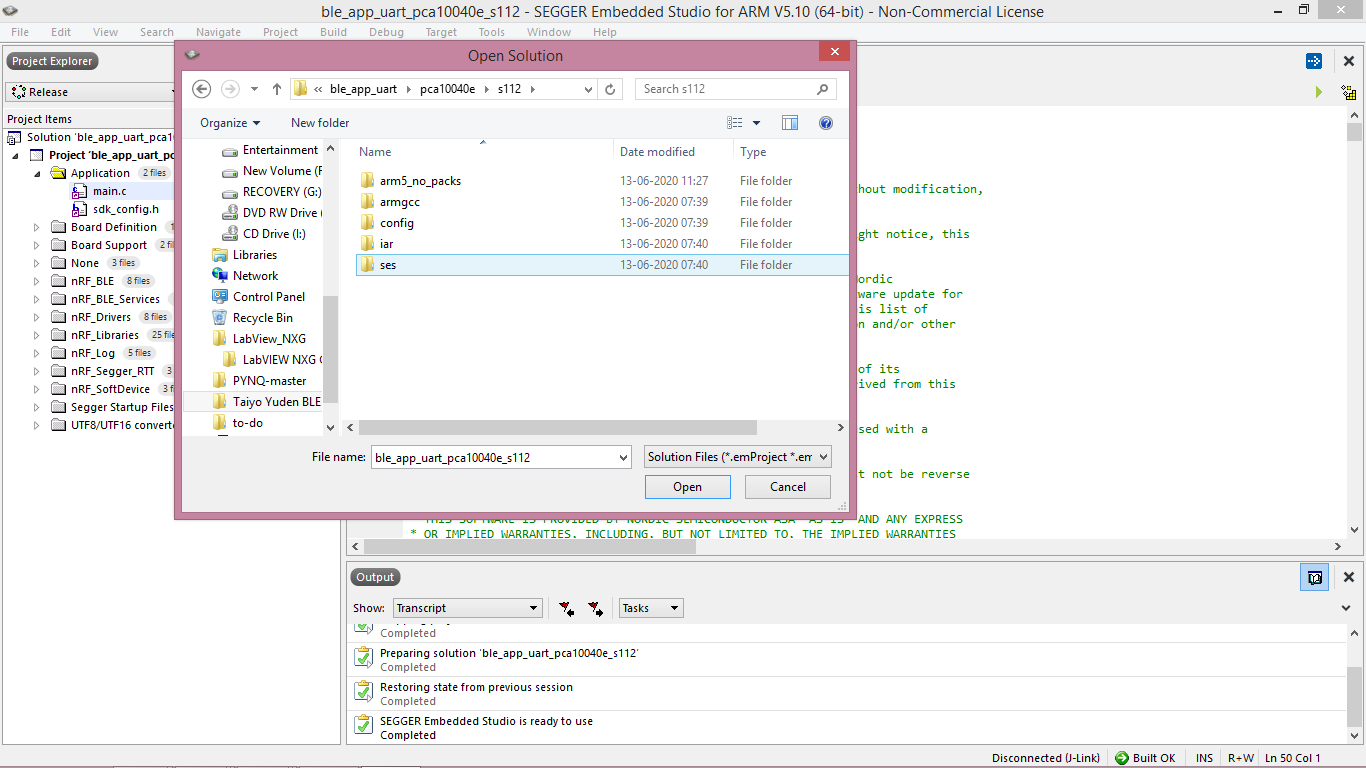
In Segger Studio go to "File" >> "Open Solution" to open sample project from nRF52 SDK at "<location>" >> "examples" >> "ble_app_uart" >> "PCA10040e" >> "s112" >> "ses" >> "ble_app_uart". Sample projects are made for Nordic development boards which supports Taiyo Yuden BLE kit too with some modifications since they have same nRF5281x core. (files are also attached below)
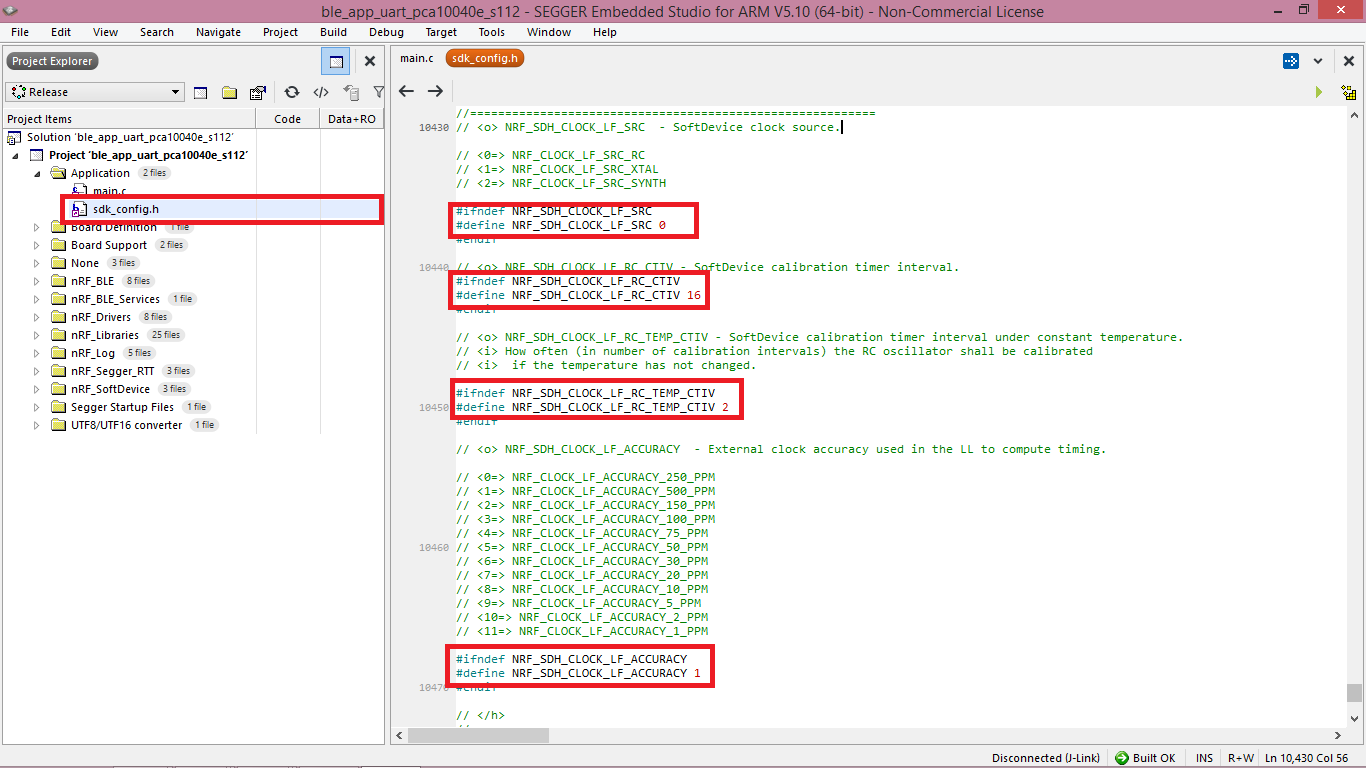
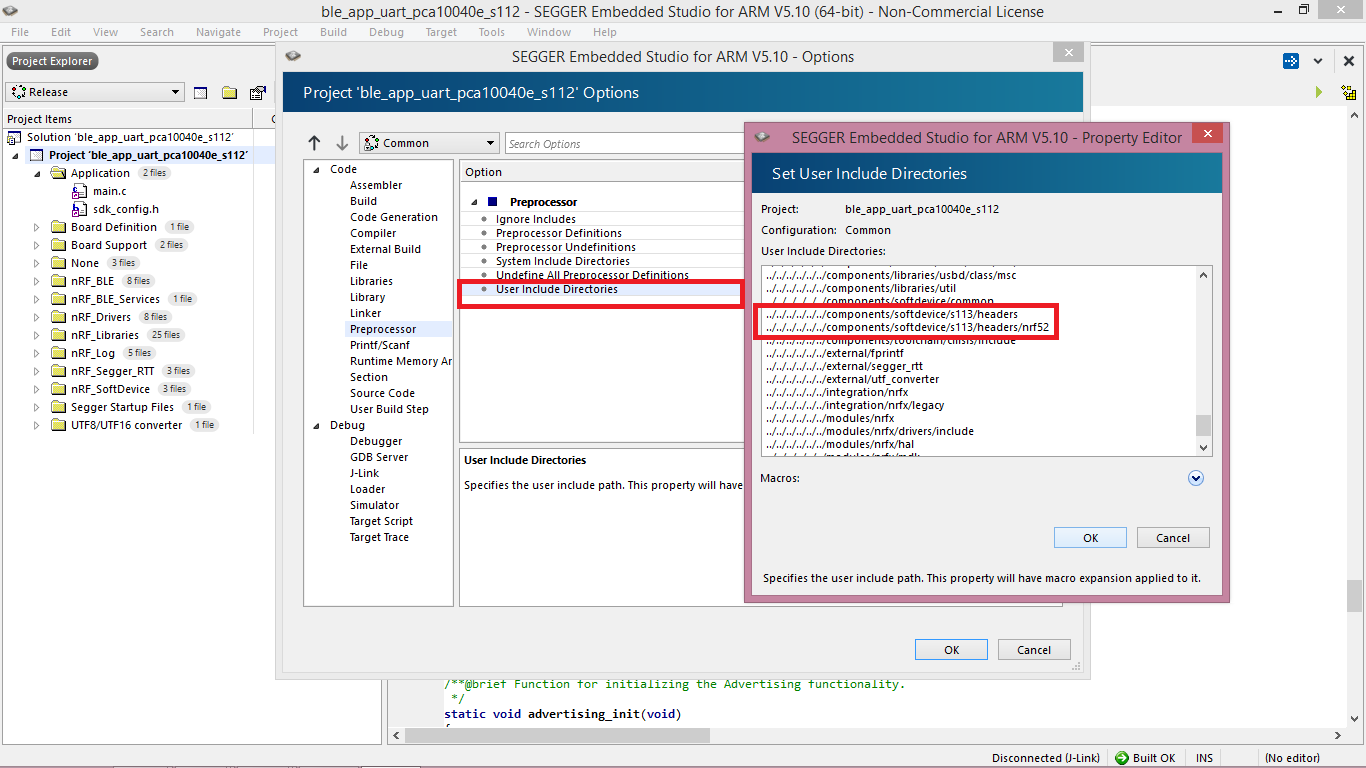
| {gallery} Firmware Setup |
|---|
IMAGE TITLE: File Location |
IMAGE TITLE: Clock Configuration |
IMAGE TITLE: UART Pins |
IMAGE TITLE: Change SoftDevice |
IMAGE TITLE: Change SoftDevice |
IMAGE TITLE: Change SoftDevice |
IMAGE TITLE: Change Memory mapping |
IMAGE TITLE: Build and Download to Hardware. |


After making the following changes and building, Taiyo Yuden BLE Kit is ready! Pulling the serial wires (Rx/Tx) to Arduino Nano and interphasing LED's to some Digital IOs, its time to program Nano.
I have used basic serial read command and ran 5 test cases for 5 different commands namely "R", "G", "B", "Y", "S" for Red, Green, Blue, Yellow LEDs and Buzzer in pins D4, D5, D6, D7, D8 respectively. Then, I used a reset command "0" to set all the digital pins to state 0. Following is the implementation.
#include <SoftwareSerial.h> //for ser1ial communication within software.
#define TxD 2               //  in1itialize
#define RxD 3
SoftwareSerial mySerial(RxD, TxD);
void setup()
{
  pinMode(4, OUTPUT);       //  R,G,B,Y LED's
  pinMode(5, OUTPUT);
  pinMode(6, OUTPUT);
  pinMode(7, OUTPUT);
  pinMode(8, OUTPUT);
  mySerial.begin(115200);
  Serial.begin(115200);
}

void loop()
{
    char isValidInput;
    do
{

char c;
while ( !mySerial.available());
c = mySerial.read();
Serial.print(c);
switch ( c )
{

case 'R':
mySerial.println( "You've entered Red ON" ); //Red LED control
digitalWrite(8, HIGH);
isValidInput = true;
break;

case 'G':
mySerial.println( "You've entered Green ON " ); //Green LED control
digitalWrite(7, HIGH);
isValidInput = true;
break;

case 'B':
mySerial.println( "You've entered Blue ON" );  //Blue LED control
digitalWrite(6, HIGH);
isValidInput = true;
break;

case 'Y':
mySerial.println( "You've entered Yellow ON" ); //Ye11ow LED control
digitalWrite(5, HIGH);
isValidInput = true;
break;

case 'S':
mySerial.println( "You've entered Sound ON" );
digitalWrite(4, HIGH);
isValidInput = true;
break;

case '0':
mySerial.println( "You've pressed Reset!" ); //Resetting Pins
digitalWrite(4, LOW);
digitalWrite(5, LOW);
digitalWrite(6, LOW);
digitalWrite(7, LOW);
digitalWrite(8, LOW);
isValidInput = true;
break;

default:
mySerial.println( "Enter 'R'-Red/'G'-Green/'B'-Blue/'Y'-Yellow/'S'-Sound/'0'-Reset");
isValidInput = false;                           //User input decleration
break;
}
}
while ( isValidInput == true );
}

All these being set up, its good to go! Opening the nRF Toolbox Application and connecting to "Nordic_UART" network will open the UART Terminal on the smartphone. The commands to enter will be displayed for choosing the device to toggle. Once the respective command is entered, you can see live toggling on the other end.
The BLE network range in Taiyo Yuden EYSNSNZWW Module isn't that good. Changing floors will cut the connection and network ranges about 10 meters.


Here is a quick video on working of Wireless BLE Miniature Automation.
Cheers!!!
Happy Making.
Top Comments