


|
I connected an Arduino MKR WAN 1310 to Amazon Web Services (AWS IoT). Then tested if the Arduino can publish uplinks to AWS, and can receive AWS topics as downlinks. This post is my log of the activity.
Read this post first: Arduino MKR WAN 1310 on The Things Network (TTN) . This posts starts at the point where the Arduino is working with The Things Network (TTN). |

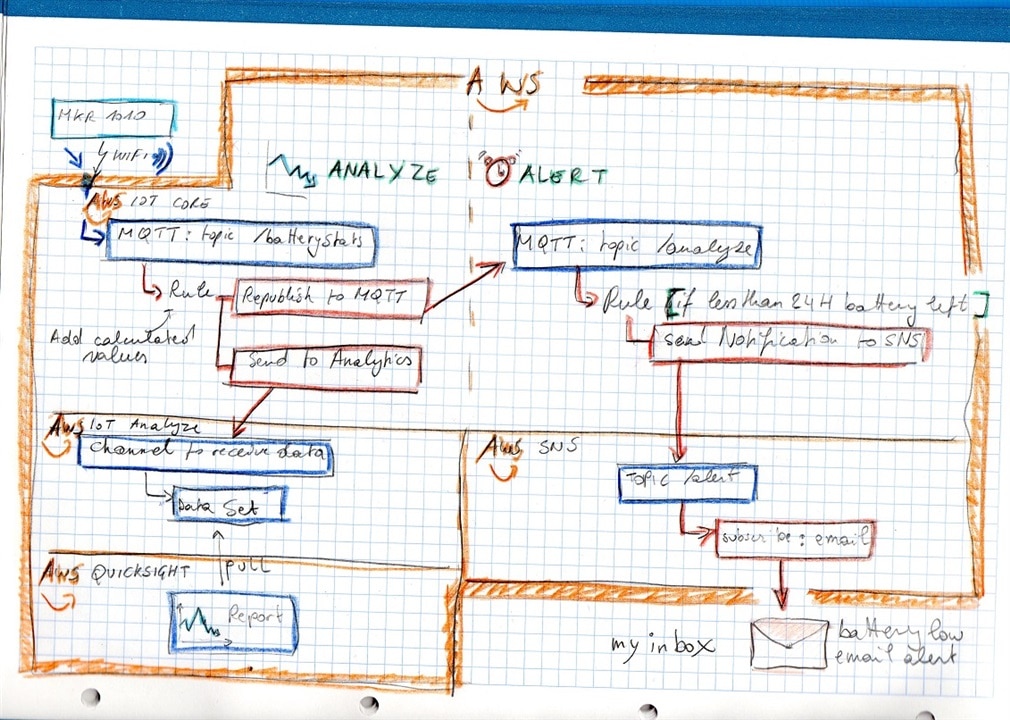
The Example setup
An Arduino MKR WAN 1310 is registered and tested on TTN ( Arduino MKR WAN 1310 on The Things Network (TTN) ).
TTN to AWS integration is enabled.
Data that the Arduino uplinks via LoRaWan, arrive on an AWS IoT MQTT topic.
Data that's published to a topic on that Aws IoT MQTT service, arrives on the Arduino as a downlink.

image source: me
|
AWS IoT MQTT is the usual integration entry to AWS IoT. From that point on, you can use other AWS services (database, dashboards and analytics, mail, alerts, ...).
|
Assumptions:
- you have your Arduino MKR WAN 1310 integrated with TTN
- you have an AWS account and know how to navigate the AWS IoT console.
Steps:
- enable integration of your TTN Thing with AWS IoT
- test uplink to AWS IoT MQTT and
- test downlink from AWS IoT MQTT
We don't have to change the Arduino code or modify existing TTN setup. The integration is an extension, not a modification.
Enable TTN to AWS integration
I followed the Integrating TTN and AWS: TTN AWS Deployment guide. It's very clear.
I can't explain it better than they do. Follow their steps. A few things to note:
- Create the required Application API ID from the TTN console, with the application open:
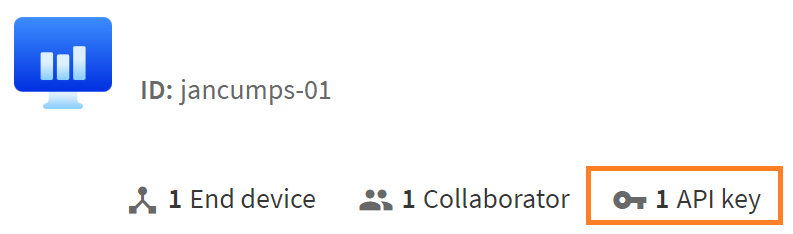
The application ID (named jancumps-01 in my case) will be the Application ID on the integration template that we 'll use in one of the next steps. - When creating the application API ID, you get a pop-up with the key. Copy this because you will not be able to retrieve this later. It's secret, store it safely.
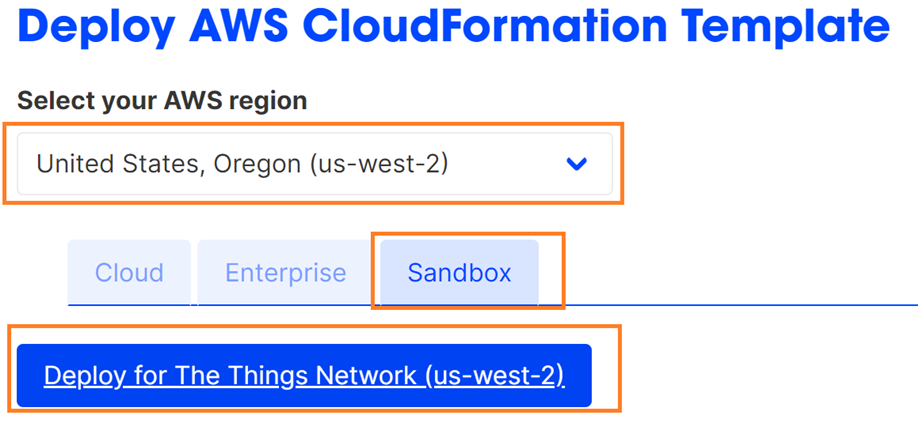
When we integrate with AWS, this will have to be entered in the template as Application API Key. - When you are ready to open the template, take care to select the correct TTN (Sandbox) and AWS (your AWS area) settings. You can find the AWS info when you open the console in your browser. For me, it's Oregon, US WEST 2.
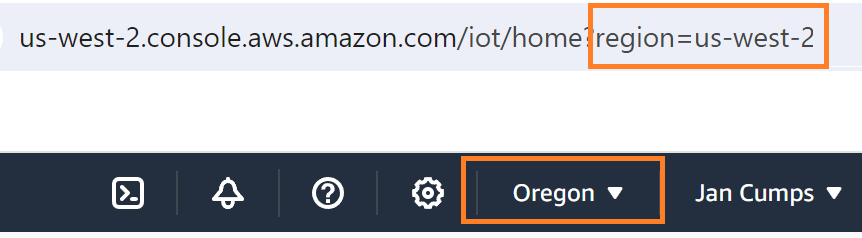
Don't just take over my settings :) - this has to be correct for you. - Now you're ready to activate the integration:
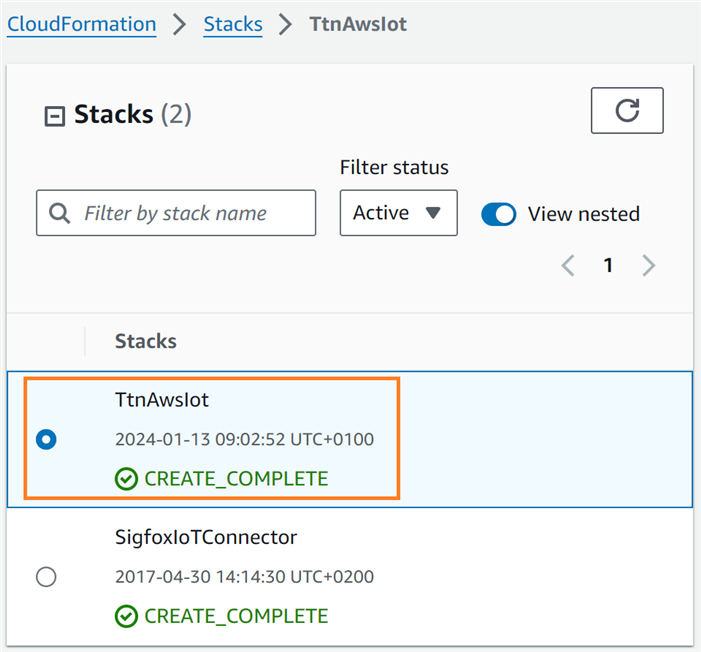
- Keep all defaults. Find a sensible name (I called it TtnAwsIot) . The two fields below have to be filled with the IDs you saved while creating the key in TTN.
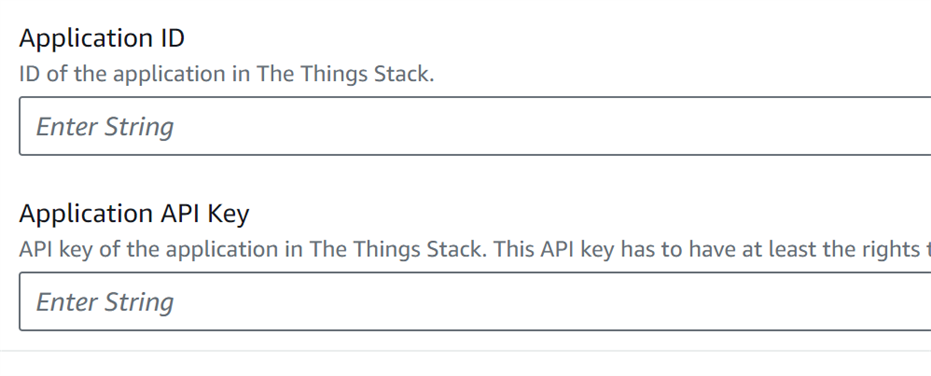
When you filled in all required data, and left all defaults, submit the template. The integration setup will be executed on AWS. You don't need to do any manual setup in AWS console.
You may be surprised that you don't see the Thing in AWS yet. That will happen automatically the next time it talks to a TTN gateway. Usually the next uplink, or the next join.
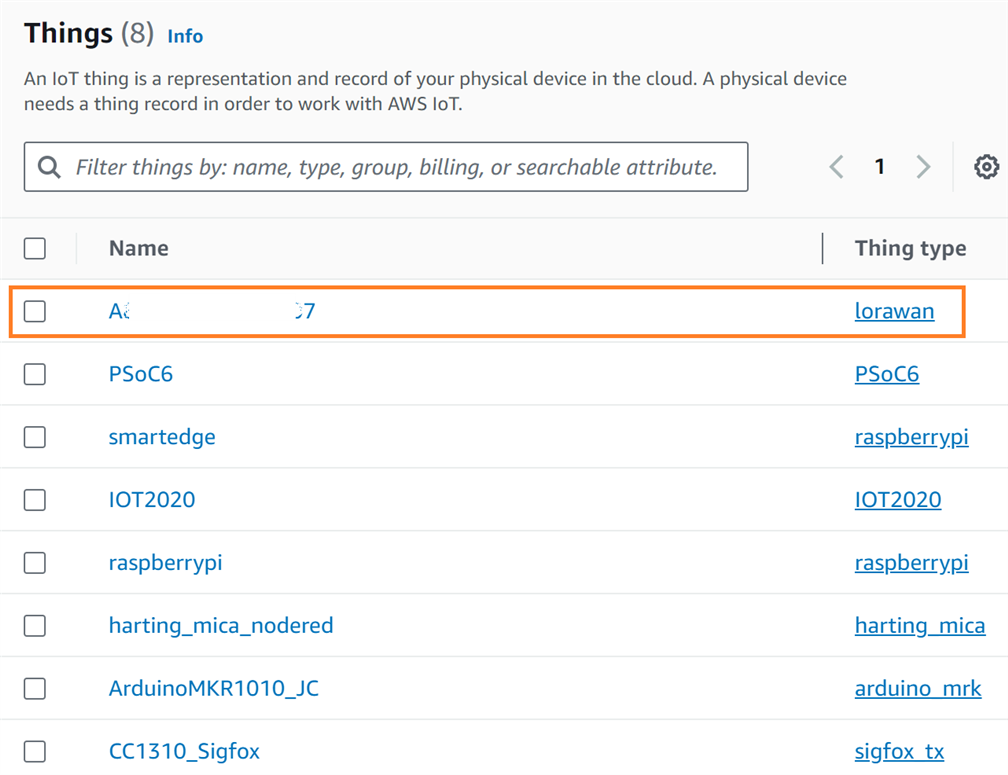
image source: all things I have registered on AWS
Details:

Test the integration with AWS IoT MQTT
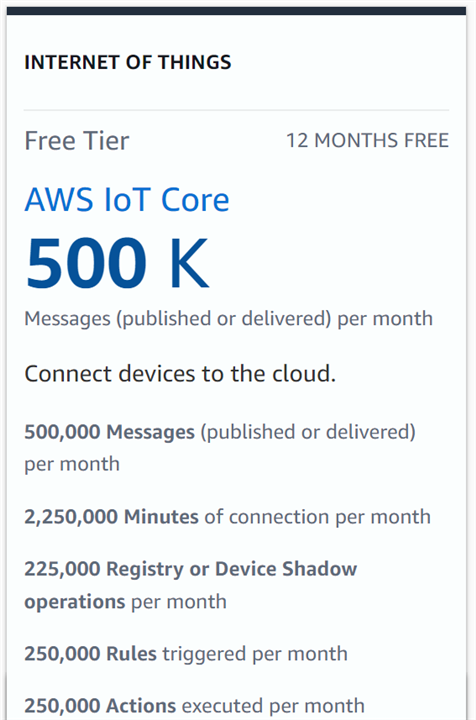 |
The AWS free tier account has limitations. Take care to stay within the limits, to prevent charges. When you have concluded the exercise, it's good practice to disable the integrations and/or switch off the Arduino. |
TTN has written a good manual for that too: TTN AWS Messages. I followed the exact steps and it worked.
uplink from Arduino
To see incoming messages, go to the MQTT Test page of the AWS IoT console, and Subscribe to topic lorawan/#. As soon as your Arduino sends a message over LoRaWan, it will appear in the AWS IoT MQTT log . Her's a capture of an incoming payload:

That works. The payload is JSON, because we provided an uplink formatter in our TTN device setup.
downlink to Arduino
We can test that in the same MQTT console. Publish a message to the lorawan/downlink topic.
Payload:
{
  "thingName": "A****************7",
  "payload": {  "ledState": "on"   }
}
We can also use JSON here, because we have a downlink formatter in TTN.

The message will immediately appear in the live data log in the TTN console:

But will not yet arrive on the Arduino. That's because we'll only get downlink data when we start a communication (design choice in my sketch). Once we receive an uplink from the Arduino, the downlink is sent back:
![]()
And the LED will light up:

end to end
How the downlink works:
At the start of this test, Initial state, my Arduino was not active.
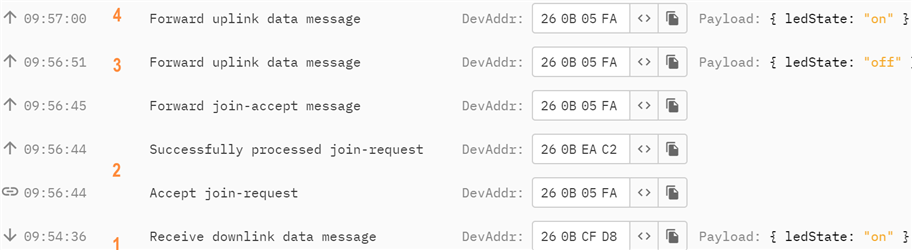
- on AWS, I posted a topic on the MQTT service to turn the Thing's LED on.
- 2 minutes later, I switched on the Arduino. It joined TTN
- the first activity of the Arduino sketch, after joining, is to uplink its LED status.
Immediately after that, it receives the downlink command to turn the LED on (the AWS message).
See image below for the detail of that. - After the Arduino's LED was switched on, the sketch noticed the state change. It uplinked the new status.

Enjoy!
If you just need a simple MQTT service to exchange data with your Arduino, check out Arduino MKR WAN 1310 integration with The Things Network MQTT .
-

DAB
-
Cancel
-
Vote Up
0
Vote Down
-
-
Sign in to reply
-
More
-
Cancel
Comment-

DAB
-
Cancel
-
Vote Up
0
Vote Down
-
-
Sign in to reply
-
More
-
Cancel
Children