


Much of this BLOG has been covered before and in other BLOGS, but for the sake of completeness, I have included it here. Additionally, Microsoft has recently discontinued support for their iot-explorer CLI tool and integrated that functionality into their Azure CLI tool, so I discuss how to install and get monitoring and messaging capabilities.
Web/Azure Prerequisites
To work with the example code, you must have an active Azure subscription. If you don't have an Azure account, you can create a free Azure trial account. After you have an account there are two steps you must perform to work with it:
- Step #1 You must create an IoT Hub. This is the repository that contains the devices you interact with.
- Step #2 You must register a device in the IoT Hub.
Create an IoT hub
- Sign in to the Azure portal.
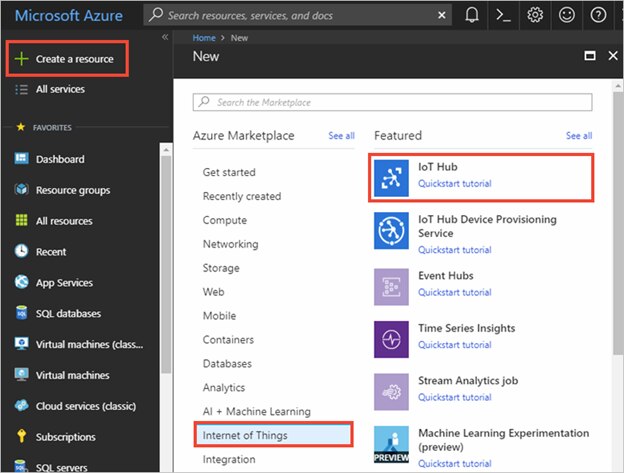
- Select Create a resource > Internet of Things > IoT Hub.
- In the IoT hub pane, enter the following information for your IoT hub:
- Subscription: Choose the subscription that you want to use to create this IoT hub.
- Resource group: Create a resource group to host the IoT hub or use an existing one. For more information, see Use resource groups to manage your Azure resources.
- Region: Select the closest location to you.
- Name: Create a name for your IoT hub. If the name you enter is available, a green check mark appears.
Important
The IoT hub will be publicly discoverable as a DNS endpoint, so make sure to avoid any sensitive information while naming it.
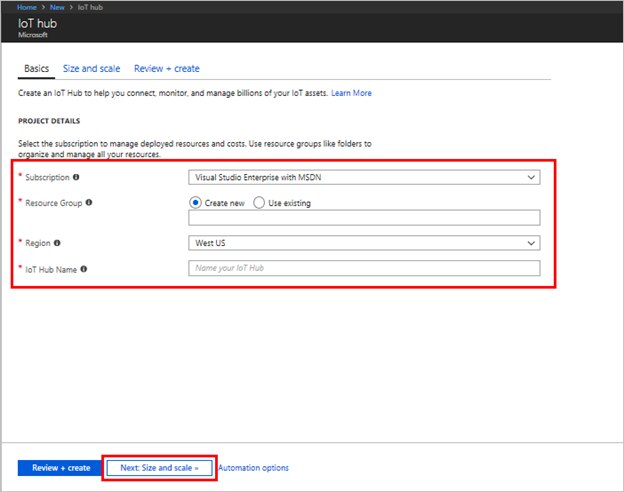
- Next: Size and scale to continue creating your IoT hub.
- Choose your Pricing and scale tier. For this article, select the F1 - Free tier if it's still available on your subscription. For more information, see the Pricing and scale tier.
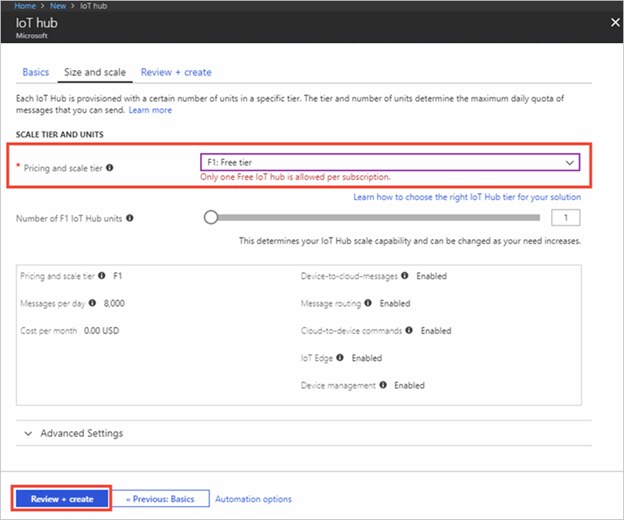
- Review + create.
- Review your IoT hub information, then click Create. Your IoT hub might take a few minutes to create. You can monitor the progress in the Notifications pane.
Retrieve the IoT Hub Connection String
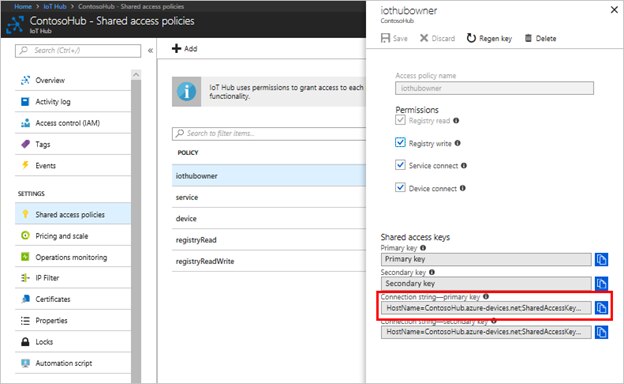
With the IoT Hub you just created, you will need to have a connection string to interact with it. You obtain this by going to the IoT hub navigation menu, and opening Shared access policies. Select the iothubowner policy, and then copy the Connection string---primary key of your IoT hub. For more information, see Control access to IoT Hub. This connection string is used by the device you create to connect to your IoT Hub.
Note: You need this iothubowner connection string to configure your example application.
Register your device in the IoT hub using the Web Interface
- In your IoT hub navigation menu, open IoT devices, then click Add to register your device in the IoT hub.
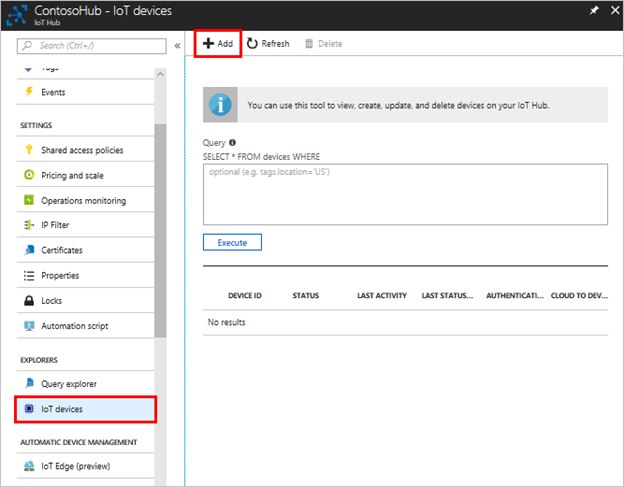
- Enter a Device ID for the new device. Device IDs are case sensitive.
Important: The device ID may be visible in collected logs so avoid sensitive information while naming it.
- Save.
- After the device is created, open the device from the list in the IoT devices pane.
- You should then record the Connection string---primary key for later use.
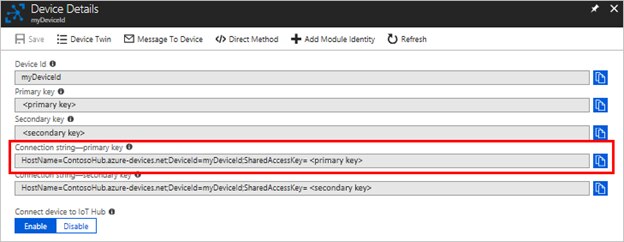
Note: There are two connection strings you have recorded now. The first Connection String is for connecting to the IoT Hub, the second connection string is for connecting to the device you created. When you want to interact with the device itself, you use the device connection string (the last one discussed). However, when you want to interact with the IoT Hub, you use the connection string obtained in the previous step. For me, this was a point of confusion initially.
Install Azure Command Line Interface (CLI)
The Azure CLI (with iot hub extensions) allows you to manage and monitor data that is sent to/from Azure IoT Hub using the command line. Alternatively, you can use the Microsoft Device Explorer (see next section).
To install the Azure CLI, use the information provided by Microsoft from https://docs.microsoft.com/en-us/cli/azure/install-azure-cli?view=azure-cli-latest. After the Azure CLI is installed, you need to add the add the azure-cli-iot-ext extension so that you can monitor/send messages to your device. This is done by executing the following command:
az extension add --name azure-cli-iot-ext
Install Microsoft Azure Device Explorer (Windows GUI)
Microsoft Device Explorer helps you manage devices, send messages, and monitor events by connecting to the IoT Hub that you have created using a graphical user interface. To use the GUI, Install this application. You will find the install package SetupDeviceExplorer.msi which will install everything needed.
Wrap-up
With the prerequisites installed, we have the tools necessary for the M18Qx to interact with Azure IoT Hub, plus, we have to tools necessary to both send and monitor messages sent between the M18Qx and Azure. You also use the connection strings we obtained to build the software application so it interacts with your Azure IoT Hub.