


Hello element14,
In this post, I'm introducing a oscilloscope-like instrument that you can build for less than $25. And the good thing is it can work over internet.
Introduction
Are you a electronics tinkerer? How many times you wished for an oscilloscope?? What about building one? And how awesome it would be if it can work over internet??
It all started when I saw a roadtest, here in element14. It was the road test for Tiva C Series TM4C1294 Connected LaunchPad. It is a evaluation kit from Texas Instruments. After going through the hardware specs, I was just blown away. For just $20, they are offering :
- TM4C1294NCPDT MCU: 120MHz 32-bit ARM Cortex-M4 CPU with floating point
- 1MB Flash
- 256KB SRAM
- 6KB EEPROM
- Integrated 10/100 Ethernet MAC+PHY
- data protection hardware
- 8x 32-bit timers
- dual 12-bit 2MSPS ADCs
- motion control PWMs
- USB H/D/O
- Ten I2C modules with four transmission speeds including high-speed mode
- On-board, in-circuit debug interface (ICDI)
Blown away, right? The feature is just a snapshot of what it actually have in its chest. You could go to Tiva C Series Connected LaunchPad (EK-TM4C1294XL) for more information. I posted my idea of an oscilloscope for the roadtest application and managed to get one. Thanks element14.
And when it came, it surprised me more. My laptop if running on Ubuntu. When I searched through the forums, I found that although Code Composer Studio( TI's own IDE ) works with linux, it won't support debugging feature. I went through the list of the boards fully supported, partially supported etc., but was not able to figure out exactly whether it will work or not. And when it came, it worked. Thanks TI, you people are now adding both development and debugging support to linux too. I'm so sure now linux fans will be happy.
And then I found 'Energia' - arduino like IDE for launchpads. With that, development is super easy. My previous experience with arduino helped me a lot. In Energia, you can simply put your arduino code( of course modified for GPIO pins ) and it will compile for launchpads. Energia has been around for a while and recently they added supported for TM4C1294 Connected launchpad. So I decided to use Energia rather than CCS. It actually accelerated my development time a lot.
A walk through
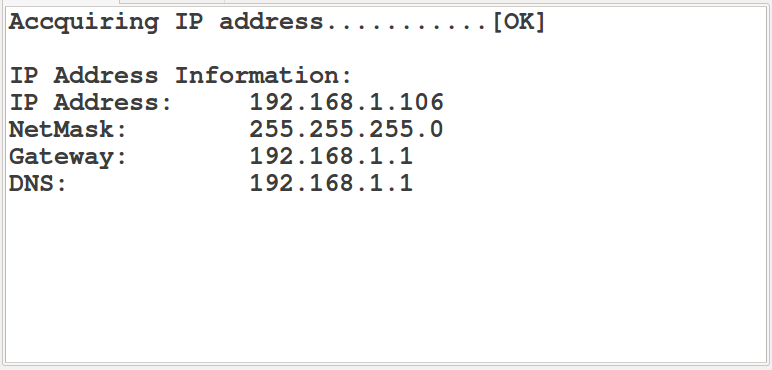
Before taking you to the hardware stuff, I would like to take you to a tour about how it works. As you might have figured out from the title of this post, it works over ethernet. You can connect it to your PC's ethernet port or to your home router. I'm using it by connecting it to my wifi router, so I have coded it to acquire IP via DHCP. But if you want to use it along with your PC, you would probably have to code it for acquiring static IP. If you used arduino with ethernet sheild, you know how to do it. If you are not, it's not a big deal. You could easily google it out. And make sure that a working internet connection is available in your PC( I'll explain why later ).After connecting it to router/PC, once it acquires IP, it will print the IP address via serial port. If you connect it to your PC via USB, you can see that in your serial monitor as shown below.
Once you know the IP address, you can use this to connect to launchpad. Please note that only firefox is supported currently. Once you access launchpad with firefox, you will be presented with a page like this.
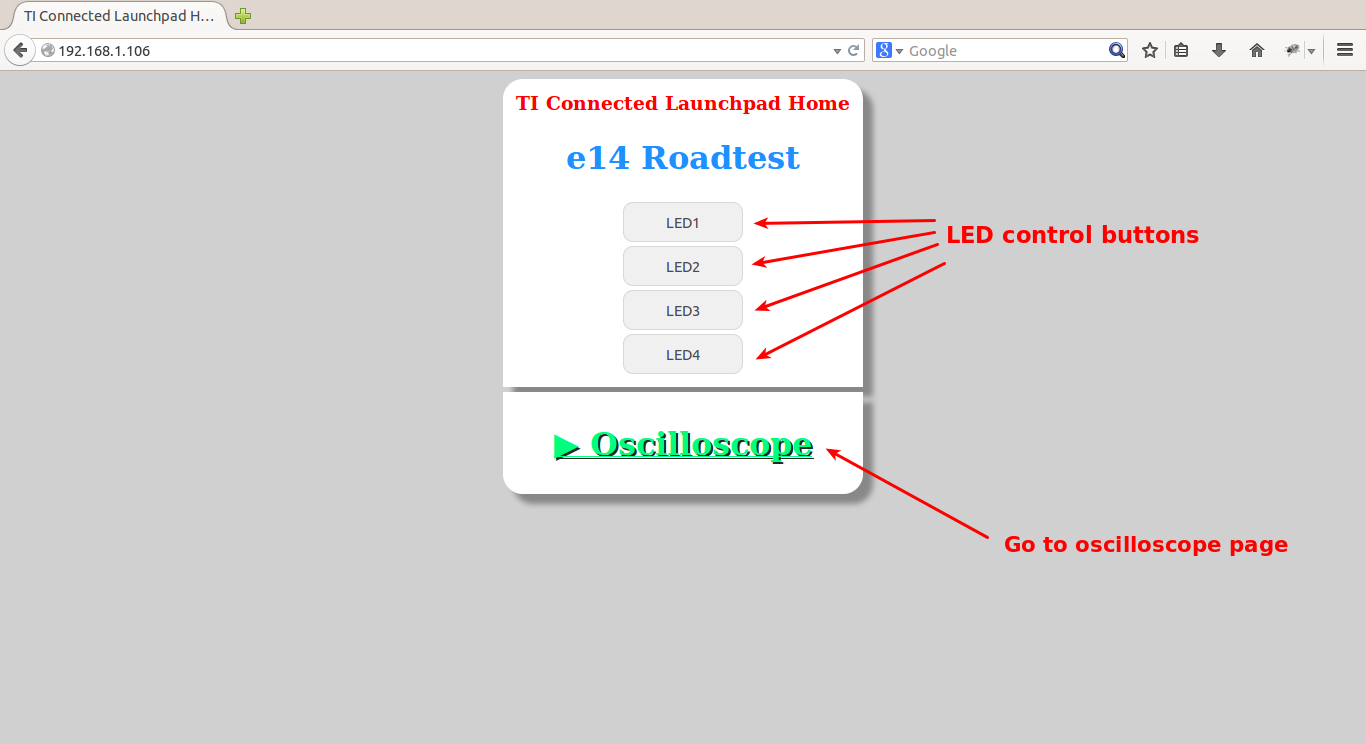
This page will allow you to control the onboard leds. I added this page as a point to test whether the connections are working fine. You can click on the 'Oscilloscope' link and it will take you to oscilloscope page, like this :
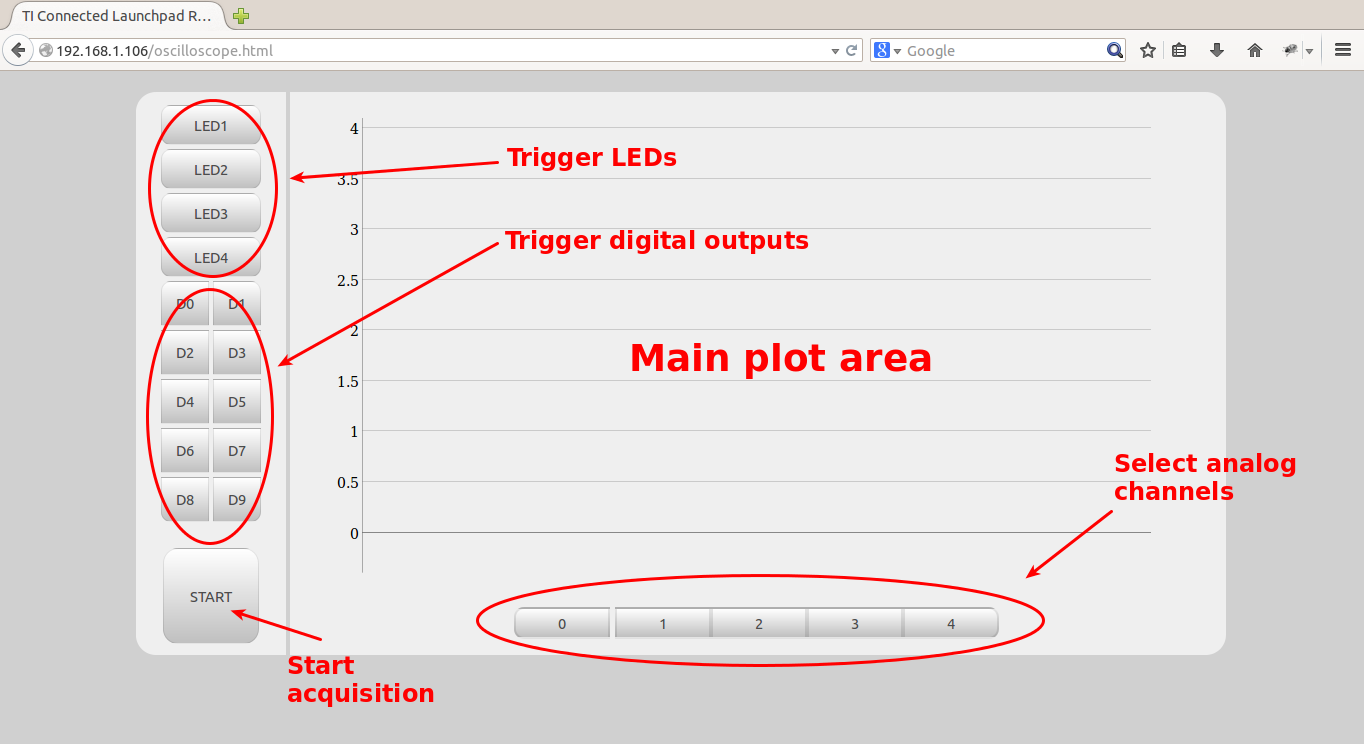
It has the ability to acquire from 5 analog channels and can control upto 10 GPIO pins. Feature to trigger some digital ouputs via the web interface which I think will be very useful when you want to trigger some external devices while taking the trace.
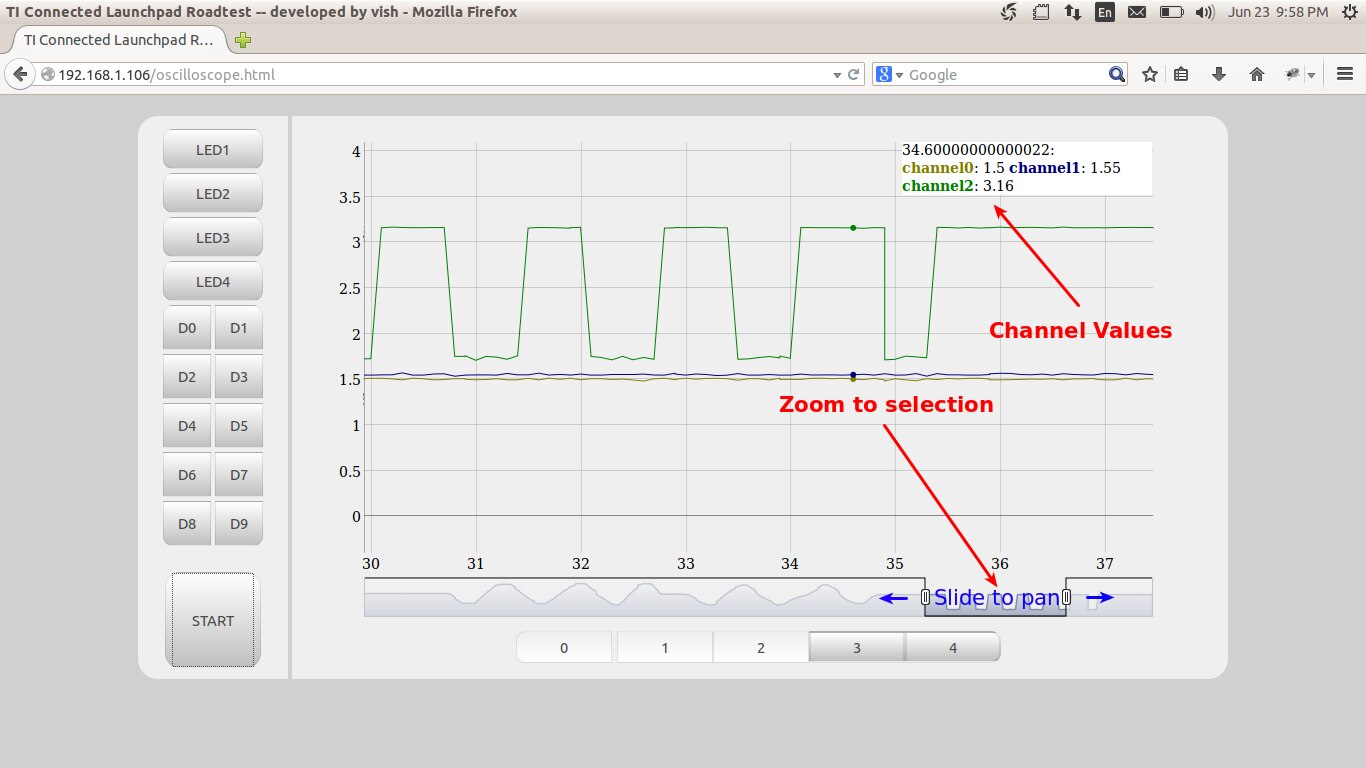
You can start measuring by clicking 'START' button. A sample trace is shown below.
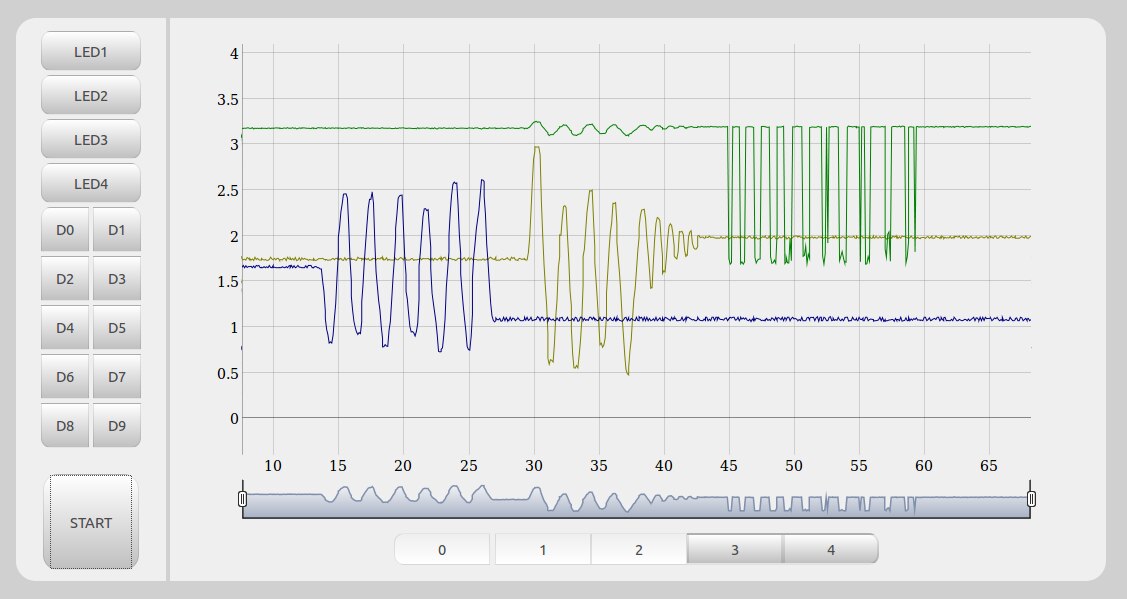
You will be able to see traces from three channels in the figure above. After you stop the trace, you can zoom to particular part of the trace and can see individual channel values by hovering mouse over it as shown in figure below.
How it works
What happens behind the scene is really simple. Evey time you clicks a button( LED/GPIO pins ), an ajax request is framed and send to the launchpad. It will respond by a corresponding status message, which upon reception, we will update to the UI. And when you click the start button, a function is called every 100ms which will query the launchpad for analog values. Once launchpad receives this query, it will sample the first five anaog channels( A0 ~ A4 ) and reports back the values. We will update this to the graph. For graph plotting purpose, I'm using an open source charting library, dygraphs. (http://dygraphs.com/). It is an incredibly simple charting library and has lots of features. But as I said, the update happens every 100ms, the sampling is also done at only 100ms intervals, which I know is not an appreciable rate. I'm working to a prototype which can handle upto 200kHz, but it very buggy and not much efficient for now. More on this below. I have also created a demo video to explain the functionality.
Testing the idea
For testing the idea I came up with a simple test circuit as shown in figure :
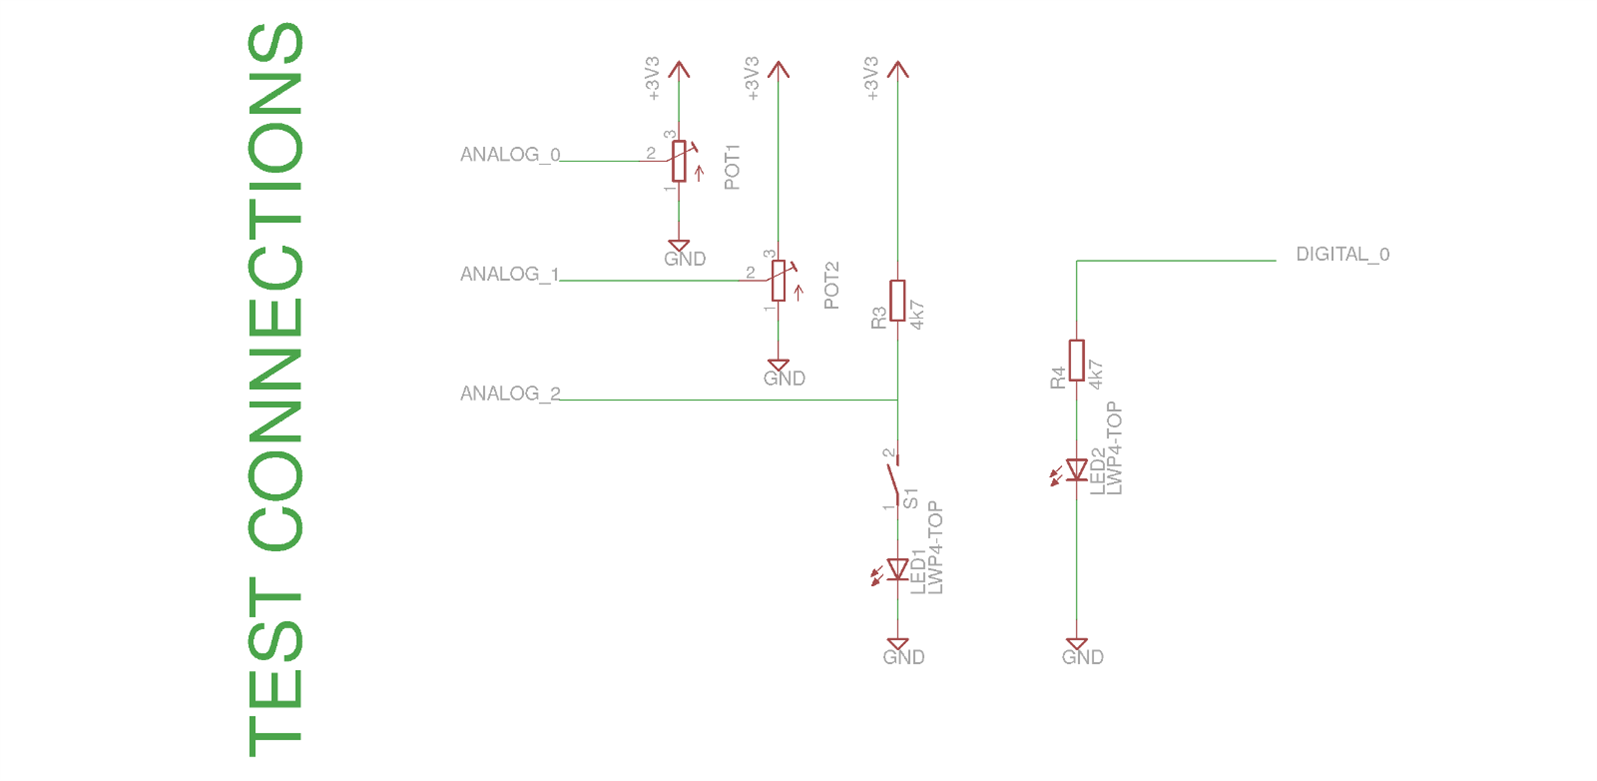
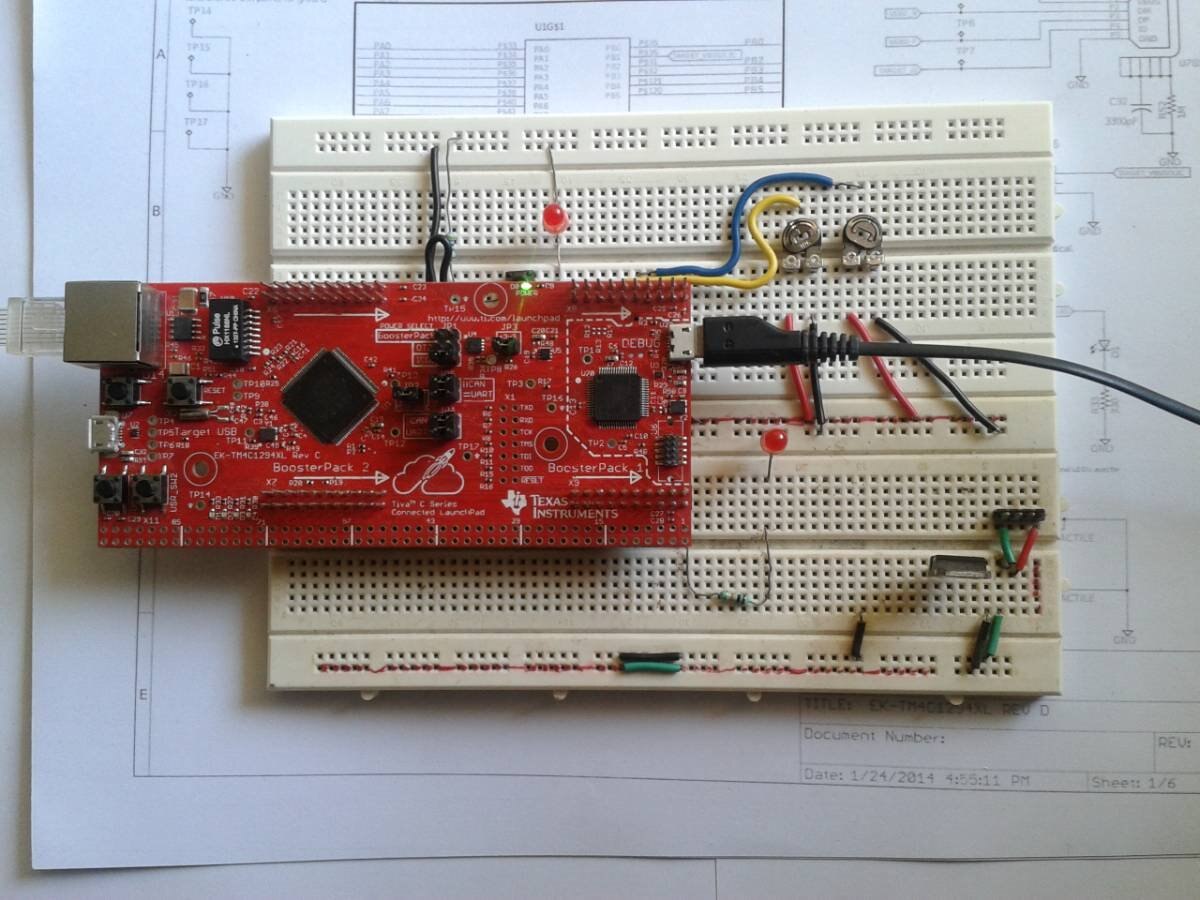
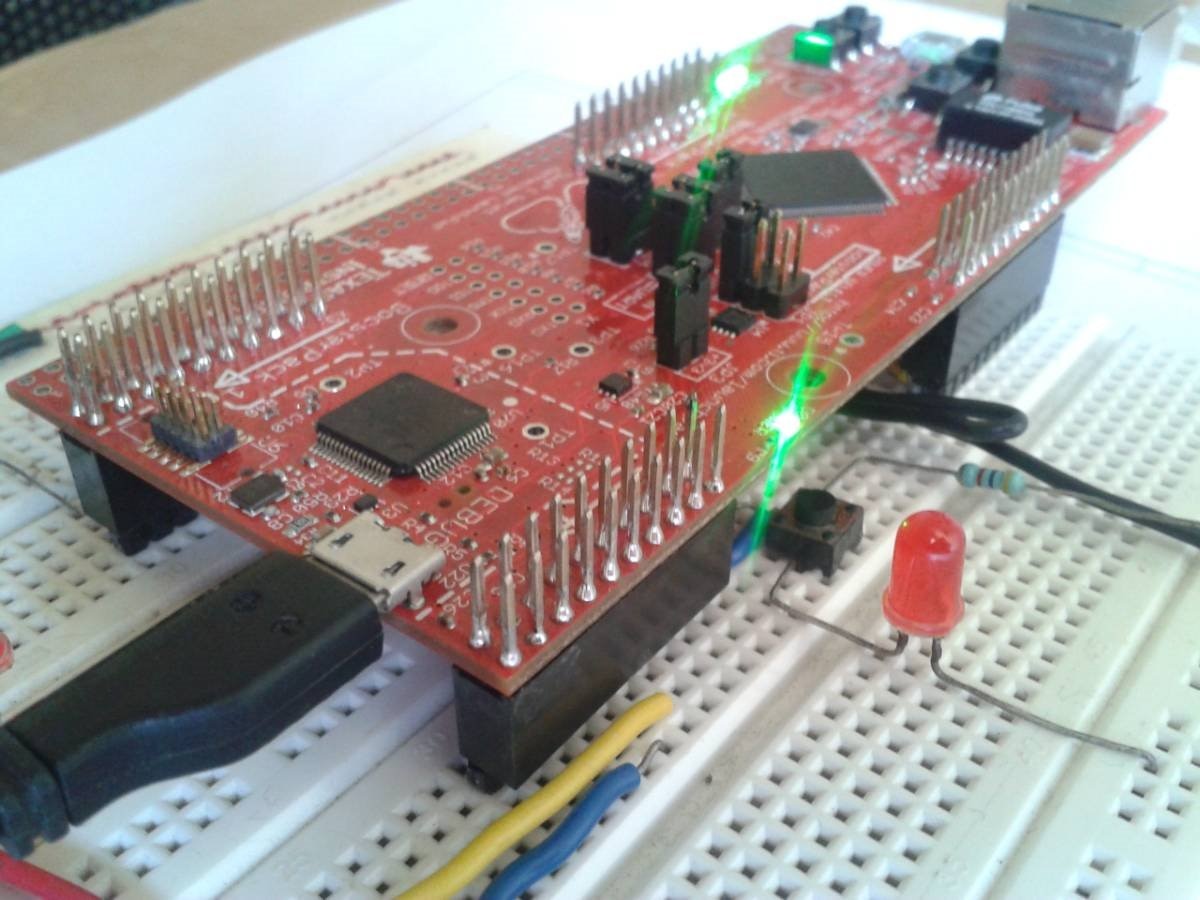
I have added two pots to analog pins A0 and A1 each and a LED to ground via switch at A3. Also at D0, an LED is added to ground via a 4K7. So when I change the pots, a sinusoidal waveform will be caught on screen. And when I press the switch, A3 will be pulled down via an LED, plotting a square wave. When you press 'D0' button in webpage, it will trigger LED2 in the circuit. Here is a few snaps of my test setup

This a video of my test :
Same video in youtube( in the case you are getting any error accessing this video :
The code
You can find the code and related HTML files from here : https://github.com/v-i-s-h/scope_lite
Future plans
As I said, the 100ms sampling interval is not something very appreciable for serious measurements. So I'm currently working on a prototype which can handle 200+kHz. The proto type is now at a very buggy stage( almost hangs the browser after a few minutes of acquisition ) As I found it difficult to manage such a large bug prone software in Energia, I'm now porting it to CCS project where it will be easy to debug. With 2MSPS ADCs sitting inside the launchpad, sampling at higher rate is not a problem. It involves triggering ADCs via timed interrupts and optimize the ethernet packet for more efficient communications.The idea is to add more payload to each ethernet packet and send which will be unpacked at client end and plotted properly. Hope I can soon post the modified version.
A request to arduino community
As I mentioned above, the energia is 100% code compatible with arduino. Can any one of you with a ethernet shield can compile it with arduino and post the results. I'm just curious to know how this performs in arduino.
Thanks a lot for reading 
Happy tinkering,
vish
Top Comments