element14 Community
element14 Community
    Register Log In
  • Site
  • Search
  • Log In Register
  • About Us
  • Community Hub
    Community Hub
    • What's New on element14
    • Feedback and Support
    • Benefits of Membership
    • Personal Blogs
    • Members Area
    • Achievement Levels
  • Learn
    Learn
    • Ask an Expert
    • eBooks
    • element14 presents
    • Learning Center
    • Tech Spotlight
    • STEM Academy
    • Webinars, Training and Events
    • Learning Groups
  • Technologies
    Technologies
    • 3D Printing
    • FPGA
    • Industrial Automation
    • Internet of Things
    • Power & Energy
    • Sensors
    • Technology Groups
  • Challenges & Projects
    Challenges & Projects
    • Design Challenges
    • element14 presents Projects
    • Project14
    • Arduino Projects
    • Raspberry Pi Projects
    • Project Groups
  • Products
    Products
    • Arduino
    • Avnet Boards Community
    • Dev Tools
    • Manufacturers
    • Multicomp Pro
    • Product Groups
    • Raspberry Pi
    • RoadTests & Reviews
  • Store
    Store
    • Visit Your Store
    • Choose another store...
      • Europe
      •  Austria (German)
      •  Belgium (Dutch, French)
      •  Bulgaria (Bulgarian)
      •  Czech Republic (Czech)
      •  Denmark (Danish)
      •  Estonia (Estonian)
      •  Finland (Finnish)
      •  France (French)
      •  Germany (German)
      •  Hungary (Hungarian)
      •  Ireland
      •  Israel
      •  Italy (Italian)
      •  Latvia (Latvian)
      •  
      •  Lithuania (Lithuanian)
      •  Netherlands (Dutch)
      •  Norway (Norwegian)
      •  Poland (Polish)
      •  Portugal (Portuguese)
      •  Romania (Romanian)
      •  Russia (Russian)
      •  Slovakia (Slovak)
      •  Slovenia (Slovenian)
      •  Spain (Spanish)
      •  Sweden (Swedish)
      •  Switzerland(German, French)
      •  Turkey (Turkish)
      •  United Kingdom
      • Asia Pacific
      •  Australia
      •  China
      •  Hong Kong
      •  India
      •  Korea (Korean)
      •  Malaysia
      •  New Zealand
      •  Philippines
      •  Singapore
      •  Taiwan
      •  Thailand (Thai)
      • Americas
      •  Brazil (Portuguese)
      •  Canada
      •  Mexico (Spanish)
      •  United States
      Can't find the country/region you're looking for? Visit our export site or find a local distributor.
  • Translate
  • Profile
  • Settings
Power & Energy
  • Technologies
  • More
Power & Energy
Forum Need to get MG Electronics Power Supply repaired...or NOT!?
  • Blog
  • Forum
  • Quiz
  • Documents
  • Polls
  • Events
  • Mentions
  • Sub-Groups
  • Tags
  • More
  • Cancel
  • New
Actions
  • Share
  • More
  • Cancel
Forum Thread Details
  • State Suggested Answer
  • Replies 120 replies
  • Answers 51 answers
  • Subscribers 289 subscribers
  • Views 9271 views
  • Users 0 members are here
Related

Need to get MG Electronics Power Supply repaired...or NOT!?

Former Member
Former Member over 10 years ago

Hi.

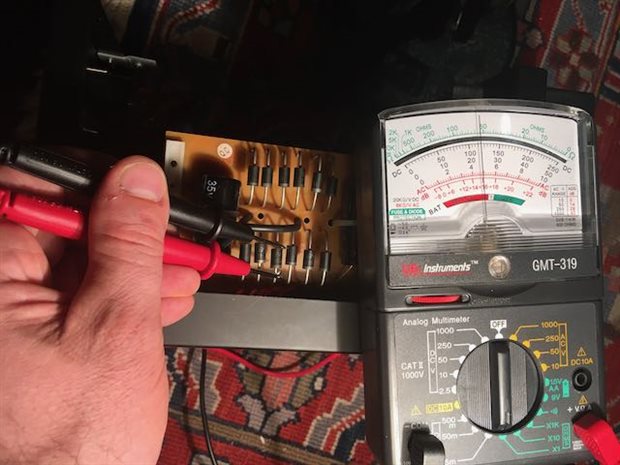
I just bought a lot of Slot Car stuff, yes those cars that go around a track. The guy was serious about his hobby he didn't have the usual wall plug in power pack, he used a MG Electronics PS-10AD, 0-20 VDC at 10 Amps. Well this power supply doesn't work anymore. It does turn on and the red overload light stays on. It doesn't put out anything. I used my multimeter etc., nothing. I know that these are made overseas . They did retail for about $200. So the questions is were can I get it repaired OR should I ? I'm in Western MAss.

I did check the fuse , it's fine. I've got a heavy door stop on my hands, it does have a nice handle and cord on it !

Many thanks for info, Ted


http://www.mgelectronics.com/shopexd.asp?id=179

  • Sign in to reply
  • Cancel

Top Replies

  • mpulliam
    mpulliam over 4 years ago in reply to jw0752 +4 suggested
    Well, I spent all day replacing four 2N3055 transistors....it wasn't easy and... Success!!!
  • mpulliam
    mpulliam over 5 years ago in reply to jw0752 +3
    Hi John, I have a thought. If the output transistors (or is it pass or power transistors?) NTE130 or 2N3055H are giving a bad voltage reading in the voltage test, could it be that any component between…
  • mpulliam
    mpulliam over 4 years ago in reply to mpulliam +3 suggested
    BTW I tested the old 2N3055 transistors, the continuity is the same as a new 2N3055 . There is no continuity between any of the terminals But when I run a diode test, a new 2N3055 tests at .486 volts with…
Parents
  • mpulliam
    0 mpulliam over 5 years ago

    7812 voltage regulator test results:

    w/ Power off and writing facing me

    Black lead on the center pin, read lead on the left pin = 1.2mV and it trickled down to 0

    Black lead on the center pin, read lead on the right pin = .5mV and it trickled down to a negative number


    w/ Power On and writing facing me

    Black lead on the center pin, read lead on the left pin = 30V

    Black lead on the center pin, read lead on the right pin = 12.04v


    I re-tested the D313 for continuity (after the unit has been turned on and off)

    There is NO continuity between the base and the emitter or collector

    There IS continuity between the emitter and the collector


    I retested the corroded diode and it is ok.  The corrosion was giving me a bad reading previously but I scraped it off and the diode shows a voltage reading of .519v in one direction and nothing in the other.

    • Cancel
    • Vote Up +1 Vote Down
    • Sign in to reply
    • Verify Answer
    • Reject Answer
    • Cancel
  • jw0752
    0 jw0752 over 5 years ago in reply to mpulliam

    All sounds good and normal except the D313. We need to test that one out of circuit and verify if it is good or bad.


    At some point I mistyped Read when I meant to type Red. I mention it so that we don't start a new convention for what is the correct nomenclature.  Sorry about that. I always try to proofread but at 1:30 AM I may miss things.


    John

    • Cancel
    • Vote Up 0 Vote Down
    • Sign in to reply
    • Verify Answer
    • Cancel
  • jw0752
    0 jw0752 over 5 years ago in reply to mpulliam

    Yes that would be a 1N5402 which has a 3 Amp current capacity and can tolerate 200 Volts. The some of the ones in your power supply are probably being used in parallel to accommodate the higher current of the power supply. If you were to take them out of the circuit I would expect the diode test to be closer to 0.55 Volts as these are not Schottky diodes. Your test however has convinced me that they are not the problem.


    John

    • Cancel
    • Vote Up 0 Vote Down
    • Sign in to reply
    • Verify Answer
    • Cancel
  • mpulliam
    0 mpulliam over 5 years ago in reply to jw0752

    I sent an email to MG Electronics asking for a schematic, but I doubt they will respond as they have been unresponsive so far.

    • Cancel
    • Vote Up +1 Vote Down
    • Sign in to reply
    • Verify Answer
    • Cancel
  • jw0752
    0 jw0752 over 5 years ago in reply to mpulliam

    A schematic could make all the difference.

    • Cancel
    • Vote Up 0 Vote Down
    • Sign in to reply
    • Verify Answer
    • Cancel
  • mpulliam
    0 mpulliam over 5 years ago in reply to jw0752

    I also got in the analog multimeter like you have.  I still need to test the capacitors....

    • Cancel
    • Vote Up +1 Vote Down
    • Sign in to reply
    • Verify Answer
    • Cancel
  • jw0752
    0 jw0752 over 5 years ago in reply to mpulliam

    That is excellent news. The first thing that I want you to do once you get it set up is to put it on the Ohms RX1 scale. Next take your digital meter set to volts and read the voltage across the probes from the analog meter. Note which of the two analog probes your red digital meter probe is on when it indicates a positive voltage. We are determining the polarity of the voltage that is being used by the analog meter. It may not correspond to the colors of the leads. For example on my analog meter the black lead actually has the positive polarity. Let me know if the black or the red lead of the analog meter has the positive voltage so  are testing with the analog meter I can better understand what is going on. Use the analog meter to go back and test the 1N5402 Diodes. You should find that the meter needle will deflect towards zero when the positive lead of the analog meter is on the side of the diode that is away from the marker line and it will not deflect when the probes are reversed. This is the indication of a good diode.


    John

    • Cancel
    • Vote Up 0 Vote Down
    • Sign in to reply
    • Verify Answer
    • Cancel
  • mpulliam
    0 mpulliam over 5 years ago in reply to jw0752

    I'll be able to get to that on Monday.


    I just heard back from the CEO of https://www.professormotor.com/  where I purchased the unit.  They said that MG Electronics had refused to honor returns and warranties on over 100 hundred units that they had purchased.  He has no details on the schematic but said 'most power supplies of this type fail by the output transistor or the rectifiers going bad.'  He will scour the shop and look for potential parts.

    • Cancel
    • Vote Up +1 Vote Down
    • Sign in to reply
    • Verify Answer
    • Reject Answer
    • Cancel
  • mpulliam
    0 mpulliam over 5 years ago in reply to mpulliam

    Well this didn't take too long.  I have to cross the leads to get positive voltage (black/negative digital MM to red/positive analog MM and red/positive digital mm to black/negative analog MM)


    My first test I was the top left diode and it deflected immediately and then went back to zero and stayed there. It repeated tested at zero as did the rest of the diodes.


    image


    All diodes tested the same.


    image

    • Cancel
    • Vote Up +1 Vote Down
    • Sign in to reply
    • Verify Answer
    • Reject Answer
    • Cancel
  • jw0752
    0 jw0752 over 5 years ago in reply to mpulliam

    That looks good. The leads of the meter have a positive voltage on the Black and a negative voltage on the Red. The meter allows you to apply a 3 volt voltage to any component and the meter tells you whether a current is flowing or not. If you test a large uncharged capacitor and you put the Red lead on the side with the line (negative) and the Black on the positive lead of the capacitor the meter will deflect and then gradually return to zero. This is the effect of the capacitor charging. When it is empty it draws a lot of current and as it fills the current flow lessens, You can also test transistors with the meter . Put the black on the base and move the Red to the collector and emitter. If it is an NPN transistor you will see a nearly equal deflection. Now reverse the leads with the Red on the base and you should see no deflection. There may be a little deflection between the Emitter and Collector depending on the polarity. If the meter deflects all the way this is indication of a short and may indicate a failed transistor. Any full deflection on diodes in both polarities will be a likely bad diode. You can check the smaller capacitors as well. On the smaller capacitors you may need to got to the RX10 or RX100 scales in order to see a small momentary deflection. For testing most components the RX1 scale is the best. If the meter deflects all the way to zero while testing any of the components except an inductor it is a sign of a potential problem. Sometimes it is necessary to take a component out of the circuit but most of the time you can get a pretty good test result right in the circuit.  Do some experimenting and testing of components. Always look at the component in both polarities. Sometimes other components in the circuit will affect your reading in one polarity more than the other. Good luck and ask questions as needed. If I had to go on a service call and I could take only one instrument with me it would be the little analog meter.


    John

    • Cancel
    • Vote Up +1 Vote Down
    • Sign in to reply
    • Verify Answer
    • Reject Answer
    • Cancel
  • mpulliam
    0 mpulliam over 5 years ago in reply to jw0752

    Everything I've tested looks good, but I haven't gone through and tested procedurally, so must have missed something or I'm testing incorrectly. 


    I got in touch with MG Electronics.  They just buy these as black boxes from China and resell - no schematic available. Service guy said he's never opened one up.  He suggested to follow the voltage from the outlet to the front of the unit and vice-versa.   Maybe it could be the front terminals and to test for voltage from the inside, and to test the potentiometer on the output.  Other than that, could be just some small component that went out somewhere down the line...


    M

    • Cancel
    • Vote Up +2 Vote Down
    • Sign in to reply
    • Verify Answer
    • Reject Answer
    • Cancel
  • jw0752
    0 jw0752 over 5 years ago in reply to mpulliam

    Hi Matt,


    I would like to have you test the potentiometer on the front. With the power turned off, use the resistance setting on the digital meter and test the resistance from the two outside terminals. Next put one probe on an outside and middle terminal and slowly turn the control from one end to the other. You should see a gradual change from zero to the reading that you got on the two outside terminals.


    Next let's measure voltages on the LM741 integrated circuits. Turn on the unit. Turn the potentiometer of the unit fully CCW. Put your digital meter on volts. Place the black probe on pin 4 Take voltage readings on each of the other pins 1,2,3,5,6,7,8 and write them down. Now turn the potentiometer fully CW and repeat the taking of voltages. Do this for each of the two LM 741 ICs.


    Let me know what the voltages are and I will try to interpret them. Remember the numbering of the IC pins as described in a previous post.


    John

    • Cancel
    • Vote Up +1 Vote Down
    • Sign in to reply
    • Verify Answer
    • Reject Answer
    • Cancel
Reply
  • jw0752
    0 jw0752 over 5 years ago in reply to mpulliam

    Hi Matt,


    I would like to have you test the potentiometer on the front. With the power turned off, use the resistance setting on the digital meter and test the resistance from the two outside terminals. Next put one probe on an outside and middle terminal and slowly turn the control from one end to the other. You should see a gradual change from zero to the reading that you got on the two outside terminals.


    Next let's measure voltages on the LM741 integrated circuits. Turn on the unit. Turn the potentiometer of the unit fully CCW. Put your digital meter on volts. Place the black probe on pin 4 Take voltage readings on each of the other pins 1,2,3,5,6,7,8 and write them down. Now turn the potentiometer fully CW and repeat the taking of voltages. Do this for each of the two LM 741 ICs.


    Let me know what the voltages are and I will try to interpret them. Remember the numbering of the IC pins as described in a previous post.


    John

    • Cancel
    • Vote Up +1 Vote Down
    • Sign in to reply
    • Verify Answer
    • Reject Answer
    • Cancel
Children
  • mpulliam
    0 mpulliam over 5 years ago in reply to jw0752

    I tried to test the resistance on the outside terminals with my digital multimeter.  The ohms keep increasing until it gets to 0L.


    My guess is that is charging a capacitor that is connected to inside terminals....

    • Cancel
    • Vote Up +1 Vote Down
    • Sign in to reply
    • Verify Answer
    • Cancel
  • Jan Cumps
    0 Jan Cumps over 5 years ago in reply to mpulliam

    Yes.

    • Cancel
    • Vote Up 0 Vote Down
    • Sign in to reply
    • Verify Answer
    • Cancel
  • mpulliam
    0 mpulliam over 5 years ago in reply to mpulliam

    Here are more photos of the potentiometer, which is the most complex one I have ever seen, wire with two resistors.  Last picture shows the capacitor.


    imageimageimageimage

    • Cancel
    • Vote Up +1 Vote Down
    • Sign in to reply
    • Verify Answer
    • Reject Answer
    • Cancel
  • jw0752
    0 jw0752 over 5 years ago in reply to mpulliam

    The component in the picture is the range switch which chooses 0 to 7 Volts - 7 to 12 volts and 12 to 20 volts. The potentiometer will be the control to the right as you look at the front panel. It should turn smoothly without clicking and it has a black ramp painted on the front bezel to denote a change in the voltage as it is turned.


    John

    • Cancel
    • Vote Up 0 Vote Down
    • Sign in to reply
    • Verify Answer
    • Reject Answer
    • Cancel
  • mpulliam
    0 mpulliam over 5 years ago in reply to jw0752

    Here is one oddity I noticed.  It looks like the yellow lead to the center terminal of the pot was in contact with the terminal to its right as pictured.  So much so that I thought it was welded to both.  But I pushed it with some tweezer and it separated as pictured in the last two photographs

    imageimage

    imageimageimage

    • Cancel
    • Vote Up 0 Vote Down
    • Sign in to reply
    • Verify Answer
    • Cancel
  • mpulliam
    0 mpulliam over 5 years ago in reply to mpulliam

    It's difficult to test because I don't have three hands, but it seems like the R value between the two outside terminals on the pot is 1.6 kOhms.  The value between the red outside lead and the center yellow lead ranges from .9Ohms to 1.6k Ohms.

    • Cancel
    • Vote Up +1 Vote Down
    • Sign in to reply
    • Verify Answer
    • Cancel
  • jw0752
    0 jw0752 over 5 years ago in reply to mpulliam

    Hi Matt,


    The readings on the potentiometer appear to be normal and acceptable. I would not have been surprised if the yellow was connected to both terminals. This potentiometer is being used as a resistive trimmer in either configuration. I am waiting to see what voltages you measure on the leads of the two LM 741 ICs.


    John

    • Cancel
    • Vote Up 0 Vote Down
    • Sign in to reply
    • Verify Answer
    • Cancel
  • jw0752
    0 jw0752 over 5 years ago in reply to mpulliam

    Hi Matt,


    Here is another experiment I would like you to try. There are two large capacitors on the board with the diodes. I would like you to set your digital meter to DC volts. Turn on the power supply and measure the voltage across the capacitor leads in each of the settings of the range control on the front panel. We may get different voltages and we may get only one voltage. This may tell us something about the actual circuit design. Do this test for each of the two filter capacitors. Note the lead that is closest to the line on the side of the capacitor is the negative. Let me know what you find out.


    John

    • Cancel
    • Vote Up 0 Vote Down
    • Sign in to reply
    • Verify Answer
    • Cancel
  • mpulliam
    0 mpulliam over 5 years ago in reply to jw0752

    Voltage Test for large capacitor (both measured exactly the same)

    at 0-7V = 16.50V

    at Mid-mark = 24V and falling

    at 7-14V = 26.09V

    Mid-mark = 35V and falling

    at 14-20V = 36.7V

    • Cancel
    • Vote Up +1 Vote Down
    • Sign in to reply
    • Verify Answer
    • Reject Answer
    • Cancel
  • mpulliam
    0 mpulliam over 5 years ago in reply to jw0752

    LM741 IC Tests

    Top Left IC

    Pot at Full CCW

    1 = 5.2mV

    2 = 6.22V

    3 = 6.33V

    5 = 4.8mV

    6 = 17.71V

    7 = 18.33V

    8 = 35mV and falling past 20mV


    Pot at Full CW

    1 = 4.9mV

    2 = 6.22V

    3 = 6.33V

    5 = 5mV

    6 = 17.71V

    7 = 18.33V

    8 = 35mV and falling past 20mV


    Bottom Right IC

    Pot at Full CCW

    1 = 9.6mV

    2 = 6.33V

    3 = 6.98V

    5 = .6mV

    6 = 18V

    7 = 18.33V

    8 = 30mV and falling past 20mV


    Pot at Full CW

    1 = 10.1mV

    2 = 6.33V

    3 = 10.20V

    5 = 2.5mV

    6 = 18V

    7 = 18.33V

    8 = 96mV and falling


    image

    • Cancel
    • Vote Up +1 Vote Down
    • Sign in to reply
    • Verify Answer
    • Reject Answer
    • Cancel
element14 Community

element14 is the first online community specifically for engineers. Connect with your peers and get expert answers to your questions.

  • Members
  • Learn
  • Technologies
  • Challenges & Projects
  • Products
  • Store
  • About Us
  • Feedback & Support
  • FAQs
  • Terms of Use
  • Privacy Policy
  • Legal and Copyright Notices
  • Sitemap
  • Cookies

An Avnet Company © 2025 Premier Farnell Limited. All Rights Reserved.

Premier Farnell Ltd, registered in England and Wales (no 00876412), registered office: Farnell House, Forge Lane, Leeds LS12 2NE.

ICP 备案号 10220084.

Follow element14

  • X
  • Facebook
  • linkedin
  • YouTube