element14 Community
element14 Community
    Register Log In
  • Site
  • Search
  • Log In Register
  • About Us
  • Community Hub
    Community Hub
    • What's New on element14
    • Feedback and Support
    • Benefits of Membership
    • Personal Blogs
    • Members Area
    • Achievement Levels
  • Learn
    Learn
    • Ask an Expert
    • eBooks
    • element14 presents
    • Learning Center
    • Tech Spotlight
    • STEM Academy
    • Webinars, Training and Events
    • Learning Groups
  • Technologies
    Technologies
    • 3D Printing
    • FPGA
    • Industrial Automation
    • Internet of Things
    • Power & Energy
    • Sensors
    • Technology Groups
  • Challenges & Projects
    Challenges & Projects
    • Design Challenges
    • element14 presents Projects
    • Project14
    • Arduino Projects
    • Raspberry Pi Projects
    • Project Groups
  • Products
    Products
    • Arduino
    • Avnet Boards Community
    • Dev Tools
    • Manufacturers
    • Multicomp Pro
    • Product Groups
    • Raspberry Pi
    • RoadTests & Reviews
  • Store
    Store
    • Visit Your Store
    • Choose another store...
      • Europe
      •  Austria (German)
      •  Belgium (Dutch, French)
      •  Bulgaria (Bulgarian)
      •  Czech Republic (Czech)
      •  Denmark (Danish)
      •  Estonia (Estonian)
      •  Finland (Finnish)
      •  France (French)
      •  Germany (German)
      •  Hungary (Hungarian)
      •  Ireland
      •  Israel
      •  Italy (Italian)
      •  Latvia (Latvian)
      •  
      •  Lithuania (Lithuanian)
      •  Netherlands (Dutch)
      •  Norway (Norwegian)
      •  Poland (Polish)
      •  Portugal (Portuguese)
      •  Romania (Romanian)
      •  Russia (Russian)
      •  Slovakia (Slovak)
      •  Slovenia (Slovenian)
      •  Spain (Spanish)
      •  Sweden (Swedish)
      •  Switzerland(German, French)
      •  Turkey (Turkish)
      •  United Kingdom
      • Asia Pacific
      •  Australia
      •  China
      •  Hong Kong
      •  India
      •  Korea (Korean)
      •  Malaysia
      •  New Zealand
      •  Philippines
      •  Singapore
      •  Taiwan
      •  Thailand (Thai)
      • Americas
      •  Brazil (Portuguese)
      •  Canada
      •  Mexico (Spanish)
      •  United States
      Can't find the country/region you're looking for? Visit our export site or find a local distributor.
  • Translate
  • Profile
  • Settings
Test & Tools
  • Technologies
  • More
Test & Tools
Blog Drag-soldering Surface-mount components
  • Blog
  • Forum
  • Documents
  • Files
  • Members
  • Mentions
  • Sub-Groups
  • Tags
  • More
  • Cancel
  • New
Join Test & Tools to participate - click to join for free!
  • Share
  • More
  • Cancel
Group Actions
  • Group RSS
  • More
  • Cancel
Engagement
  • Author Author: shabaz
  • Date Created: 12 May 2020 1:23 AM Date Created
  • Views 8408 views
  • Likes 17 likes
  • Comments 28 comments
  • smt soldering
  • smd
  • prototying
  • learn to solder
  • drag soldering
Related
Recommended

Drag-soldering Surface-mount components

shabaz
shabaz
12 May 2020

I had to solder an IC today, nothing new there, but usually I'll use a 1mm conventional soldering tip (slice off conical shape) to solder each individual pin one-by-one, deal with any bridges with desoldering braid, and call it a day.


There are dozens of different ways to solder though. I have a reflow oven, but it is overkill for a single IC. I have a pre-heater and a hot air tool but the ones I have are under-powered. 


Although I have seen an expert present drag soldering once, I have never tried it because I've been ok with the way I do it - it works, although it is a bit tedious. However, there has been a drag-soldering tip (also known as a spoon tip or gull-wing tip) in my drawer for years, of size 1.9mm diameter. I figured I'd give it a shot since I was soldering a relatively cheap component, and with the recent activity on element14 concerning soldering tools Cool Tools Kit Awards 2020  and soldering station reviews Weller Soldering Station WT Series I figured I'd post a photo of the results..


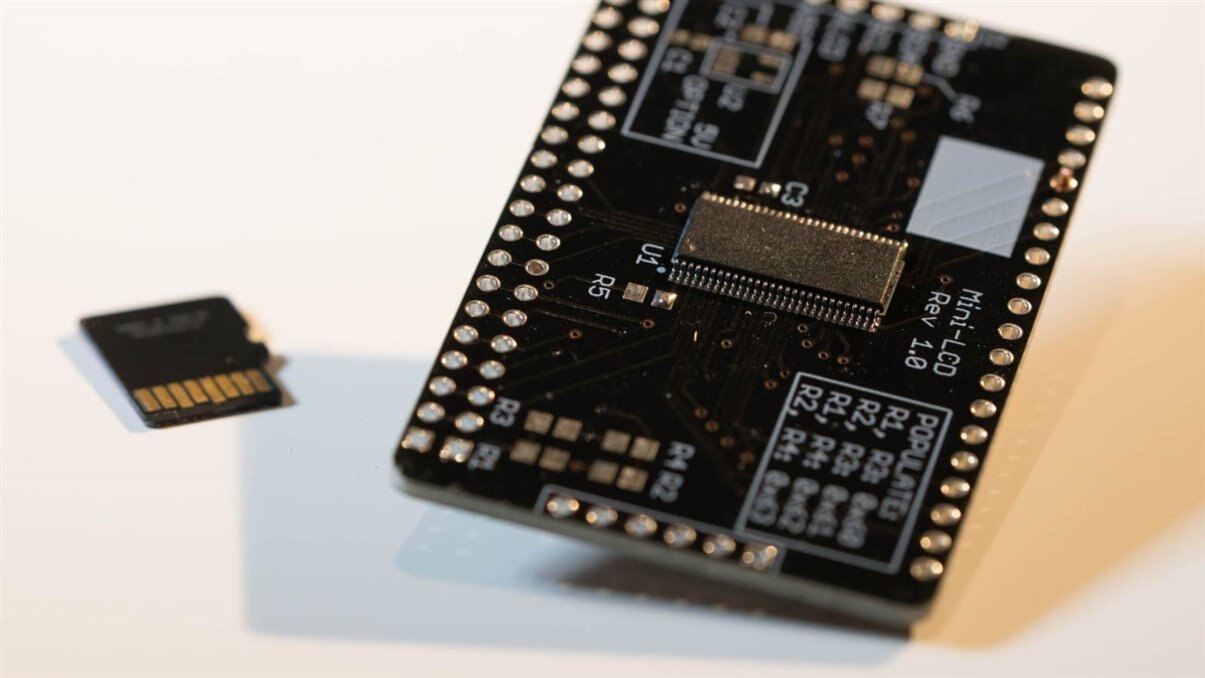
The part was PCF85176T which is a 56-pin 0.5mm pitch device - it was for an LCD board Building a 3.5 Digit Low Power LCD Module .

The finest SMD part I've had to do with a soldering iron was 0.4mm pitch, so this was not going to be as bad as that, but still a good test.


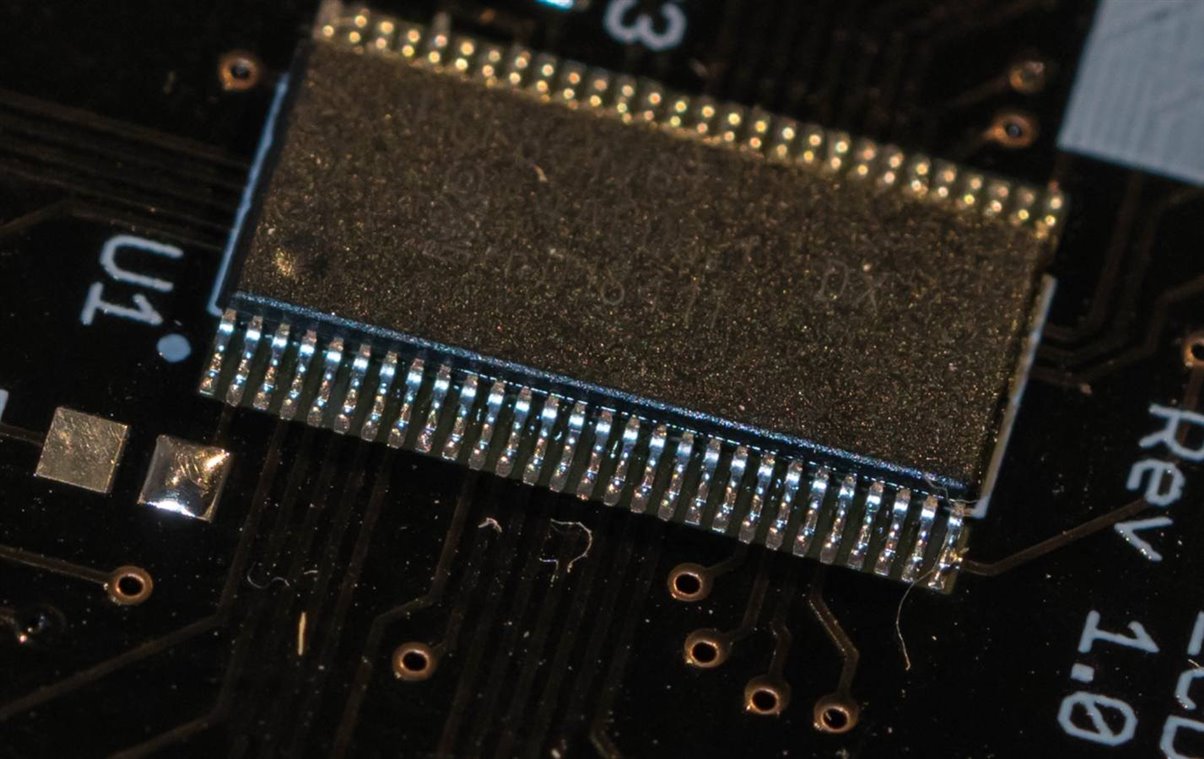
The result with the drag soldering was quite good! If your soldering iron accepts such a tip, I think it is worth giving it a go!


image


Here is the result, close-up (click to enlarge further):

image

I didn't take photos or a video [edit - see below for a second attempt which was recorded] of the process (because I fully expected to fail the first time), but in brief, this is what I did - I can take more photos next time:


  1. Put on head magnifier and switch on a desk lamp!
  2. Position the IC and temporarily affix it to the board (can use paper or Kapton tape for that, or two small blobs of blu-tack [temporary putty] at either end - I used the blu-tack this time and was able to very finely adjust the position of the IC by just pressing against the blue-tack)
  3. Solder a corner pin on either side, using regular solder so that the part would stay in position, and then removed the blu-tack
  4. Apply a thin long bead of flux along the pins (I actually applied some liquid flux because I couldn't find the syringe of paste, but then 10 seconds later I found it - so I had a mix of both!)
  5. Feed some solder into the spoon tip until it is nicely convex (I didn't make it bulge a lot, perhaps just 70% of capacity, I'll explore that more next time)
  6. Place the tip so that it was touching the board for helping with position support, and then angled down so that the blob was into the pins, and just ran the iron along! In a couple of places where I thought it wasn't adequately soldered or there was a bridge, I just repeated in that area using the same method.
  7. Dab with a half of a dry wipe to soak up some of the flux, and then put a few drops of isopropanol (isopropyl alcohol or IPA) on the board, rubbed with an antistatic stiff brush, and then wiped it all off with the clean part of the wipe.
  8. Using a thin scalpel blade (very small, surgical type), and with the head magnifier on, using the unsharpened side of the blade, i.e. sharp side up, I pressed against the side of each pin (the thin scalpel blade flexes slightly) to confirm it was stuck with solder, and did that for each pin - it doesn't take long to do this, and gives me peace of mind rather than having to troubleshoot with potentially unsoldered pins later.


I have no idea if my technique was entirely correct or not, all I can say is that it was far quicker than soldering each pin individually, and the result visually looks good I think.

It would be great to learn any tips, and about other peoples drag soldering or alternate techniques for surface-mount too!


Second attempt

This time around I recorded it, this is uncut from start to finish:

You don't have permission to edit metadata of this video.
Edit media
x
image
Upload Preview
image

  • Sign in to reply

Top Comments

  • jw0752
    jw0752 over 5 years ago +3
    It sure looks pretty! John
  • Fred27
    Fred27 over 5 years ago in reply to Andrew J +3
    If it looks OK then I just power it up and hope!
  • michaelkellett
    michaelkellett over 5 years ago in reply to shabaz +3
    I reckon that the key to re-touching surface mount parts is to use lots and lots of really runny flux. I use the Warton metals Future 315 from Rapid Electronics, and it's just like water in terms of viscosity…
Parents
  • memyselfandi
    memyselfandi over 5 years ago

    Nice work and write-up, shabaz. Thanks for taking your time for the creation of the videos.

    Here are a few more tips:


    • Related to brushes:
      • Take a regular, quality paint brush of your preferred size and cut off the brush with a sharp knife or cutter.
        That shall leave about 3 to 4 mm left of the original length.
      • This creates a stiff brush, which in combination with IPA alcohol forms an excellent tool for cleaning grime, oil and flux residue.
      • New tool comes at a fraction of the costs of "professional" brushes.
    • I have always found the following video material very informative:
      https://www.youtube.com/watch?v=Y2AeDGXCwU0  from John Gammell
      and the material from Pace here: https://www.youtube.com/watch?v=LNp0pASpgOI
      The "classic" videos from Pace on THT, cable joints etc. are also worth a look.


    Happy soldering.

    Cheers,

    M.

    • Cancel
    • Vote Up +1 Vote Down
    • Sign in to reply
    • More
    • Cancel
  • shabaz
    shabaz over 5 years ago in reply to memyselfandi

    Hi Magnus,


    Thanks for the tips!

    • Cancel
    • Vote Up 0 Vote Down
    • Sign in to reply
    • More
    • Cancel
Comment
  • shabaz
    shabaz over 5 years ago in reply to memyselfandi

    Hi Magnus,


    Thanks for the tips!

    • Cancel
    • Vote Up 0 Vote Down
    • Sign in to reply
    • More
    • Cancel
Children
No Data
element14 Community

element14 is the first online community specifically for engineers. Connect with your peers and get expert answers to your questions.

  • Members
  • Learn
  • Technologies
  • Challenges & Projects
  • Products
  • Store
  • About Us
  • Feedback & Support
  • FAQs
  • Terms of Use
  • Privacy Policy
  • Legal and Copyright Notices
  • Sitemap
  • Cookies

An Avnet Company © 2025 Premier Farnell Limited. All Rights Reserved.

Premier Farnell Ltd, registered in England and Wales (no 00876412), registered office: Farnell House, Forge Lane, Leeds LS12 2NE.

ICP 备案号 10220084.

Follow element14

  • X
  • Facebook
  • linkedin
  • YouTube