


This project will show you how to stream data and control the Digilent Analog Discovery ProDigilent Analog Discovery Pro (ADP3450/ADP3250) remotely. There are 2 ways to establish the connection, using Standard Mode and Linux Mode, to communicate with and control Analog Discovery Pro through Ethernet.
The ADP3450 and ADP3250 are the first in the line of Analog Discovery Pro devices and take the analog and digital instruments from the internationally popular Analog Discovery and turn up key functionalities to meet the growing need for professional-level home electronics test benches. At the heart of each device is a four or two-channel high-resolution oscilloscope, offering 14-bit resolution at up to 0.5 GS/s. Additionally, to meet the needs of an increasingly digital world, 16 dedicated digital channels make the Analog Discovery Pro a true mixed-signal oscilloscope. With the included digital power supply, digital outputs, two-channel arbitrary waveform generator, and two dedicated external triggers the Analog Discovery Pro come with 12 instruments ready to analyze mixed-signal systems through our free software, WaveForms.

WaveForms is the free software application for the ADP3450 and ADP3250 and enables the use of the available analog and digital instruments. The software has been refined by customer feedback for over 10 years and features a computer and laptop-friendly user interface that has the feel of traditional benchtop software. The device communicates with WaveForms via a USB or ethernet connection to your computer, allowing users to capture, record, analyze, and generate mixed-signal and mixed domain waveforms.
To set up the connection, you need to plug the Analog Discovery Pro into your computer via USB. In addition, an Ethernet cable is plugged into the Analog Discovery Pro.

Control Analog Discovery Pro through a network
The network settings required differ depending on how your device is connected. Pick one of the two dropdowns below, depending on which method you chose:
Direct Connection to a host computer
In order to use the ADP3450/ADP3250's Ethernet connection in Standard mode, make sure that the Enable Ethernet interface in the Standard Boot Mode box is checked.
If your device is directly connected to the host computer through an Ethernet cable, then you should set a static IP address on both the Analog Discovery Pro and on the network device of the host computer.
It should be noted that the DNS server settings are not applicable when using Standard mode. When connected to a router, the DNS server addresses should be obtained automatically.


Connection through a Local Network
In order to use the ADP3450/ADP3250's Ethernet connection in Standard mode, make sure that the Enable Ethernet interface in the Standard Boot Mode box is checked.
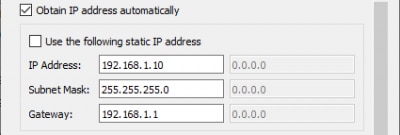
If you are connected directly to a router or connected to a router through an Ethernet switch, then you should have the Analog Discovery Pro obtain its IP address automatically - so as to avoid conflicts with other IPs on the network.
With the Ethernet connection running, you can begin using the instruments as you would over USB.

You can follow the step-by-step guide on Digilent Reference Page to connect the Analog Discovery Pro to a network.
Connect Analog Discovery Pro to the Internet
First of all, you need to switch to Linux mode. Connect a serial terminal to your device, which will be used later when logging into Linux mode. Find out which serial port the device is connected to and make note of it. Note that the serial connection should be established before booting into Linux mode, to ensure that no boot messages are missed.
Open a terminal emulator, such as TeraTerm, and connect to the noted serial port


Configure the network settings of the Analog Discovery Pro in WaveForms. To most easily connect to the internet, you should be connected to an access point that provides DHCP, typically a router. Check each of the “obtain automatically” boxes in order to take advantage of this.
Log into Linux mode in the terminal. By default, the username and password are both “digilent”.

Now, you can choose to connect Analog Discovery Pro to the Internet by ethernet or Wi-Fi. For example, if you plan to use wireless network, a Wi-Fi dongle is plugged into one of the USB ports at the back of the device. In the terminal, run ip l to get a list of network interfaces. In this case, the WiFi interface is `wlx00c0caad6c4b`, the final network interface in the screenshot to the right. Create the WIF, WSSID, and WPWD environment variables. You can also run some commands to set up a permanent connection even after a system reboot.


You can find out step-by-step guide for connecting Analog Discovery Pro to the Internet on the Digilent Reference Page.