element14 Community
element14 Community
    Register Log In
  • Site
  • Search
  • Log In Register
  • About Us
  • Community Hub
    Community Hub
    • What's New on element14
    • Feedback and Support
    • Benefits of Membership
    • Personal Blogs
    • Members Area
    • Achievement Levels
  • Learn
    Learn
    • Ask an Expert
    • eBooks
    • element14 presents
    • Learning Center
    • Tech Spotlight
    • STEM Academy
    • Webinars, Training and Events
    • Learning Groups
  • Technologies
    Technologies
    • 3D Printing
    • FPGA
    • Industrial Automation
    • Internet of Things
    • Power & Energy
    • Sensors
    • Technology Groups
  • Challenges & Projects
    Challenges & Projects
    • Design Challenges
    • element14 presents Projects
    • Project14
    • Arduino Projects
    • Raspberry Pi Projects
    • Project Groups
  • Products
    Products
    • Arduino
    • Avnet Boards Community
    • Dev Tools
    • Manufacturers
    • Multicomp Pro
    • Product Groups
    • Raspberry Pi
    • RoadTests & Reviews
  • Store
    Store
    • Visit Your Store
    • Choose another store...
      • Europe
      •  Austria (German)
      •  Belgium (Dutch, French)
      •  Bulgaria (Bulgarian)
      •  Czech Republic (Czech)
      •  Denmark (Danish)
      •  Estonia (Estonian)
      •  Finland (Finnish)
      •  France (French)
      •  Germany (German)
      •  Hungary (Hungarian)
      •  Ireland
      •  Israel
      •  Italy (Italian)
      •  Latvia (Latvian)
      •  
      •  Lithuania (Lithuanian)
      •  Netherlands (Dutch)
      •  Norway (Norwegian)
      •  Poland (Polish)
      •  Portugal (Portuguese)
      •  Romania (Romanian)
      •  Russia (Russian)
      •  Slovakia (Slovak)
      •  Slovenia (Slovenian)
      •  Spain (Spanish)
      •  Sweden (Swedish)
      •  Switzerland(German, French)
      •  Turkey (Turkish)
      •  United Kingdom
      • Asia Pacific
      •  Australia
      •  China
      •  Hong Kong
      •  India
      •  Korea (Korean)
      •  Malaysia
      •  New Zealand
      •  Philippines
      •  Singapore
      •  Taiwan
      •  Thailand (Thai)
      • Americas
      •  Brazil (Portuguese)
      •  Canada
      •  Mexico (Spanish)
      •  United States
      Can't find the country/region you're looking for? Visit our export site or find a local distributor.
  • Translate
  • Profile
  • Settings
Test & Tools
  • Technologies
  • More
Test & Tools
Forum Oscilloscope tutorials
  • Blog
  • Forum
  • Documents
  • Files
  • Members
  • Mentions
  • Sub-Groups
  • Tags
  • More
  • Cancel
  • New
Join Test & Tools to participate - click to join for free!
Actions
  • Share
  • More
  • Cancel
Forum Thread Details
  • Replies 12 replies
  • Subscribers 358 subscribers
  • Views 3824 views
  • Users 0 members are here
  • tp4056
  • oscilloscopes
  • beginner
Related

Oscilloscope tutorials

cyberwasp
cyberwasp over 5 years ago

Can anyone point me to a good tutorial on oscilloscopes. I've been watching a lot on YouTube but they seem to skip practical applications and make adjustments without stating why. Also they tend to end even though they state there will be follow up videos.


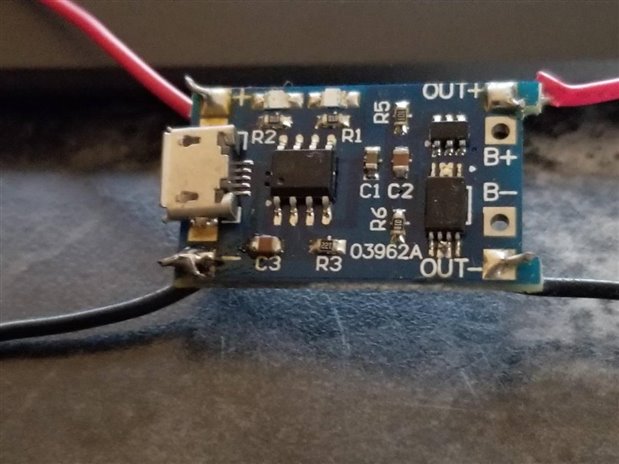
My main goal is to get comfortable with the scope and I would like to duplicate a video I saw on YoutTube that was using a scope to watch the charging current on a tp4056 li-ion charger.  TIA

  • Sign in to reply
  • Cancel

Top Replies

  • shabaz
    shabaz over 5 years ago +9
    Hi Steven, I've not watched these completely, but these two seem ok for the essential controls: How to use an Oscilloscope part 2 of 5 Measure Period, Frequency and Amplitude on an Oscilloscope part 3…
  • fmilburn
    fmilburn over 5 years ago +7
    Hi Steven, You don't mention the model of your oscilloscope but some of the larger manufacturers have very good training material for their specific 'scopes. For example, Keysight provides excellent training…
  • shabaz
    shabaz over 5 years ago in reply to cyberwasp +6
    The explanation in the TP4056 PDF datasheet was a little hard to follow, but it does appear you could measure the voltage at pin 2 to determine if it is in pre-charge or not. However, it would be easier…
Parents
  • fmilburn
    fmilburn over 5 years ago

    Hi Steven,


    You don't mention the model of your oscilloscope but some of the larger manufacturers have very good training material for their specific 'scopes.  For example, Keysight provides excellent training for the DSOX1102GDSOX1102G which I wrote about here Entry Level Oscilloscope Comparison:  Keysight, Rigol, Siglent  and even used to assess other oscilloscopes.  The Keysight training does require the built-in wave generator on the DSOX1102  to get full value however.  Other manufacturers such as Rigol provide good training for their 'scopes as well, e.g.:  https://www.rigolna.com/basics-of-oscilloscopes/ .  This can be applied to other models if the manual for your oscilloscope is consulted alongside.  In any event, try looking for training from the manufacturer for specific capability if you haven't already done so.

    • Cancel
    • Vote Up +7 Vote Down
    • Sign in to reply
    • Cancel
  • cyberwasp
    cyberwasp over 5 years ago in reply to fmilburn

    Sorry, my scope is a Siglent SDS1102CML+ 100Mhz model . I know there's better but didn't go that route as I only use it as a hobby to keep me busy. In the good ole' days I was always throwing together radios, counters,  from parts my dad brought home from work along with other numerous things. I haven't built anything since other than computers Which I now at 63 use for my job..


    I have the basic understanding and am well versed using a multimeter. I've calibrated the probe and set it at 10k. I recently watched a video from a guy  using an Arduino to show basic measurement with the scope 


    What intrigued me though was a video using a tp4056 to charge a Li-ion battery which I do weekly as I've become my neighborhoods "solar light repairer."  In the video he had his scope measuring the batteries charge And current draw. However he was using the older TP4056 and I haven't yet to identify the same point on the new version with battery thermal and overcharge protection.


    From the tp4056 data sheet it should be the PROG(Pin 2): Constant Charge Current Setting and Charge Current Monitor Pin which I've yet to find.


    "Can't take it with you unless you keep practicing!!!"image

    • Cancel
    • Vote Up +4 Vote Down
    • Sign in to reply
    • Cancel
  • fmilburn
    fmilburn over 5 years ago in reply to cyberwasp

    I had the SDS1102 CML as well and that is one of the oscilloscopes included in the comparison link I gave above.  In that comparison I give a brief description of capability and how to use various functions of the 3 scopes so it may be worth a look for you.  I used the Siglent for a number of years and found it intuitive to use but the manufacturers training for that model was lacking comparatively. That may no longer be the case for their newer scopes, I haven’t looked.

    Your battery charger project sounds interesting and I imagine you can get help on that here on element14 with a new post.  Give it a title like how do I measure current on a LiPo battery charger or something like that and outline what you have done along with links to datasheets if you have them and other relevant information.  I am not clear why a scope is needed but a sketch with how they were hooking up the scope would be helpful.  Once that is known applying the Siglent to the problem is probably straight forward.

    • Cancel
    • Vote Up +4 Vote Down
    • Sign in to reply
    • Cancel
  • shabaz
    shabaz over 5 years ago in reply to cyberwasp

    The explanation in the TP4056 PDF datasheet was a little hard to follow, but it does appear you could measure the voltage at pin 2 to determine if it is in pre-charge or not. However, it would be easier to determine that using a multimeter set to amps, in series with the power source. If the current is high then the battery is not in precharge state.

    To determine if the battery is charged or is in a charging state, then pins 6 and 7 can be examined, according to the text below, extracted from the datasheet. None of this needs a 'scope (although if you have it it is a good opportunity to use it), a multimeter could be used (and if desired LEDs attached to pins 6 and 7 as shown in the circuit further below). If you mean to use the scope to plot a chart over time of the battery terminal voltage, or current, or something else, then normally an oscilloscope is not used, because it is such a slow-changing thing (the charging may take at least an hour normally. Some multimeters will log data, or some code could be written to capture this from a 'scope, or something like 'Analog Discovery' could be used. It would be an unusual thing to measure though, because for a repair all you'll usually care about is if indeed the battery is charging or not, if it does reach the termination state, and how long the charged battery operates the product. I may have misunderstood your requirement.

    image


    image

    • Cancel
    • Vote Up +6 Vote Down
    • Sign in to reply
    • Cancel
Reply
  • shabaz
    shabaz over 5 years ago in reply to cyberwasp

    The explanation in the TP4056 PDF datasheet was a little hard to follow, but it does appear you could measure the voltage at pin 2 to determine if it is in pre-charge or not. However, it would be easier to determine that using a multimeter set to amps, in series with the power source. If the current is high then the battery is not in precharge state.

    To determine if the battery is charged or is in a charging state, then pins 6 and 7 can be examined, according to the text below, extracted from the datasheet. None of this needs a 'scope (although if you have it it is a good opportunity to use it), a multimeter could be used (and if desired LEDs attached to pins 6 and 7 as shown in the circuit further below). If you mean to use the scope to plot a chart over time of the battery terminal voltage, or current, or something else, then normally an oscilloscope is not used, because it is such a slow-changing thing (the charging may take at least an hour normally. Some multimeters will log data, or some code could be written to capture this from a 'scope, or something like 'Analog Discovery' could be used. It would be an unusual thing to measure though, because for a repair all you'll usually care about is if indeed the battery is charging or not, if it does reach the termination state, and how long the charged battery operates the product. I may have misunderstood your requirement.

    image


    image

    • Cancel
    • Vote Up +6 Vote Down
    • Sign in to reply
    • Cancel
Children
  • cyberwasp
    cyberwasp over 5 years ago in reply to shabaz

    Shabaz. My reason for using a scope to watch the current is mostly just a learning experience with the scope. Even back when I was hip deep in transistors and such I couldn't learn by seeing but when I actually built a circuit and physically started measure values off of components and traces did it make sense. Back than it was an analog voltmeter the size of a toaster.


    What's been bugging me is when the guy in the video did it, why can't I. Hope that makes sense.


    Here's the video I'm trying to duplicate. https://www.youtube.com/watch?v=wfrm6lbt8Pc&t=630s


    TIA

    • Cancel
    • Vote Up +2 Vote Down
    • Sign in to reply
    • Cancel
  • shabaz
    shabaz over 5 years ago in reply to cyberwasp

    Hi Steven,


    What happens when you try to monitor the same connections? What are the settings you're using? A screenshot or photo will indicate this.

    In the video it is hard to tell but I think he's got the horizontal scale (i.e. timebase) set to 100 seconds per division, which is extremely long. He's not directly monitoring current, he is monitoring pin 2 (see the datasheet snippet in my previous comment) which supplies a voltage proportional to the current apparently.

    That's his yellow trace I believe. The red trace is connected to the battery I think (I didn't watch the entire video), so that he can see the battery terminal voltage simultaneously too.


    This is an unusual use-case to learn with, because you don't need to make use of the things worth learning when using a 'scope, i.e. triggering, the 'scope may act differently too, e.g. go into a not-frequently-used mode (rolling mode) and it's hard to understand scale and position with a slow signal. It's easier to practice on a more normal repetitive signal (like a sine wave or square wave) at a frequency where you can quickly see the response and determine what happens with the scale, position, input coupling and so on.

    He's using the 'scope as a chart recorder if anything.. Anyway, there's no reason why your 'scope won't display the same thing too, provided the triggering is disabled or set to auto mode, or if you hit the single trigger button (I don't have the same 'scope but it should be visible somewhere on your 'scope too), and provided your timebase is set to such a slow speed, and so on. It's not a special thing that his 'scope is doing, other 'scopes will do that too.

    You're not going to find many youtube videos showing such settings, since this isn't frequently done. The thing worth reading up on is oscilloscope triggering modes, that's possibly where you're getting stuck, although I'm guessing, because I cannot see your 'scope settings.

    • Cancel
    • Vote Up +5 Vote Down
    • Sign in to reply
    • Cancel
  • fmilburn
    fmilburn over 5 years ago in reply to cyberwasp

    Expanding a bit on what Shabaz says... The Siglent User Manual states the scope can be set down to 50 s/div which while not as slow as the video is very slow.  I never used mine for something like this but would advise you to push "Auto" first to make sure the scope is triggering after connecting the probes.  You should see the traces for both channels.  Then using the Horizontal position control move the start left to where it is just within the screen.  Next turn the Horizontal as slow as it will go, i.e. 50 s/div.  You should be able to do a single shot (upper right hand) if desired after getting the controls set as well.

    • Cancel
    • Vote Up +4 Vote Down
    • Sign in to reply
    • Cancel
  • fmilburn
    fmilburn over 5 years ago in reply to fmilburn

    I Was thinking about this as I took my morning walk.  As Shabaz said, this is an unusual case and for most of the time it is seeing a very slowly changing DC voltage instead of a repeating wave form it can trigger on.  When Auto is pressed as I suggest above it will probably think you are interested in the noise on the DC input and set the vertical scale down in millivolts when you want volts.  So it will be probably be necessary to adjust the vertical scale up as well.  

    • Cancel
    • Vote Up +1 Vote Down
    • Sign in to reply
    • Cancel
element14 Community

element14 is the first online community specifically for engineers. Connect with your peers and get expert answers to your questions.

  • Members
  • Learn
  • Technologies
  • Challenges & Projects
  • Products
  • Store
  • About Us
  • Feedback & Support
  • FAQs
  • Terms of Use
  • Privacy Policy
  • Legal and Copyright Notices
  • Sitemap
  • Cookies

An Avnet Company © 2025 Premier Farnell Limited. All Rights Reserved.

Premier Farnell Ltd, registered in England and Wales (no 00876412), registered office: Farnell House, Forge Lane, Leeds LS12 2NE.

ICP 备案号 10220084.

Follow element14

  • X
  • Facebook
  • linkedin
  • YouTube