

Want to set up your own home automation? Do you want to be able to control your lights, or windows with a few clicks on your phone? You could run a sequence that turns off the lights when you fall asleep, or to prevent waking up in the middle of the night because your environment is too hot, and you want to open a window without getting up. Join Milos as he goes over simple ways to automate your home using an Arduino and Raspberry Pi.
Watch the Video:
Download & Links | Bill of Material | Discussion
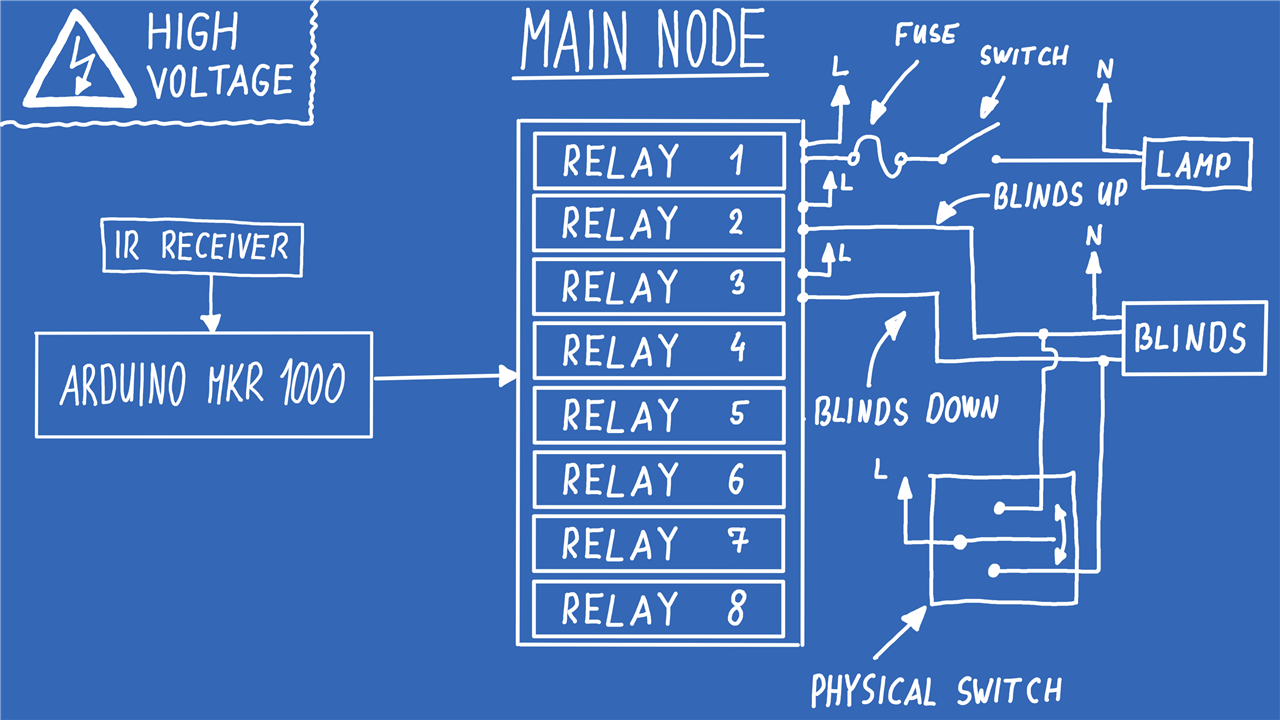
Be warned that this project can involve working with high voltages. If you are not experienced or qualified to do so, please do not attempt to replicate this project without guidance and assistance from a suitably qualified and competent person.
Milos decides to focus on the bedroom, aiming for a routine that is suitable for getting ready for sleep, or waking up. In their ‘smart room concept’ we can see what he wants to control and how he intends to interact and control them. With separate nodes for each component, controlling window access, lighting along with sensors and the base server with communications.

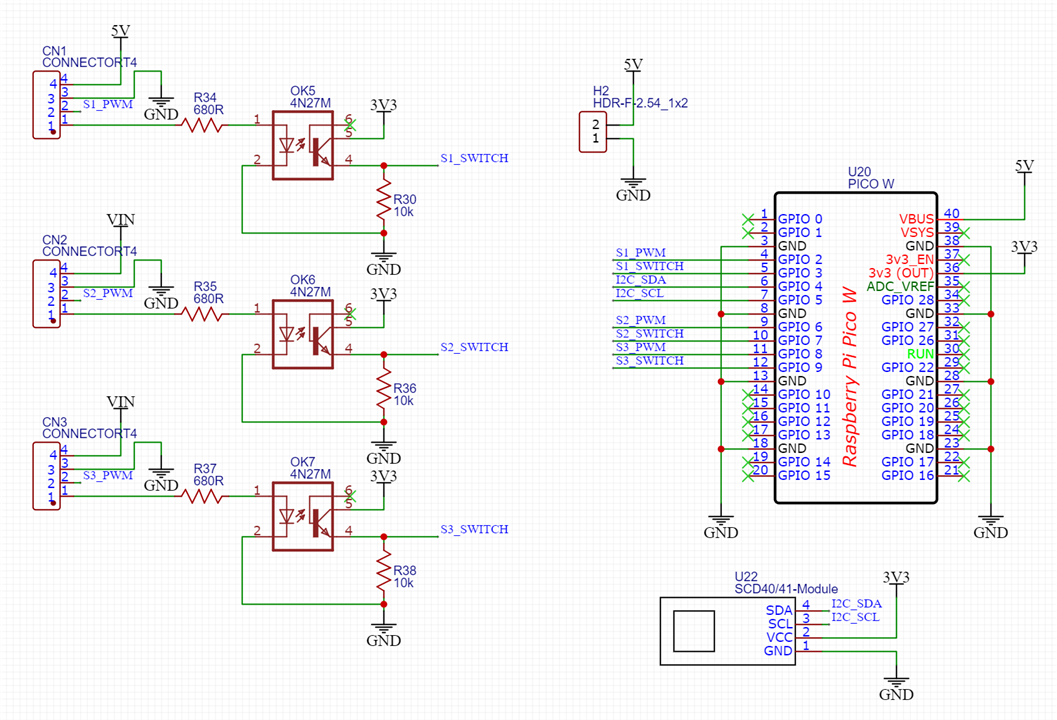
Milos has three main components to this project; these are a server and two nodes. Identifying that the server would benefit from being low power, Milos opts for a Raspberry Pi 3B+ (though any Raspberry with a wireless LAN connection will work), while the nodes will be a Raspberry Pi Pico W and an Arduino MKR 1000 (both could be done with a Pi Pico W, but Milos notes that the Arduino has already been a part of the project for the past five years!). Going for a standard protocol for the components to talk together, Milos uses MQTT, with the server running Node Red.
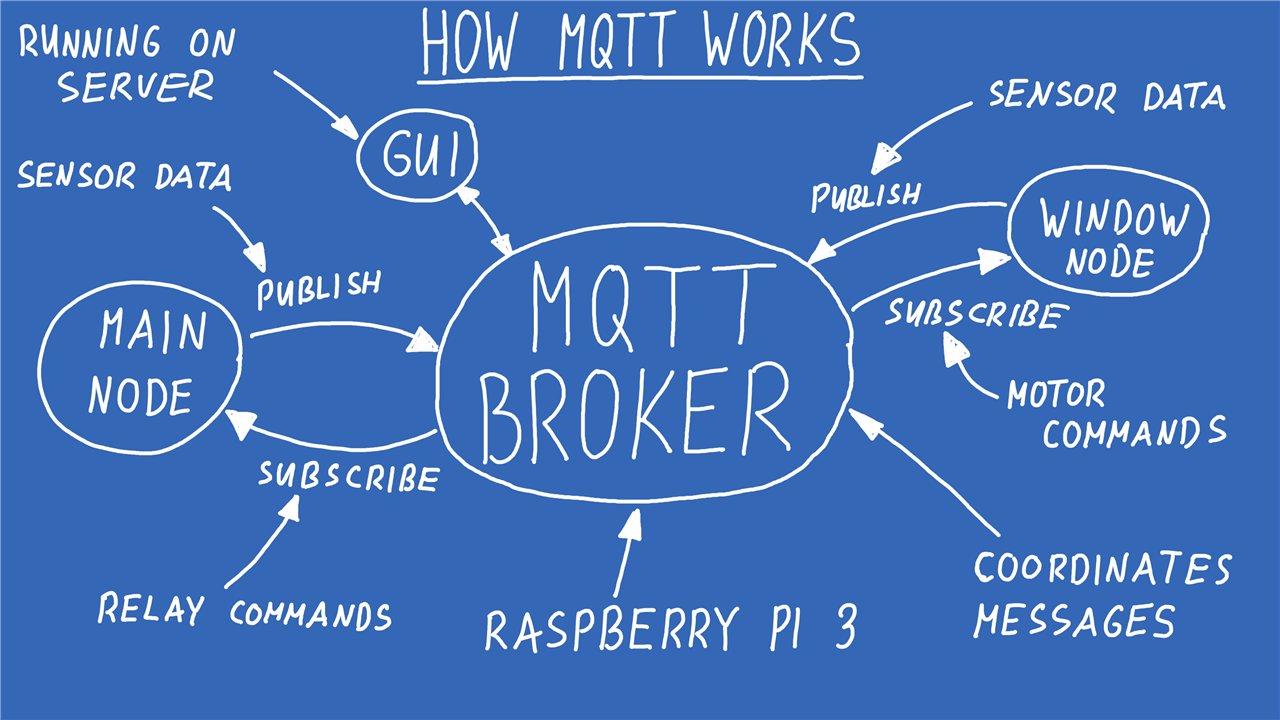
With Milos’ decision to use MQTT it requires a broker which will be set up on the ‘server’. Using the Raspberry Pi 3B+ it will work as the message coordinator, so all communication goes through it. Any connected nodes can either subscribe or publish data to the ‘topics’ (which are like messaging channels) that the MQTT broker controls. You can find more information on setting up Node Red and Mosquitto for this project below, be sure to check the official documentation with the latest downloads.
After setting up the broker Milos quickly has a way to receive commands on his nodes and a way of sending the sensor data to the server.
The Arduino Node
Again, please be aware that this project can involve working with high voltages. If you are not experienced or qualified to do so, please do not attempt to replicate this project without guidance and assistance from a suitably qualified and competent person.
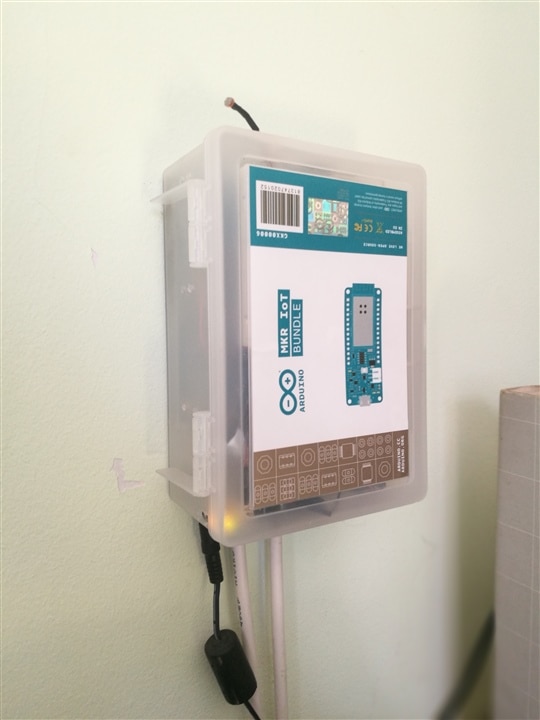
Milos blogged about this part of The Smart Room Project - Current Phase in 2019 (code included in link) , using relays, motor control and blinds. This part of the project works by running a small server on the Arduino MKR1000 detecting requests and commands, the node also has a small infra-red receiver for infra-red remote control.
| {gallery}My Gallery Title |
|---|
|
|
|
|
|
|

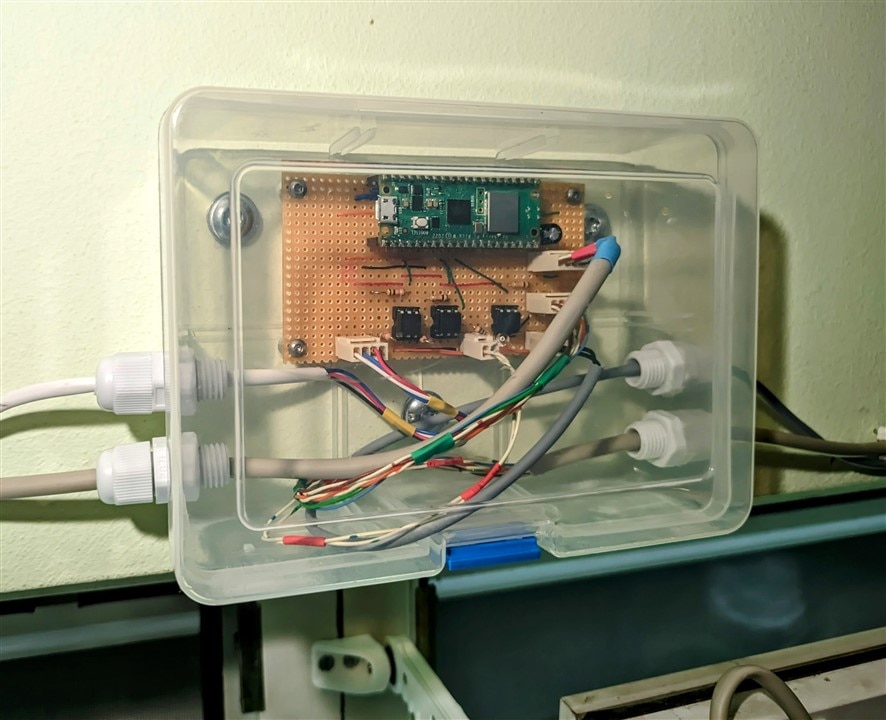
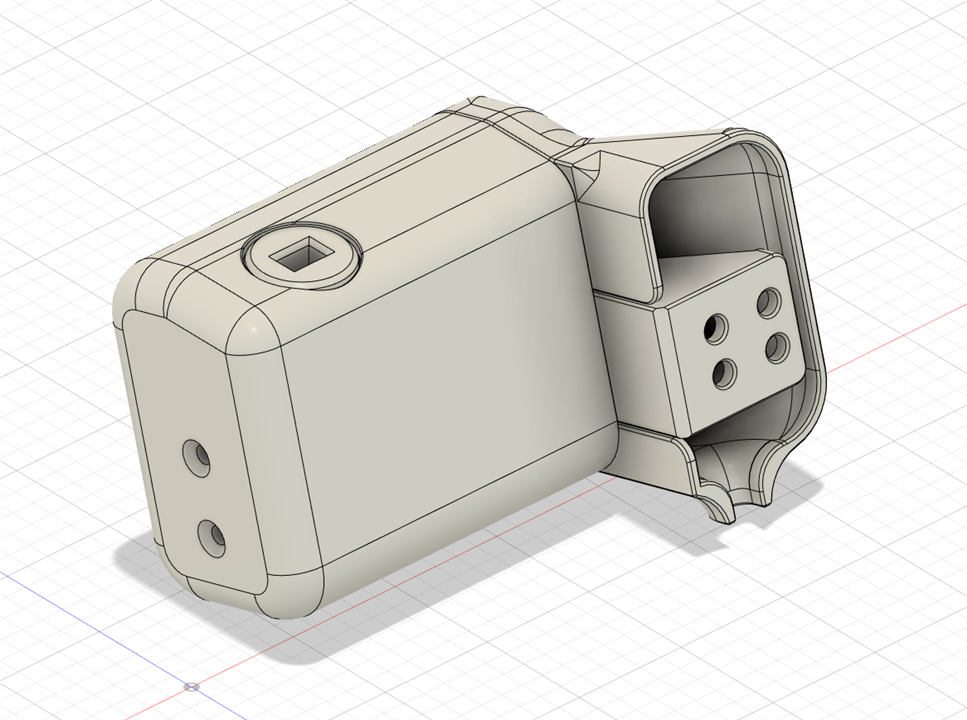
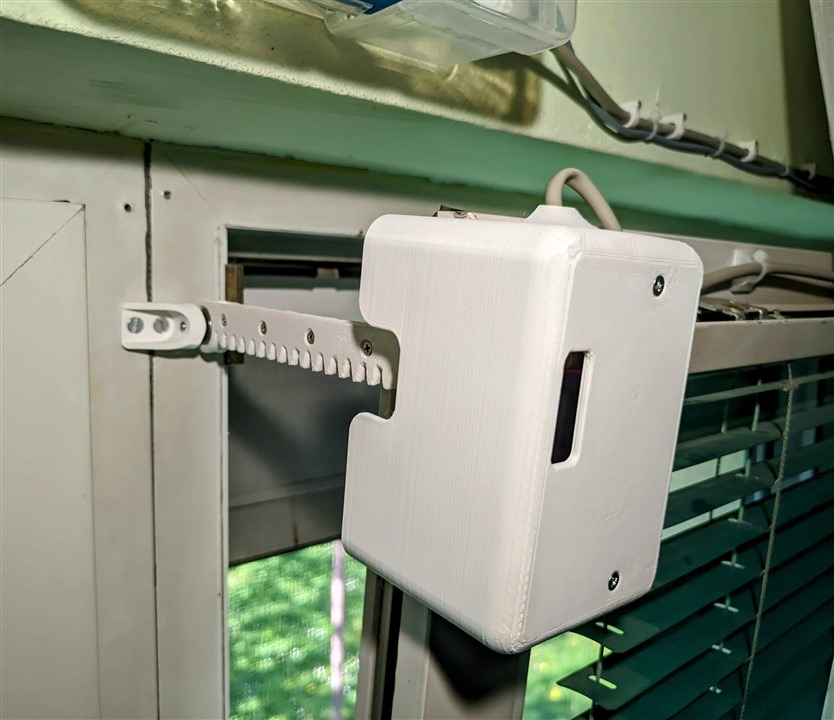
Raspberry Pi Pico W Node for the Window Blinds
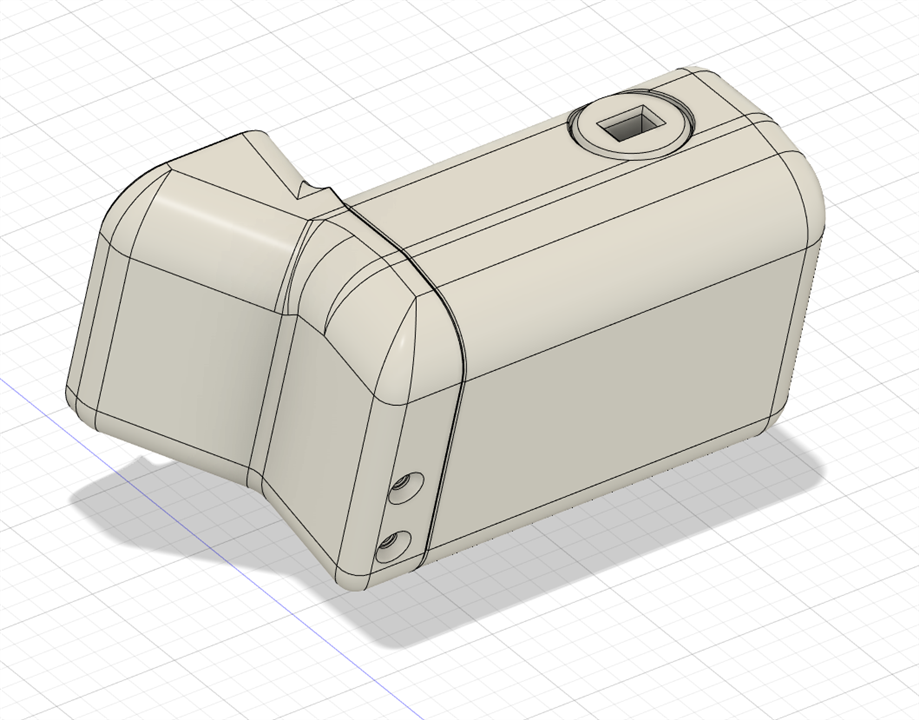
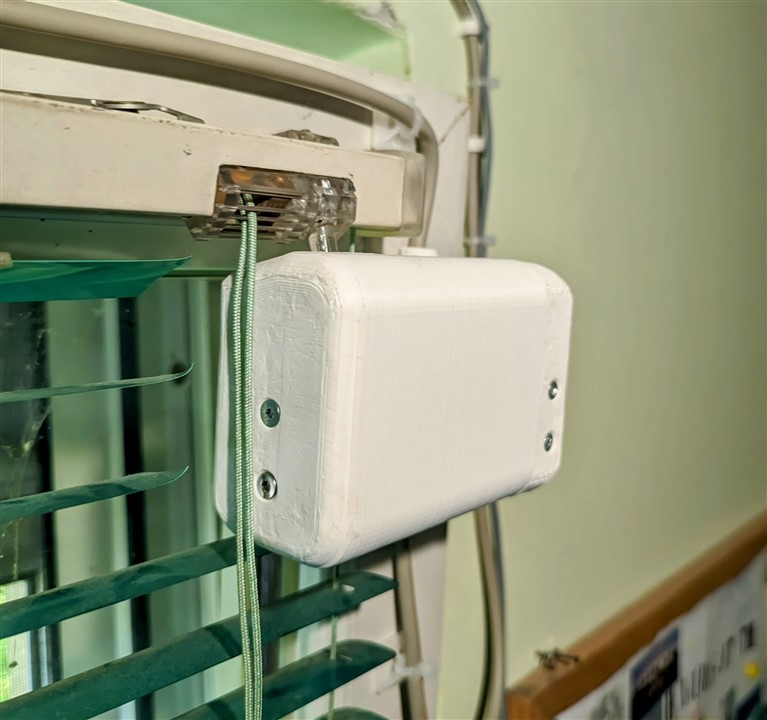
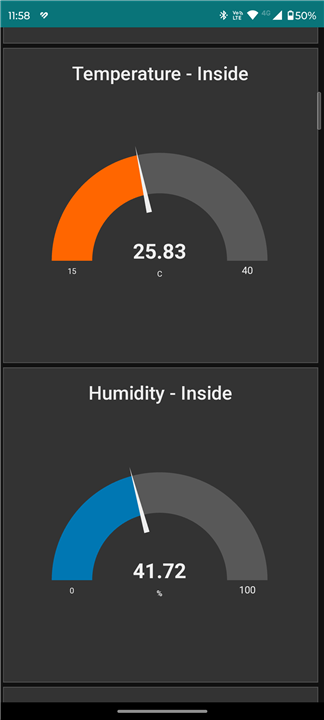
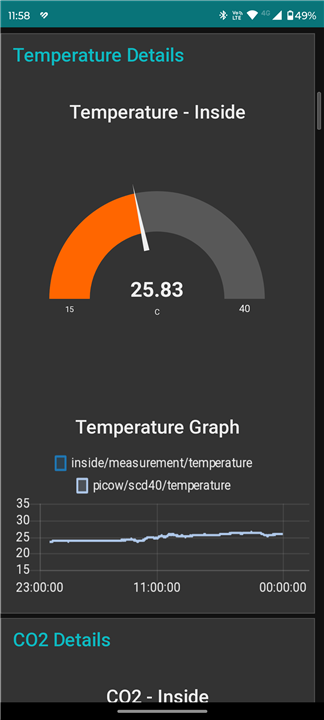
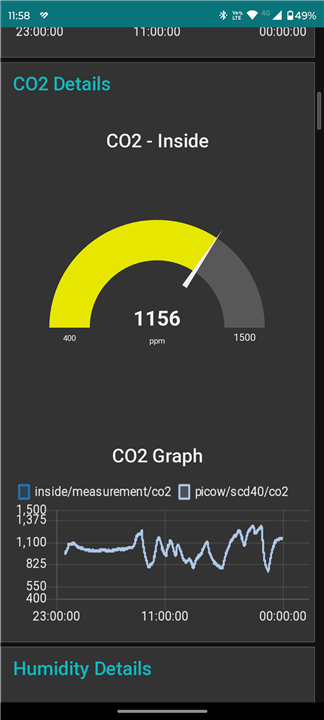
On top of the existing project, this is the new addition that Milos will be adding to the room automation setup. This node will control the venetian blinds on both windows in the room, open the right window and monitor the ambient temperature, humidity, and CO2 levels. Milos mounted the node above his windows where the curtain will hide it which will also reduce the needed length of the cabling.
| {gallery}My Gallery Title |
|---|
|
|
|
|
Controlling the Venetian Blinds
Designing the actuator for the venetian blind control was an entirely new experience for Milos. The ones in the room operate by turning an axle a few times in either direction, changing the angle of the light blades of the blinds. To accomplish this, Milos decided to use a 360-degree servo to ensure control of the range of motion in either direction. Adding small dimples to the blind’s coupler, it then triggers a micro switch which is used as a makeshift encoder.
| {gallery}My Gallery Title |
|---|
|
|
|
|
 |
|
|

Setting up the Window Control
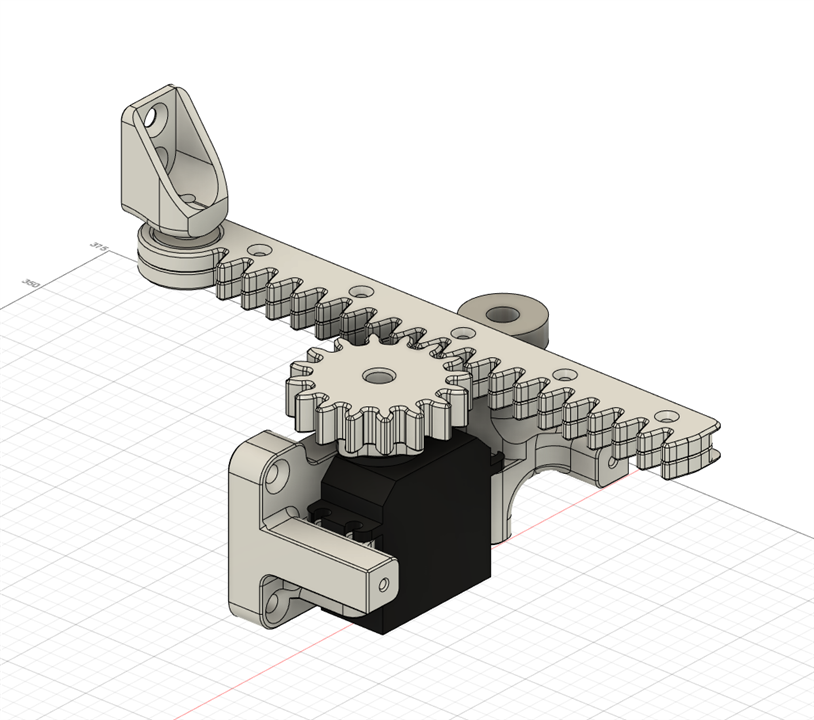
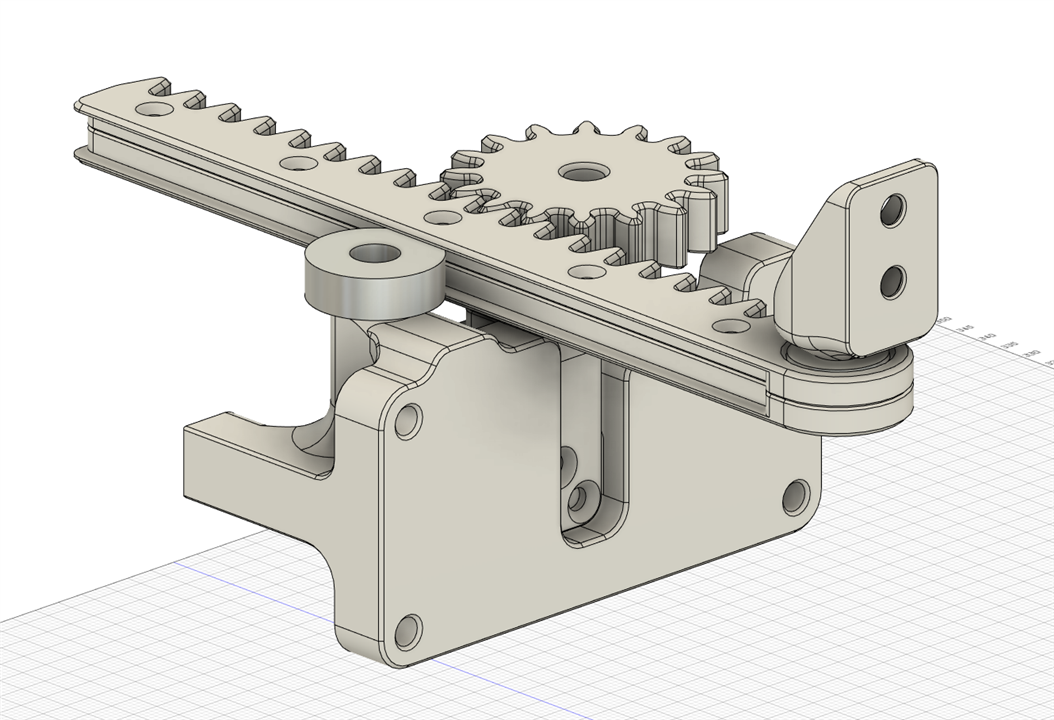
Controlling the opening and closing of the window required setting up another actuator, deciding to use the same motor, but this time requiring linear motion. This required setting up a rock and pinion mounted onto the window frame. When activated, this causes the setup to move and open and close the window as it navigates the rack gear, also using a micro switch for limit detection
| {gallery}My Gallery Title |
|---|
|
|
 |
 |
|
|
|
|
|
|


Setting up the Interface Control
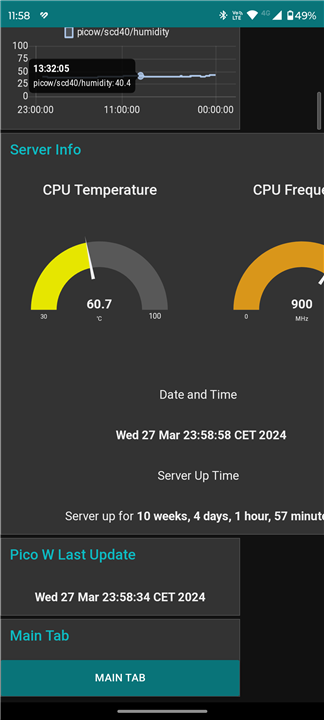
Since the server-side is programmed in Node Red, it has functional dashboard elements! Which are incredibly useful for making simple graphical interfaces. Milos wanted to be able to control everything in his room from his PC and his smart phone. By bookmarking the address to the dashboard, with its responsive design it can adapt suitably to both a desktop browser or a portrait layout without installing it as an app.
| {gallery}My Gallery Title |
|---|
|
|
|
|
|
|
 |
|
|
|
|
 |
 |
|
|
|
|
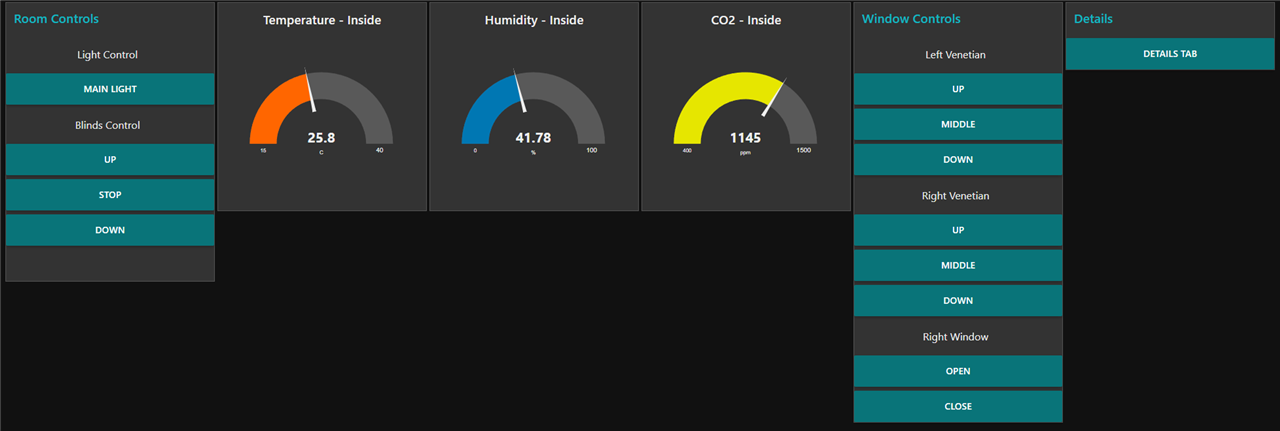
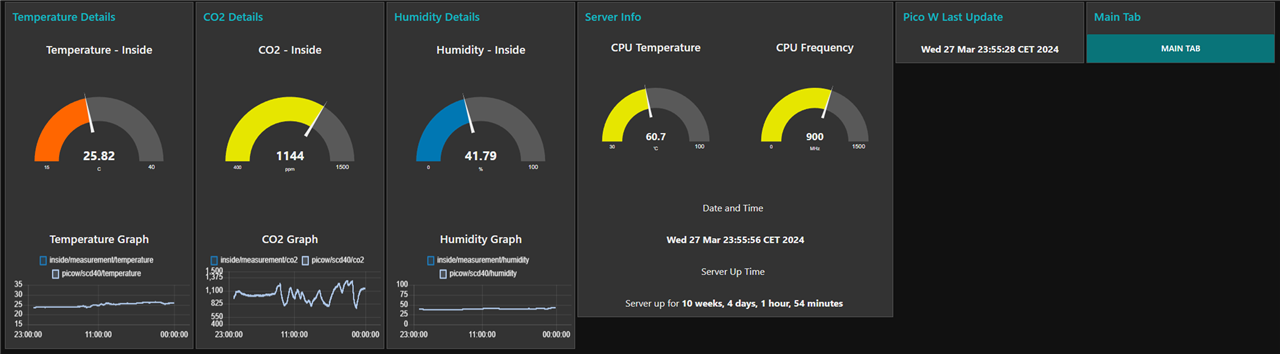
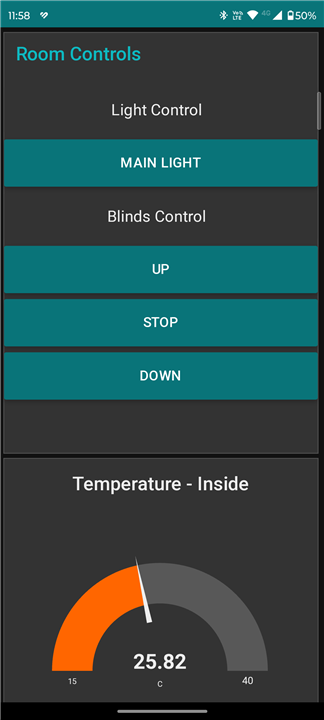
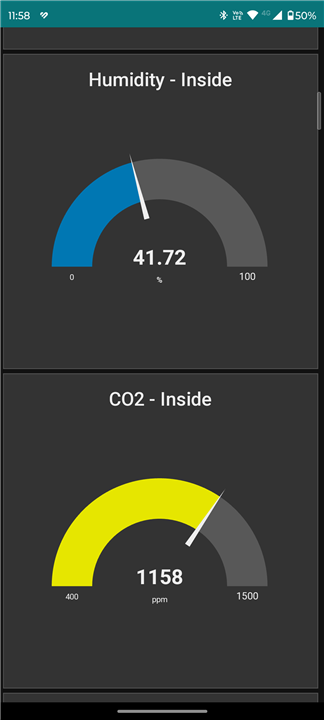

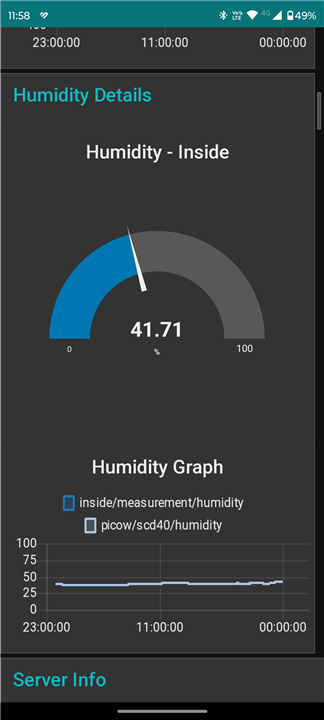
Overall, it provides a nice and presentable way to control lighting, windows and monitor the environment to ensure comfort all from the convenience of a computer or phone, potentially even away from home if necessary. So long as you take necessary security precautions of course!
Is this something you would like to set up? Or have you already set up something like this yourself?
Downloads & Links:
- Download Code and CAD Files
- Running on Raspberry Pi
- Mosquitto Debian repository
- The Smart Room Project - Current Phase
Bill of Material:
| Product Name | Manufacturer | Quantity | Buy Kit |
|---|---|---|---|
| RASPBERRY-PI SBC, Raspberry Pi Pico W, RP2040, ARM Cortex-M0+, 264kB RAM, 2MB Flash, Wifi, Micro-USB | RASPBERRY-PI | 1 | Buy Now |
| MULTICOMP PRO 3D Printer Filament, 1.75 mm, White, EPLA, 1 kg | MULTICOMP PRO | 1 | Buy Now |
| ARDUINO ABX00004 | ARDUINO | 1 | Buy Now |
| VISHAY 4N27 | VISHAY | 3 | Buy Now |
| RASPBERRY-PI RPI3-MODBP | RASPBERRY-PI | 1 | Buy Now |
| SEEED STUDIO 103020136 | SEEED STUDIO | 1 | Buy Now |
| SENSIRION SEK-SCD41-SENSOR | SENSIRION | 1 | Buy Now |
Additional Parts:
| Continous (360 degree) Servo Motor |
| Micro Switches |
| Passive components like resistors, capacitors, header pins, perfboard |
| Cables |
| Screws like M3, M4, M5 |
| Old 5V 2A Charger |


