element14 Community
element14 Community
    Register Log In
  • Site
  • Search
  • Log In Register
  • Community Hub
    Community Hub
    • What's New on element14
    • Feedback and Support
    • Benefits of Membership
    • Personal Blogs
    • Members Area
    • Achievement Levels
  • Learn
    Learn
    • Ask an Expert
    • eBooks
    • element14 presents
    • Learning Center
    • Tech Spotlight
    • STEM Academy
    • Webinars, Training and Events
    • Learning Groups
  • Technologies
    Technologies
    • 3D Printing
    • FPGA
    • Industrial Automation
    • Internet of Things
    • Power & Energy
    • Sensors
    • Technology Groups
  • Challenges & Projects
    Challenges & Projects
    • Design Challenges
    • element14 presents Projects
    • Project14
    • Arduino Projects
    • Raspberry Pi Projects
    • Project Groups
  • Products
    Products
    • Arduino
    • Avnet Boards Community
    • Dev Tools
    • Manufacturers
    • Multicomp Pro
    • Product Groups
    • Raspberry Pi
    • RoadTests & Reviews
  • Store
    Store
    • Visit Your Store
    • Choose another store...
      • Europe
      •  Austria (German)
      •  Belgium (Dutch, French)
      •  Bulgaria (Bulgarian)
      •  Czech Republic (Czech)
      •  Denmark (Danish)
      •  Estonia (Estonian)
      •  Finland (Finnish)
      •  France (French)
      •  Germany (German)
      •  Hungary (Hungarian)
      •  Ireland
      •  Israel
      •  Italy (Italian)
      •  Latvia (Latvian)
      •  
      •  Lithuania (Lithuanian)
      •  Netherlands (Dutch)
      •  Norway (Norwegian)
      •  Poland (Polish)
      •  Portugal (Portuguese)
      •  Romania (Romanian)
      •  Russia (Russian)
      •  Slovakia (Slovak)
      •  Slovenia (Slovenian)
      •  Spain (Spanish)
      •  Sweden (Swedish)
      •  Switzerland(German, French)
      •  Turkey (Turkish)
      •  United Kingdom
      • Asia Pacific
      •  Australia
      •  China
      •  Hong Kong
      •  India
      •  Korea (Korean)
      •  Malaysia
      •  New Zealand
      •  Philippines
      •  Singapore
      •  Taiwan
      •  Thailand (Thai)
      • Americas
      •  Brazil (Portuguese)
      •  Canada
      •  Mexico (Spanish)
      •  United States
      Can't find the country/region you're looking for? Visit our export site or find a local distributor.
  • Translate
  • Profile
  • Settings
1 Meter of Pi
  • Challenges & Projects
  • Design Challenges
  • 1 Meter of Pi
  • More
  • Cancel
1 Meter of Pi
Blog Valley Forge: Project Paperinik  #2 (The design)
  • Blog
  • Forum
  • Documents
  • Polls
  • Files
  • Events
  • Mentions
  • Sub-Groups
  • Tags
  • More
  • Cancel
  • New
  • Share
  • More
  • Cancel
Group Actions
  • Group RSS
  • More
  • Cancel
Engagement
  • Author Author: gam3t3ch
  • Date Created: 7 Nov 2020 5:56 PM Date Created
  • Views 947 views
  • Likes 4 likes
  • Comments 5 comments
Related
Recommended

Valley Forge: Project Paperinik  #2 (The design)

gam3t3ch
gam3t3ch
7 Nov 2020

You don't have permission to edit metadata of this video.
Edit media
x
image
Upload Preview
image


All design files can be found here for 3d printed parts. https://www.thingiverse.com/thing:4644039


imageimage

So when I first started designing my project I had to think of what was available in space and what was available on earth and items we would have to each.  I knew that it would have to be put together with 3d printed connected blocks to make it easy for anyone to recreate and be able to adapt and adjust the project to their needs as every environment and situation may require different approaches.  This lead me to using 3/4" EMT Conduit for the frame and the 3d printed parts.  I had taken the time to go through all the pictures on the International space station that I could find. Finally finding enough EMT conduit to make the project work.  Ultimately having a project that could be reproduced anywhere and for a cheap price.  After searching online and looking at some enclosures I was floored at the prices that it costs and knew I had to make it as cheap as possible so far for the entire frame it has cost me the following


EMT Conduit: $30 Can or $22.99 USD

3D Fillament:  $23 Can or $17.63 USD


image

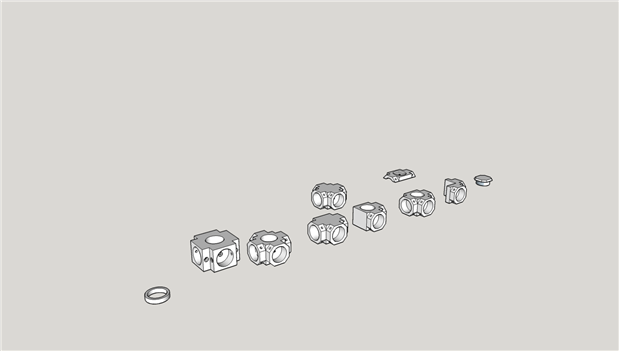
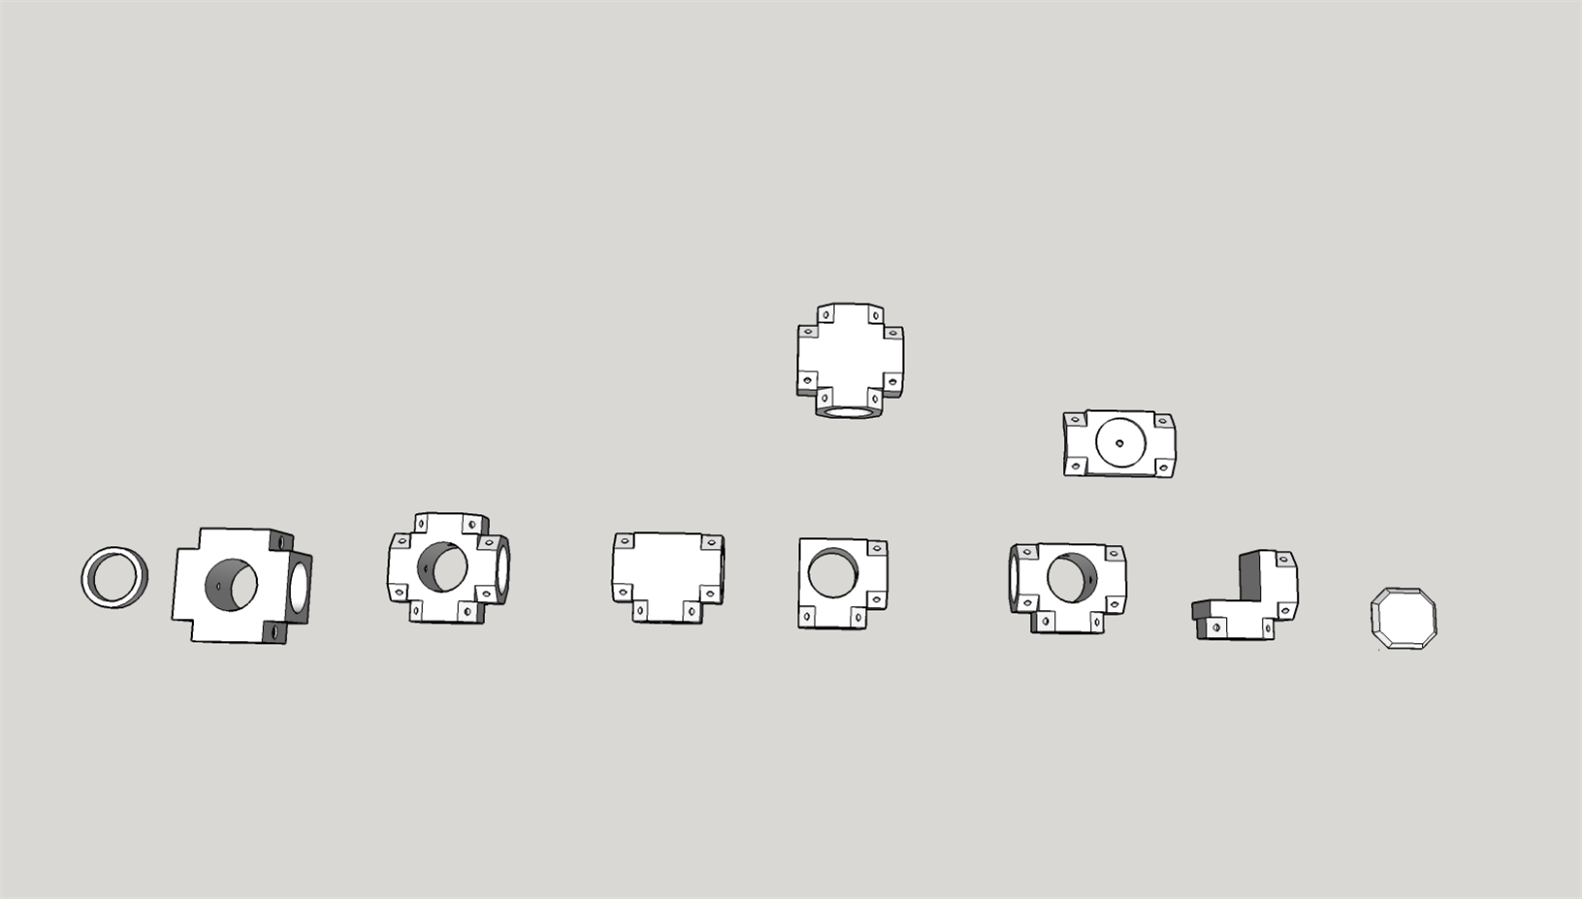
When I think about it that's not bad for just the frame of the unit.  Mind you this could become cheaper if you found materials in a reuse place which might have EMT Conduit or any other tubing you wish to use.  Taking the 3d prints and scaling them to what you would require with the test ring.


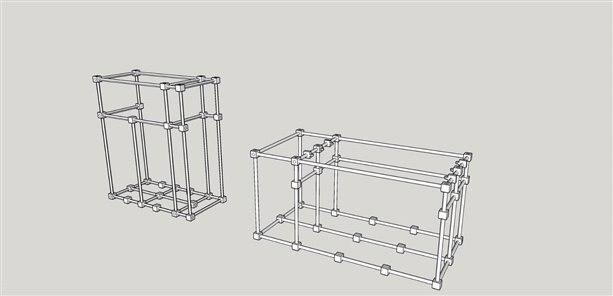
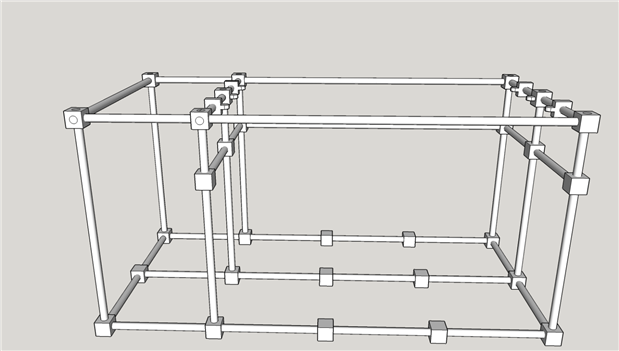
So I planned a few designs and followed along with what I thought would be ideal for my unit eventually settling for the 30x30x60 design this would put me just under the 1m3 so if I needed to run anything above or below the unit I would be able to have that little buffer zone.  Now when I was designing this the taller one was my first design on the left above.  which to me made sense but then after thinking of what I was going to be growing in the unit I soon realized I needed more floor space than I did height on the unit.  Bringing us to a final design.


Now when prototyping sure its not going to be 100% as you first design.  Things change as it did even while I was putting it together I found ways to use less conduit and less filament in my design.  Making it more cost effective.

imageimage

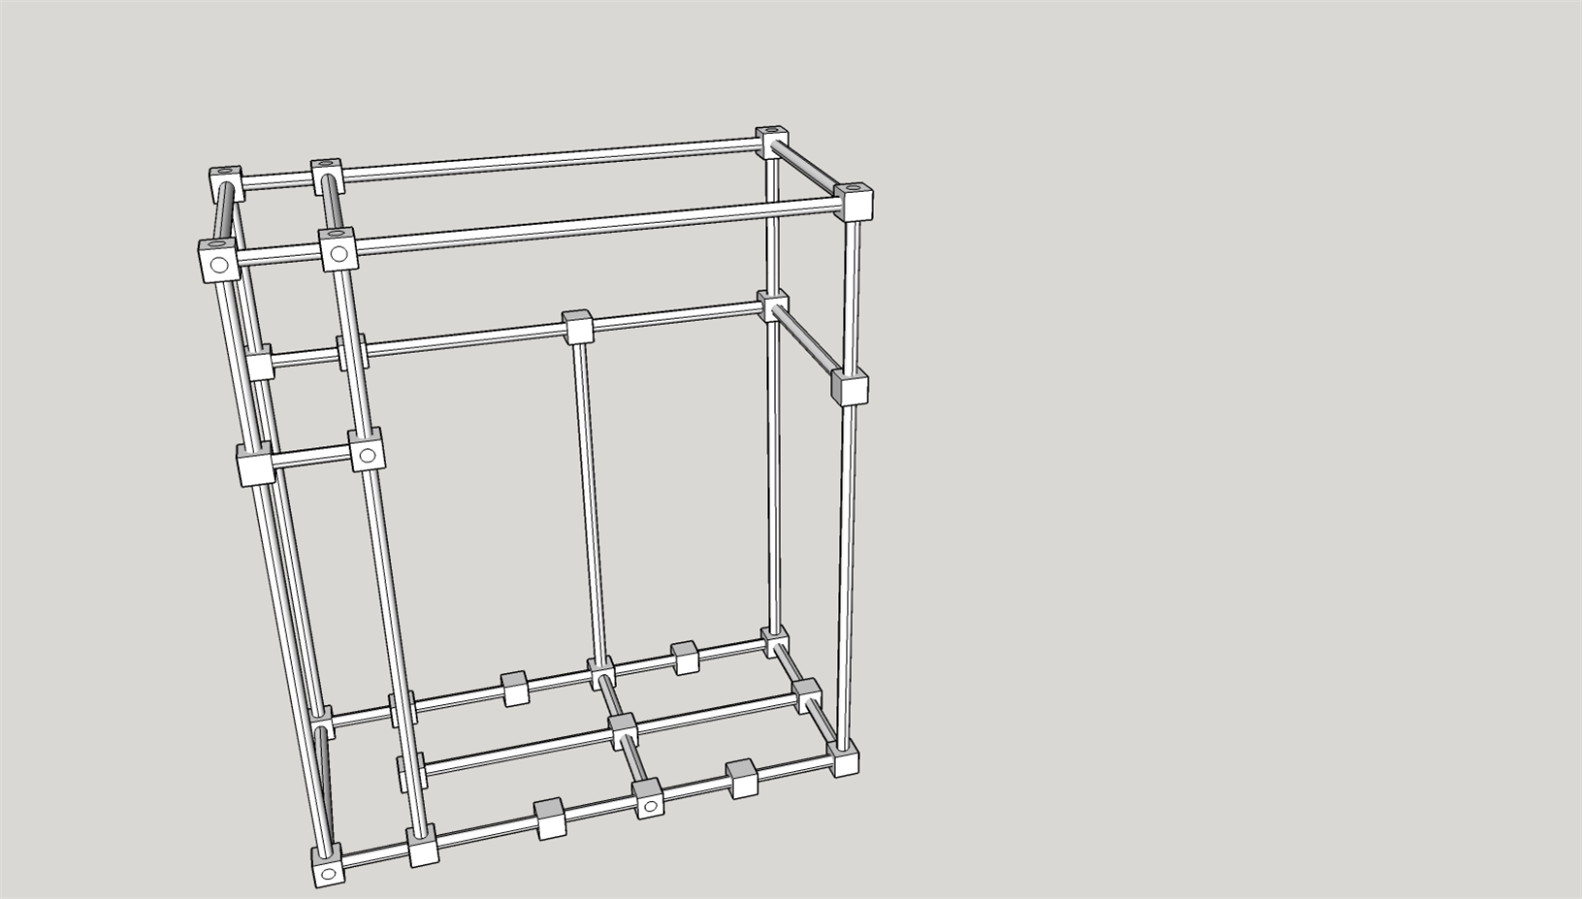
So far the design consists of 6 runs of 10ft 3/4 inch conduit and 3/4's of a roll of filament.  Now I am not one to plan out everything to a "T"  so it becomes a lot of trial and error.  so for the filament that Is currently on the unit minus my over printing of parts and prototyping I think just under half a 1kg roll of filament would do the trick for the main frame.  Leaving half of the roll left for the other items that will be required in the build.   So many times I have had to buy 2 or 3 rolls and sometimes more for a project and to me it becomes wasteful when I see the flaws and the adjustments that could have been made either in design or print.


All of my print setting will be posted in the the design files in the link at the start of this post and I thought why not add them in here if someone else could make use of them to while making their project then great or anyone wanting to play along.   We have tons of things left to do from the enclosure to setting up all the electronics to finally getting things setup for growing then finally after a bit getting to the point where we can harvest our crop.


image

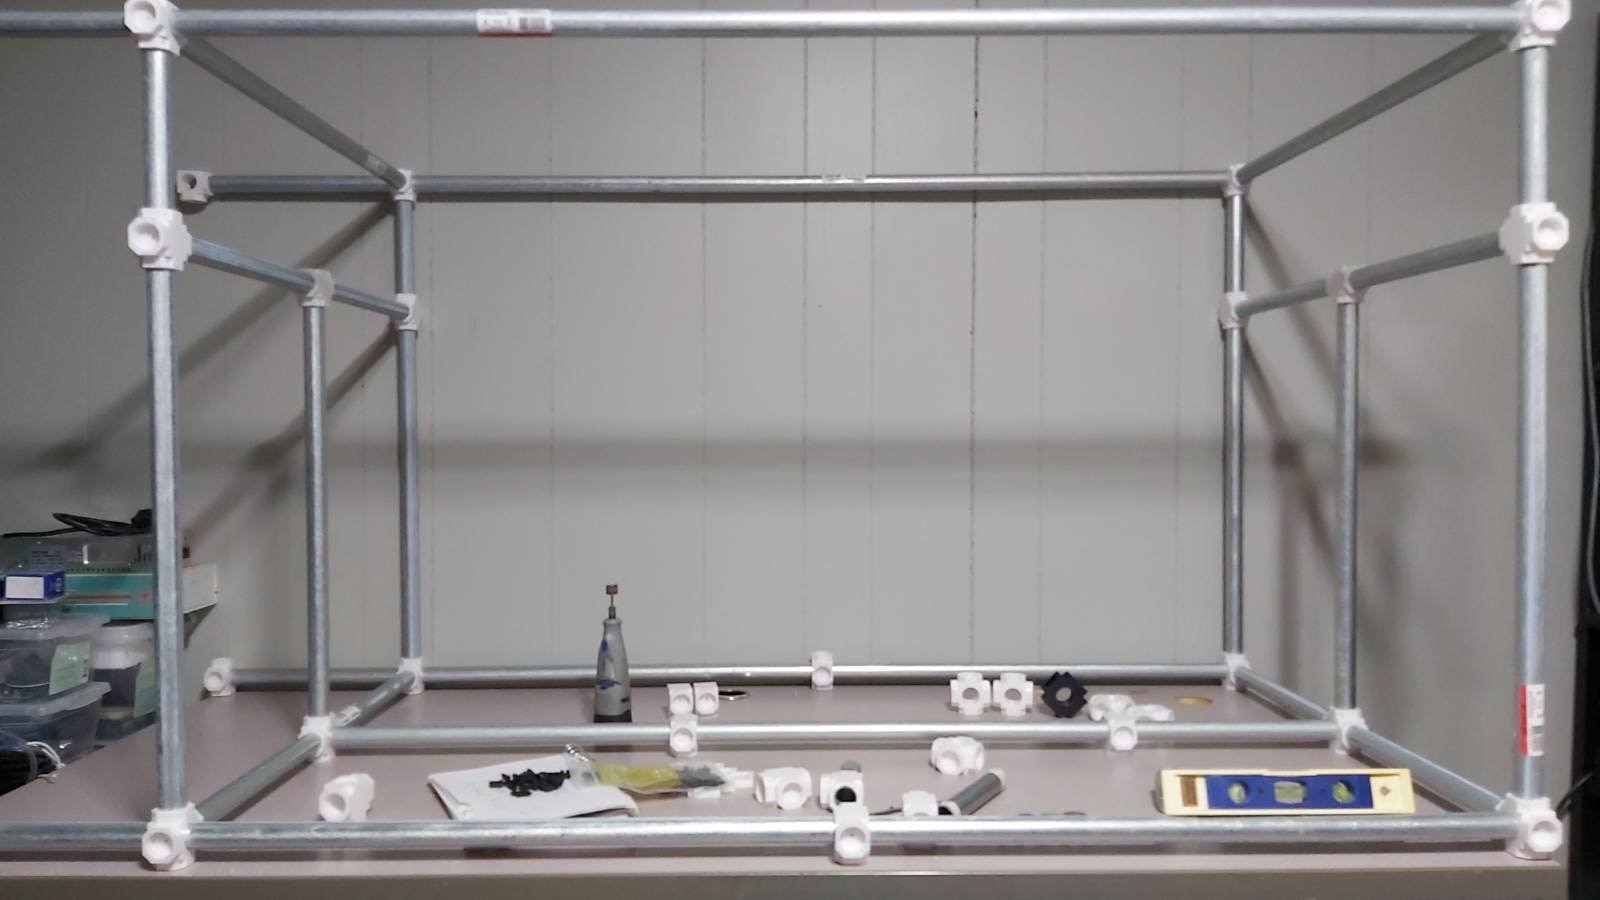
So this is the point where I was almost done with putting the frame together, I had 4 more pieces of conduit to attach to the unit.  When it comes to the base I used multiple different adapters just in case I needed to make any adjustments to the unit to allow for a more stable base once it's enclosed.  But due to its size I think it will do as it sits there for what will be put on the bottom and what will be growing there as well.


The enclosure will be a completely sealed unit which to me makes the most sense but doing so means we have more things to consider when getting it up and running so lets hope we can adjust all the extra things that might go wrong early on and be able to have a wonderful crop near the end.


Another thing I wanted to do was allow for the ability to be able to add on to the unit as space does become more available you could add more chambers or adjust the height in which the unit is to make room for higher growing plants.  To me this was a must because remember not all plants like each other when grown together.   But we will cover all that in a future blog post regarding what we are putting in the unit and why.


              below:  (Prototype on left  ||  Final design on the right)

imageimage

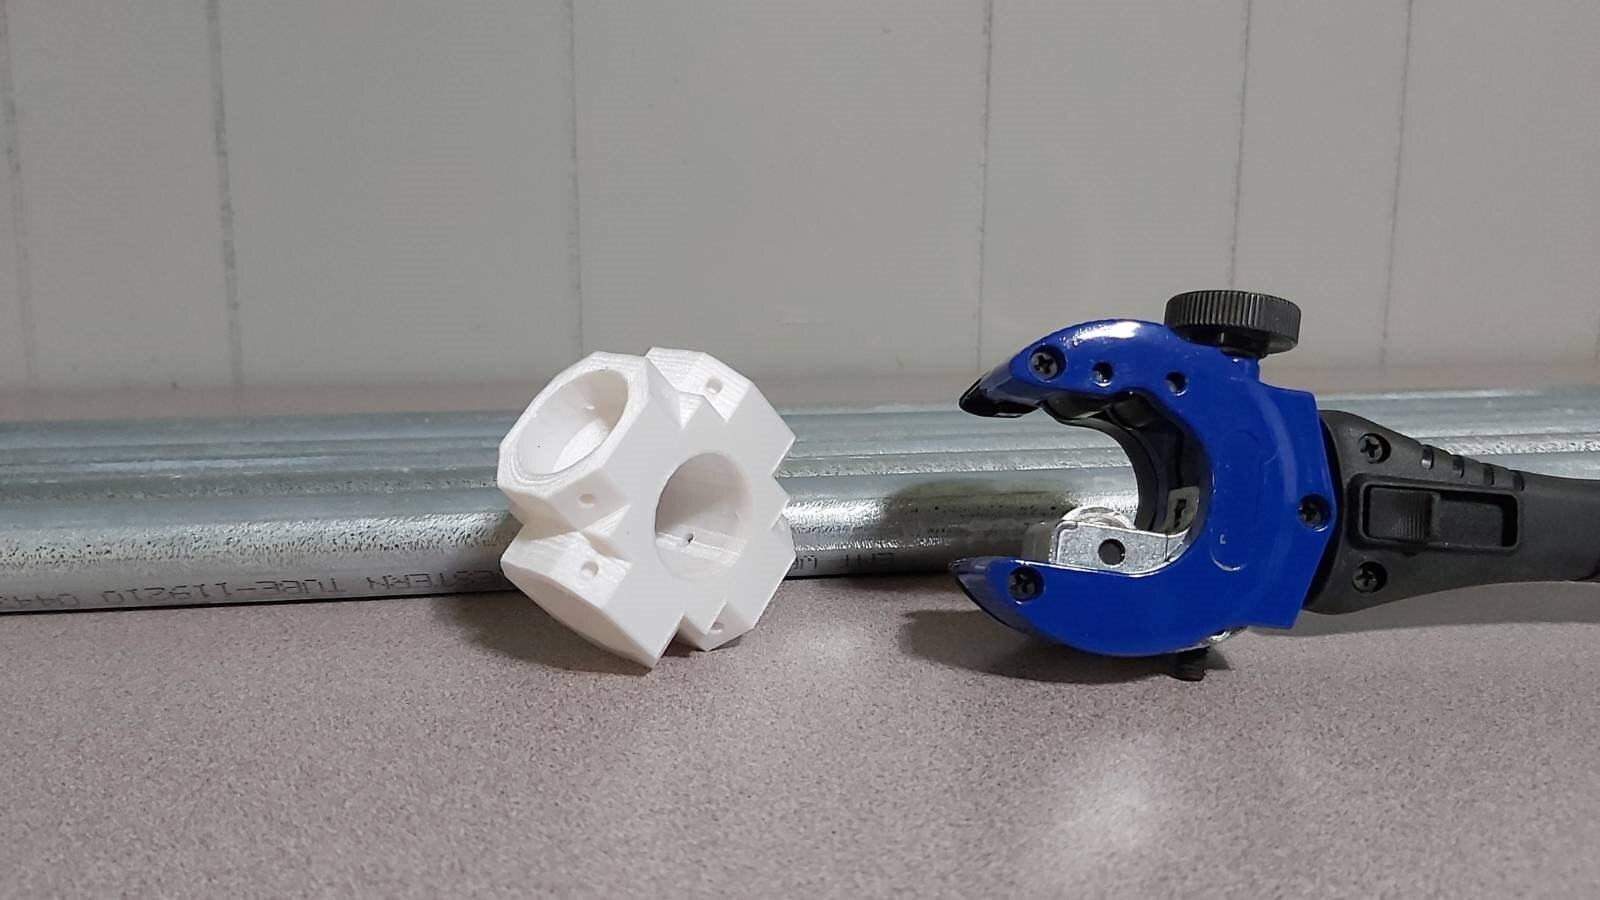
When it comes to the tools so far I have only used the following a 3d printer and a ratcheting pipe cutter.  If you have cut as much EMT conduit as me you will know how valuable the ratcheting cutter is.  The cutter information can be found here https://www.brasscraft.com/product/pst011/  which after cutting so many runs of conduit over the past 4 or 5 years I have had it.  With no need to replace the blade as of yet.


As far as my 3D Printer its just a cheap Anet A8 clone that works as well as you keep on top of tuning it every other print to make sure everything is level and belts are good.


Oh I may have told a fib,  that's right I used one more tool to clean up my prints a bit a Dremel 7300 Minimite cordless unit.  https://us.dremel.com/en_US/products/-/show-product/tools/7300-minimite-cordless  for more information on it.  I do have a corded unit but there is a purpose to me either using cordless or manual tools in this build.


If I needed I could have just used a chunk of sandpaper to clean the parts up but figure if we used a cordless unit in space we would have some sort of vacuum system either attached to the unit or something near it could be sucked into a vacuum system.  Since keeping the small plastic particles out of the environment would be a good thing.


imageimage


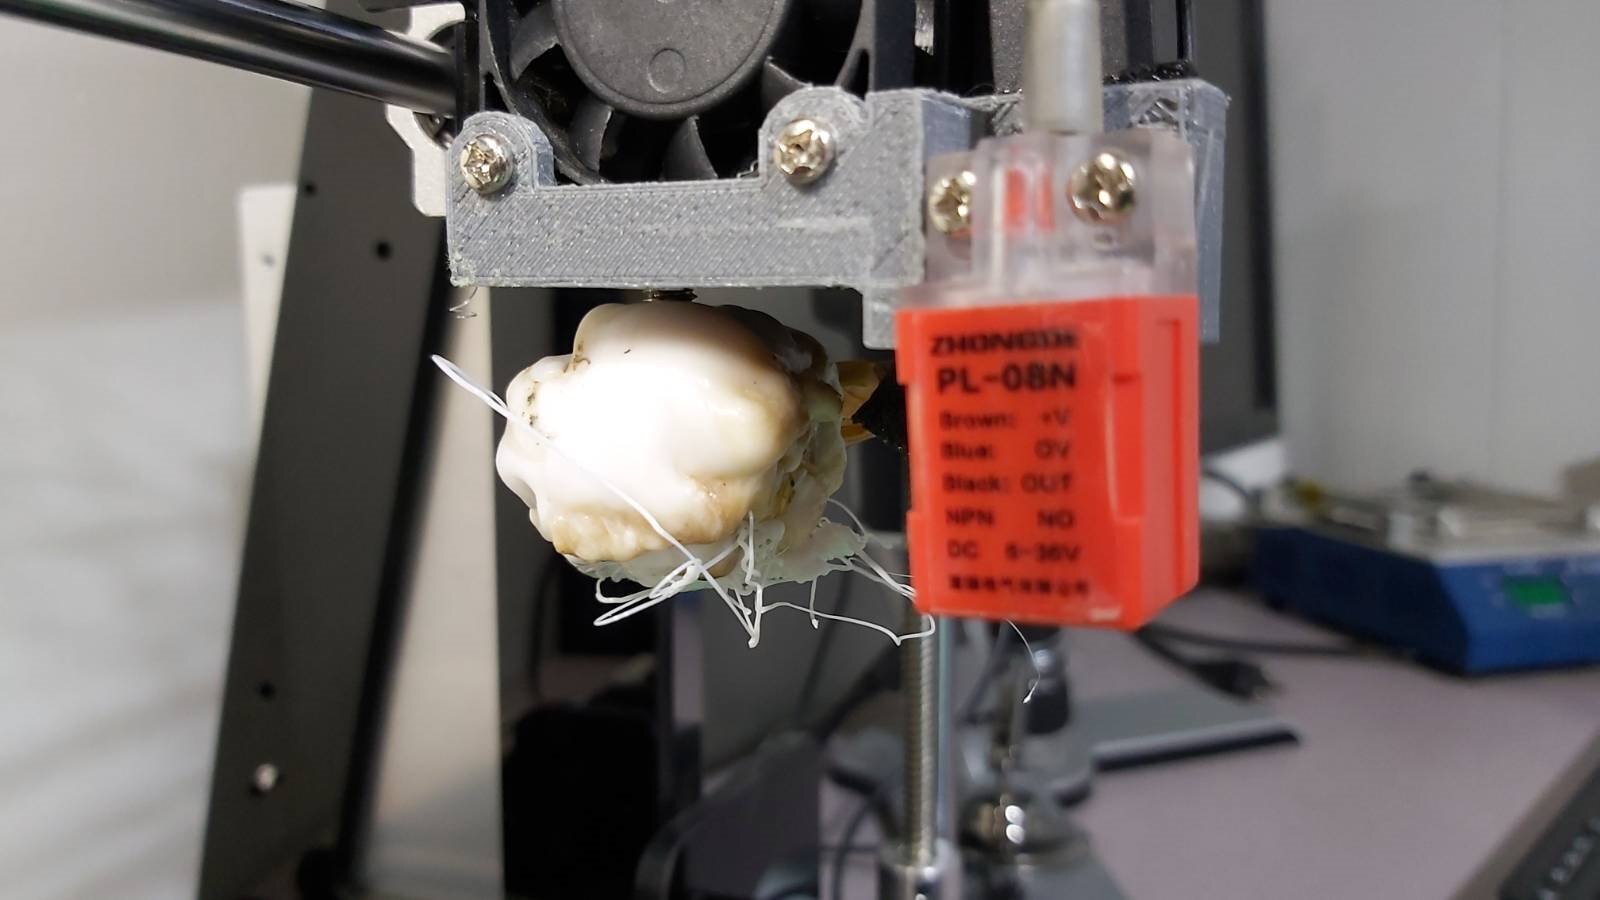
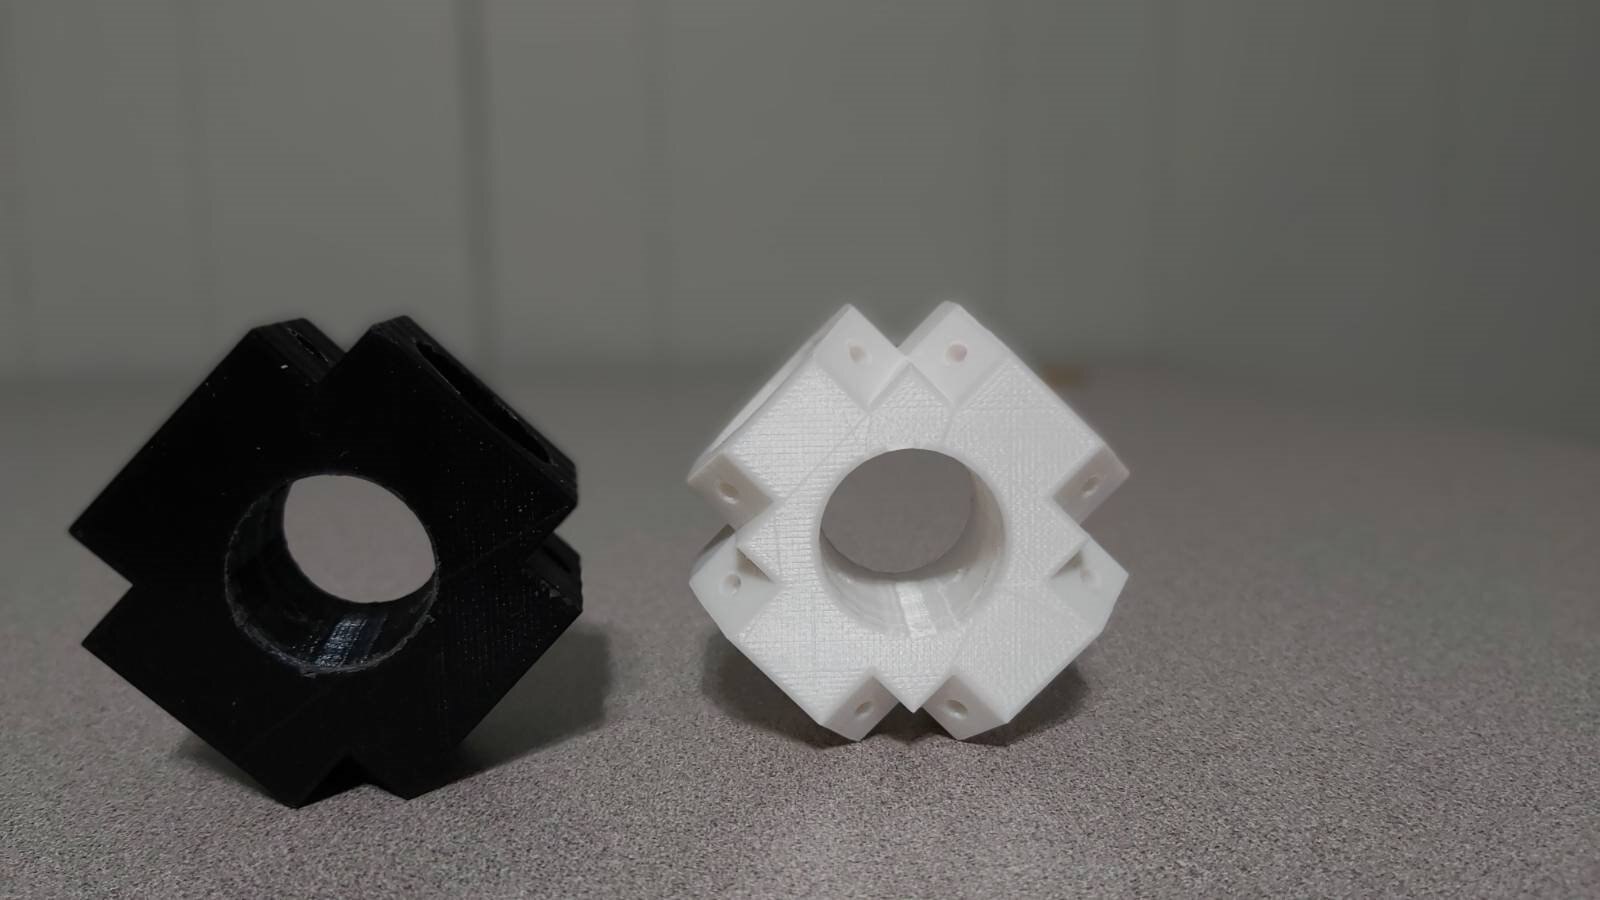
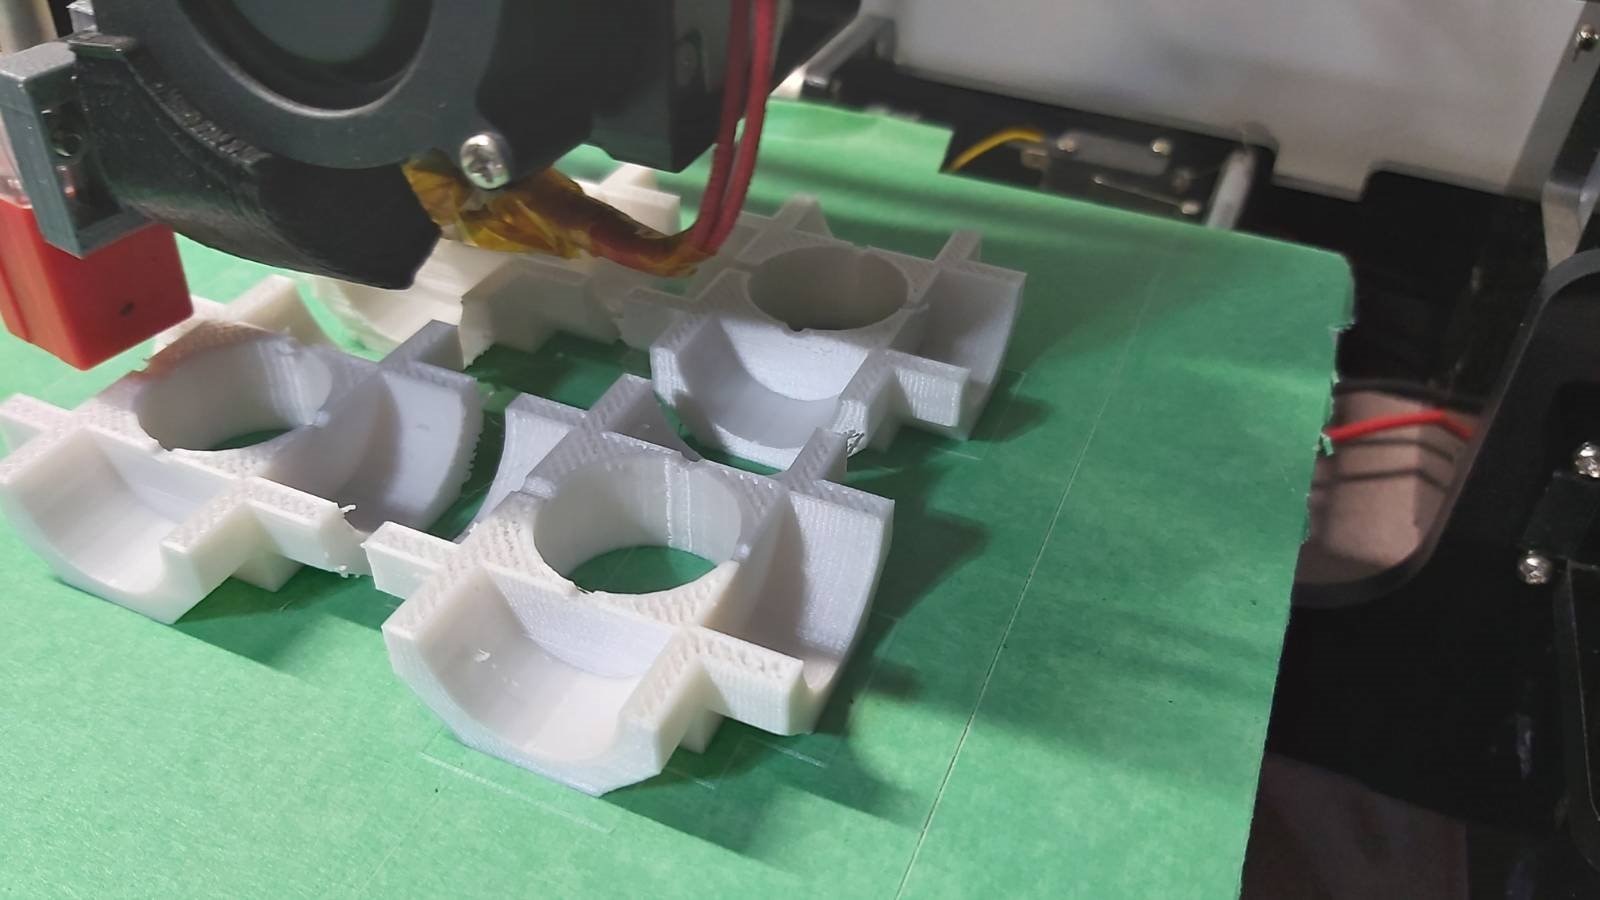
But with any project sometimes things happen....and that they did causing a delay in the production of my parts.   As you can see I guess I should have payed more attention to the prints.  Which up to this point where printing just fine and then something happened.  So after the cleanup which took a bit of time and a few burnt fingers in the process I was back to printing.


imageimage

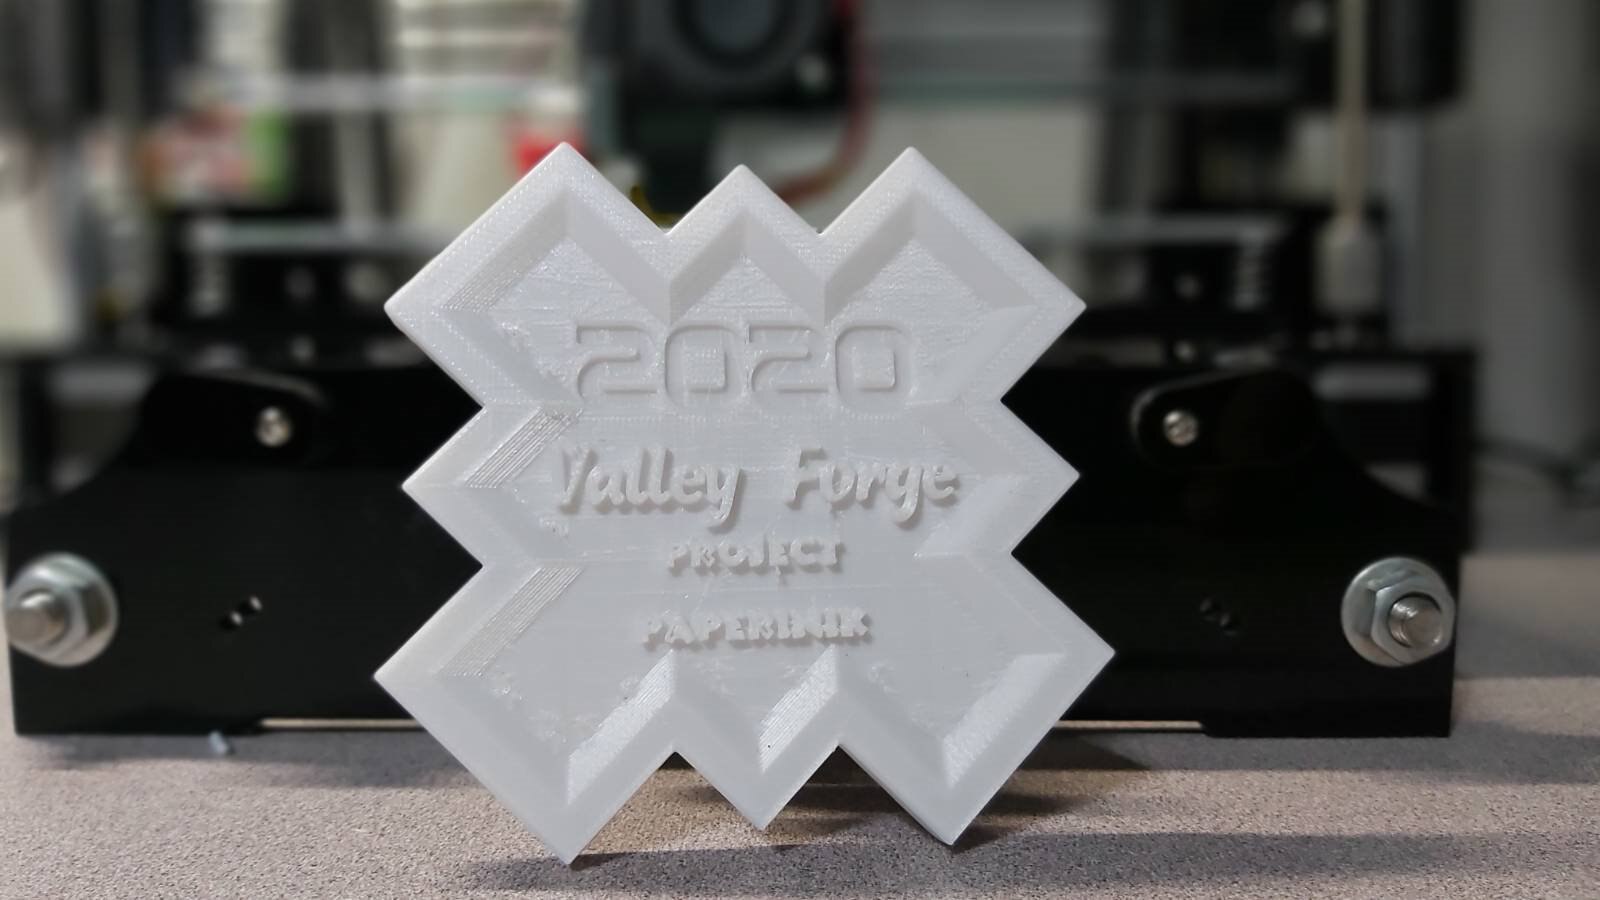
Valley Forge - Project Paperinik was back on course to be completed.  So for anyone having issues don't worry it happens to us all just step back and take your time and enjoy the process.


Onto the enclosure.........  (see you next blog post)


All 3d printed parts can be found here:

https://www.thingiverse.com/thing:4644039


Blog #1: https://www.element14.com/community/community/design-challenges/1-meter-of-pi/blog/2020/11/04/welcome-to-valley-forge-project-paperinik-1

Blog #2: https://www.element14.com/community/community/design-challenges/1-meter-of-pi/blog/2020/11/07/valley-forge-project-paperinik-2-the-design

Blog #3: https://www.element14.com/community/community/design-challenges/1-meter-of-pi/blog/2020/11/23/valley-forge-project-paperinik-3-the-enclosure

blog #4:  https://www.element14.com/community/community/design-challenges/1-meter-of-pi/blog/2021/01/03/valley-forge-project-paperinik-4-the-electronics

Blog #5: https://www.element14.com/community/community/design-challenges/1-meter-of-pi/blog/2021/01/03/valley-forge-project-paperinik-5-the-software

Blog #6: https://www.element14.com/community/community/design-challenges/1-meter-of-pi/blog/2021/01/03/valley-forge-project-paperinik-6-working-the-bugs-out

Blog #7: https://www.element14.com/community/community/design-challenges/1-meter-of-pi/blog/2021/01/03/valley-forge-project-paperinik-7-the-growing-process

Blog #8: https://www.element14.com/community/community/design-challenges/1-meter-of-pi/blog/2021/01/03/valley-forge-project-paperinik-8-the-enclosure-completed

Blog #9: https://www.element14.com/community/community/design-challenges/1-meter-of-pi/blog/2021/01/05/valley-forge-project-paperinik-9-finding-alternatives

Blog #10: https://www.element14.com/community/community/design-challenges/1-meter-of-pi/blog/2021/01/05/valley-forge-project-paperinik-10-the-outcome

  • Sign in to reply

Top Comments

  • gam3t3ch
    gam3t3ch over 4 years ago in reply to dubbie +1
    Once the enclosure is on it then it forms up alot. I was thinking of doing a bracing bar for it but trying to keep material usage down. More will make sense come this weekend on my next blog. There is…
  • gam3t3ch
    gam3t3ch over 4 years ago in reply to dubbie +1
    So just for fun I wanted to see if I could make a few 45 degree blocks that I could if needed use to tighten the frame up this what I came up with I did have another design but haven't tested it yet. once…
  • gam3t3ch
    gam3t3ch over 4 years ago in reply to dubbie

    So just for fun I wanted to see if I could make a few 45 degree blocks that I could if needed use to tighten the frame up this what I came up with I did have another design but haven't tested it yet.  once I find one that works I will probably have it so they are all 2 pieces so that if the frame is together already you can mount as needed either attach as corner bracing or cross.  As well as be able to cut down print time and filament use.


    image

    • Cancel
    • Vote Up +1 Vote Down
    • Sign in to reply
    • More
    • Cancel
  • gam3t3ch
    gam3t3ch over 4 years ago in reply to dubbie

    Once the enclosure is on it then it forms up alot. I was thinking of doing a bracing bar for it but trying to keep material usage down. More will make sense come this weekend on my next blog.


    There is a small amount of sway  to the unit since most things will be on the lower bed and on the inner side walls it should be ok but I'm ready incase something arises that needs to be addressed.  I'll make sure to get video of the sway before and after.

    • Cancel
    • Vote Up +1 Vote Down
    • Sign in to reply
    • More
    • Cancel
  • dubbie
    dubbie over 4 years ago

    I've made similar modular box frame type things before. They are good, but it tend to get a bit heavy, as well as wobble a bit if it was banged about. Have you had any problems or have you braced it well?


    Dubbie

    • Cancel
    • Vote Up 0 Vote Down
    • Sign in to reply
    • More
    • Cancel
  • gam3t3ch
    gam3t3ch over 4 years ago in reply to DAB

    Thanks eh! Lot's of fun ahead and lot more details and a few surprises  image 

    • Cancel
    • Vote Up 0 Vote Down
    • Sign in to reply
    • More
    • Cancel
  • DAB
    DAB over 4 years ago

    Good build.


    DAB

    • Cancel
    • Vote Up 0 Vote Down
    • Sign in to reply
    • More
    • Cancel
element14 Community

element14 is the first online community specifically for engineers. Connect with your peers and get expert answers to your questions.

  • Members
  • Learn
  • Technologies
  • Challenges & Projects
  • Products
  • Store
  • About Us
  • Feedback & Support
  • FAQs
  • Terms of Use
  • Privacy Policy
  • Legal and Copyright Notices
  • Sitemap
  • Cookies

An Avnet Company © 2025 Premier Farnell Limited. All Rights Reserved.

Premier Farnell Ltd, registered in England and Wales (no 00876412), registered office: Farnell House, Forge Lane, Leeds LS12 2NE.

ICP 备案号 10220084.

Follow element14

  • X
  • Facebook
  • linkedin
  • YouTube