


Introduction
In this blog, I will try to run ML on Pynq and do some image classification using neural network. Machine learning on PYNQ involves leveraging the FPGA (Field-Programmable Gate Array) capabilities of PYNQ boards to accelerate machine learning algorithms.
The earlier plan was to use pretrained tflite models on the FPGA board. But I started facing many issues. First I had to install the correct versions of packages, then whenever I tried to invoke the tensorflow interpreter the terminal crashed. Frustrated from the issues, I started looking into blogs of other participants for some help to see if I was doing something wrong. And in one good blog, I came to know that pynq has prebuilt hardware overlays for running inferencing on neural networks. So, in this blog I will follow an example jupyter notebook and learn about various steps involved in inferencing.
What is Neural Network?
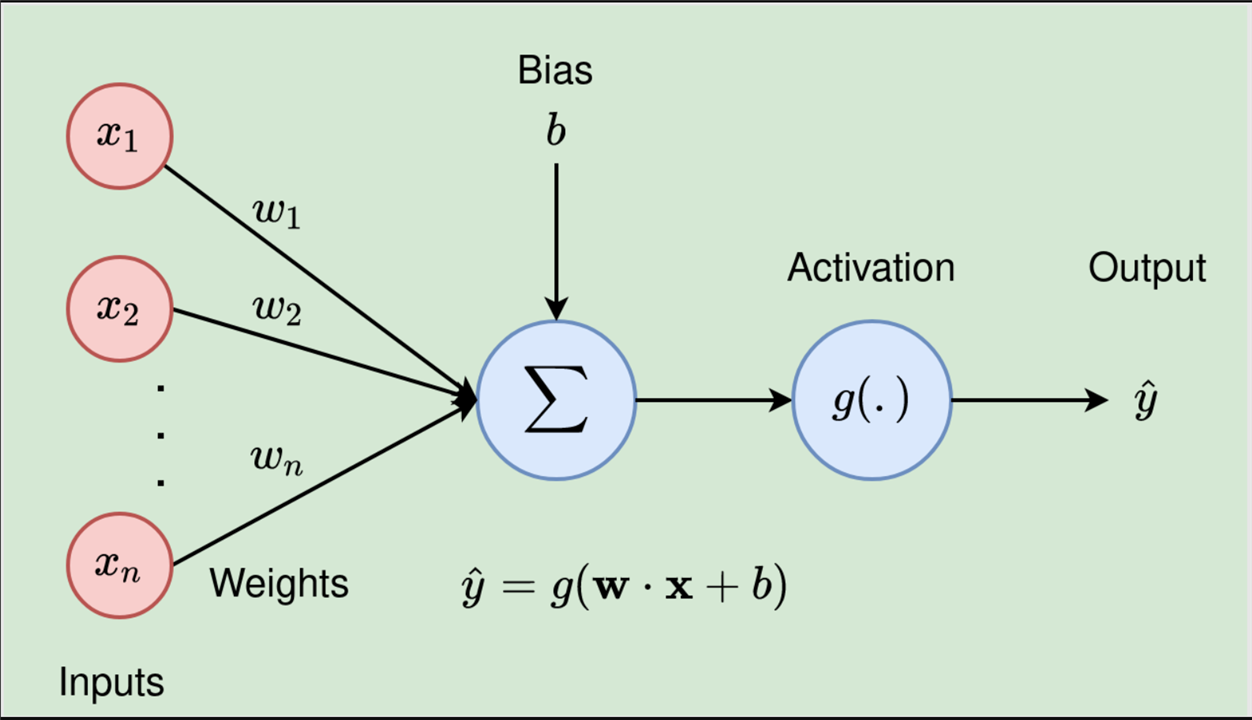
A neural network is a computational model inspired by the way biological neural networks in the human brain process information. Neural networks are designed to recognize patterns, make predictions, and solve complex problems by learning from data.
What are components of a neural network?
Here's a breakdown of the main components:
- Neurons (Nodes) : The basic units that receive input, process it, and produce an output.
- Layers :
- Input Layer : The first layer that receives the initial data.
- Hidden Layers : Intermediate layers between the input and output layers that perform complex transformations. There can be multiple hidden layers.
- Output Layer : The final layer that produces the output prediction.
- Weights : Parameters that determine the importance of each input. Weights are adjusted during training to minimize the error between the predicted and actual outputs.
- Biases : Additional parameters added to the weighted sum before applying the activation function. Biases allow the activation function to shift, improving the model's flexibility.
Quantization of Neural Network?
Quantization of neural networks is a technique used to reduce the computational complexity and memory requirements of deep learning models. This is achieved by converting the model's weights and activations from high-precision floating-point numbers (e.g., 32-bit or 64-bit) to lower-precision fixed-point numbers (e.g., 8-bit or 4-bit). We will be using the QNN-MO-PYNQ (QNN stands for Quantized neural network) pip package in this tutorial. The source code can be found here.
Running ML on PYNQ
The QNN-MO-PYNQ package is tested on pynq2.5. So I had to uninstall the latest version of pynq and re-install pynq2.5 instead.
- Make sure the board is connected to the internet. I have written about how to share the laptop wifi with the board in this blog.
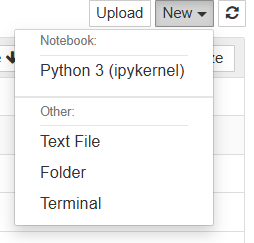
- Open a new notebook by clicking on 'New', then 'Python 3 (ipykernel)'.
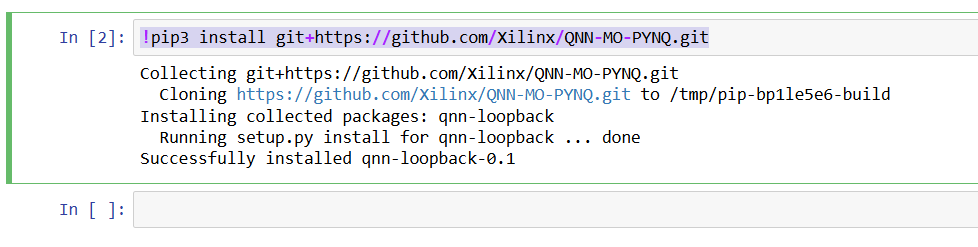
- Enter the below command and run it to install the QNN-MO-PYNQ package. This should create a QNN folder in the jupyter notebooks directory.
!pip3 install git+https://github.com/Xilinx/QNN-MO-PYNQ.git
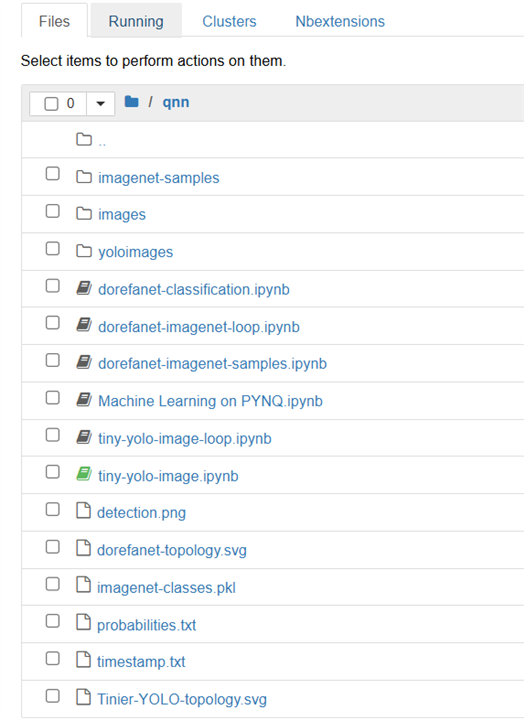
- There are many example notebooks in the qnn directory. I ran the tiny-yolo-image.ipynb to make sure that the flow is clean.
- First we need to import all the required packages.
import sys import os, platform import json import numpy as np import cv2 import ctypes from PIL import Image from datetime import datetime import qnn from qnn import TinierYolo from qnn import utils sys.path.append("/opt/darknet/python/") from darknet import * from matplotlib import pyplot as plt %matplotlib inline - Now, we will create a classifier and pass the network architecture file to it. The network architecture file (.json) describes the architecture of the model, including the configuration of layers.
classifier = TinierYolo()
classifier.init_accelerator()
net = classifier.load_network(json_layer="/usr/local/lib/python3.6/dist-packages/qnn/params/tinier-yolo-layers.json")
- Load weights for the CNN layers. The weights are stored in a numpy arrays binary file format. Transposing the axes is necessary to get correct format. The np.broadcast_to() command is performing a broadcasting operation on a bias array to match the shape required for the next layer in the neural network.
conv0_weights = np.load('/usr/local/lib/python3.6/dist-packages/qnn/params/tinier-yolo-conv0-W.npy', encoding="latin1", allow_pickle=True) conv0_weights_correct = np.transpose(conv0_weights, axes=(3, 2, 1, 0)) conv8_weights = np.load('/usr/local/lib/python3.6/dist-packages/qnn/params/tinier-yolo-conv8-W.npy', encoding="latin1", allow_pickle=True) conv8_weights_correct = np.transpose(conv8_weights, axes=(3, 2, 1, 0)) conv0_bias = np.load('/usr/local/lib/python3.6/dist-packages/qnn/params/tinier-yolo-conv0-bias.npy', encoding="latin1", allow_pickle=True) conv0_bias_broadcast = np.broadcast_to(conv0_bias[:,np.newaxis], (net['conv1']['input'][0],net['conv1']['input'][1]*net['conv1']['input'][1])) conv8_bias = np.load('/usr/local/lib/python3.6/dist-packages/qnn/params/tinier-yolo-conv8-bias.npy', encoding="latin1", allow_pickle=True) conv8_bias_broadcast = np.broadcast_to(conv8_bias[:,np.newaxis], (125,13*13)) - Now, we need to load and configure the neural network based on the settings specified in the configuration file.
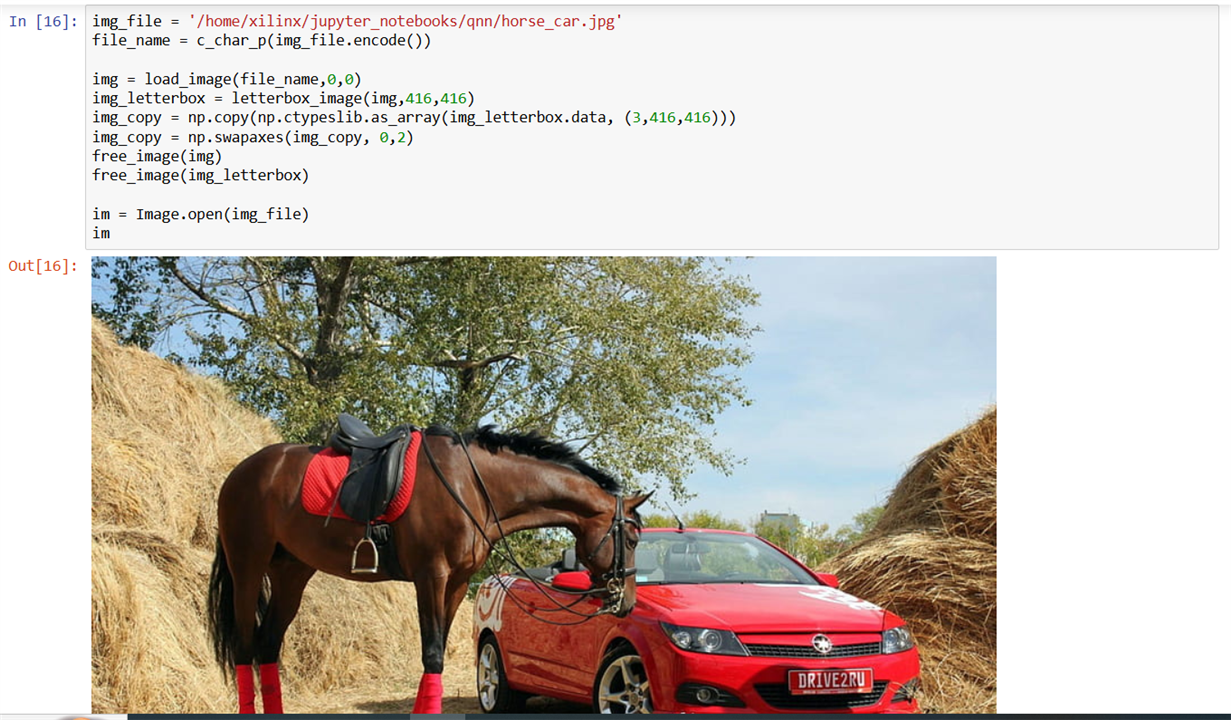
file_name_cfg = c_char_p("/usr/local/lib/python3.6/dist-packages/qnn/params/tinier-yolo-bwn-3bit-relu-nomaxpool.cfg".encode()) net_darknet = lib.parse_network_cfg(file_name_cfg) - I have downloaded an image of a horse and a car from internet on which I want to do image detection.
The neural network has been trained on the PASCAL VOC (Visual Object Classes) and is able to identify 20 classes of objects in an image, namely:
Person: person
Animal: bird, cat, cow, dog, horse, sheep
Vehicle: aeroplane, bicycle, boat, bus, car, motorbike, train
Indoor: bottle, chair, dining table, potted plant, sofa, tv/monitorimg_file = '/home/xilinx/jupyter_notebooks/qnn/horse_car.jpg' file_name = c_char_p(img_file.encode()) img = load_image(file_name,0,0) img_letterbox = letterbox_image(img,416,416) img_copy = np.copy(np.ctypeslib.as_array(img_letterbox.data, (3,416,416))) img_copy = np.swapaxes(img_copy, 0,2) free_image(img) free_image(img_letterbox) im = Image.open(img_file) im
- Now, we will run the first layer of the neural network. The first layer of this neural network has not been quantized, thus will not be executed in the HW accelerator.

start = datetime.now() img_copy = img_copy[np.newaxis, :, :, :] conv0_ouput = utils.conv_layer(img_copy,conv0_weights_correct,b=conv0_bias_broadcast,stride=2,padding=1) conv0_output_quant = conv0_ouput.clip(0.0,4.0) conv0_output_quant = utils.quantize(conv0_output_quant/4,3) end = datetime.now() micros = int((end - start).total_seconds() * 1000000) print("First layer SW implementation took {} microseconds".format(micros)) print(micros, file=open('timestamp.txt', 'w')) - The core layers, which values have been quantized during training, are executed in the Programmable Logic.

out_dim = net['conv7']['output'][1] out_ch = net['conv7']['output'][0] conv_output = classifier.get_accel_buffer(out_ch, out_dim) conv_input = classifier.prepare_buffer(conv0_output_quant*7); start = datetime.now() classifier.inference(conv_input, conv_output) end = datetime.now() conv7_out = classifier.postprocess_buffer(conv_output) micros = int((end - start).total_seconds() * 1000000) print("HW implementation took {} microseconds".format(micros)) print(micros, file=open('timestamp.txt', 'a')) - Execute the last layer of the neural network.

start = datetime.now() conv7_out_reshaped = conv7_out.reshape(out_dim,out_dim,out_ch) conv7_out_swapped = np.swapaxes(conv7_out_reshaped, 0, 1) # exp 1 conv7_out_swapped = conv7_out_swapped[np.newaxis, :, :, :] conv8_output = utils.conv_layer(conv7_out_swapped,conv8_weights_correct,b=conv8_bias_broadcast,stride=1) conv8_out = conv8_output.ctypes.data_as(ctypes.POINTER(ctypes.c_float)) end = datetime.now() micros = int((end - start).total_seconds() * 1000000) print("Last layer SW implementation took {} microseconds".format(micros)) print(micros, file=open('timestamp.txt', 'a')) - Now we will draw bounding boxes using darknet and print probabilities.

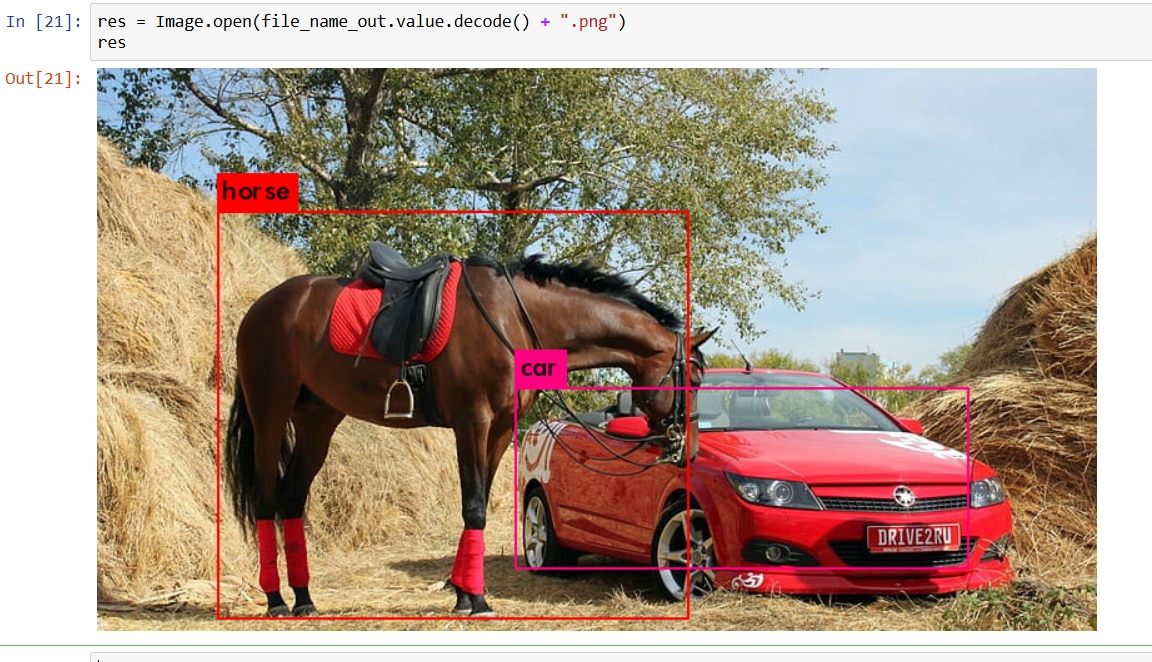
lib.forward_region_layer_pointer_nolayer(net_darknet,conv8_out) tresh = c_float(0.3) tresh_hier = c_float(0.5) file_name_out = c_char_p("/home/xilinx/jupyter_notebooks/qnn/detection".encode()) file_name_probs = c_char_p("/home/xilinx/jupyter_notebooks/qnn/probabilities.txt".encode()) file_names_voc = c_char_p("/opt/darknet/data/voc.names".encode()) darknet_path = c_char_p("/opt/darknet/".encode()) lib.draw_detection_python(net_darknet, file_name, tresh, tresh_hier,file_names_voc, darknet_path, file_name_out, file_name_probs); #Print probabilities file_content = open(file_name_probs.value,"r").read().splitlines() detections = [] for line in file_content[0:]: name, probability = line.split(": ") detections.append((probability, name)) for det in sorted(detections, key=lambda tup: tup[0], reverse=True): print("class: {}\tprobability: {}".format(det[1], det[0])) - Now lets see the results.
res = Image.open(file_name_out.value.decode() + ".png")
res
Summary
In this blog, we learned how to use the prebuilt pynq overlays for ML neural network inferencing. By quantizing the layers, the model ran more efficiently on the hardware accelerator and produced fast and accurate result on the test image.
References

