


The Goal - Imagine your stove had a magical device hovering above it to help you see what you're cooking and possibly save your life...?
i.e. a Smart Range Hood which monitors air quality, checks what's on the stove and can turn on the fan and lights by itself or from a mobile app. It also supplies images of the cooktop. See Blog Post #1 for links to the full build process.
Here are some pictures from this past weekend with the assembly of the sheet metal. This post will be more of a photo gallery with a description talking about the process. The sheet metal was fabricated at a local shop near Milwaukee, WI based on the CAD models I created (See Blog Post # 3 for detailed description, video of the process and links to all the raw CAD files).
As already described, the donor hood's fan box is not the same shape to fit in the opening for the new hood.There was therefore some modification required to make them work together. I will also discuss some of the mistakes that I made in the process of the design.
There is a quick video at the end showing more the of the mechanical instillation for this project. Skip down there if you get bored looking at the pictures 
Design for manufacturing
When I contacted the fabricator - Engineered Metal Products [EMP] about the project and sent them the files, I was able to ask some key questions and get feedback about the design. They were able to recommend some modifications which would allow the product to be built easily and look better as a finished product. There were two key recommendations they had -
1. Use thicker gauge steel. I had planned for 24 gauge for the insert and 20 gauge for the hood. This was based on the gauges of the donor hood. Since I had requested a full weld of the seams, they recommended using 18 or 16 gauge stainless. The 20 gauge would be very light to weld on and difficult to produce a clean finished product. I modified the CAD model to include this with using the sheet metal bend profile they supplied. I left the insert at 24 gauge but as I found out there was an issue with it sagging once installed.
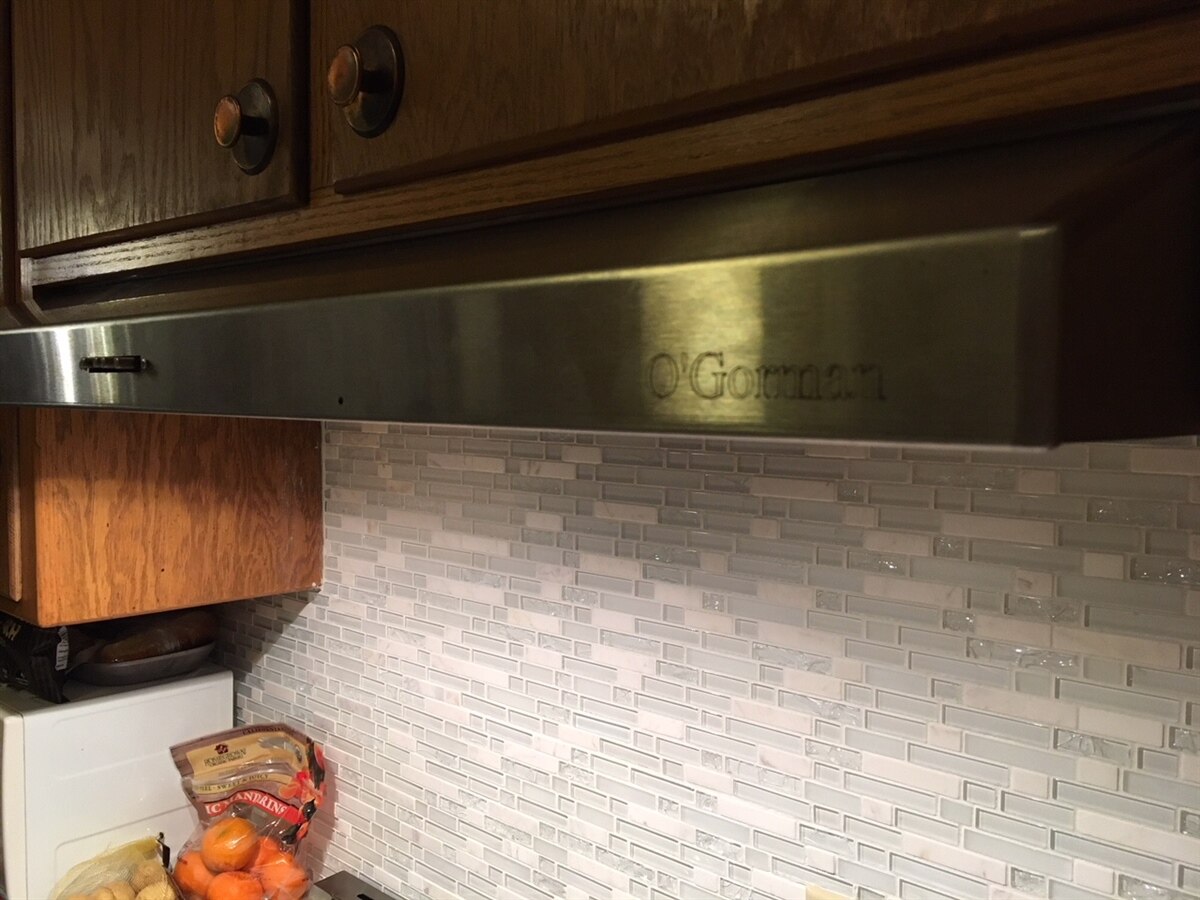
2. Move the "O'Gorman" lettering a little farther away from the weld seam. This was to allow them more access to the weld to clean it up without risk of hitting the letters. This was also updated and a new file was sent over.
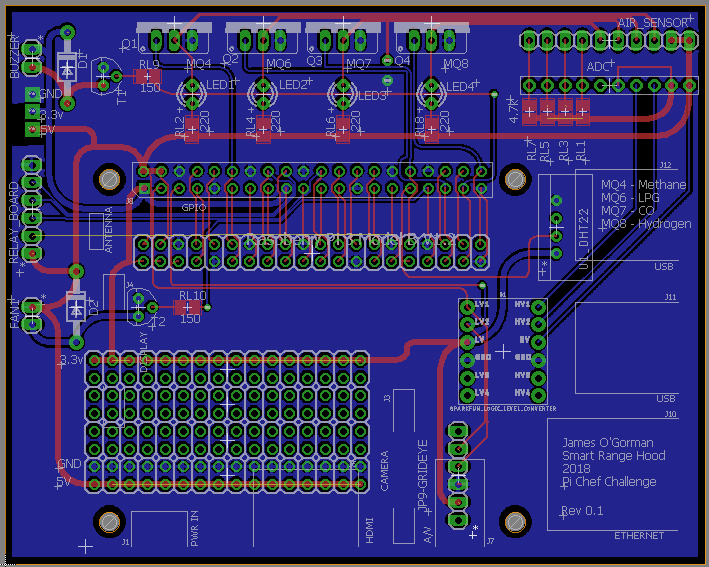
The same basic process applies to PCB manufacturing - it is always a good idea to call the board house for their particular specs to avoid disappointment.
I have to say that EMP did an absolutely amazing job and I would recommend them. They had a fast turn, helpful staff, and the quality of work was top notch. If this had not fit properly in the opening, I would have created a very expensive and time consuming project for myself to find a work-around. They went above and beyond by giving my good lady wife carry-out service when she showed up with our two month old baby to pick up the parts! My wife will be posting a video of her trip there and I'll link it.
On to the pictures!
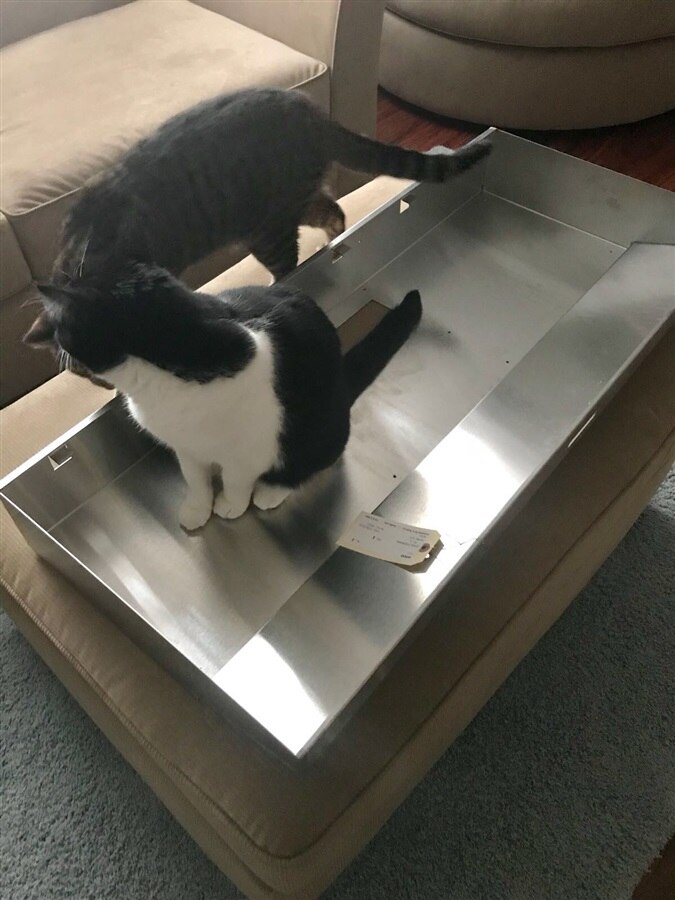
If it fits, I sits. The cats approve of the new design.
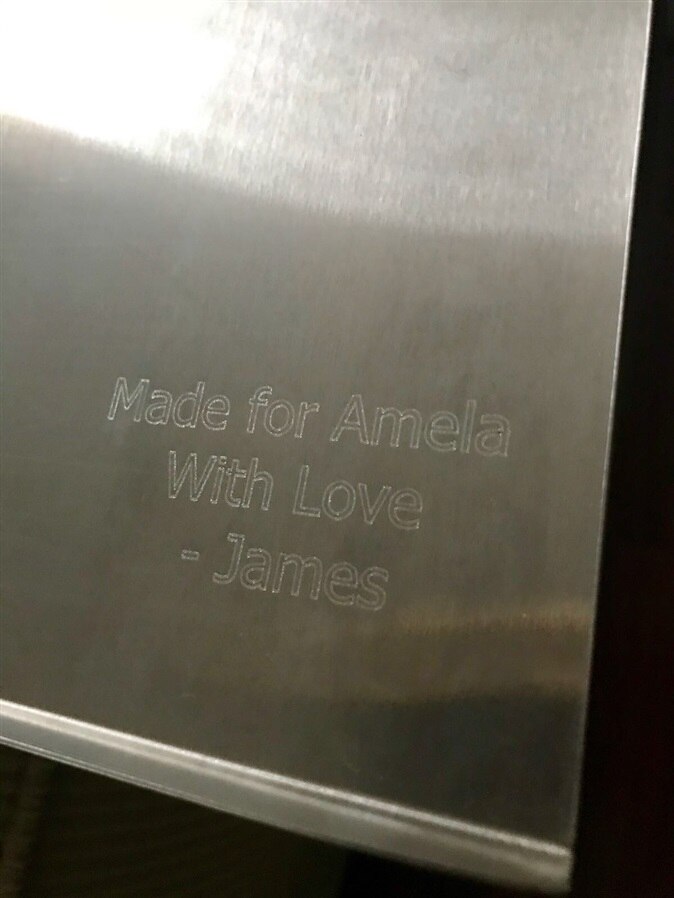
A secret message is engraved inside the insert for future generations [of homeowners]
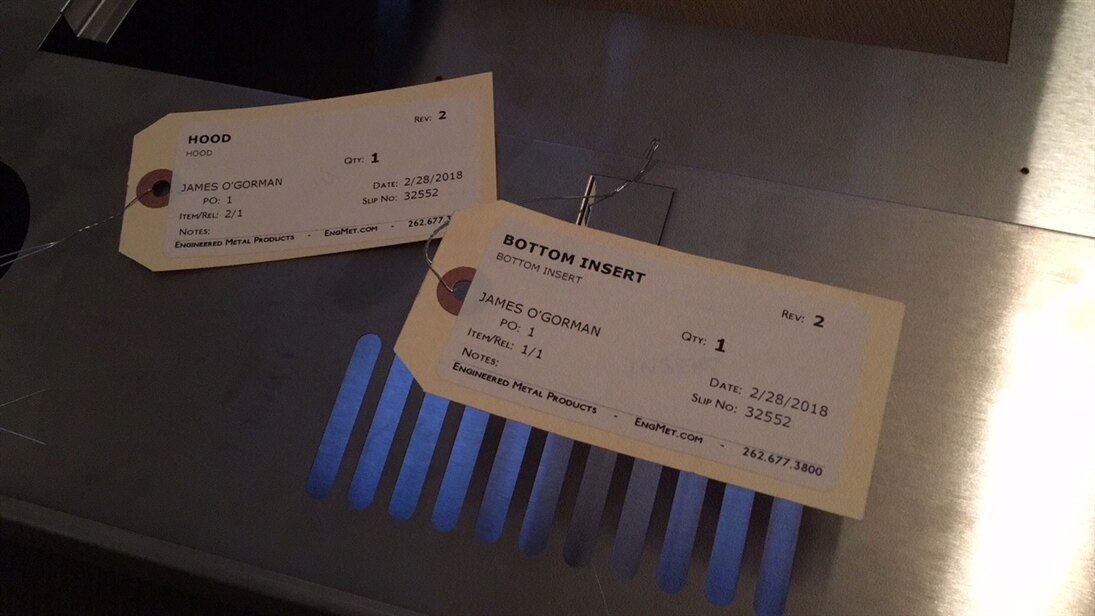
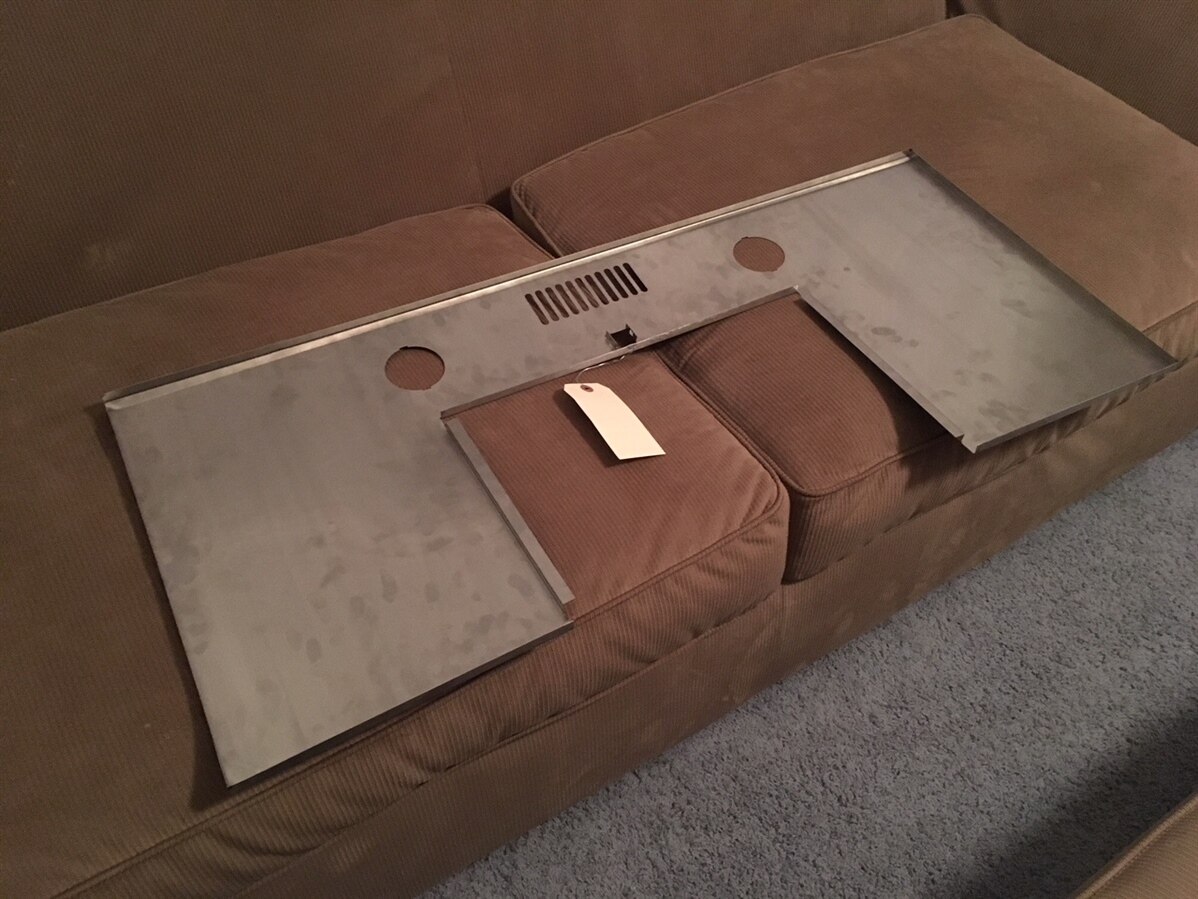
Here are the manufacturing ID tags for the two pieces. The blue backlighting looks very cool on the slots I made... I might have to implement this feature... As noted in Blog Post # 3, I was considering just leaving a big rectangle open in the insert for the camera and air sensors, but finally settled on the multiple slot design. As it turns out, these look amazing. This was totally the correct choice.
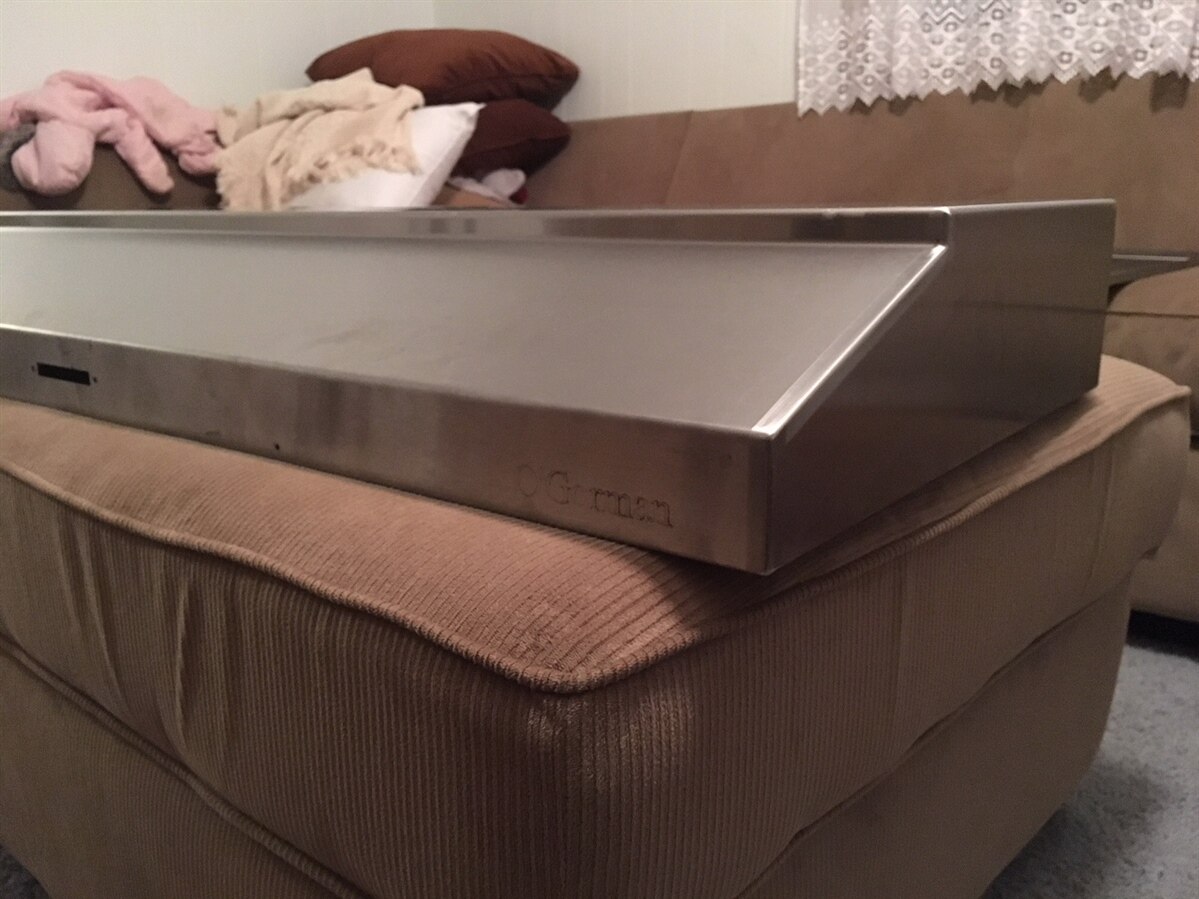
Hood sitting on our couch. Note the grind lines around the welded seam - they are very clean. I had moved the engraving of "O'Gorman" in to clear the weld seam, but from the looks of it, when I took the manufacturers' recommendation of a clear zone and doubled it, that was excessive!
Insert - The 24 gauge started to flex immediately when we got it. This was my mistake for not adding proper supporting to the design.

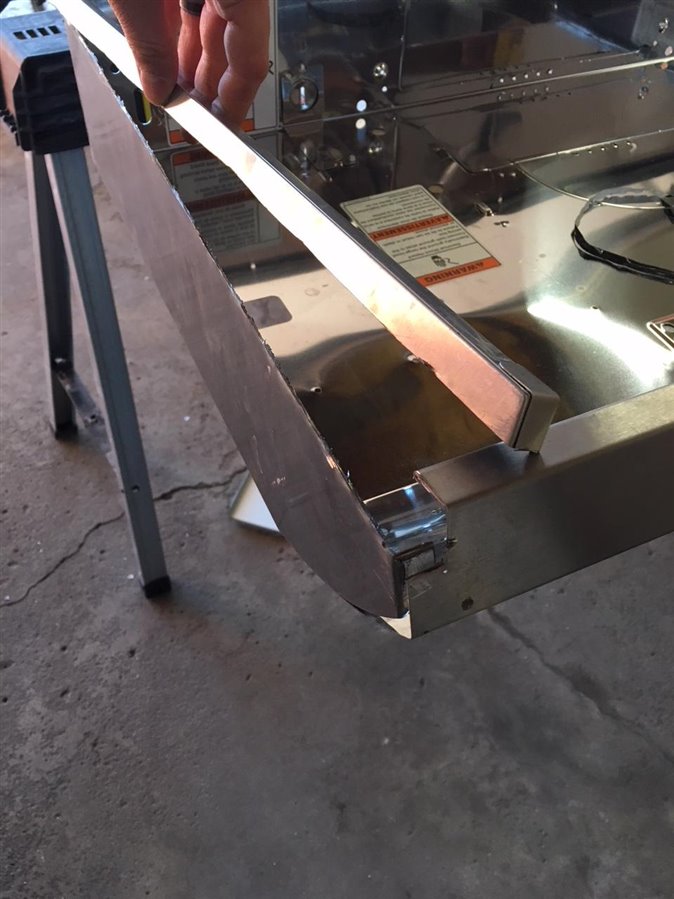
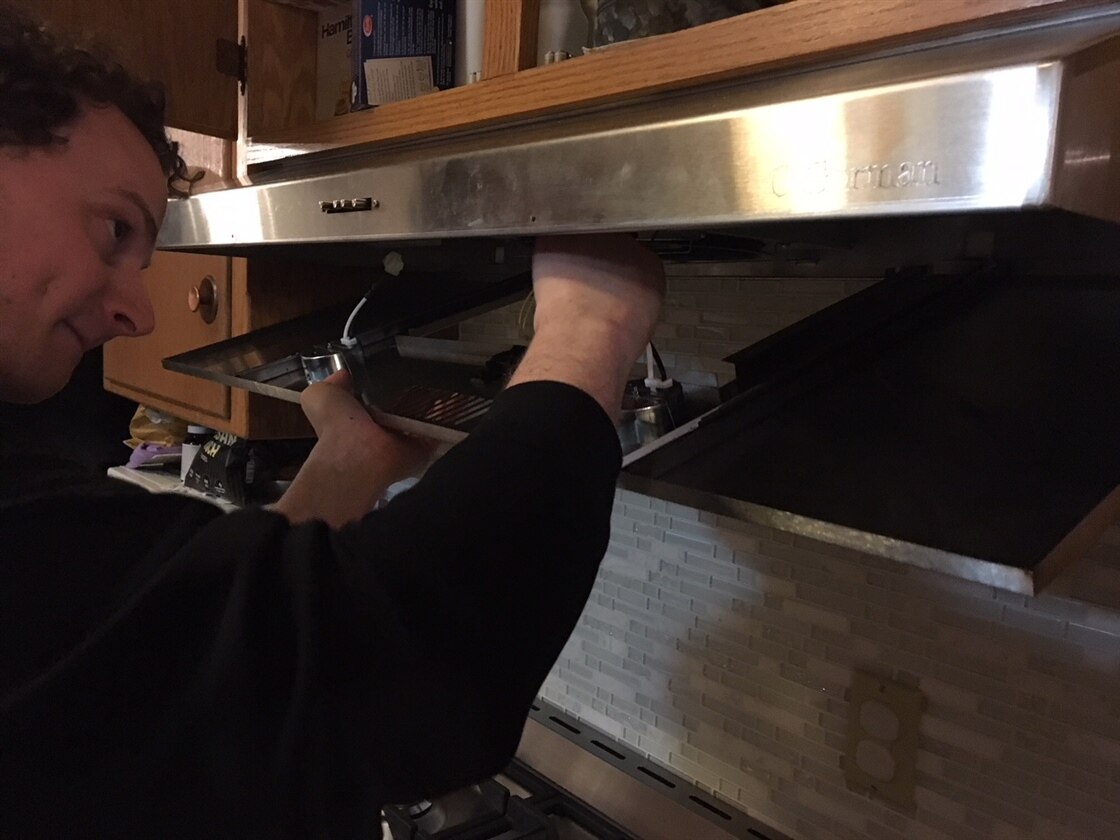
This was a critical and somewhat complex design aspect - there is a black clip from the donor hood which retains the filter to the insert. I had to model all of the cutouts so I could reuse the clip in the new hood. The final design worked /almost/ perfect but I did have to clearance the "retracted" end stop on the clip.
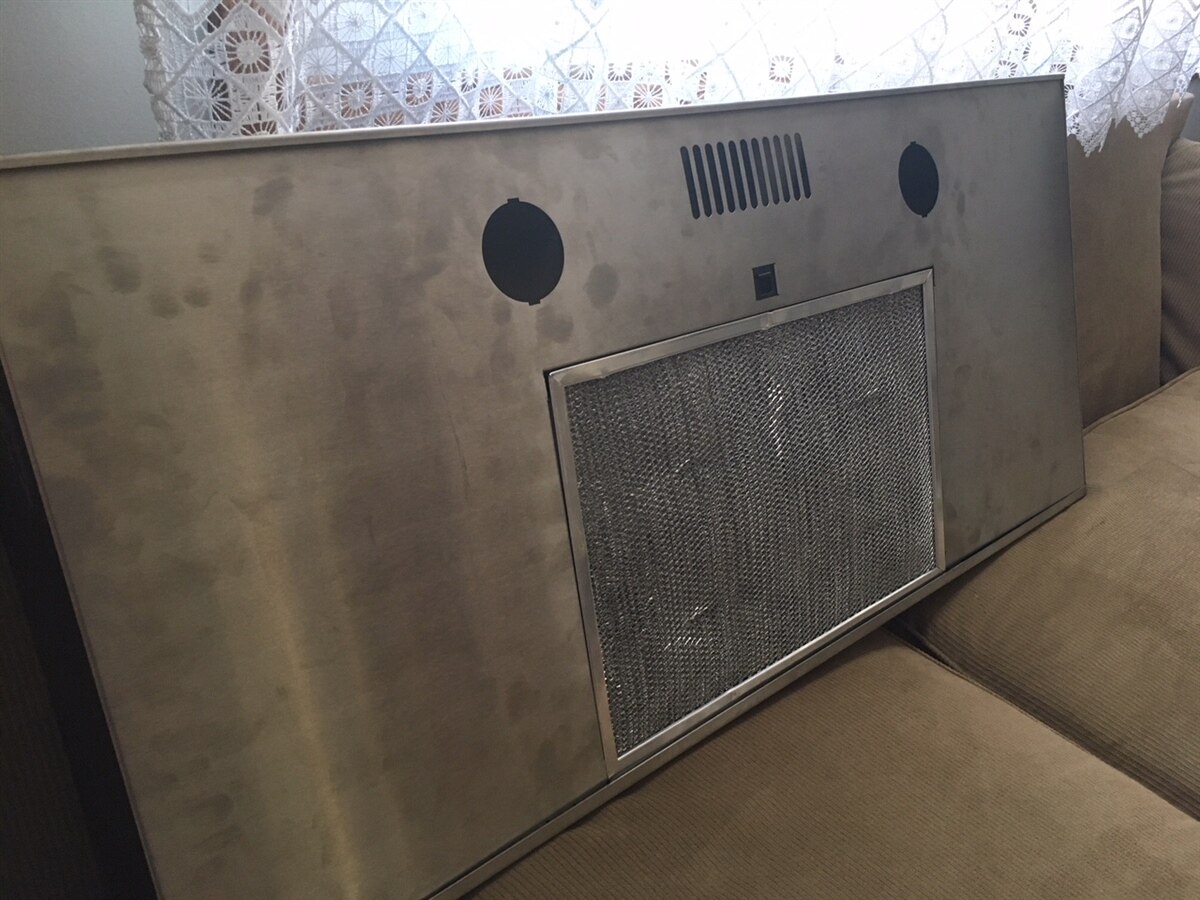
Mock-up showing the insert inside the shell with the filter screen from the donor hood installed. Sorry about all the fingerprints!

"Factory" control panel installed in the new hood. I found out that the buttons do not share a center line with the two mounting screws. This puts the four push-buttons almost touching the edge of the rectangular slot and makes the factory plastic insert rub. This will be cleaned up by slotting out the two mounting holes. Sorry about the blurry picture!
The Engine Swap
Details and photos below show the actual process of moving the components over from the donor hood.

The patients on the operating table. We have the original hood on the left, the new sheet metal in the center, and the donor on the right. Baby stroller on the far right.

My friend Jeff was over to help me out. He wasted no time taking the grinder to my brand new, expensive, "100's of design hours" hood to open up the "retract" end-stop for the plastic clip on the sheet metal. And his efforts were very much appreciated!
Drilling out the rivets which held the fan box in the donor hood.
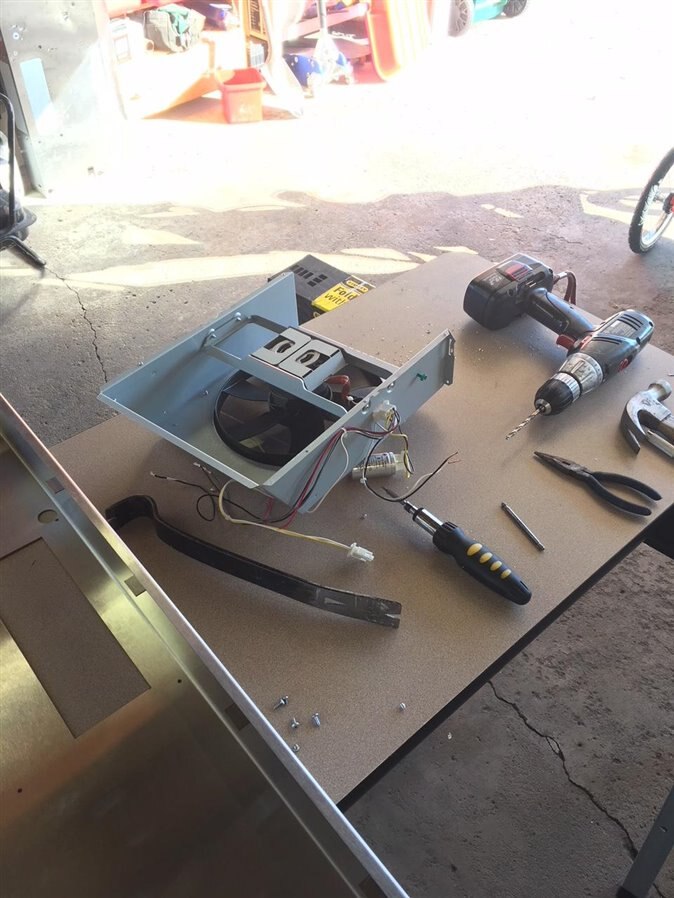
Fan box removed.
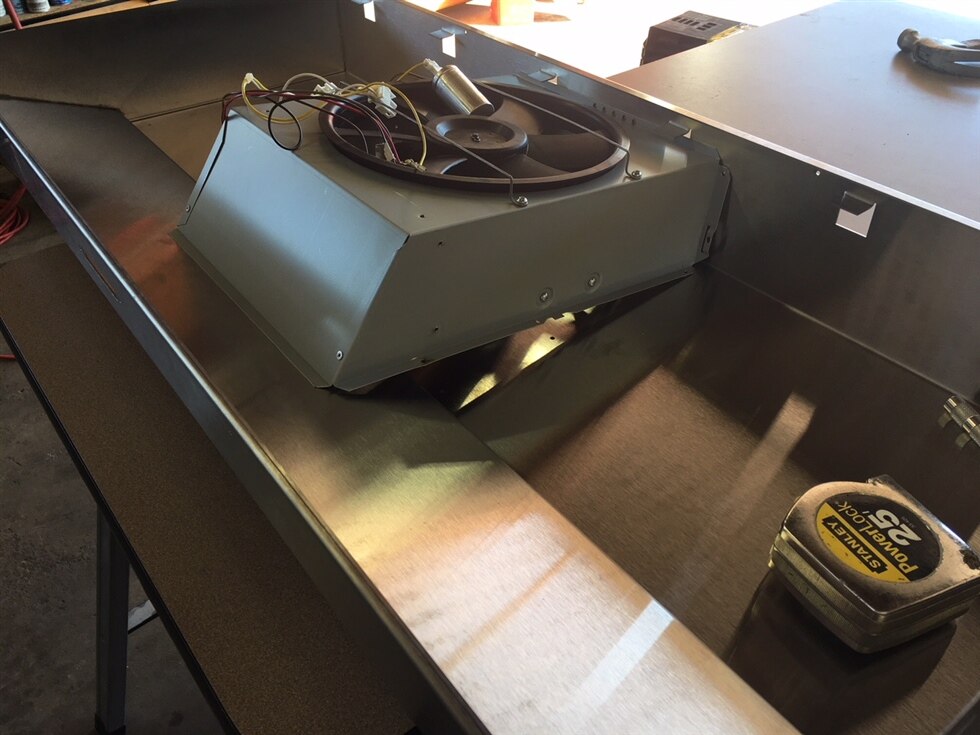
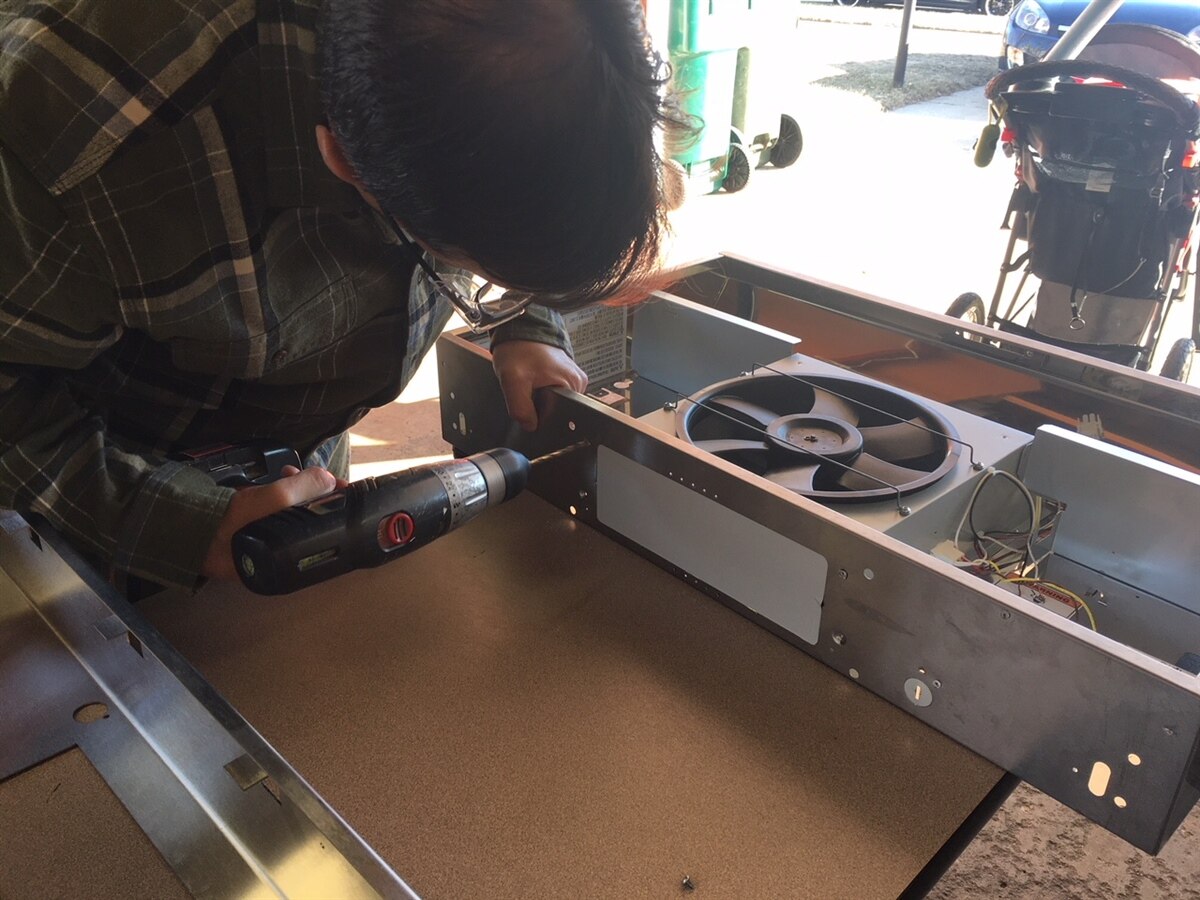
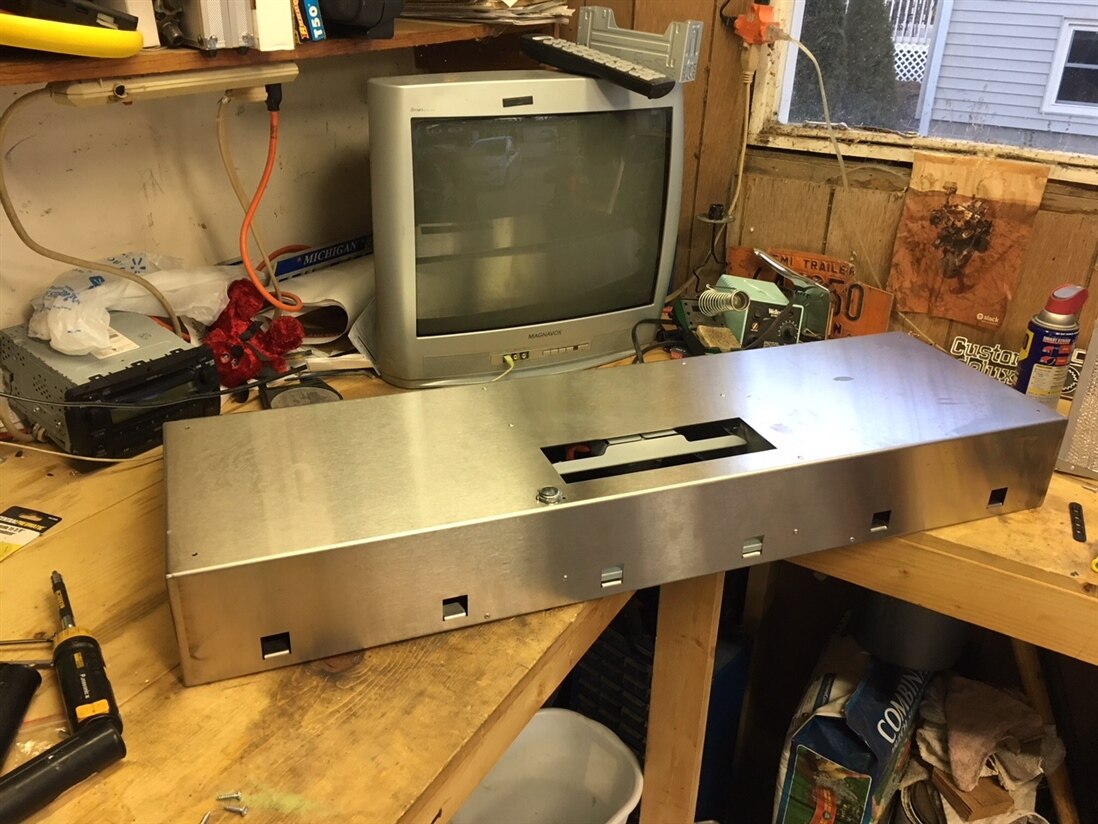
Here is how the fan box sits inside the new sheet metal. The angled front side will have to be trimmed down to fit properly.
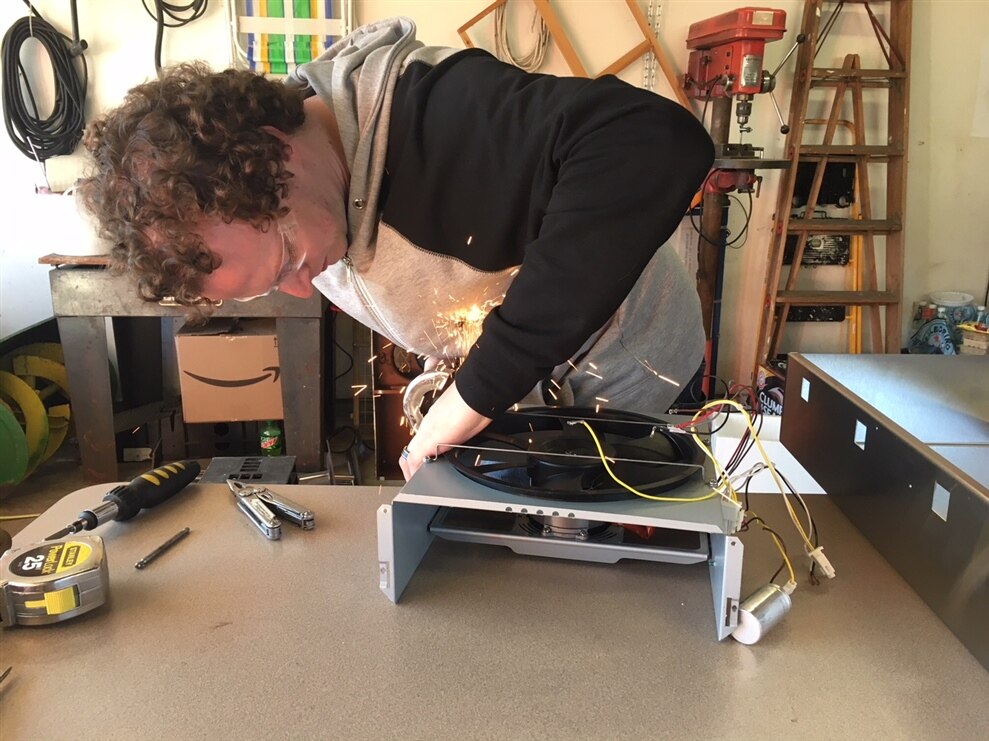
Here I am cutting down the wedge shape. Note - This photo shows very accurately how I ended up with a burn hole in my new hoodie.
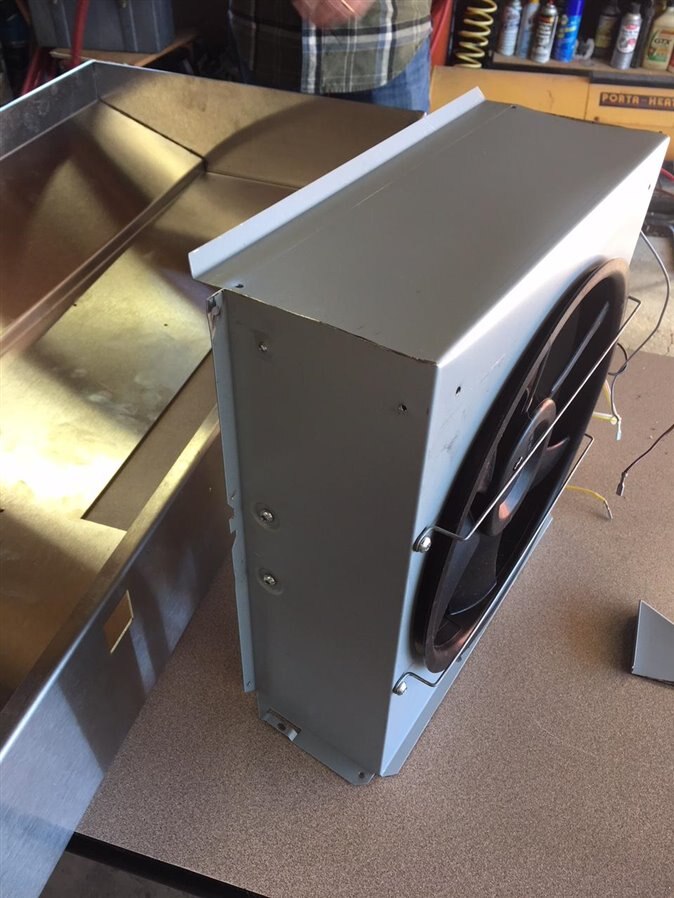
With the wedge shape removed, the front flap was folded down. Excess was then trimmed off the box so it laid flat again.

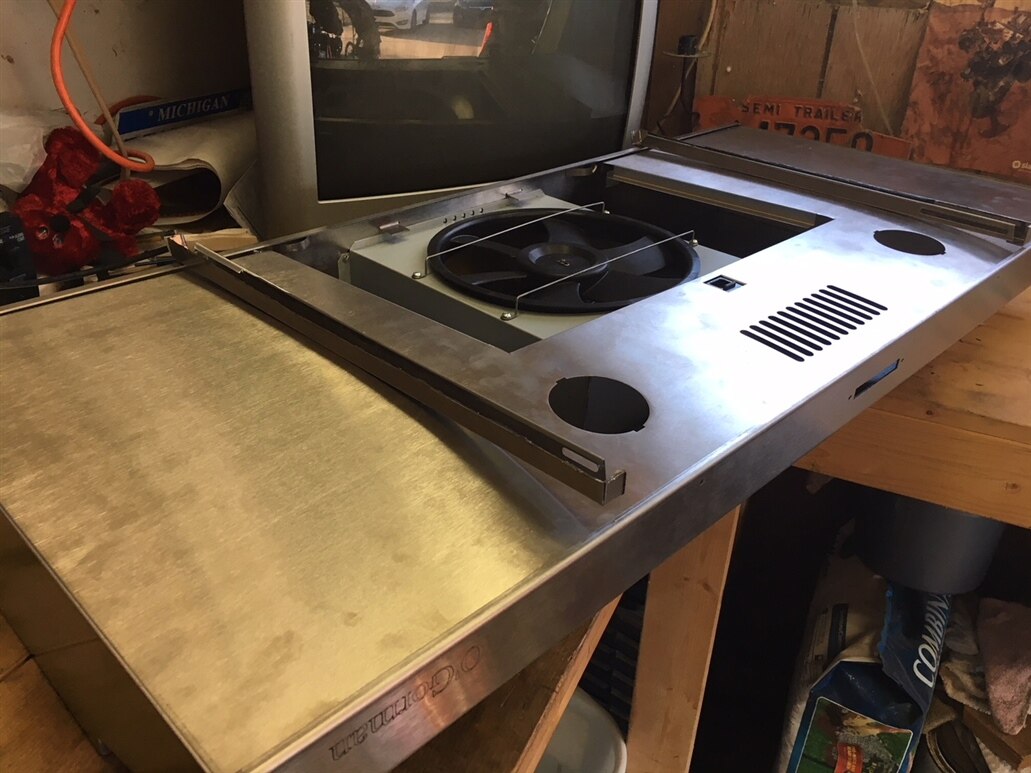
Now the fan box fits inside the new sheet metal!!! Progress!!!
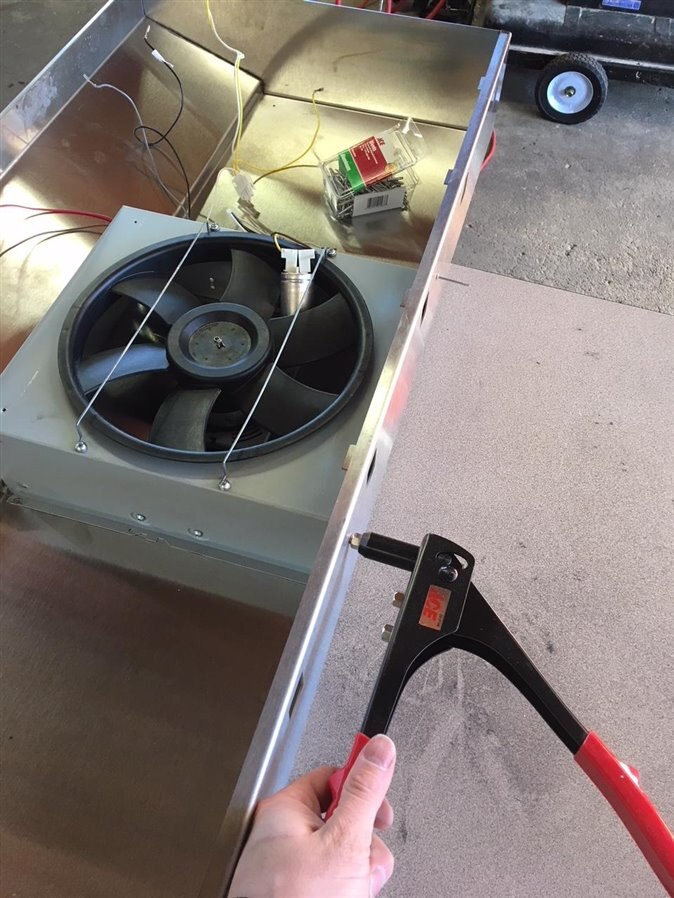
Starting to rivet the box in the new shell. The fan box was riveted in the donor shell so I did the same. I had holes pre-cut in the 16 gauge shell which was a life saver. They even /mostly/ lined up. Some needed to have the fan box drilled a little to work properly.
Something saggy is going on here...
As soon as we picked up the insert with 24 gauge, it was obvious for a flat piece of metal that large and that thin, that supports would be needed. It was very "saggy" when installed and looked poor. Again, this was a mistake that I had made in the design. The commercial donor hood used a 3-piece insert design and I used a 1-piece for a larger area. I looked around and spent some time thinking about the problem and trying to decide what to do. Just before going to take a tour of the local hardware store, I figured out that I could cut some pieces off the donor hood and use them as braces. The two bottom edges made perfect C-Channels when they were cut out. I decided to use these and rivet them to the insert for stability.
Two C-Channels were made using parts cut from the donor hood.
Supports were then riveted to the insert.
I didn't get any good images of the insert sagging, but this cleary shows the problem before the supports were added.
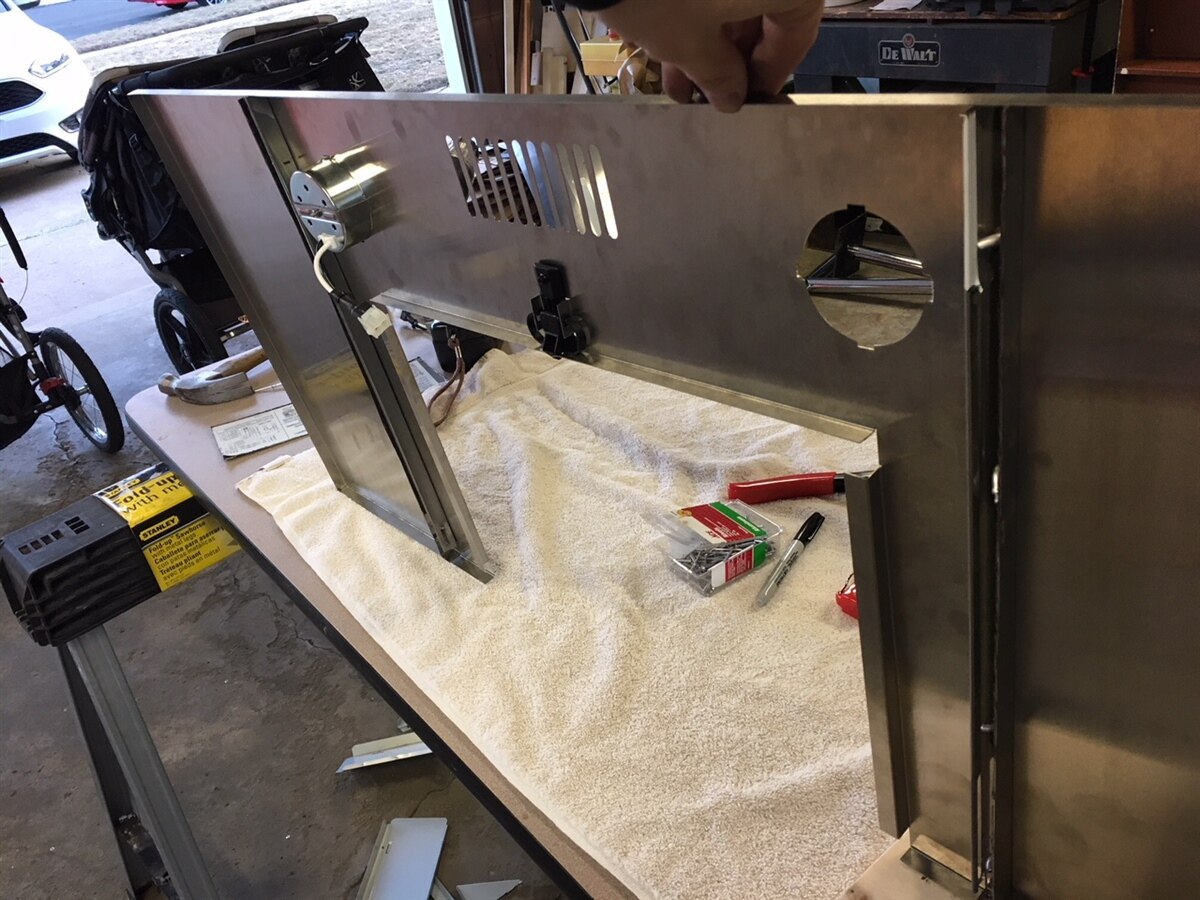
Here is a view of the back/top of the hood. I added a Romex wire strain relief to the power entry hole which is visible in this image.
This essentially completed the "guts swap" from the donor hood.
Time to install!
It took an afternoon of work with help from my friend Jeff to complete the swap; then it was time to install.

Here my father in law helps me place the hood. The 16 gauge was heavy!
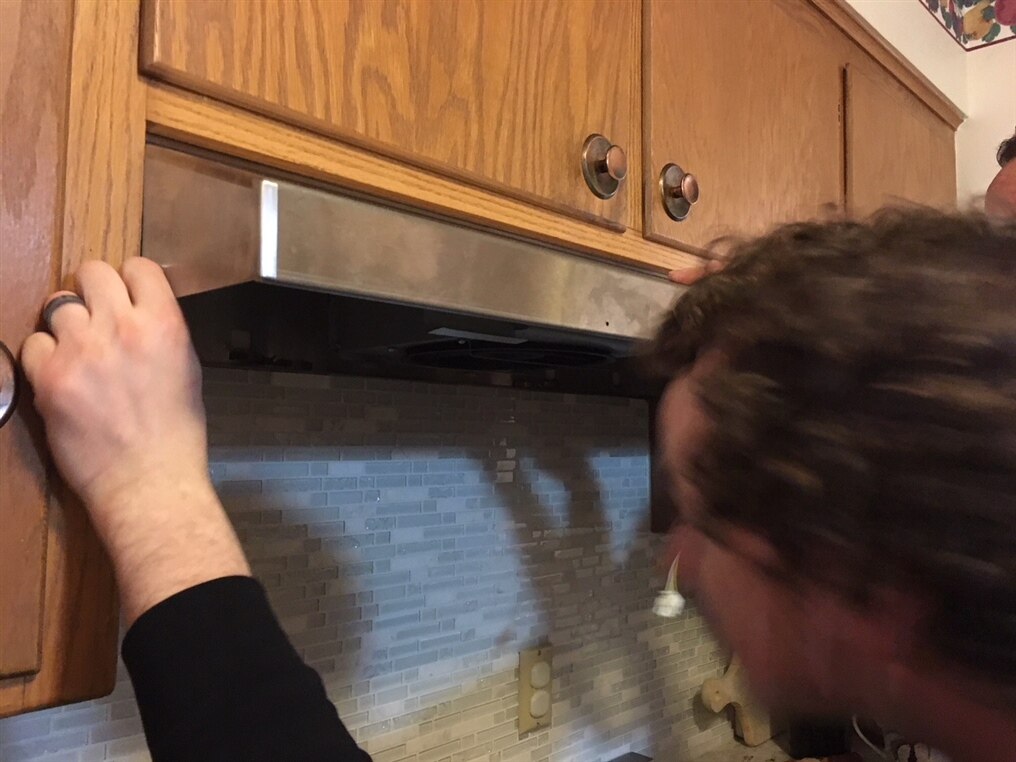
A tight fit! Everything had to line up properly so that I didn't have to get out the sander or grinder. The final fitment ended up being just a perfect "snug" in all the critical dimensions.
Installing lights.
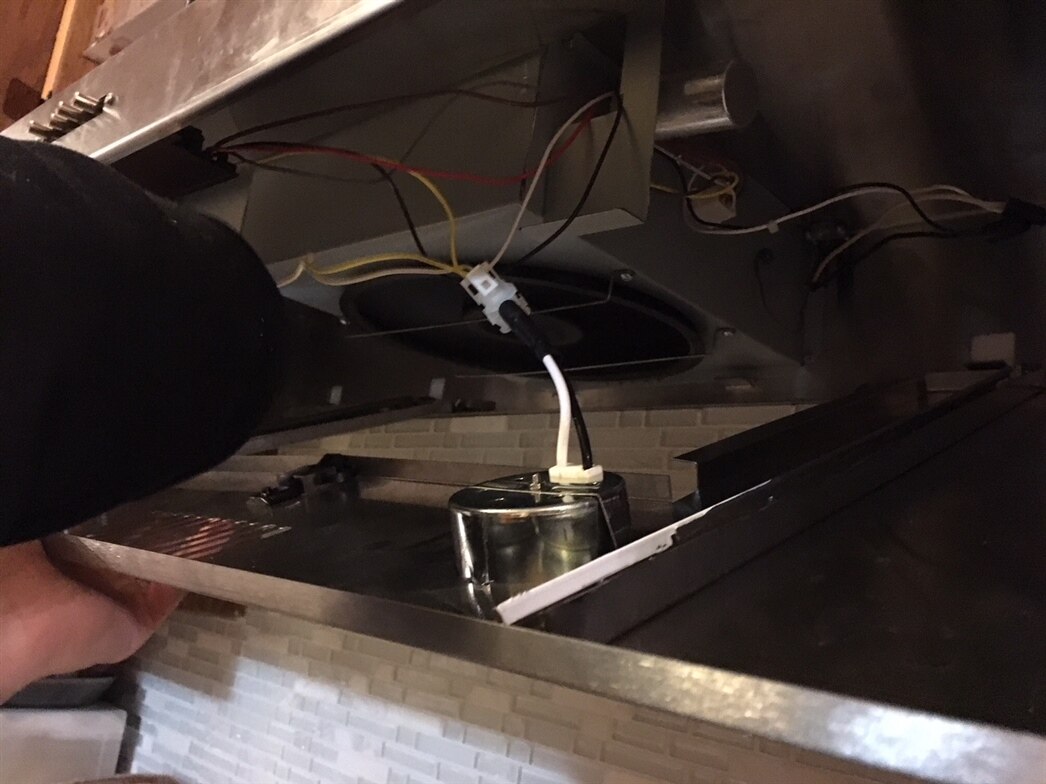
Completing internal wiring.. One of the support braces is clearly visible in this image.
And the verdict is...
Amazing!!!
The hood was installed using the factory switch panel - the Smarts will be integrated in about one or two more blog posts. This was actually a critical part of the overall project since I needed to verify that the factory controls would fit and function. This appliance will likely outlast my tenure at this house and I want the ability to convert it back to 'normal' operation.

The fan box and control panel from the donor can be seen in this image. The mesh metal filter is not installed yet here. The rivets which were added to hold the support brace are visible here, but I think they generally blend in with what someone would normally expect to see in an appliance such as this.
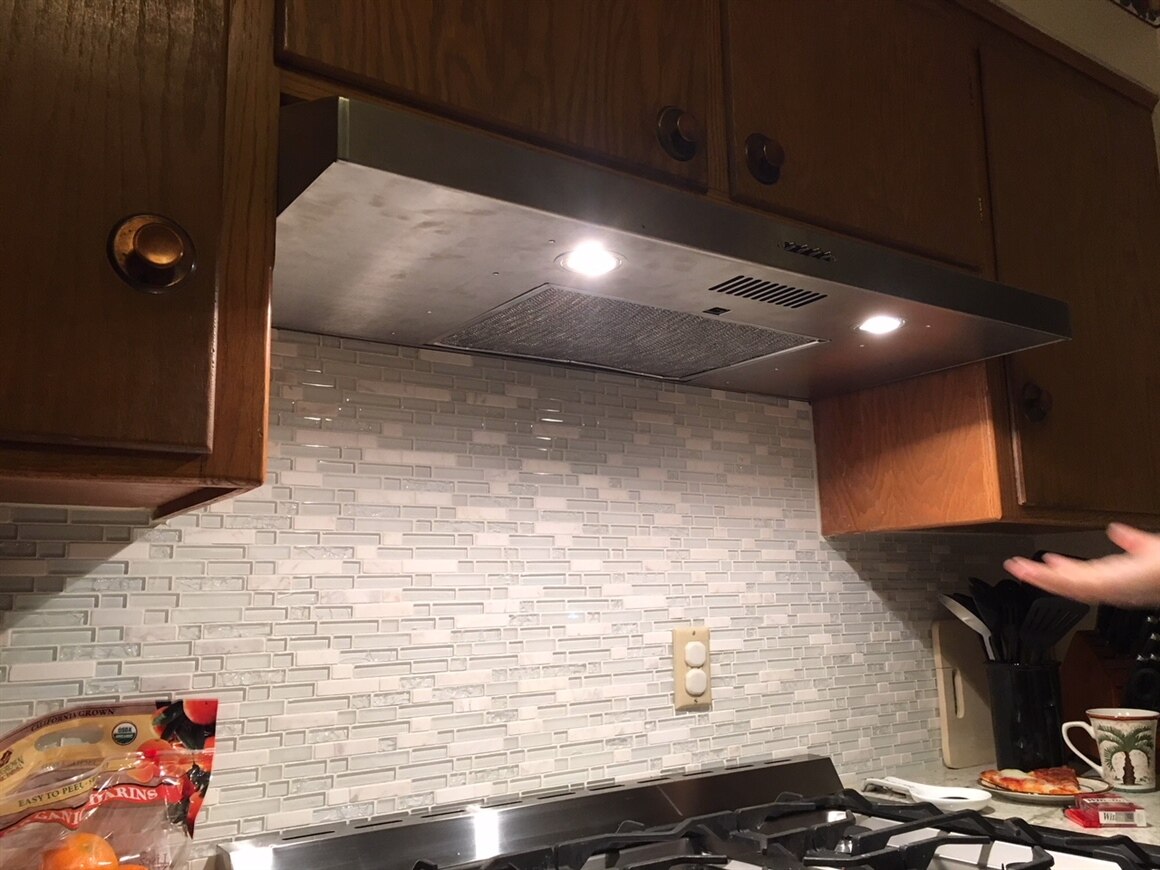
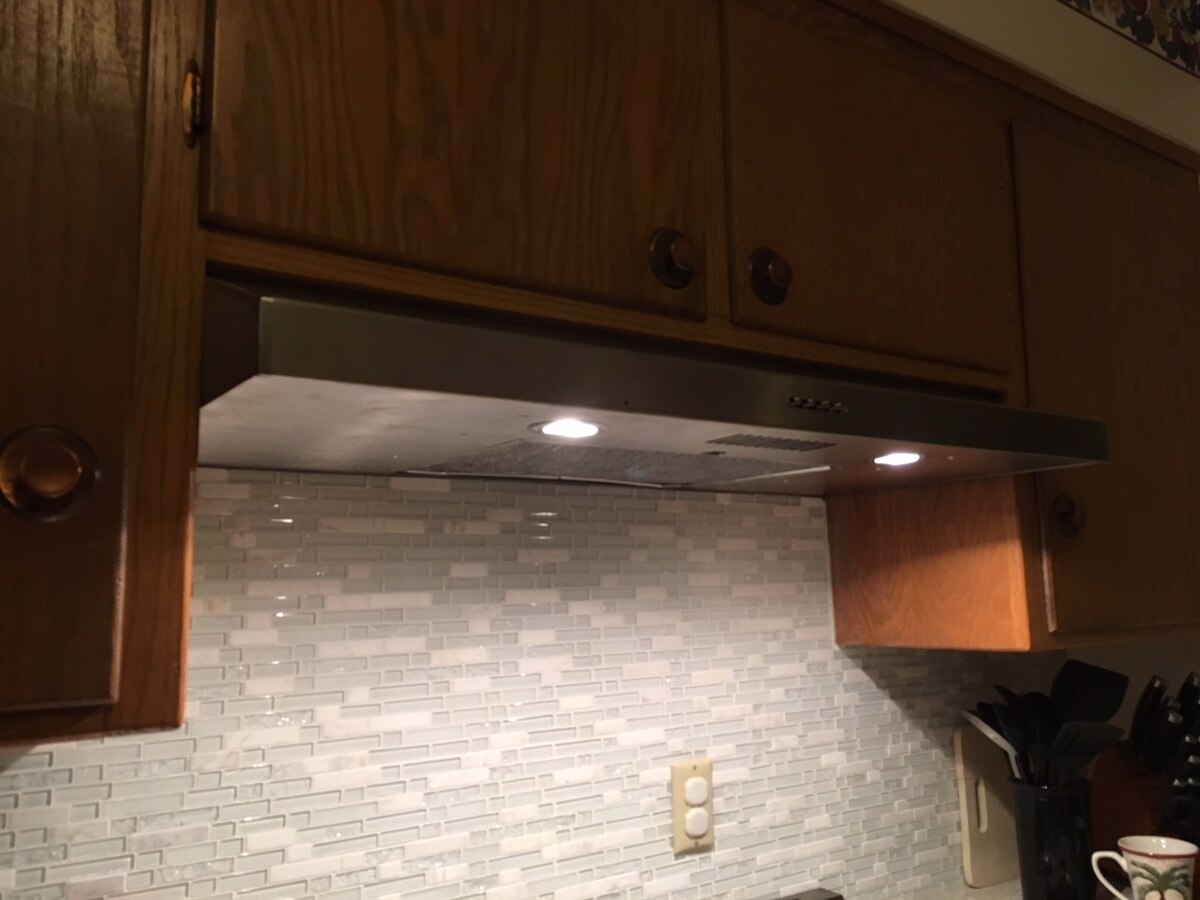
View showing the hood after installing the screen. I found that the 100 watt lights generate a considerable amount of heat. I have plans which will mitigate this issue and not throw off the DHT22 sensor.

That name looks familiar... I laugh when I think that the next homeowner will see that every day Hey Charles_Gantt maybe you can update my project icon? What do you guys think of the kerning in the logo? I should have seen that before I sent this to be made... The WAF (Wife Approval Factor) was negatively impacted by that blunder.
As shown, the slot design ended up looking amazing and will allow easy sampling of the air above the stove as well as concealing the Pi Camera and GridEye.
Sorry - a little blurry.. The stainless steel was very tricky to photograph.

Pizza!!!
I find it funny that the worst looking part of this hood at this point is the stock mesh filter. It got pretty beat up over the months of work. This is a standard size filter so I could easily pick one up at a hardware store.
A video!
Here is the "cliff notes" version. I do a walk through of the hood after installing and show how it comes apart.
Upcoming...
Fear not, electron junkies - there is more in store for the next post!!!
My wife is trying to tell me that the contest is over now that she has a working range hood after a 1-year absence. I am ignoring her...
Here is a preview of what will be discussed in the next post -
Top Comments
-

genebren
-
Cancel
-
Vote Up
+3
Vote Down
-
-
Sign in to reply
-
More
-
Cancel
-

aspork42
in reply to genebren
-
Cancel
-
Vote Up
+2
Vote Down
-
-
Sign in to reply
-
More
-
Cancel
-

genebren
in reply to aspork42
-
Cancel
-
Vote Up
+2
Vote Down
-
-
Sign in to reply
-
More
-
Cancel
Comment-

genebren
in reply to aspork42
-
Cancel
-
Vote Up
+2
Vote Down
-
-
Sign in to reply
-
More
-
Cancel
Children