element14 Community
element14 Community
    Register Log In
  • Site
  • Search
  • Log In Register
  • About Us
  • Community Hub
    Community Hub
    • What's New on element14
    • Feedback and Support
    • Benefits of Membership
    • Personal Blogs
    • Members Area
    • Achievement Levels
  • Learn
    Learn
    • Ask an Expert
    • eBooks
    • element14 presents
    • Learning Center
    • Tech Spotlight
    • STEM Academy
    • Webinars, Training and Events
    • Learning Groups
  • Technologies
    Technologies
    • 3D Printing
    • FPGA
    • Industrial Automation
    • Internet of Things
    • Power & Energy
    • Sensors
    • Technology Groups
  • Challenges & Projects
    Challenges & Projects
    • Design Challenges
    • element14 presents Projects
    • Project14
    • Arduino Projects
    • Raspberry Pi Projects
    • Project Groups
  • Products
    Products
    • Arduino
    • Avnet Boards Community
    • Dev Tools
    • Manufacturers
    • Multicomp Pro
    • Product Groups
    • Raspberry Pi
    • RoadTests & Reviews
  • Store
    Store
    • Visit Your Store
    • Choose another store...
      • Europe
      •  Austria (German)
      •  Belgium (Dutch, French)
      •  Bulgaria (Bulgarian)
      •  Czech Republic (Czech)
      •  Denmark (Danish)
      •  Estonia (Estonian)
      •  Finland (Finnish)
      •  France (French)
      •  Germany (German)
      •  Hungary (Hungarian)
      •  Ireland
      •  Israel
      •  Italy (Italian)
      •  Latvia (Latvian)
      •  
      •  Lithuania (Lithuanian)
      •  Netherlands (Dutch)
      •  Norway (Norwegian)
      •  Poland (Polish)
      •  Portugal (Portuguese)
      •  Romania (Romanian)
      •  Russia (Russian)
      •  Slovakia (Slovak)
      •  Slovenia (Slovenian)
      •  Spain (Spanish)
      •  Sweden (Swedish)
      •  Switzerland(German, French)
      •  Turkey (Turkish)
      •  United Kingdom
      • Asia Pacific
      •  Australia
      •  China
      •  Hong Kong
      •  India
      •  Korea (Korean)
      •  Malaysia
      •  New Zealand
      •  Philippines
      •  Singapore
      •  Taiwan
      •  Thailand (Thai)
      • Americas
      •  Brazil (Portuguese)
      •  Canada
      •  Mexico (Spanish)
      •  United States
      Can't find the country/region you're looking for? Visit our export site or find a local distributor.
  • Translate
  • Profile
  • Settings
Twist, Turn and Move Design Challenge with TE Robotics
  • Challenges & Projects
  • Design Challenges
  • Twist, Turn and Move Design Challenge with TE Robotics
  • More
  • Cancel
Twist, Turn and Move Design Challenge with TE Robotics
Blog Rullit #3 - Wiring
  • Blog
  • Forum
  • Documents
  • Polls
  • Files
  • Leaderboard
  • Mentions
  • Sub-Groups
  • Tags
  • More
  • Cancel
  • New
  • Share
  • More
  • Cancel
Group Actions
  • Group RSS
  • More
  • Cancel
Engagement
  • Author Author: amgalbu
  • Date Created: 19 Aug 2022 8:57 AM Date Created
  • Views 1394 views
  • Likes 6 likes
  • Comments 8 comments
  • rullit
  • te connectivity
  • terobotics
  • designchallenge
  • Turn and Move Design Challenge with TE Robotics
Related
Recommended

Rullit #3 - Wiring

amgalbu
amgalbu
19 Aug 2022
Rullit #3 - Wiring

In this post, I will write about how I use the Arduino board, the DFRobotic shield and the TE connectors

1. Connections overview

Picture below shows the components and the wiring
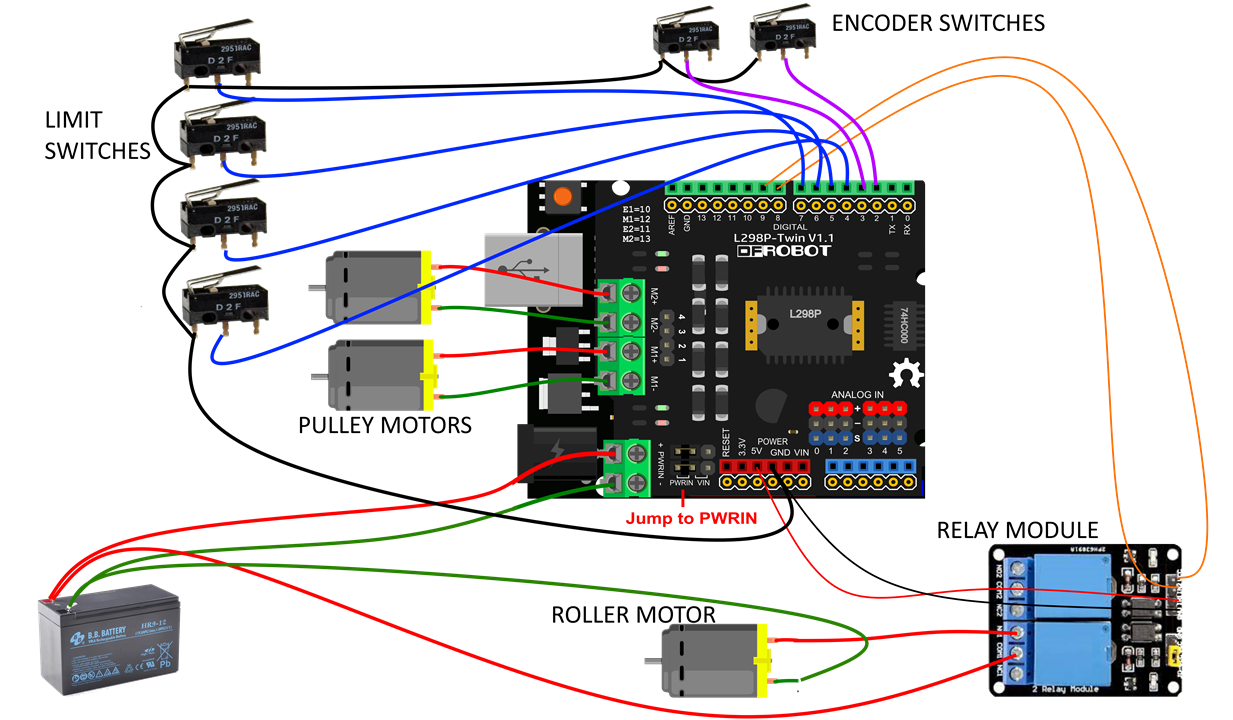
image 

Main components are

  • Arduino Uno R3 board
  • Gravity: 2 x 2A Motor shield for Arduino to control the motors that move Rullit around
  • 2 relay module to control the solenoid valve (to dispense water and detergent) and the roller motor
  • 4 limit switches (front, rear, left and right) to stop Rullit when the edge of the PV modules has been reached
  • [Experimental] 2 limit switches to implement a rough encoder and detect the real length of thread winded or unwinded. This could be useful because, at low PWM values, motors may stall and this may add an error that accumulates over time. The first release of the robot will not include this feature. I will evaluate performances and decide whether to implement it or not 

2. Connectors

I planned to use the following parts included in the challenger’s kit

image

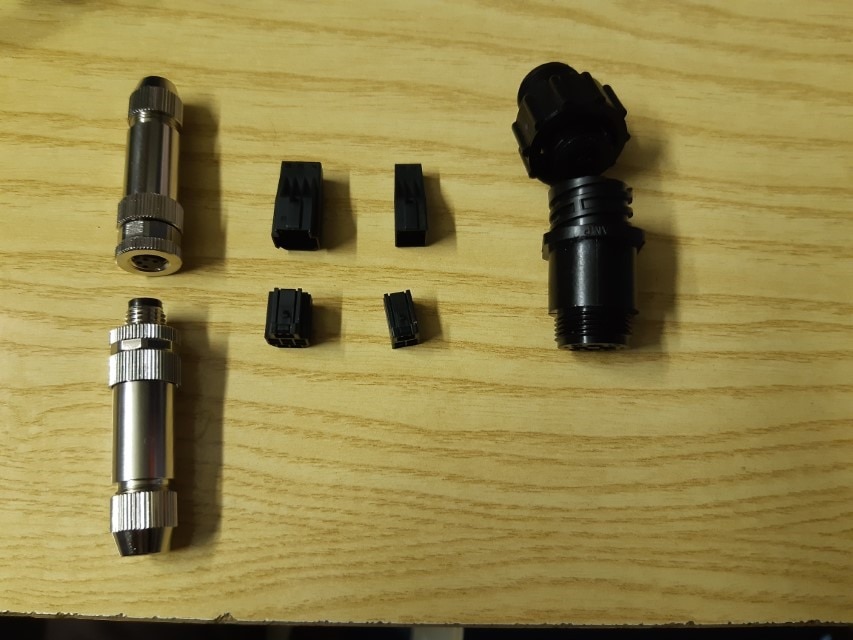
These are the parts [thanks dougw for the very detailed list of parts included in the challenger's kit]

I am not good at all in taking close-up shots. robogary wrote a great post with wonderful pictures about the crimping process 

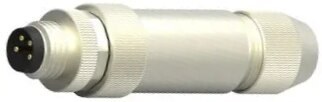
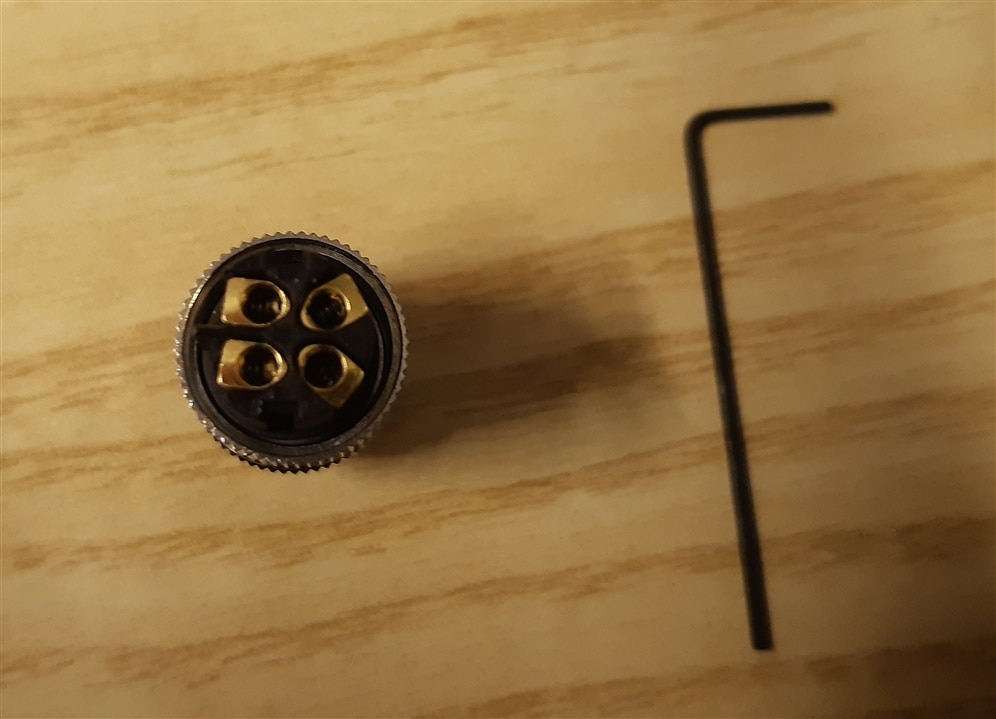
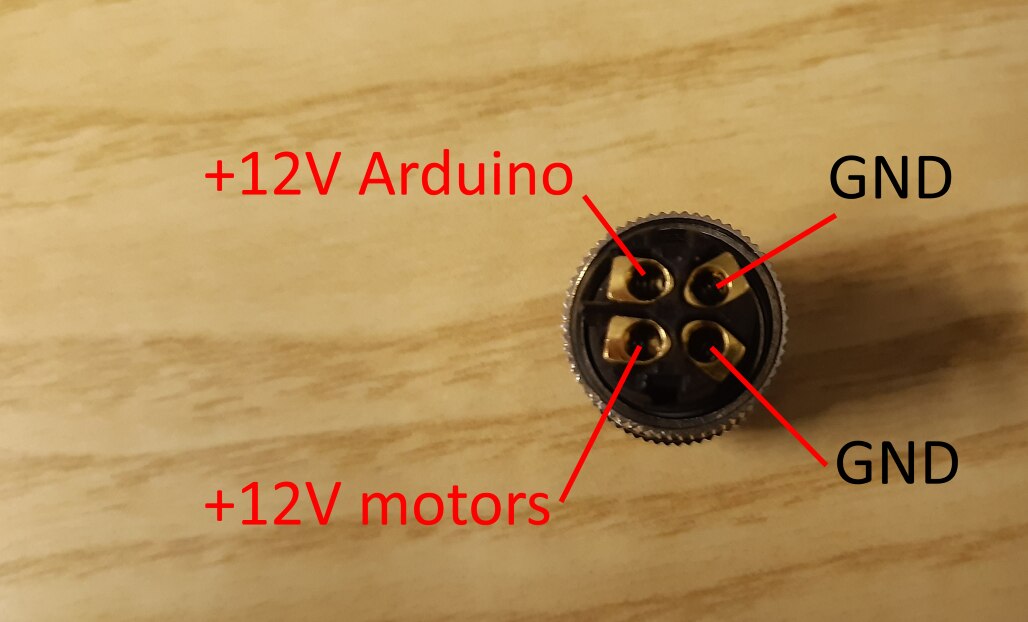
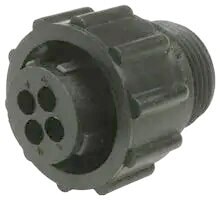
2.1 Connector N. 1: Power supply

The metal M8 connector will connect the battery to the Arduino board.

SKU: 71AJ9362
Manufacture part#: T4011019041-000
Description: Sensor Connector M8, Male 4 positions, Cable mount

image


SKU: 71AJ9360
Manufacture part#: T4010019041-000
Description: Sensor Connector M8, Female 4 positions, Cable mount

image


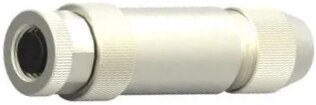
This connector has four pins and screw terminals – the wrench to tighten the screws is included

image

Looking at the power section of the Arduino Uno R3 board, it looks like it can not handle all the Amps the DFRobot motor shield can handle. The DFRobot shield is rated for a maximum current 2 x 2A, but the schematic of the power section of the Arduino board shows that a diode is mounted to prevent damages due to inverted polarity

image

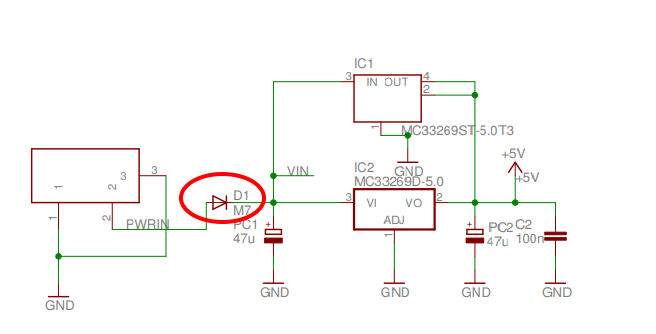
I can't read the actual code of diode on the Arduino board, but a typical diode can handle a maximum current of about 1 A. For this reason, I will use two separates 12V power supplies: one for the Arduino board (through the jack connector) and one for the DFRobot shield (through the two wire screw terminals)

imageimageimage


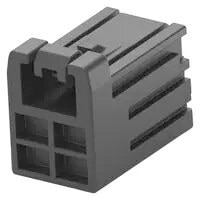
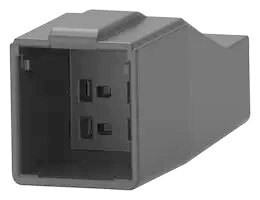
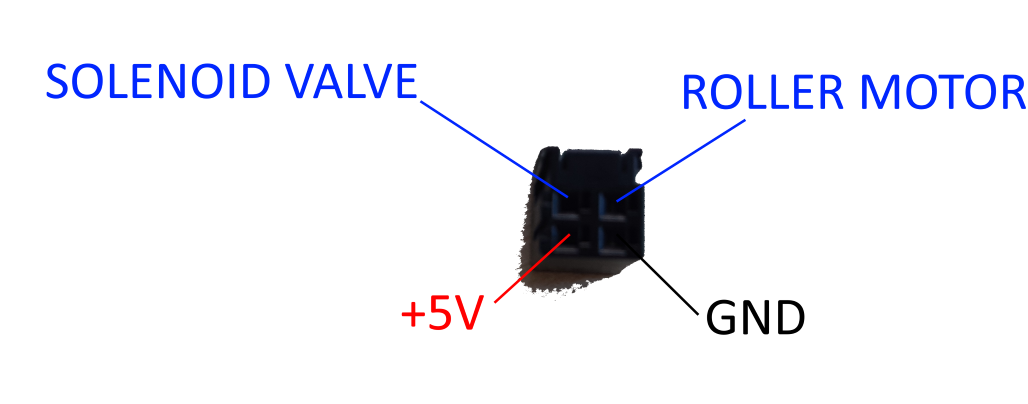
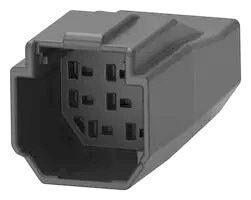
2.2 Connector N. 2: Relays

The second connector brings power supply and control signals to the relay board. Relays will switch on and off the solenoid valve and the motor that drives the paint roller

SKU: 53AJ9498
Manufacture part#: 1-2366515-4
Description: DYNAMIC D1000 SLIM, WIRE-TO-WIRE CONNECTOR, receptacle : 4 positions, 2 mm pitch key 1

image


SKU: 53AJ9501
Manufacture part#: 1-2366600-4
Description: DYNAMIC D1000 SLIM WIRE-TO-WIRE CONNECTOR pin housing : 4 positions, 2 mm pitch key 1
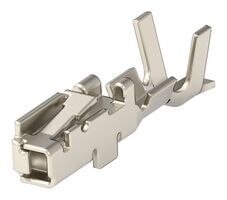
image


SKU: 53AJ9515
Manufacture part#: 2367819-2
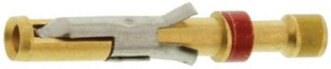
Description: DYNAMIC D1000 SLIM WIRE-TO-WIRE CONNECTOR crimp contact pin

image


SKU: 53AJ9511
Manufacture part#: 2367817-2
Description: DYNAMIC D1000 SLIM WIRE-TO-WIRE CONNECTOR receptacle - crimp contact

image

Here is the pinout of the connector

image

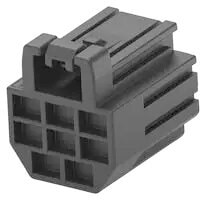
2.3 Connector N. 3: Inputs

The third connector brings input signals from encoder and limit switches.

SKU: 53AJ9500
Manufacture part#: 1-2366515-8
Description: DYNAMIC D1000 SLIM WIRE-TO-WIRE CONNECTOR receptacle : 8 positions, 2 mm pitch key 1

image

SKU: 53AJ9503
Manufacture part#: 1-2366600-8
Description: DYNAMIC D1000 SLIM WIRE-TO-WIRE CONNECTOR pin housing : 8 positions, 2 mm pitch key 1

image


Here is the pinout of the connector

image

NOTE: because the kit includes only 10 contact pins and housings, I will re-use the ground signal available on connector N.2


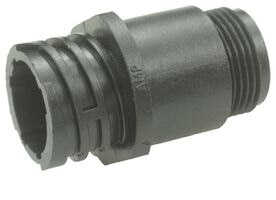
2.4 Connector N. 4: Motors

The fourth connector brings power to the DC motors that drive the pulleys

SKU: 46F314
Manufacture part#: 206153-1
Description: CPC Series Circular Connector 4 pin contacts

image


SKU: 44F8386
Manufacture part#: 206060-1
Description: CPC Series Circular Connector 4 receptacle contacts

image


SKU: 50F554
Manufacture part#: 201330-1
Description: CPC Type II Series 20 AWG pin contact

image

SKU: 50F553
Manufacture part#: 201328-1
Description: Multimate Type II Series 20 AWG socket contact
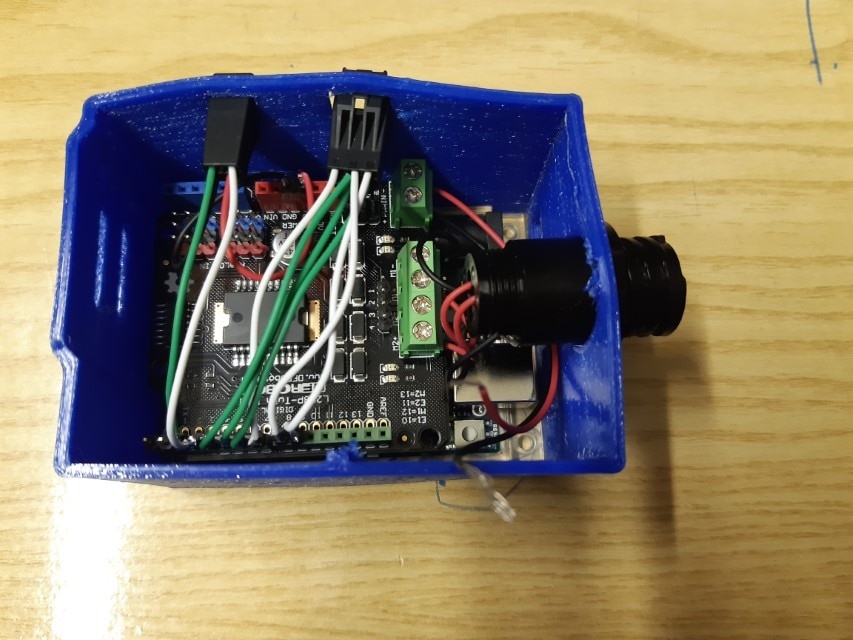
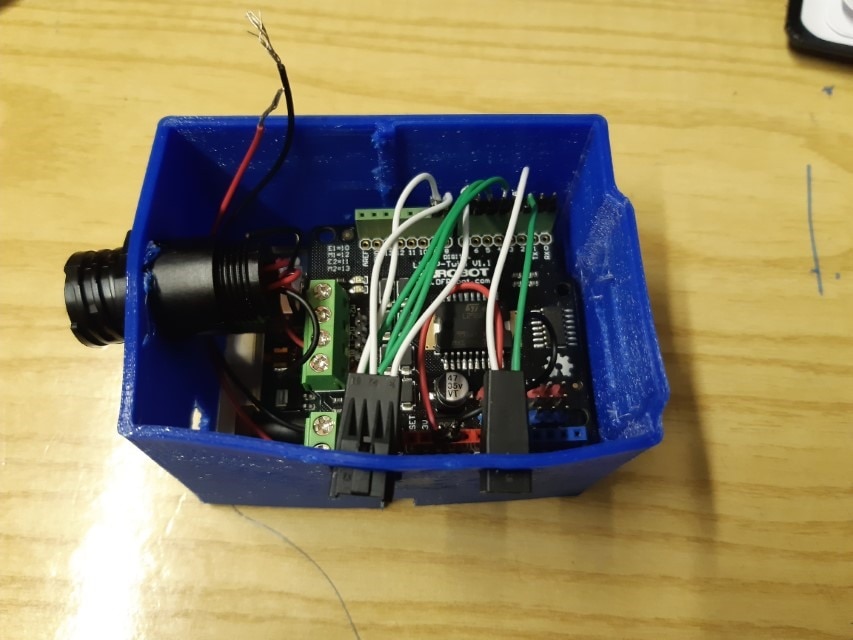
image

3. Prototype

This is the first prototype of the Arduino Uno with the case and the connectors in place. Unfortunately, I ordered the wrong filament (I ordered a TPU filament instead of PLA), so the case is flexible. I will print the final case as soon as the correct filament is delivered 

image

image

Prev: Mechanical design

Next: Building the robot

  • Sign in to reply
Parents
  • robogary
    robogary over 3 years ago

    Hi amgalbu - I;m laughing at myself. I had used the CPC connector and mounted like you did, and see the pins are installed on the energized side. It must be more of a old convention than a rule.  Good luck with the remaining build. 

    • Cancel
    • Vote Up 0 Vote Down
    • Sign in to reply
    • More
    • Cancel
  • amgalbu
    amgalbu over 3 years ago in reply to robogary

    Hi robogary. Actually one of the CPC connectors has a nice "washer" that makes it perfect to be glued to the case

    • Cancel
    • Vote Up 0 Vote Down
    • Sign in to reply
    • More
    • Cancel
Comment
  • amgalbu
    amgalbu over 3 years ago in reply to robogary

    Hi robogary. Actually one of the CPC connectors has a nice "washer" that makes it perfect to be glued to the case

    • Cancel
    • Vote Up 0 Vote Down
    • Sign in to reply
    • More
    • Cancel
Children
No Data
element14 Community

element14 is the first online community specifically for engineers. Connect with your peers and get expert answers to your questions.

  • Members
  • Learn
  • Technologies
  • Challenges & Projects
  • Products
  • Store
  • About Us
  • Feedback & Support
  • FAQs
  • Terms of Use
  • Privacy Policy
  • Legal and Copyright Notices
  • Sitemap
  • Cookies

An Avnet Company © 2025 Premier Farnell Limited. All Rights Reserved.

Premier Farnell Ltd, registered in England and Wales (no 00876412), registered office: Farnell House, Forge Lane, Leeds LS12 2NE.

ICP 备案号 10220084.

Follow element14

  • X
  • Facebook
  • linkedin
  • YouTube