element14 Community
element14 Community
    Register Log In
  • Site
  • Search
  • Log In Register
  • About Us
  • Community Hub
    Community Hub
    • What's New on element14
    • Feedback and Support
    • Benefits of Membership
    • Personal Blogs
    • Members Area
    • Achievement Levels
  • Learn
    Learn
    • Ask an Expert
    • eBooks
    • element14 presents
    • Learning Center
    • Tech Spotlight
    • STEM Academy
    • Webinars, Training and Events
    • Learning Groups
  • Technologies
    Technologies
    • 3D Printing
    • FPGA
    • Industrial Automation
    • Internet of Things
    • Power & Energy
    • Sensors
    • Technology Groups
  • Challenges & Projects
    Challenges & Projects
    • Design Challenges
    • element14 presents Projects
    • Project14
    • Arduino Projects
    • Raspberry Pi Projects
    • Project Groups
  • Products
    Products
    • Arduino
    • Avnet Boards Community
    • Dev Tools
    • Manufacturers
    • Multicomp Pro
    • Product Groups
    • Raspberry Pi
    • RoadTests & Reviews
  • Store
    Store
    • Visit Your Store
    • Choose another store...
      • Europe
      •  Austria (German)
      •  Belgium (Dutch, French)
      •  Bulgaria (Bulgarian)
      •  Czech Republic (Czech)
      •  Denmark (Danish)
      •  Estonia (Estonian)
      •  Finland (Finnish)
      •  France (French)
      •  Germany (German)
      •  Hungary (Hungarian)
      •  Ireland
      •  Israel
      •  Italy (Italian)
      •  Latvia (Latvian)
      •  
      •  Lithuania (Lithuanian)
      •  Netherlands (Dutch)
      •  Norway (Norwegian)
      •  Poland (Polish)
      •  Portugal (Portuguese)
      •  Romania (Romanian)
      •  Russia (Russian)
      •  Slovakia (Slovak)
      •  Slovenia (Slovenian)
      •  Spain (Spanish)
      •  Sweden (Swedish)
      •  Switzerland(German, French)
      •  Turkey (Turkish)
      •  United Kingdom
      • Asia Pacific
      •  Australia
      •  China
      •  Hong Kong
      •  India
      •  Korea (Korean)
      •  Malaysia
      •  New Zealand
      •  Philippines
      •  Singapore
      •  Taiwan
      •  Thailand (Thai)
      • Americas
      •  Brazil (Portuguese)
      •  Canada
      •  Mexico (Spanish)
      •  United States
      Can't find the country/region you're looking for? Visit our export site or find a local distributor.
  • Translate
  • Profile
  • Settings
Twist, Turn and Move Design Challenge with TE Robotics
  • Challenges & Projects
  • Design Challenges
  • Twist, Turn and Move Design Challenge with TE Robotics
  • More
  • Cancel
Twist, Turn and Move Design Challenge with TE Robotics
Blog Rullit #4 - Building the robot
  • Blog
  • Forum
  • Documents
  • Polls
  • Files
  • Leaderboard
  • Mentions
  • Sub-Groups
  • Tags
  • More
  • Cancel
  • New
  • Share
  • More
  • Cancel
Group Actions
  • Group RSS
  • More
  • Cancel
Engagement
  • Author Author: amgalbu
  • Date Created: 29 Aug 2022 7:46 AM Date Created
  • Views 7133 views
  • Likes 10 likes
  • Comments 5 comments
  • rullit
  • te connectivity
  • Twist Turn and Move Robotics Design Challenge
  • terobotics
  • designchallenge
  • Turn and Move Design Challenge with TE Robotics
Related
Recommended

Rullit #4 - Building the robot

amgalbu
amgalbu
29 Aug 2022
Rullit #4 - Building the robot

In this post, I am showing some picture I took during the build of the robot
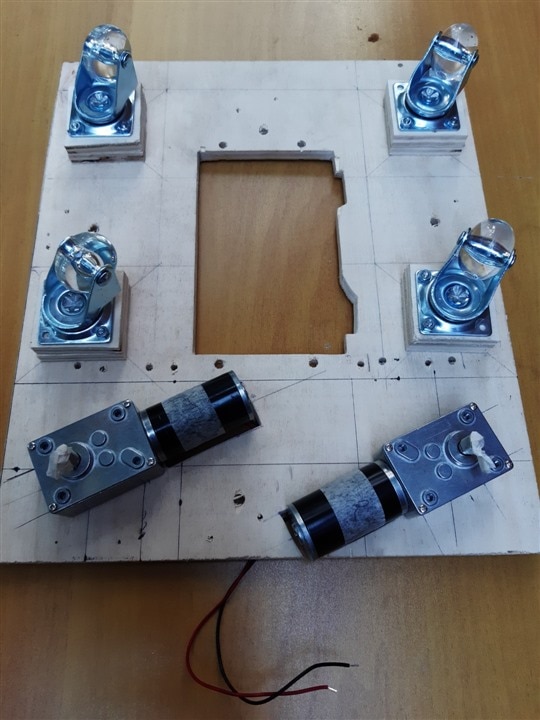
1. The chassis

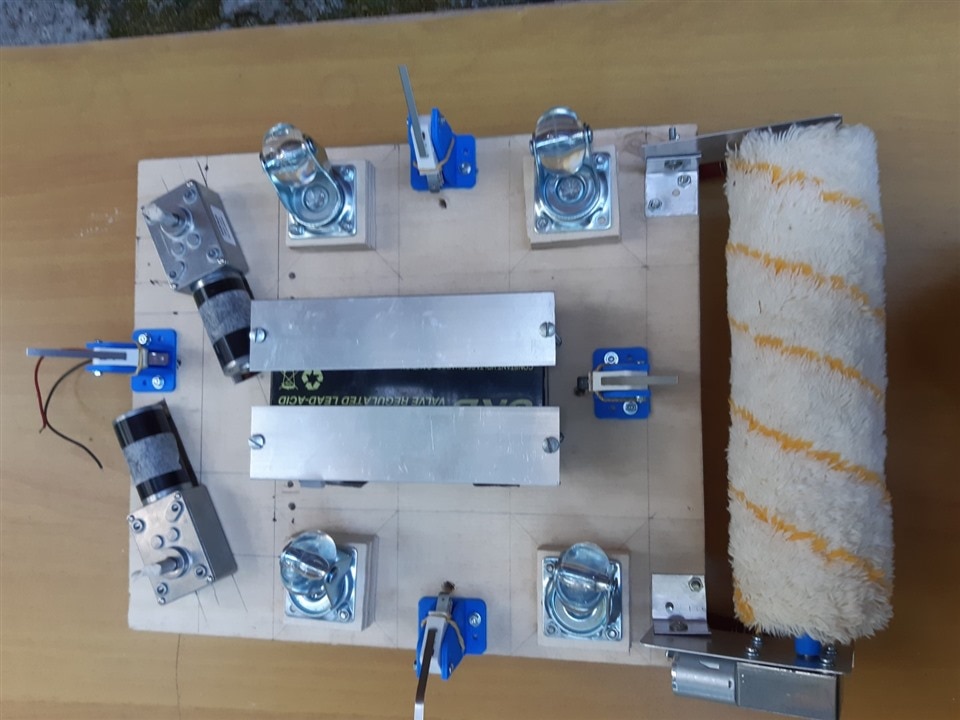
The robot chassis is made of 10 mm plywood. I cut out all the slots and holes to mount the robot components. To limit the total height, I also created a slot for the battery, so that it is aligned with the upper surface of the chassis

image

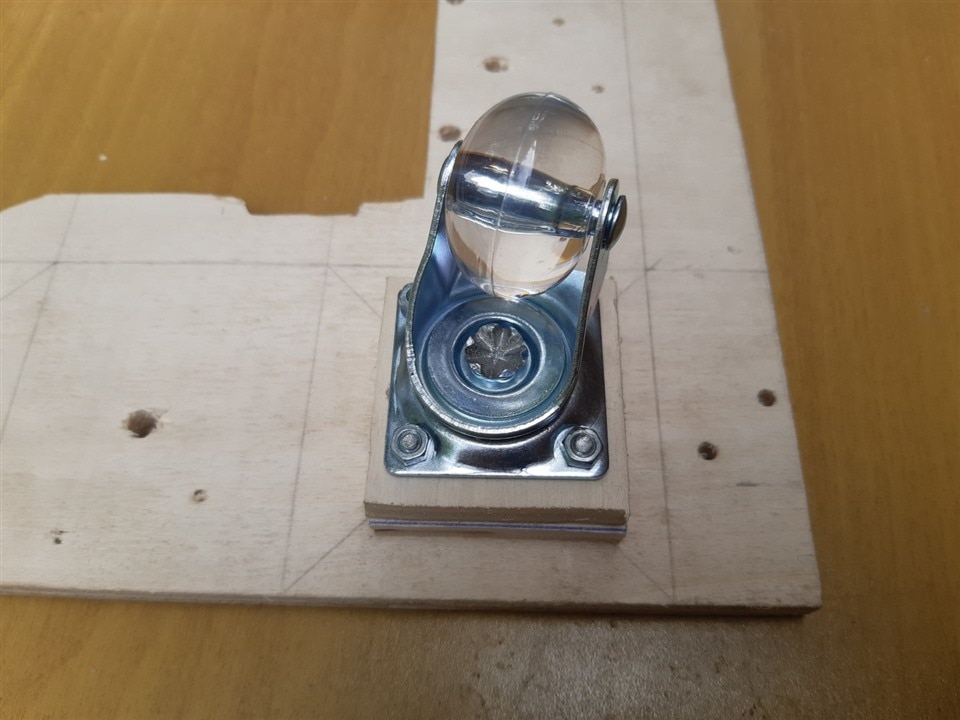
2. The caster wheels

First, I mounted the caster wheels. I used some plywood to create some thickness so that I can fit the battery and there is enough clearance to climb over the PV module frames and joints
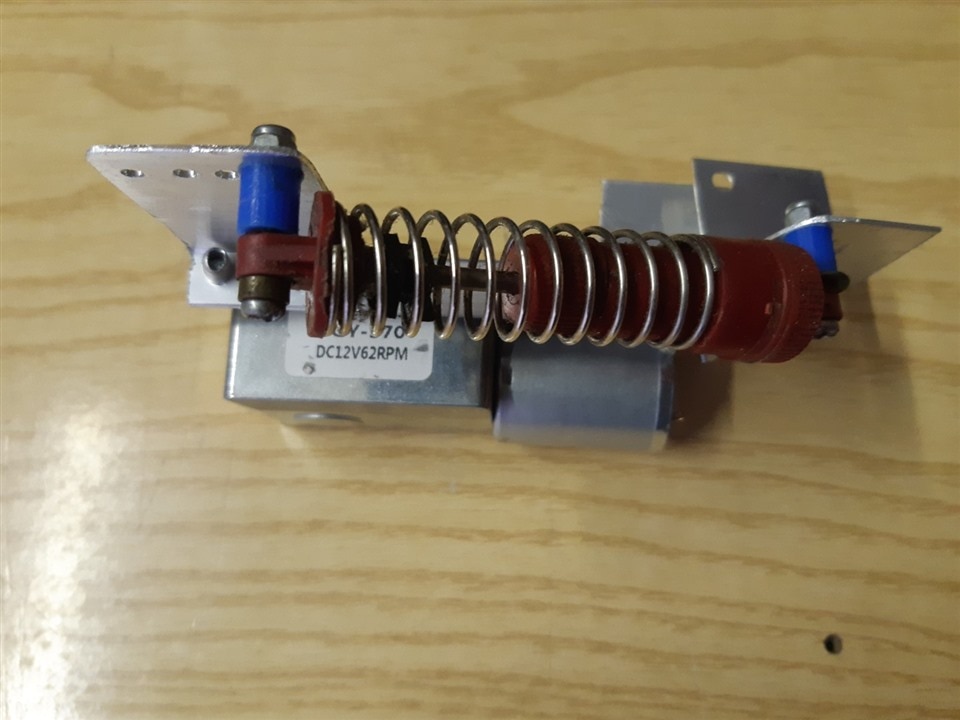
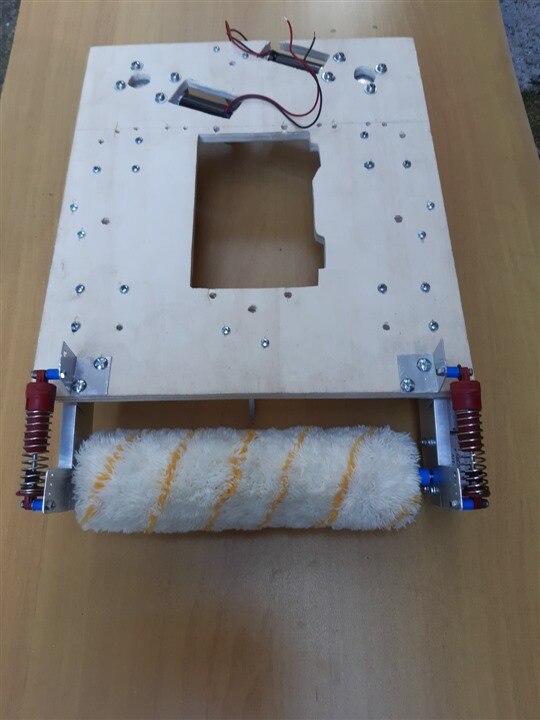
image

3. The motor

Next, I installed the two motors. I created some slots because the motor is a little higher than the gear reduction box 

image

image

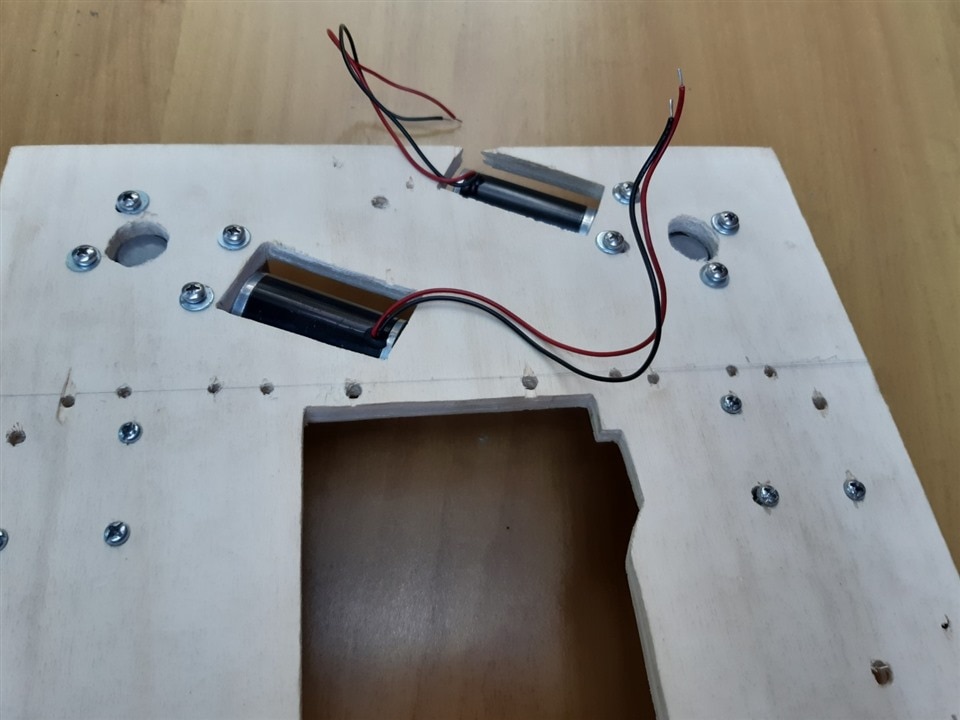
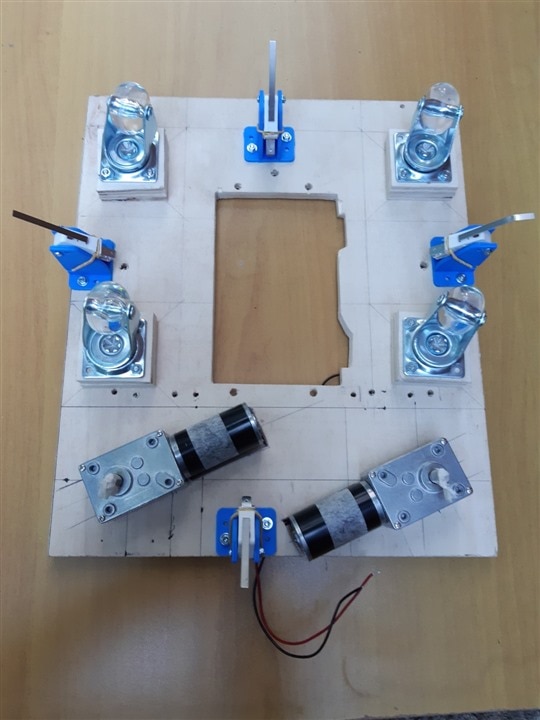
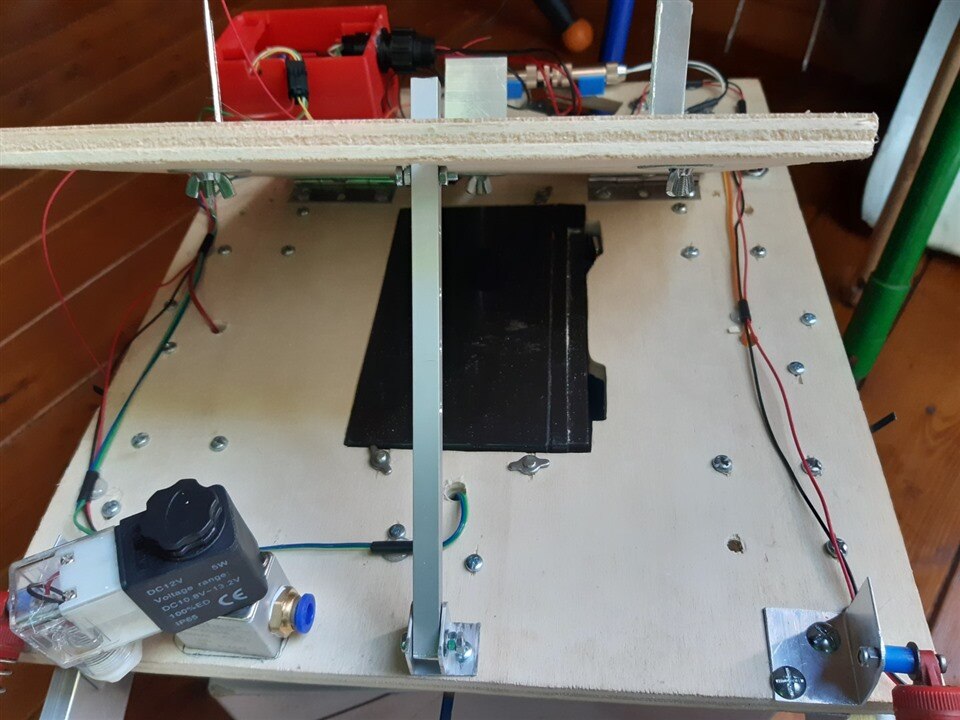
4. The limit switches

I installed the limit switches assembled in the 3D-printed supported on each of the four edges of the chassis
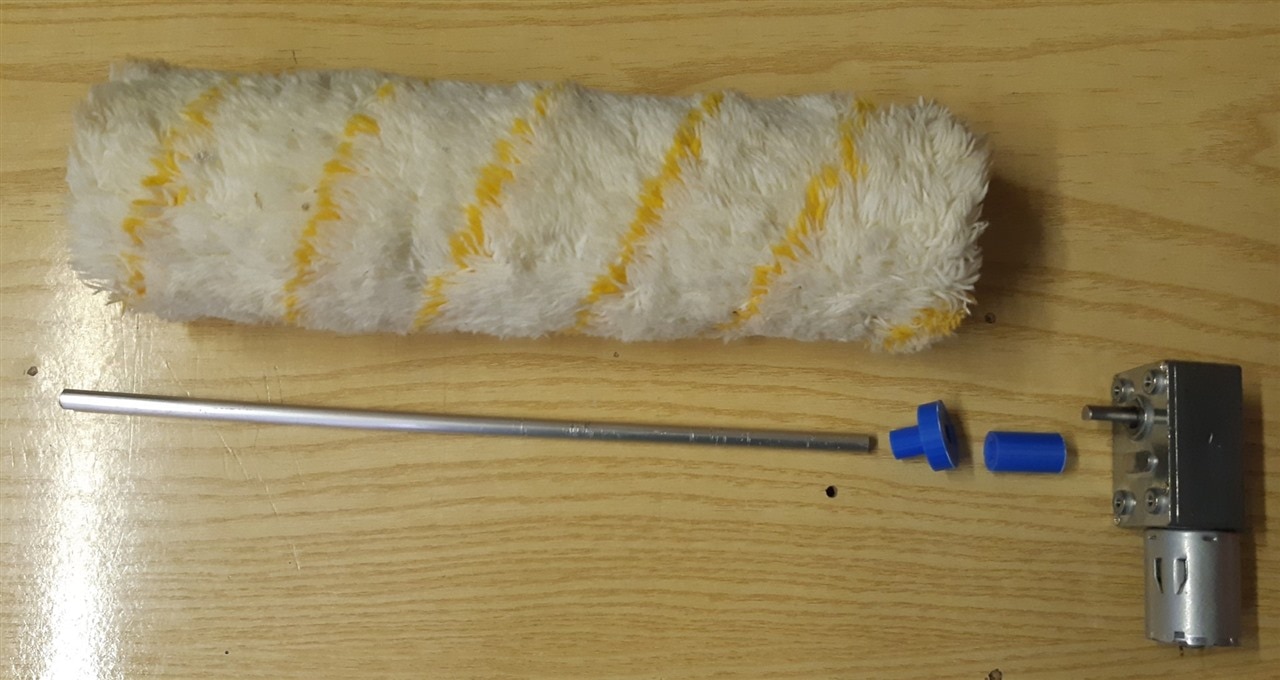
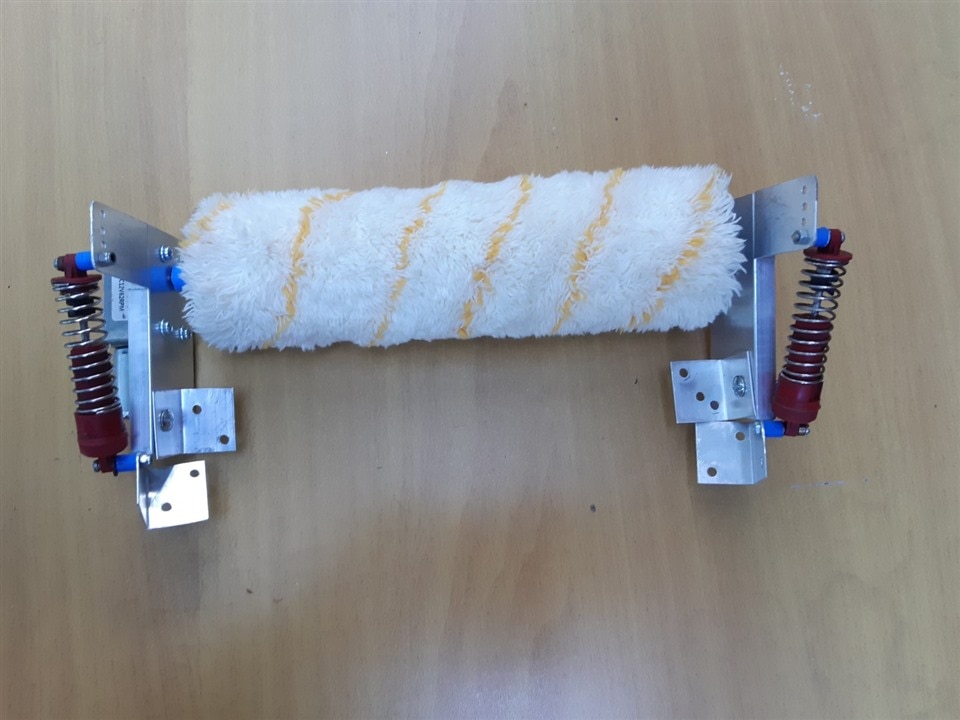
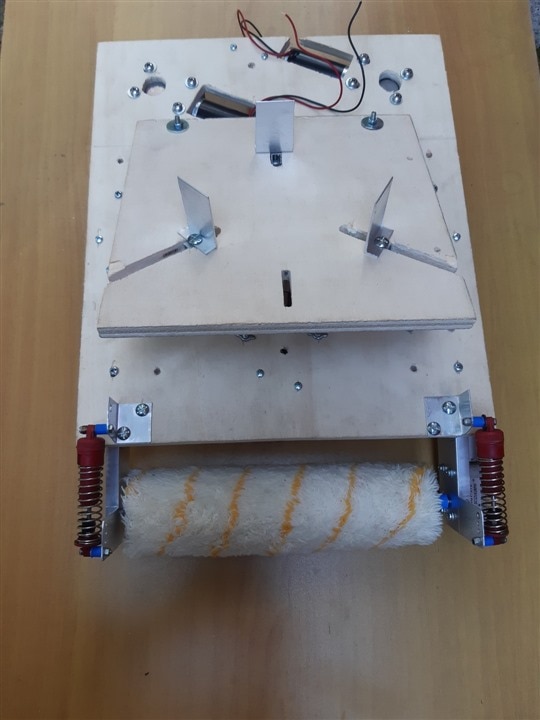
image

5. The roller

The roller has been mated to the motor by means of some 3D-printer adapters. Since the hole of the paint roller is 8 mm in diameter and the motor shaft is 6 mm in diameter, I choose a 6 mm aluminum bar and printed an adapter with an inner hole of 6 mm and an outer diameter of 8 mm. Then, I printed an adapter for the motor shaft to the 6 mm bar

image

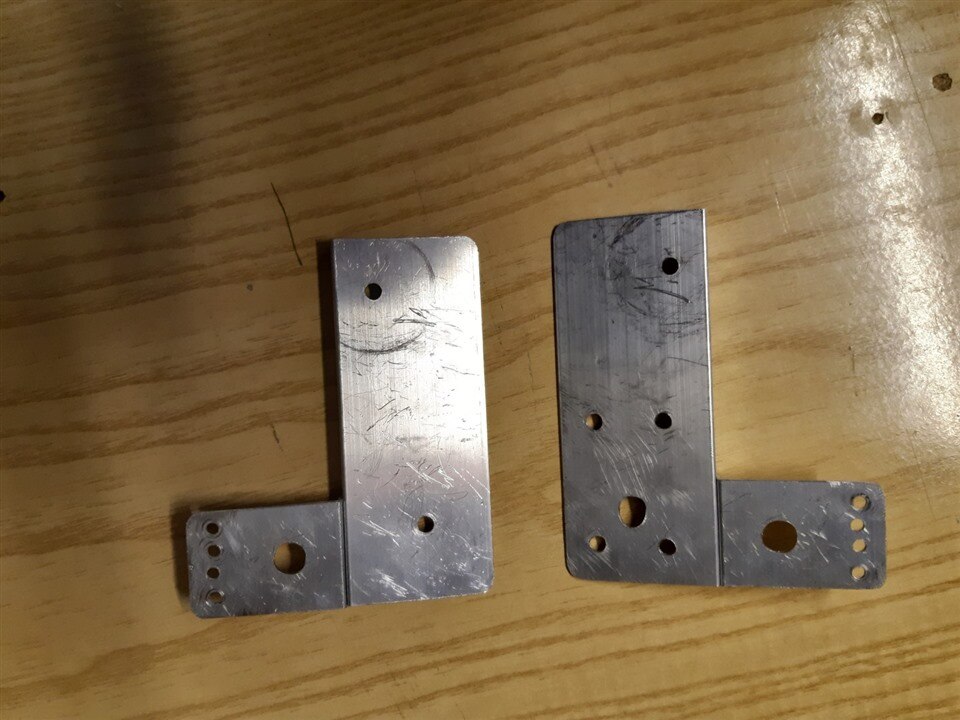
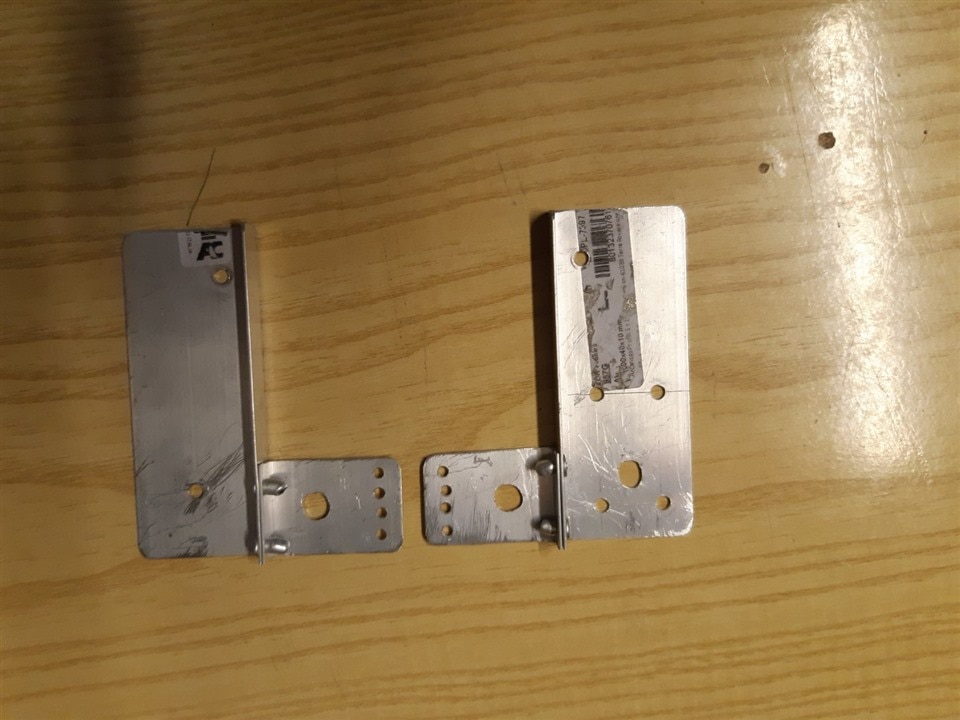
I created a support with L-shaped aluminum profile. I added a couple of shock absorbers, recovered from an old RC car. The shock absorber should be useful when an obstacle is hit by the paint roller

imageimage

image

image

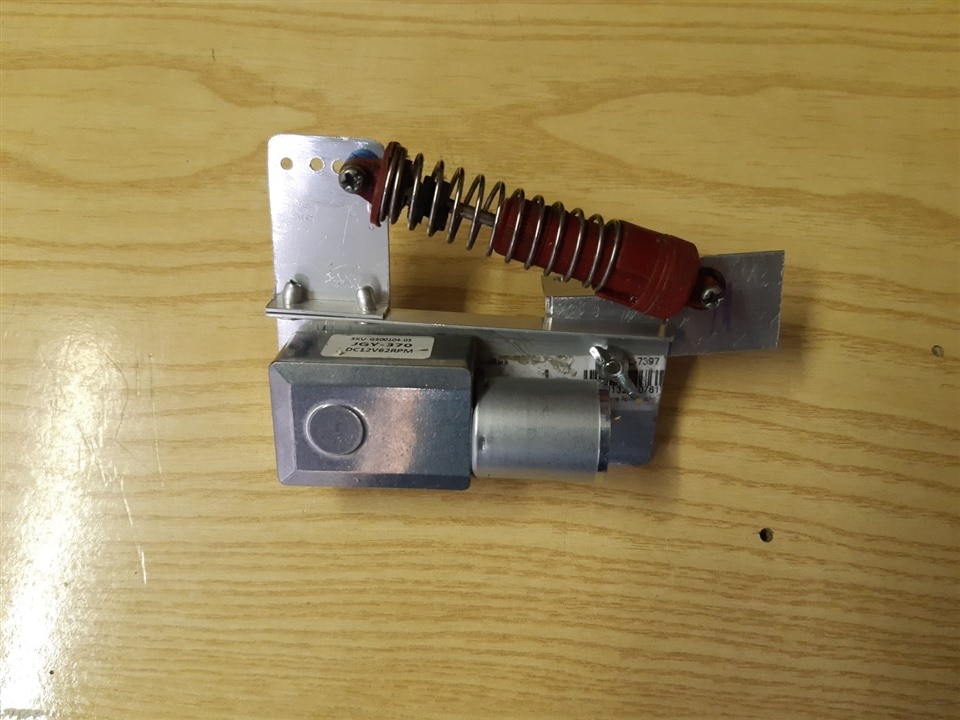
Here is the final sub-assembly of the roller 

image

and here is the roller sub-assembly mounted on the main chassis
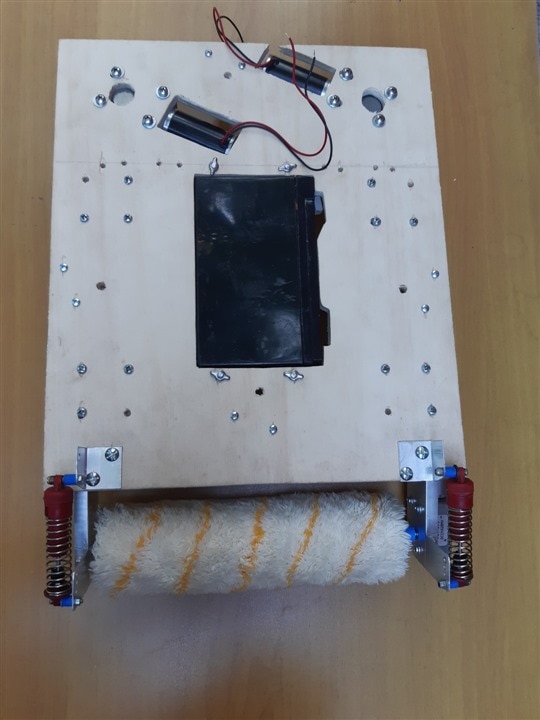
image

6. The battery

Next step is the installation of the battery. I used a 12V lead battery to keep costs down. Size and weight are relevant, so may be it would be a good idea to replace with a lithium battery. Battery can be installed and removed from the top of the chassis and is kept in place by two L-shaped aluminum bars with four long screws
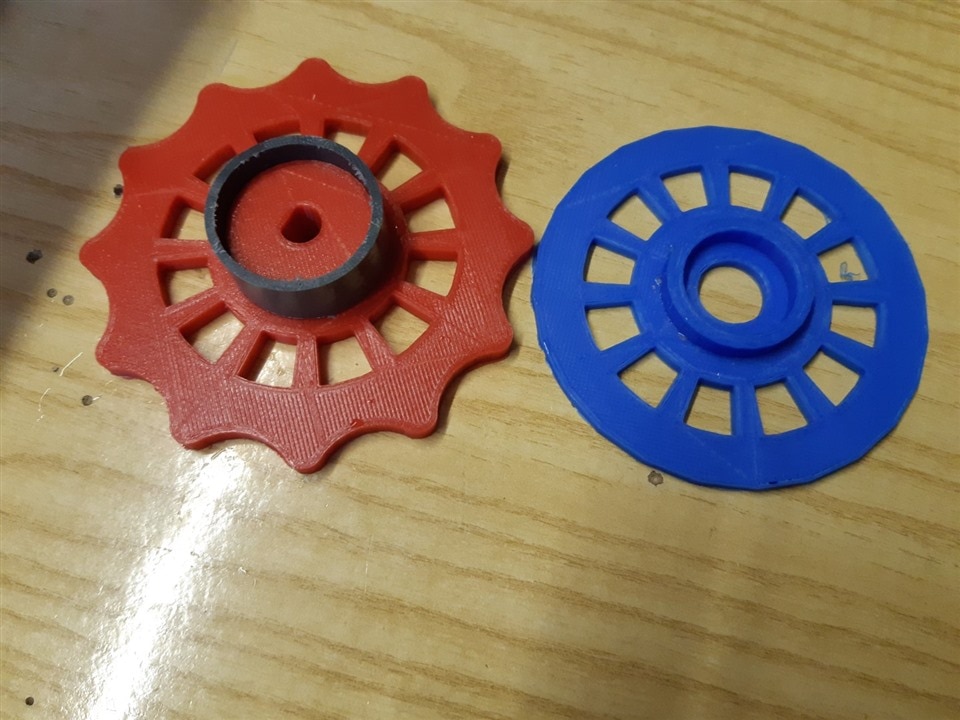
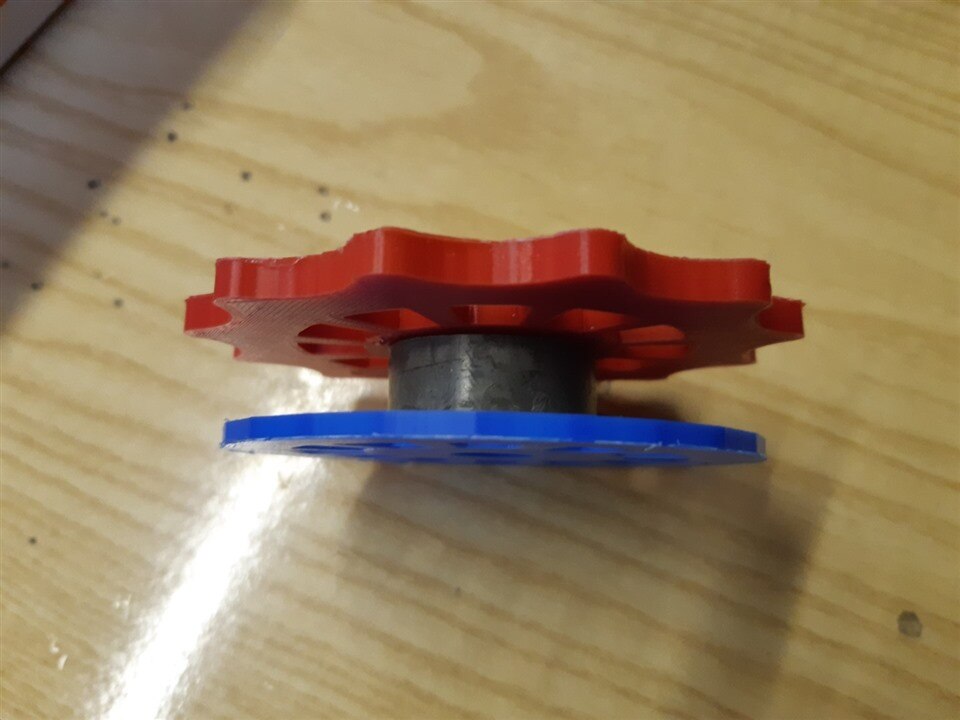
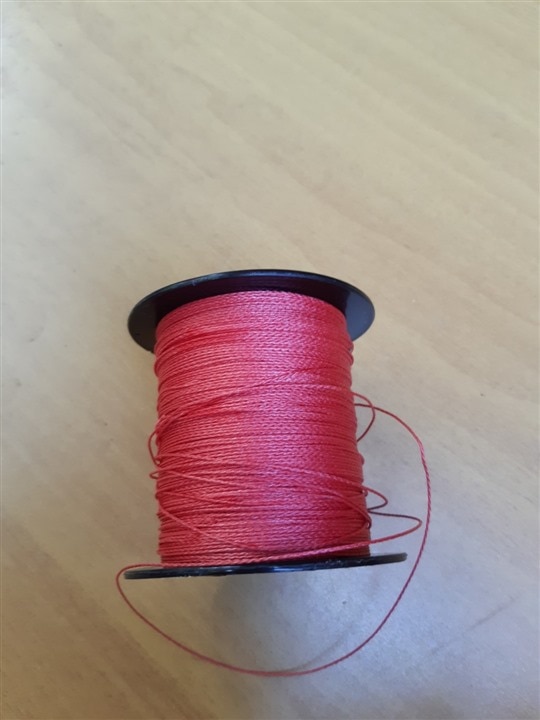
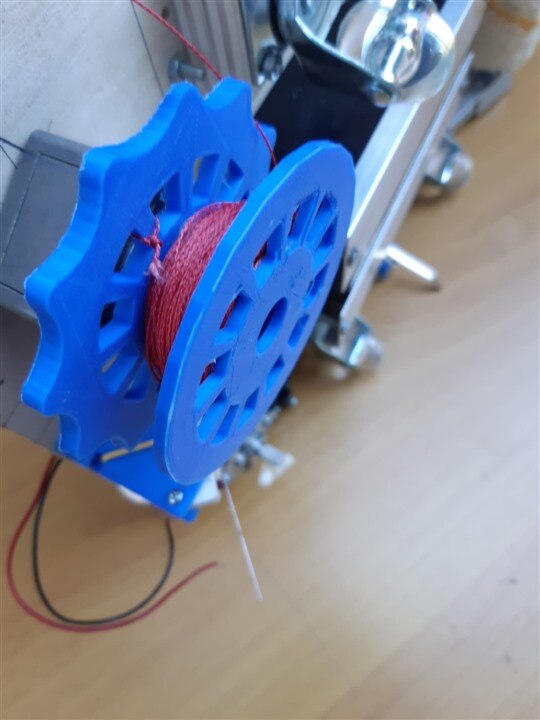
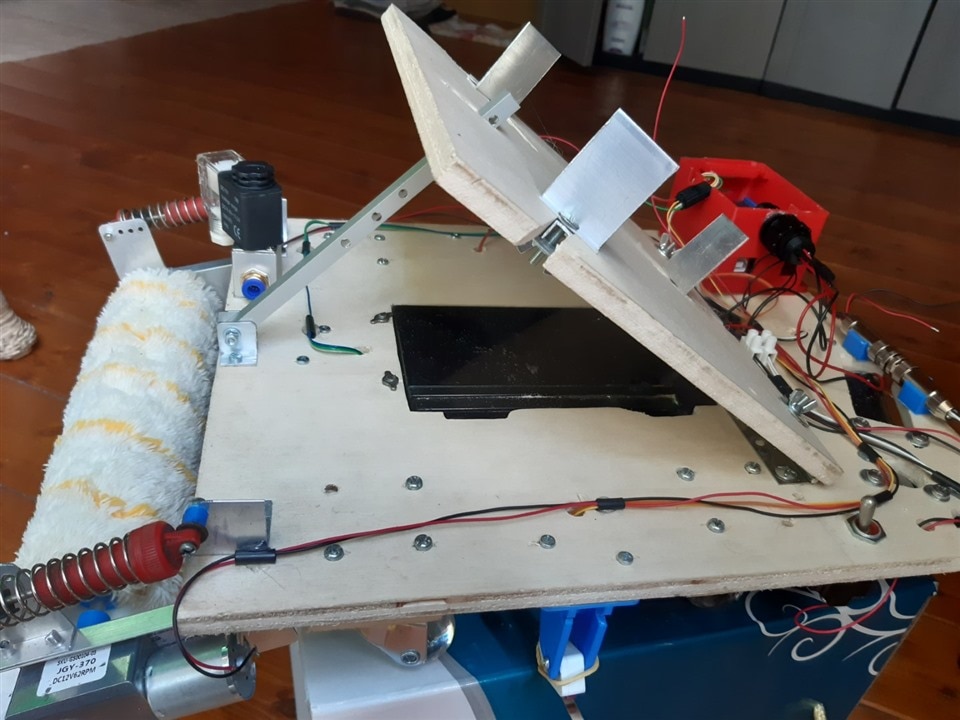
image

image

7. The pulleys

Next I installed the pulleys. Pulley are 3D-printed in the halves, and the glued together with a piece of plastic pipe to make the whole assembly more resistant

image

image

imageimage

image

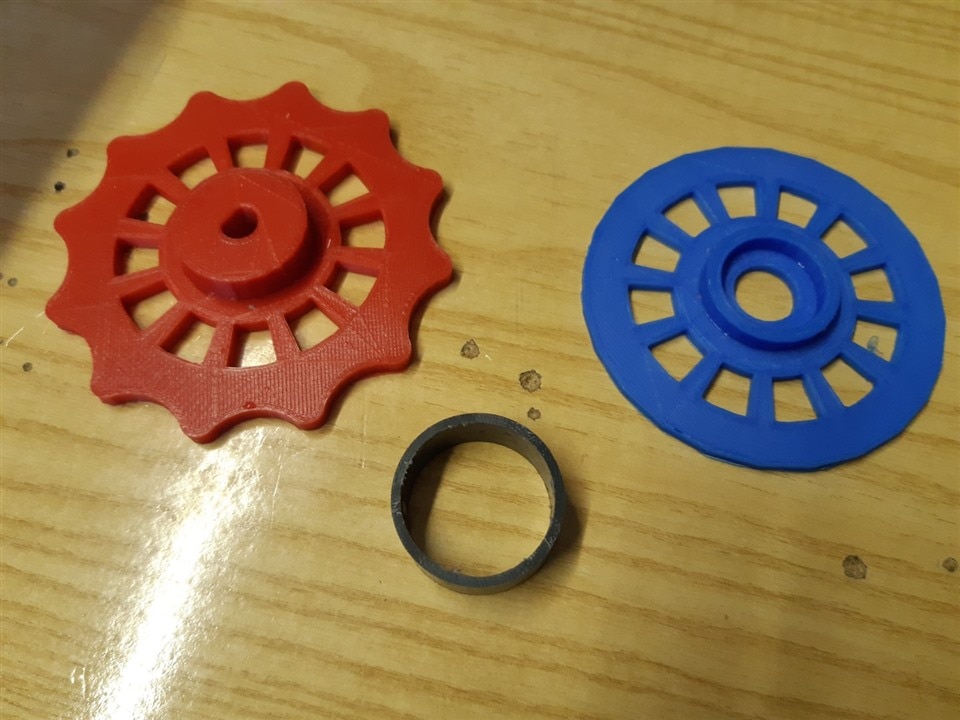
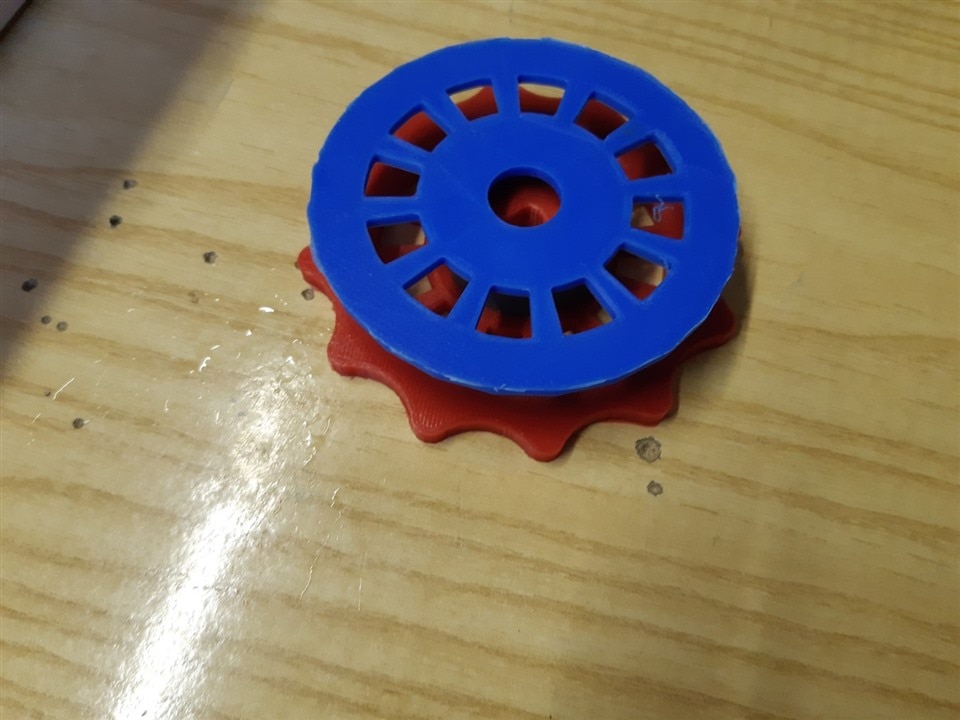
On the pulley, I winded about 15 meters of Dyneema rope, which is very thin (0.60 mm in diameter) but very strong (it can stand up to 50 kg) 

image

image


8. Water tank and valve

I installed the support surface for the water tank. It features three adjustable locks to hold the bucket. There is also a system to adjust to inclination of the support to match roof inclination and keep the bucket horizontal
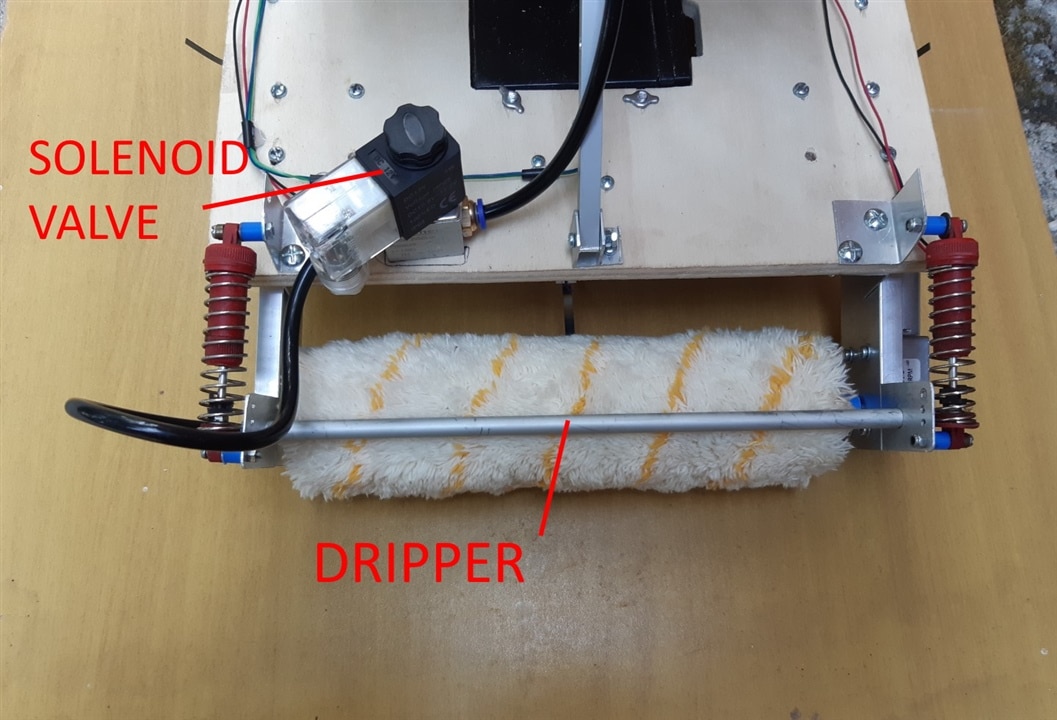
image

image

image

9. Water dispenser

The paint roller is kept wet be means of a water dispenser, which is made up the following components

  • water bucket
  • solenoid valve
  • water dripper

The water dripper is a round aluminum bar (8 cm in diameter) where I drilled some holes with a 1.5 mm tip to let water drip

image 

The dripper has then been installed just above the roller and connected to the solenoid valve
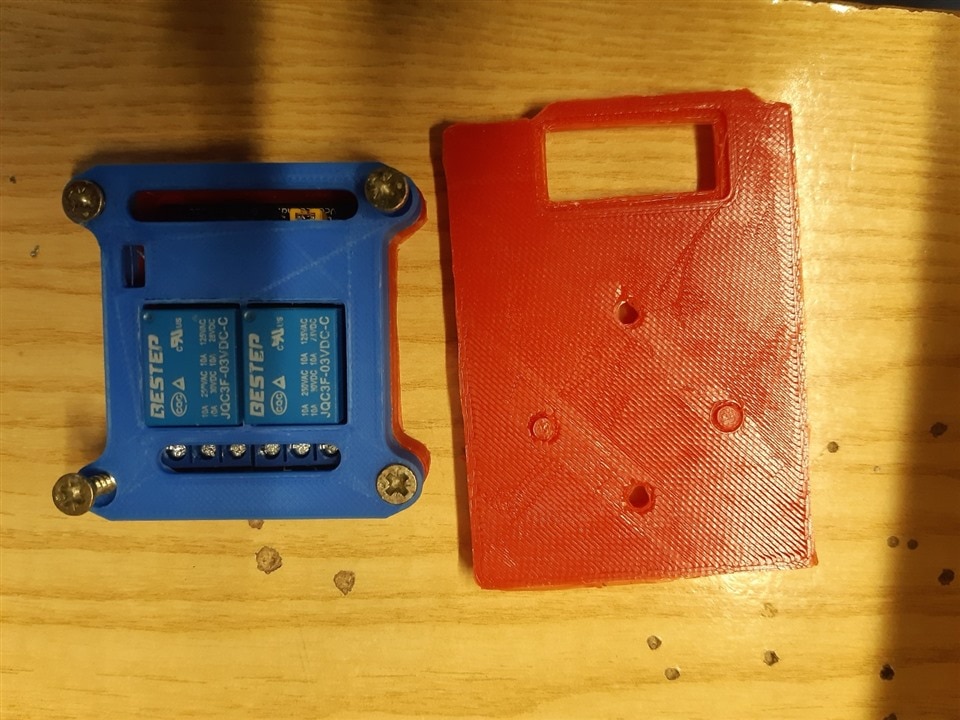
image

9. Control board

Finally I installed all the wiring and the case with Arduino board and DFRobotic shield

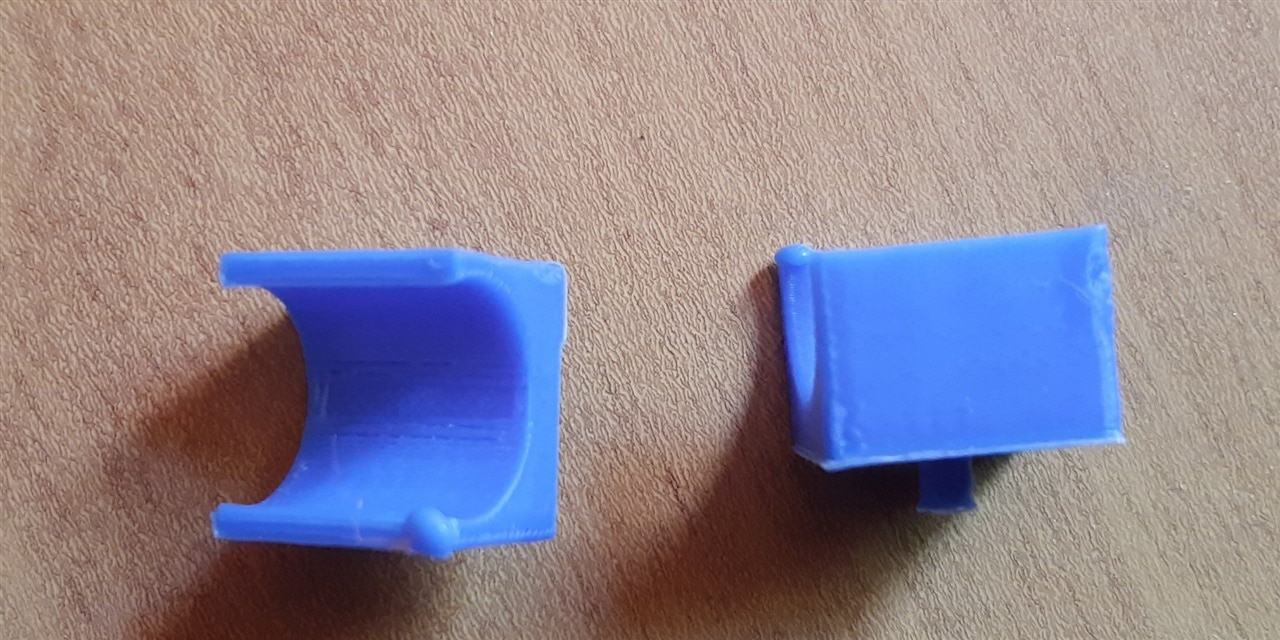
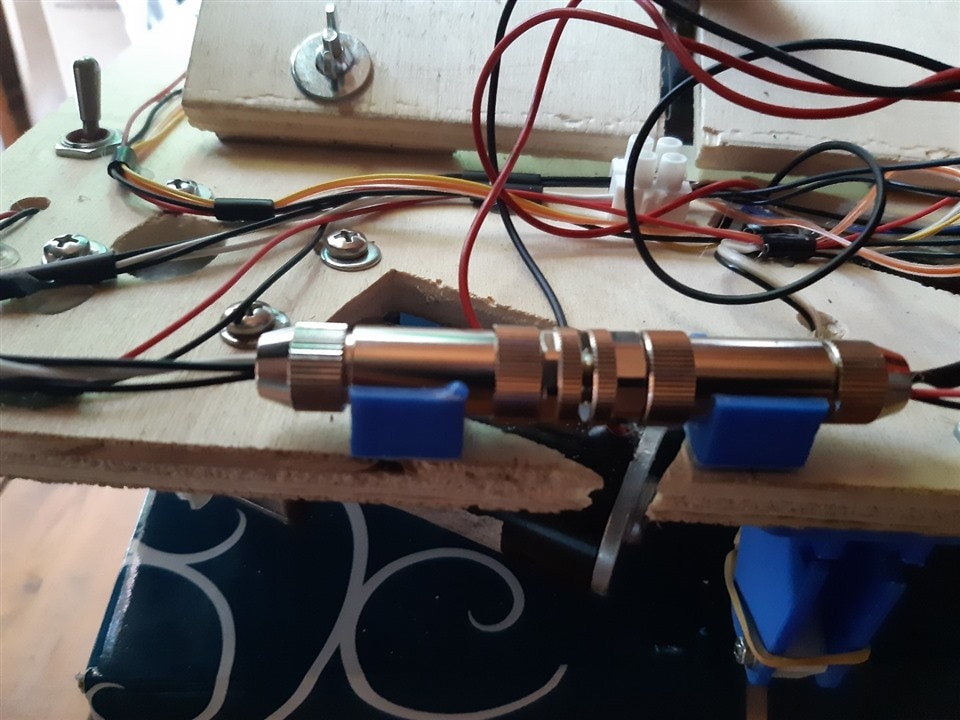
To provide two separate power supplies (one for the Arduino board and one for the DFRobotic shield), I connected the TE M8 connector as shown un pictures 

image

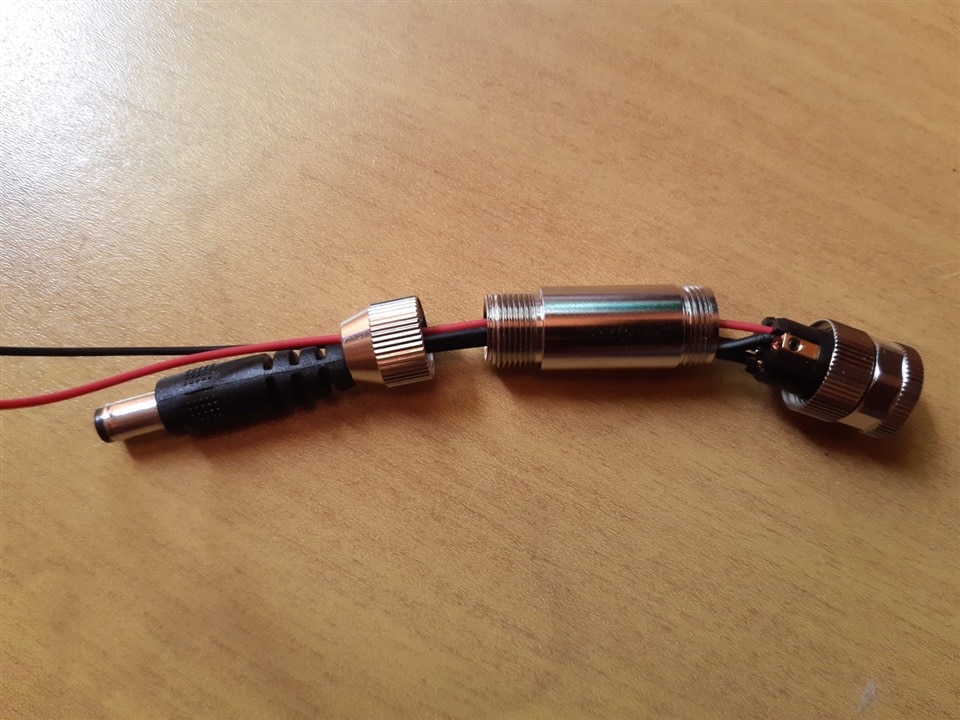
M8 connector is hold in place be means of two 3D-printed supports 

image

image

The boards are placed inside a case installed on the top left corner of the chassis

image

image

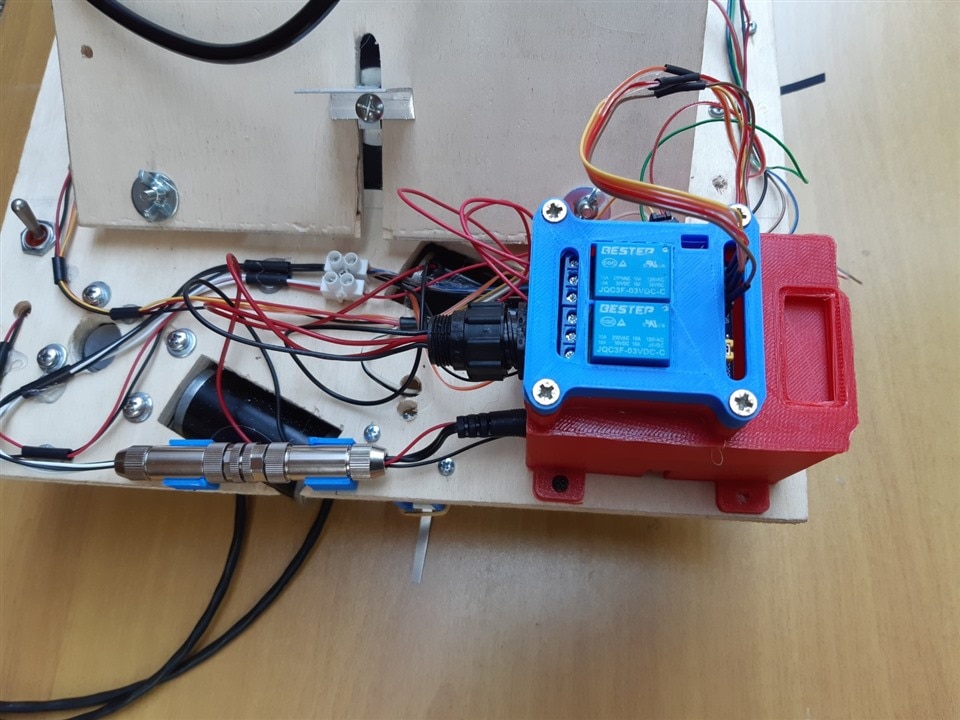
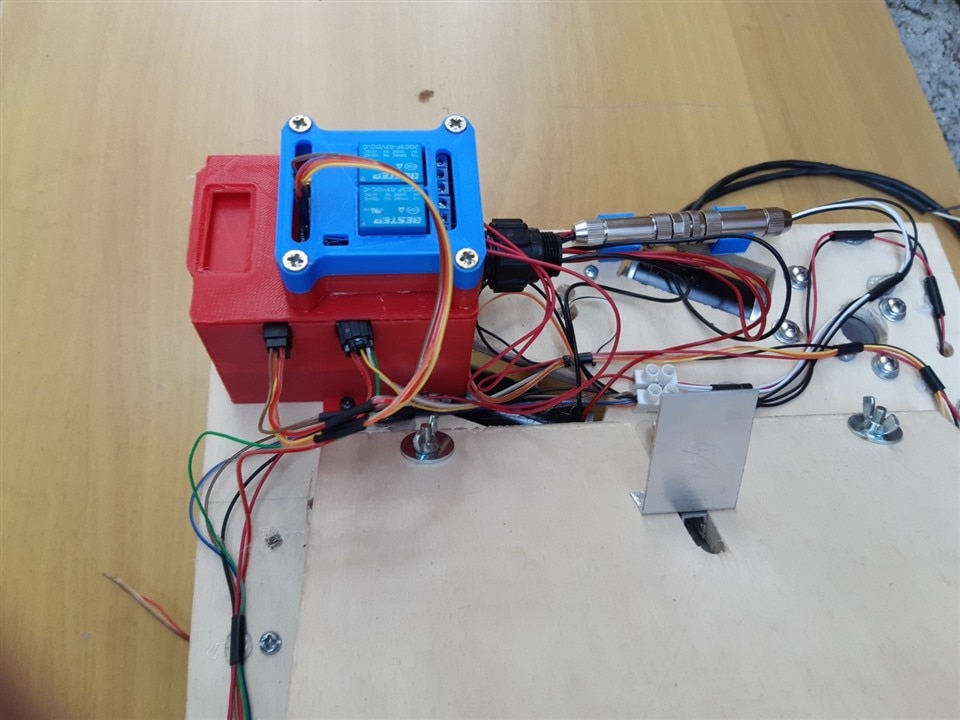
As you can see, the relays that drive the solenoid valve and the roller motor are glued to the cover of the case

image

Now I can start to make some tests and see what needs to be changed/improved.

Prev: Wiring

Next: The software

  • Sign in to reply
Parents
  • DAB
    DAB over 3 years ago

    Good start, it will be interesting to see it in action.

    • Cancel
    • Vote Up 0 Vote Down
    • Sign in to reply
    • More
    • Cancel
  • amgalbu
    amgalbu over 3 years ago in reply to DAB

    Thanks DAB. I am going to  start some real tests next weekend (I am late when compared to my initial plans). Unfortunately bad weather is  forecasted for all this week and the next. Let's hope for a clear window!

    • Cancel
    • Vote Up 0 Vote Down
    • Sign in to reply
    • More
    • Cancel
Comment
  • amgalbu
    amgalbu over 3 years ago in reply to DAB

    Thanks DAB. I am going to  start some real tests next weekend (I am late when compared to my initial plans). Unfortunately bad weather is  forecasted for all this week and the next. Let's hope for a clear window!

    • Cancel
    • Vote Up 0 Vote Down
    • Sign in to reply
    • More
    • Cancel
Children
No Data
element14 Community

element14 is the first online community specifically for engineers. Connect with your peers and get expert answers to your questions.

  • Members
  • Learn
  • Technologies
  • Challenges & Projects
  • Products
  • Store
  • About Us
  • Feedback & Support
  • FAQs
  • Terms of Use
  • Privacy Policy
  • Legal and Copyright Notices
  • Sitemap
  • Cookies

An Avnet Company © 2025 Premier Farnell Limited. All Rights Reserved.

Premier Farnell Ltd, registered in England and Wales (no 00876412), registered office: Farnell House, Forge Lane, Leeds LS12 2NE.

ICP 备案号 10220084.

Follow element14

  • X
  • Facebook
  • linkedin
  • YouTube