


Mark combines two of his past builds, the Larson Scanner and the Vocoder, into a single 3D printed “Cylon Pumpkin” for Halloween 2025. The project features a reusable 3D printed pumpkin shell with a sweeping LED eye and a built-in voice-modulating vocoder powered by a Teensy microcontroller. In this video, Mark walks through the design in Onshape, PCB assembly, soldering, firmware setup, and how it all fits together to create a talking, glowing pumpkin that’s perfect for Halloween decoration or cosplay.
Watch the Project Unfold
A Reusable Pumpkin with a Twist
For Halloween 2025, Mark decided to skip the traditional carved pumpkin. Instead, he 3D printed one, a durable, reusable pumpkin shell that can be brought back every year.
As he explained in his video, “Instead of hollowing out a pumpkin, I did something special, I 3D printed it so I can use it over and over again every year.”
The project combines two of his previous builds: the Larson Scanner and the Vocoder, merging them into a single device that not only lights up like a Cylon’s eye but also modulates speech, a fun addition to any Halloween setup or cosplay.
Designing the 3D Pumpkin
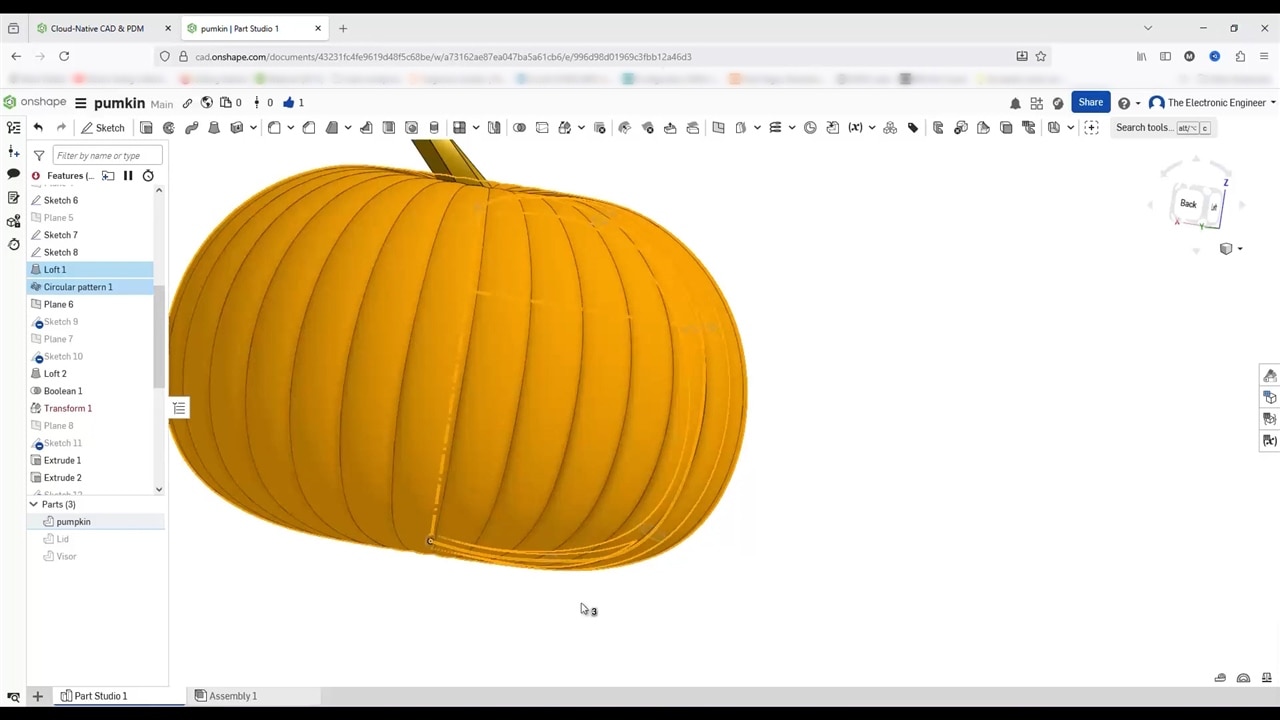
Mark designed the pumpkin using Onshape, a free, browser-based CAD tool suitable for hobbyist use. The model began as a series of arcs and ellipses, which he connected using Onshape’s loft and revolve features to form the pumpkin’s rounded body.
Once complete, he created the facial cutouts and added a “visor” opening, the slit through which the LED strip shines.
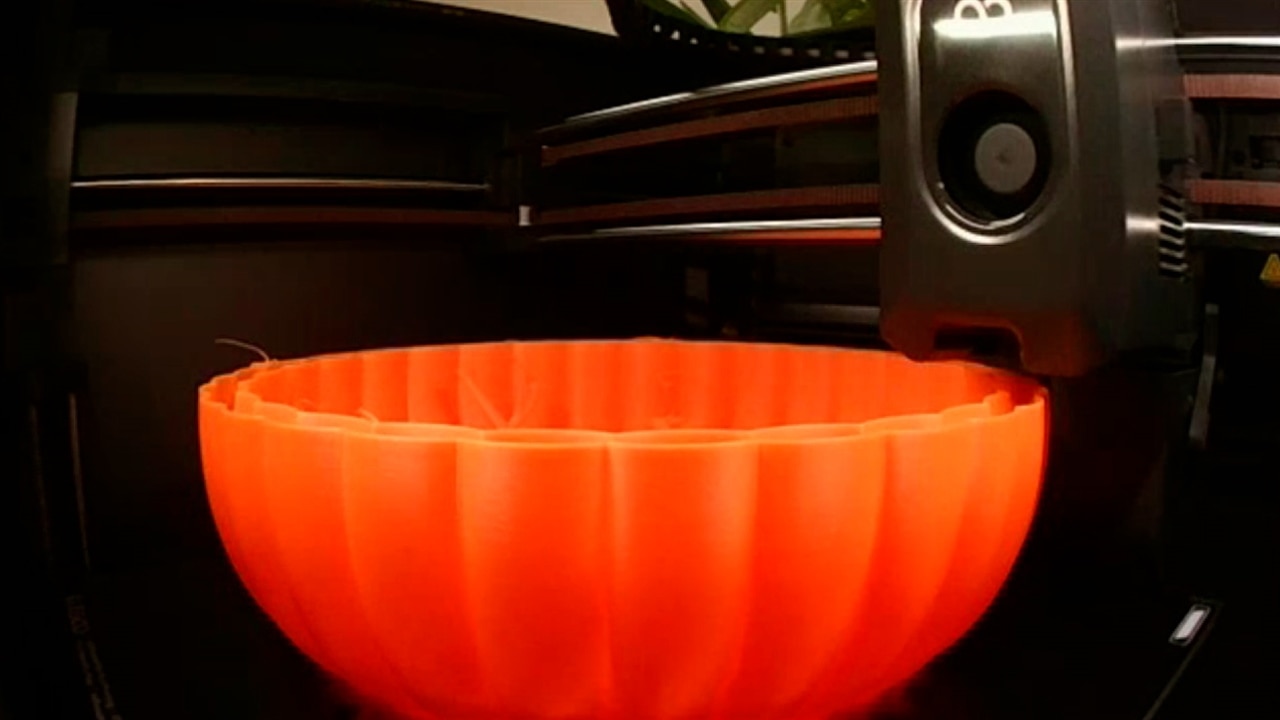
“When I imported it into my slicer, I scaled it down to 50% so it would fit my printer,” Mark explained. “Then I cut off the top and printed it in two pieces.”
He printed the pumpkin body and visor separately. The visor, designed to diffuse light from the LED strip, was printed in a transparent filament. The complete pumpkin can be fitted with internal lighting or even a small flashlight to enhance the glow effect.
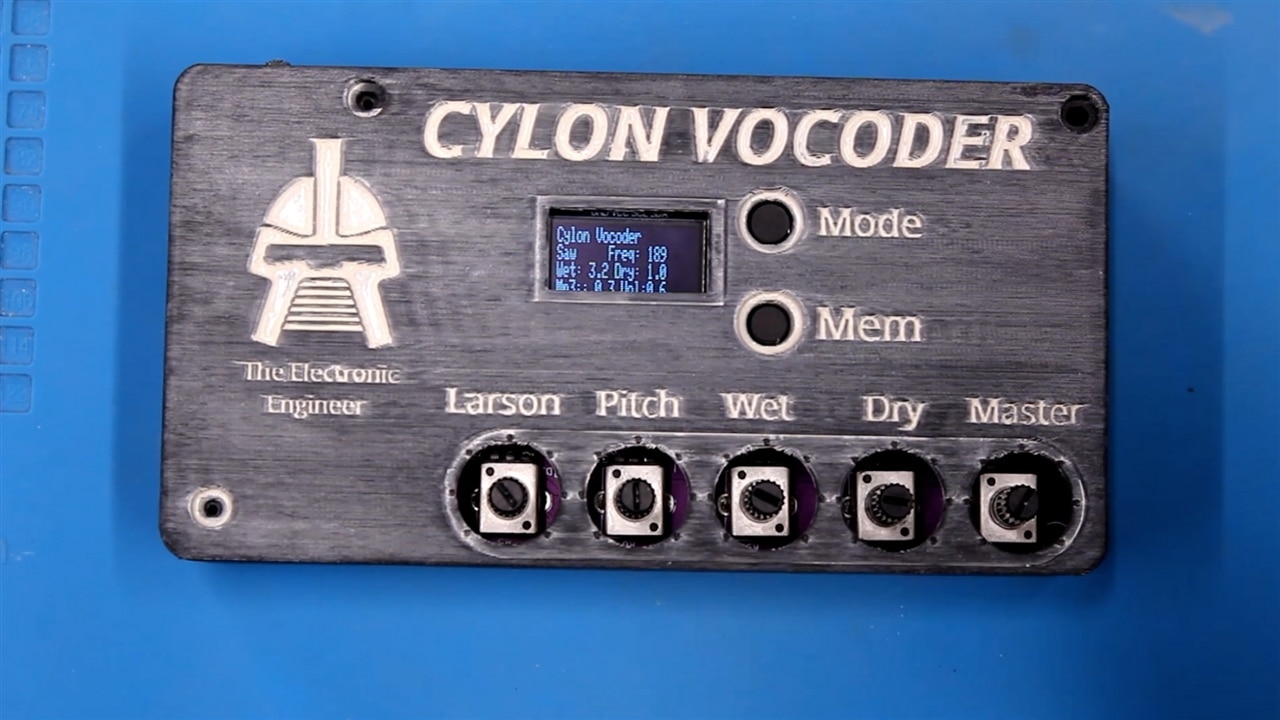
Electronics: The Cylon Vocoder
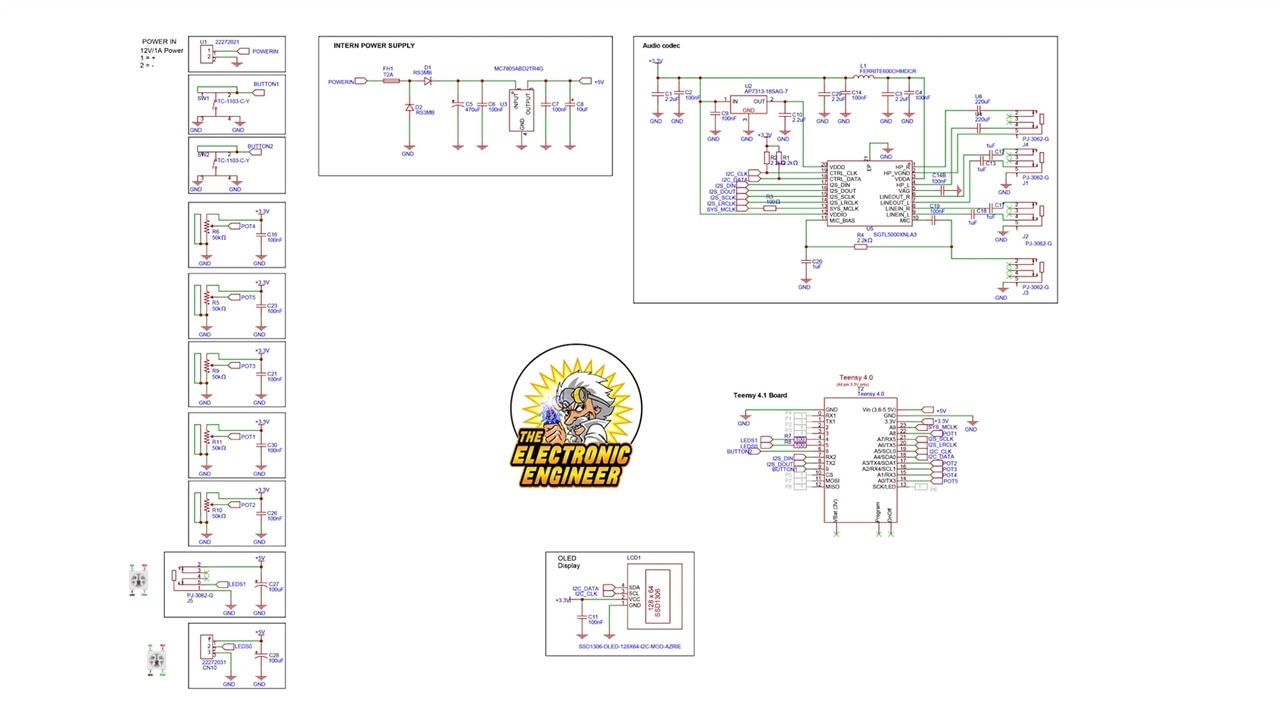
The heart of this project is a redesigned Cylon Vocoder PCB, which integrates the Teensy Audio Board circuitry directly onto the board. According to Mark, this reduces cost and simplifies assembly:
“The schematic looks complicated, but it’s basically the same electronics I used in my previous vocoder. The difference is that I designed a PCB and implemented the audio board on it.”
From the Bill of Materials, the main components include:
-
Teensy 4.0 microcontroller
-
SGTL5000 audio codec (replicated from the Teensy Audio Board design)
-
128x64 OLED display for visual feedback
-
Potentiometers for adjusting settings (wet/dry mix, pitch, function mode, etc.)
-
NeoPixel LED strip (used for the Larson scanner effect)
-
Fuse and diode protection on the 5V input
-
9V battery power supply with a sliding switch and Molex connectors
Mark highlighted a few design choices worth noting:
-
Socket mounting for the Teensy and display: “Because the Teensy is quite expensive, I wanted to be able to remove it if needed.”
-
Simple reverse-polarity protection: “If you plug it in backwards, the diode conducts and blows the fuse, a quick and dirty solution that works every time.”
These details make the board practical for repeated use, ideal for costume integration or standalone decoration.
Assembly and Design
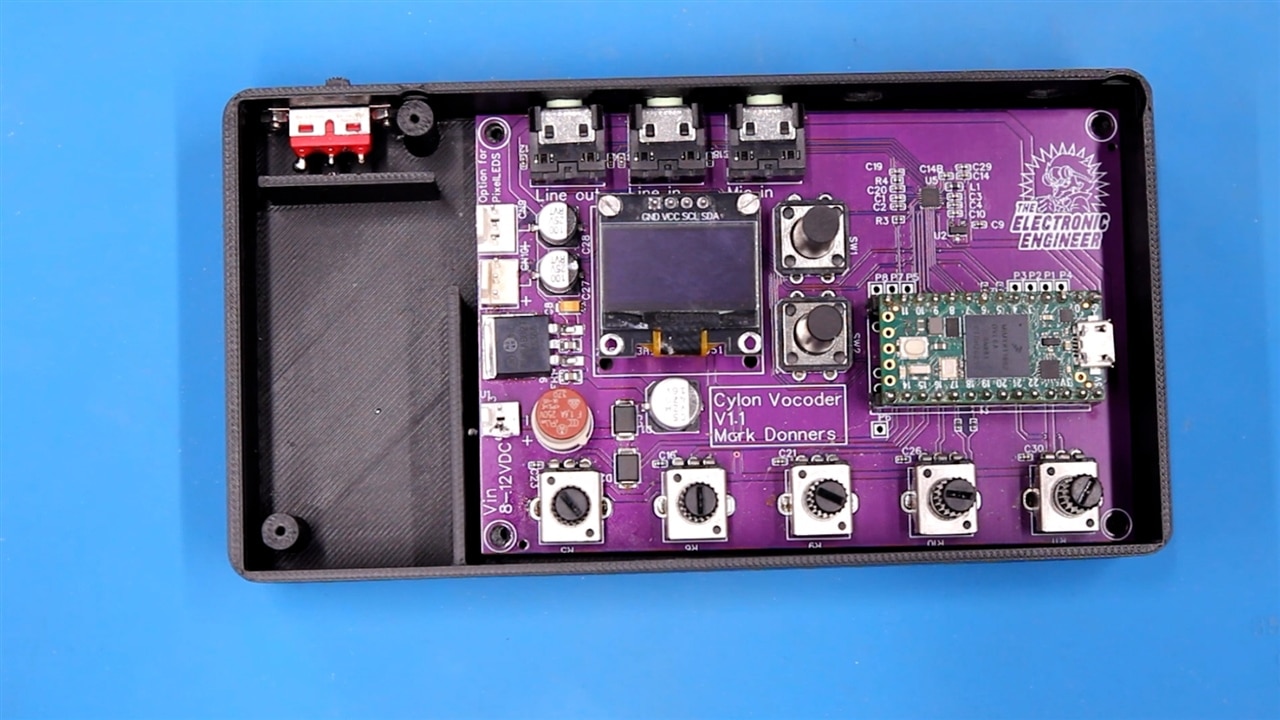
Once the PCB was assembled, with headers, potentiometers, Molex connectors, and display soldered in, the next step was mounting it in the custom 3D printed enclosure. The case includes space for the 9V battery, switch, and wiring to the LED strip.
Mark demonstrated the layout:
“The PCB fits right in here. I already mounted a sliding switch for the power, and this has room for a 9V battery, it goes right there.”
When powered, the Teensy runs firmware based on Mark’s earlier vocoder project, updated slightly to control both the audio and the LED Larson scanner animation.
The display interface provides feedback as users turn the potentiometers, showing real-time values for signal parameters such as pitch, wet/dry mix, and master level. One button changes the waveform used by the internal function generator, cycling through square, sine, saw, and pulse waveforms.

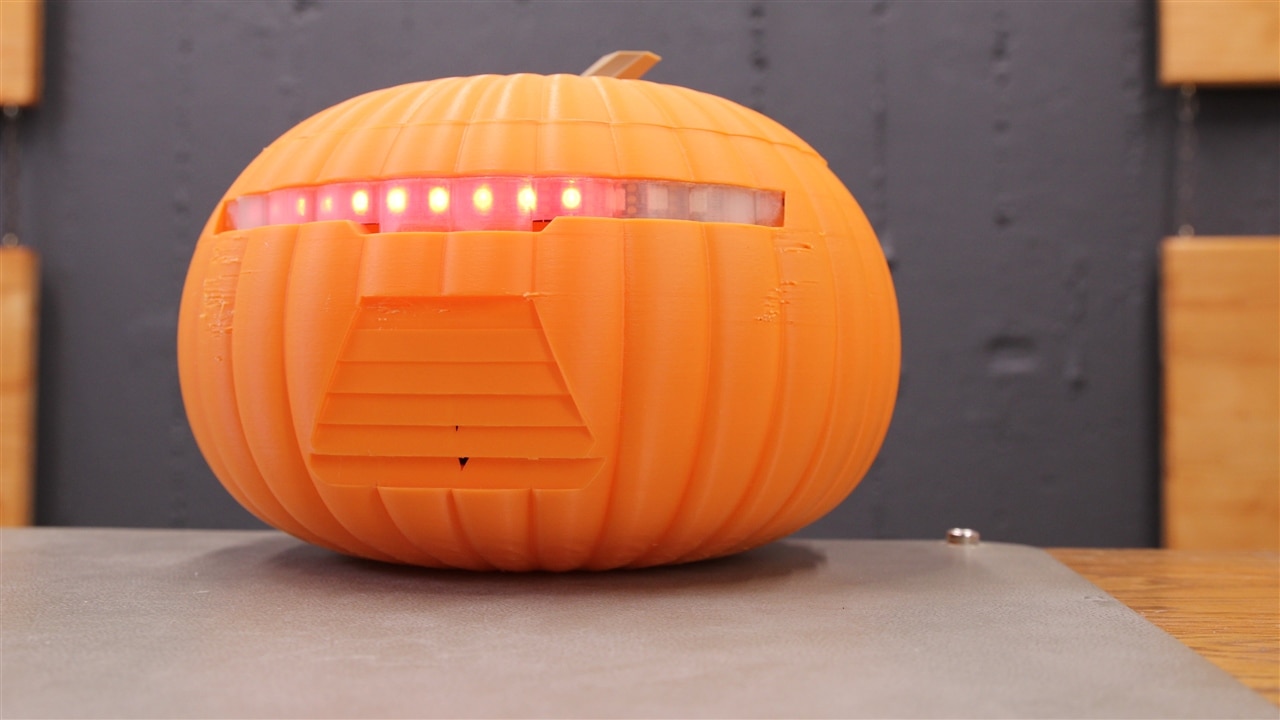
Integrating the Larson Scanner
Inside the pumpkin’s visor sits a NeoPixel LED strip, controlled by the Teensy through a dedicated output. The LED animation mimics the iconic sweeping red light from the Battlestar Galactica Cylon, a visual effect Mark first explored in his Larson Scanner project.
The LED strip was left intentionally long:
“I didn’t even bother cutting it to size,” he admitted. “It’s the original strip I used for the Larson Scanner, and I just left it in there because I don’t mind, I like the decoration.”
When activated, the strip moves rhythmically back and forth behind the pumpkin’s visor, giving it a menacing yet entertaining look.
Firmware and Future Plans
The firmware running on the Teensy is based almost entirely on Mark’s previous vocoder code, with minor additions for the LED control and display.
“It’s 99% the same as the previous version,” he said. “I just added a few lines for the display and the LED control.”
Currently, a memory button is included on the board but not yet functional. The goal is to enable users to store and recall their preferred settings in a future firmware update.
Conclusion
The Cylon Pumpkin is a fusion of two classic electronics projects, the Larson Scanner and Vocoder, brought together in a creative, seasonal build. It showcases practical PCB design, 3D modelling in Onshape, and integration of audio and lighting effects into a cohesive, reusable prop.
Mark summed up the project simply:
“A pumpkin is not a pumpkin without some decent electronics.”
With files, schematics, and firmware made available, makers can recreate, modify, or expand on the design, whether for Halloween decoration, cosplay, or just as a fun experiment in combining light, sound, and fabrication.
Supporting Files and Links
- Make Your Own Vocoder with Teensy 4.0 - Voice of a Cylon?! -- Episode 677 - for board teensy board firmware Episode 677 Resources
- Build a Larson Scanner with Sound Using an ESP32 -- Episode 670 - for more design schematics Episode 670 Resources
Bill of Materials
| Product Name | Manufacturer | Quantity | Buy Kit |
|---|---|---|---|
| ALPS ALPINE Rotary Potentiometer, 100 kohm, 1 Turns, Linear, 50 mW, ± 20%, RK09 Series | Alps Alpine | 5 | Buy Now |
| WURTH ELEKTRONIK Tactile Switch, WS-TATV Series, Top Actuated, Through Hole, Round Button, 160 gf, 50mA at 12VDC | WURTH ELEKTRONIK | 2 | Buy Now |
| Molex 2p pin header | Molex | 1 | Buy Now |
| Molex 3p pin header | Molex | 2 | Buy Now |
| Slide Switch | Knitter-Switch | 1 | Buy Now |
| Battery clip | Bud Industries | 1 | Buy Now |
| fuse tr5 | Littelfuse | 1 | Buy Now |
| Product Name | |||
| Pre assembled PCB for Cylon Vocoder | |||
| Teensy 4.0 microcontroller board | |||
| Display I2S SSD1306 | |||
| pixelleds --> ledstrip ws2812 based | |||
| Pumpkin--> 3d print or carve a real pumpkin. | |||
| optional --> 3d print housing for electronics | |||

