


After my first mistakes destroying the operational amplifiers that had been sent to me through misuse, I continued the project looking for alternatives and I discover that my capacity to make mistakes is infinite.
Looking for rail-to-rail op amps
In order to continue with the project without having to wait, I decided to look at home for what I could take advantage of. I needed rail-to-rail op amps for the triangle wave oscillator.
Searching I found an OP484 quad single-supply, 4 MHz bandwidth amplifier featuring rail-to-rail inputs and outputs from Analog Devices that I was using in a previous project.
Something similar, a light follower jumping robot controlled with a TM4C123CXL.
I already had my rail-to-rail Op Amp to generate the triangle wave. I only found one OP484 so I had to reduce the scope of the project and simplified the circuit.
Driving the motors
My next mistake was buying some IRF530NPBF MOSFETs to control the motors. I should have bought ones that were from the IRL series.
The IRF series require 10v (VGS = 10.0 V) at the gate to fully open. New problem, then I remembered the TI-RSLK that was asleep in its box for a long time.
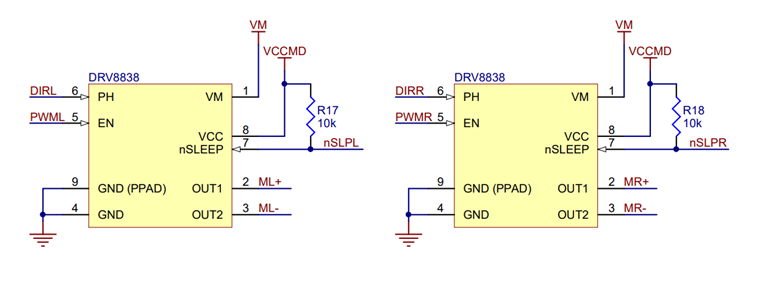
The TI-RSLK has a motor driver and power distribution board made by Pololu. The output driver block consists of Nchannel power MOSFETs configured as an H-bridge to drive the motor winding. An internal charge pump generates needed gate drive voltages.
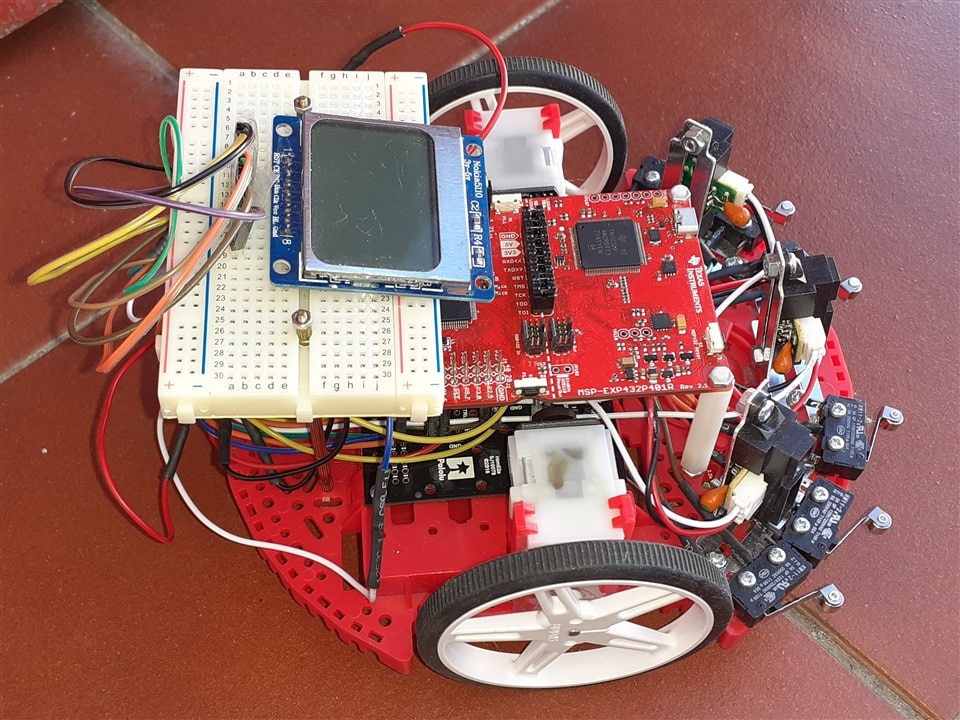
So I decided to cannibalize the TI-RSLK and use the Pololu motor driver and power distribution board.
This motor driver and power distribution board is designed specifically for the Romi chassis as a convenient way to drive the chassis’s motors and power the rest of the electronics that make up your robot. It features two DRV8838 motor drivers, one for each of the chassis’s motors, and a powerful switching step-down regulator that can supply a continuous 2.5 A at 5 V or 3.3 V.
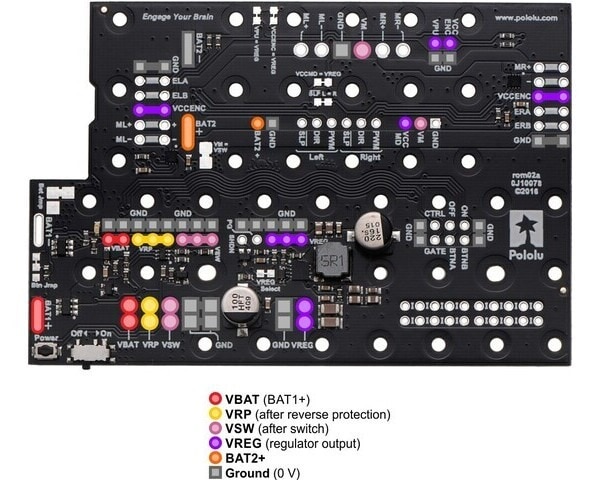
The output driver block consists of Nchannel power MOSFETs configured as an H-bridge to drive the motor winding. An internal charge pump generates needed gate drive voltages.
Line sensors
The TI-RSLK comes with a QTR-8RC Reflectance Sensor Array. The LEDs are controlled by a MOSFET with a gate normally pulled high, allowing the LEDs to be turned off by setting the MOSFET gate to a low voltage.
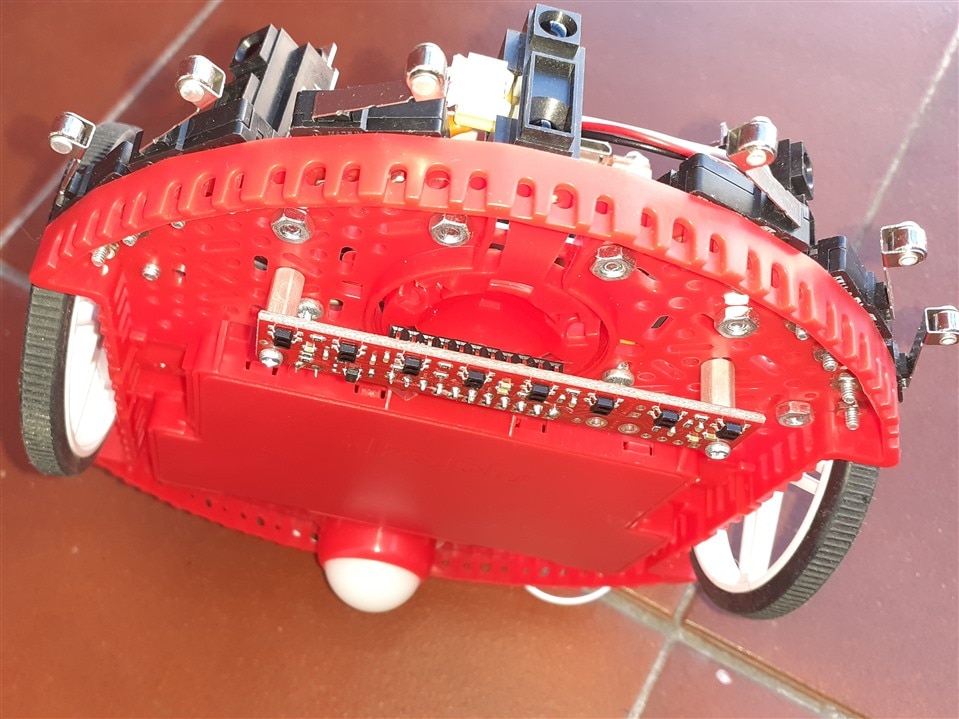
Unfortunately this line sensor could not be used for my Op Amp Line Follower. It is a recommended line sensor to be controlled from a microcontroller. You must first charge the output node by applying a voltage to its OUT pin. You can then read the reflectance by withdrawing that externally applied voltage on the OUT pin and timing how long it takes the output voltage to decay due to the integrated phototransistor.
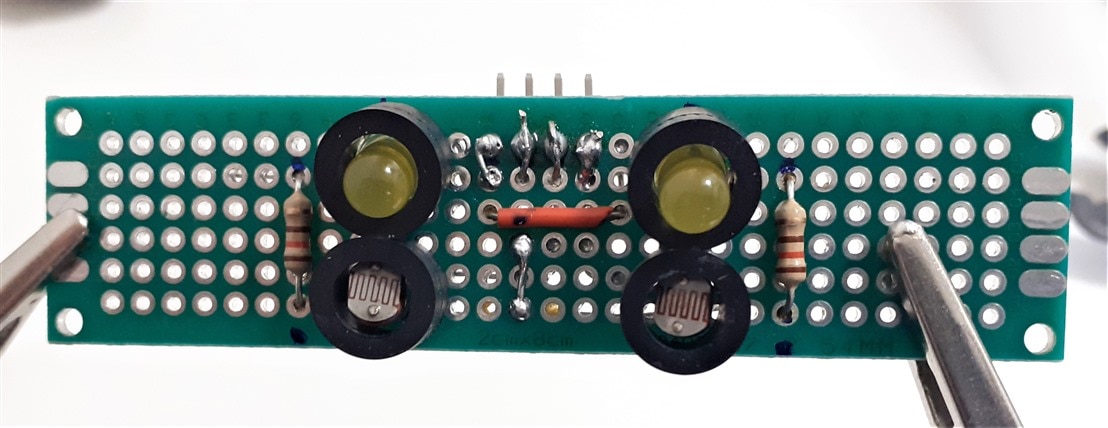
So again I went back to the light follower jumping robot and stole the photoresistors from it. I used them to react to reflected light emitted from two LEDs.

Romi chassis
And to continue with the recycling I used the chassis of the TI-RSLK. The Romi chassis is a differential-drive mobile robot platform with a diameter of 6.5″ (165 mm) and an integrated battery holder for six AA batteries. The drive wheels are located on a diameter of the circular base plate, allowing for turns or spinning in place. A large, fixed ball caster in the rear provides a smooth third point of contact.

https://www.pololu.com/product/3543/resources
Simple Line Follower Schematics
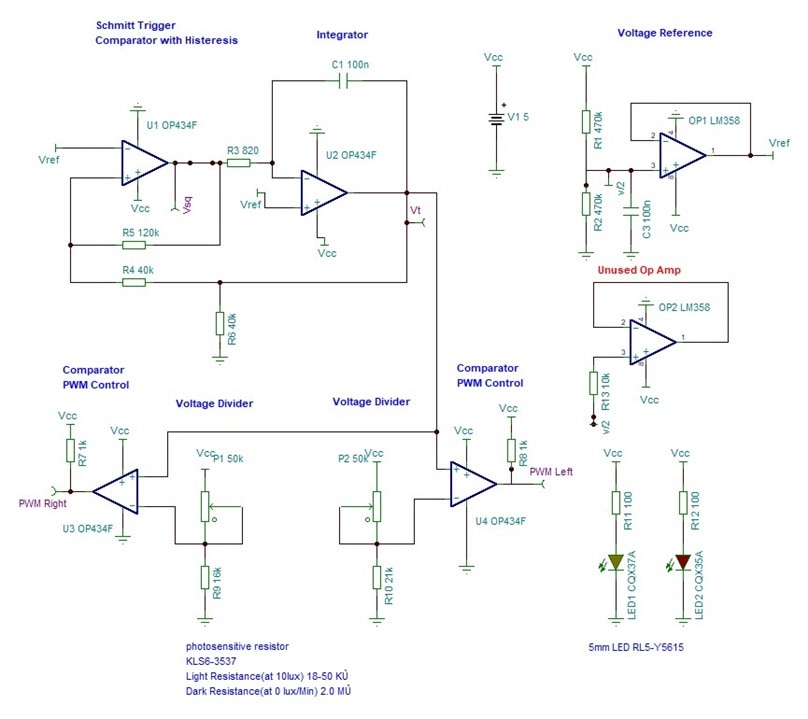
The Reference Voltage Level combines an Op-amp voltage buffer, which copies a voltage signal from a high-impedance input to a low-impedance output with a resistive voltage divider to form a fixed voltage reference.
The PWM controller was made of a triangular wave oscillator and a comparator. The triangle wave oscillator creates a symmetrical triangle wave.
The triangle wave oscillator first uses an integrator with a constant dc input voltage to generate a ramp. The integrator output drives a Schmitt trigger. The output of the Schmitt is what ought to determine the direction of the ramp. And use its output as the input to the integrator.
OP434 is used for the triangle wave oscillator and the PWM controller. All four amplifiers are used.
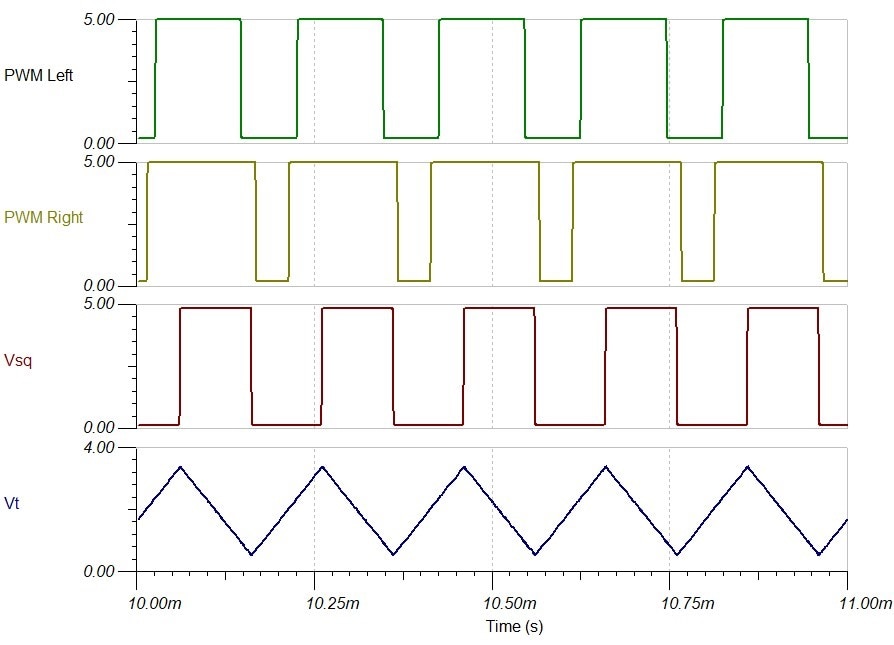
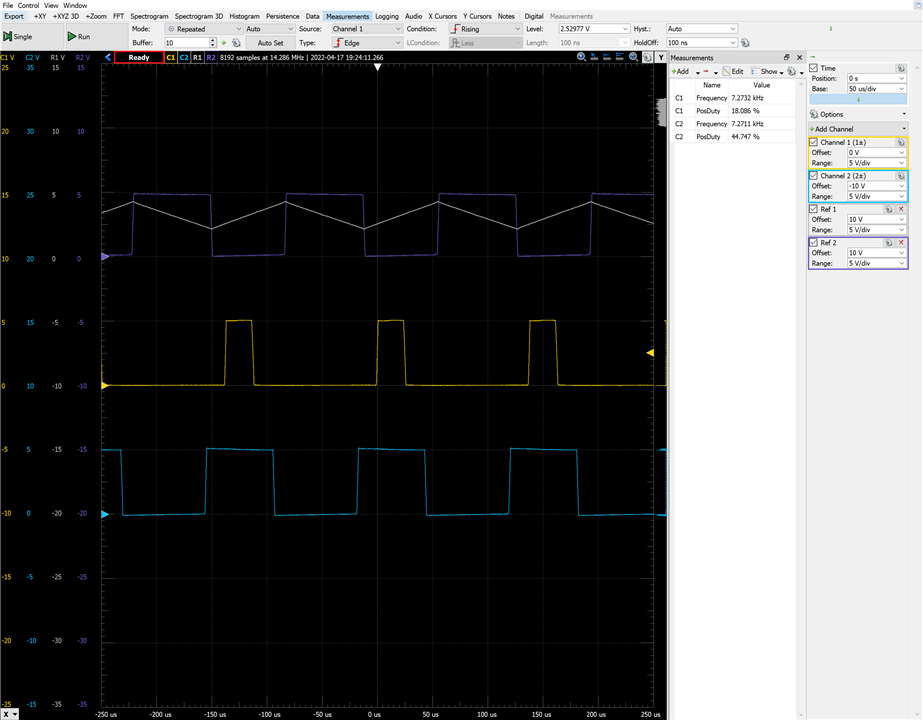
Transient response
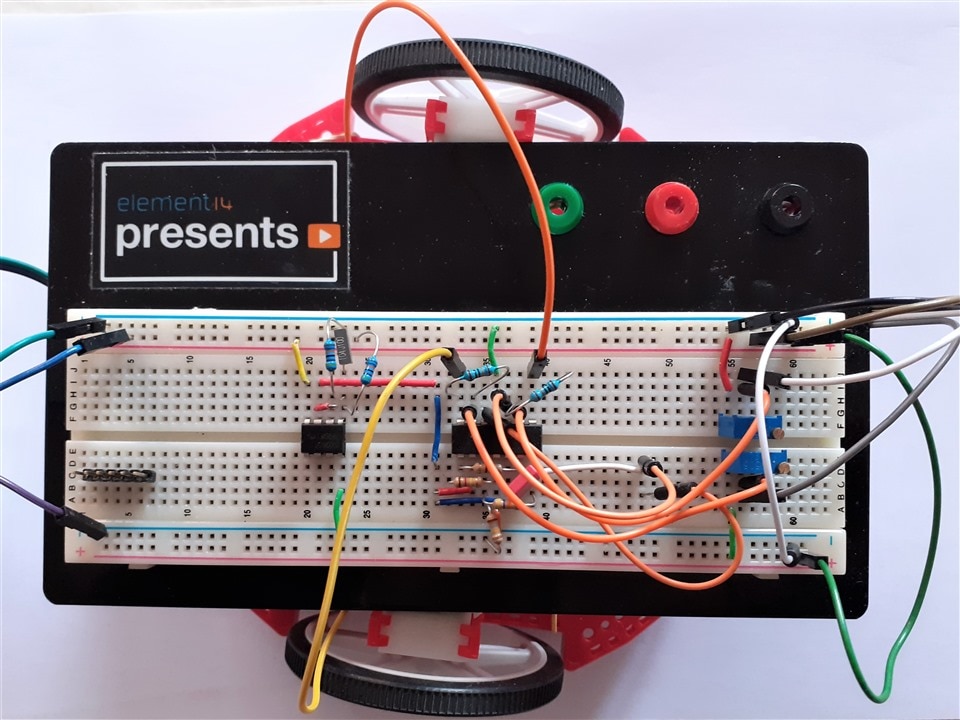
Breadboarding the circuit
For the first tests I built the circuit on a breadboard.
Checking the response without connecting the motors.
Oscillators square and triangle waves and PWM signals for both motors.
Testing with the motors
The first prototype in action. It already needs some tweaking, but the line follower... follows!
Next steps
I finally have something that "works". Now I will build the circuit on a prototyping board by soldering the components.
