


Project build Index:
Arduino Project : Three-Finger Ring - Part 1 Getting started and 3D Printing
Arduino Project : Three-Finger Ring - Part 2 Code & the Circuit
Arduino Project : Three-Finger Ring - Part 3 Assemble the Ring!
----------------------------------------------------------------------------------
I already teased this project back on "Geek Day," June 9th 2017. It's now completely finished!
This writeup will go over all the steps taken to build the screen ring. However, you dear reader won’t have to personally execute every step. You have the option of skipping steps because we will provide the 3D models for the ring and the accompanying code. You can procure the parts and print the ring without any of the design work. The one aspect of the design that you may have to change is the size of the holes in the ring to accommodate finger size.
In this section, we are going over all the mechanical aspects of the ring. What parts to gather. And how to get the ring 3D-Printed. (Part 2 is where we will cover the circuit design and code.)
Step 1: Decide on the parts to use.
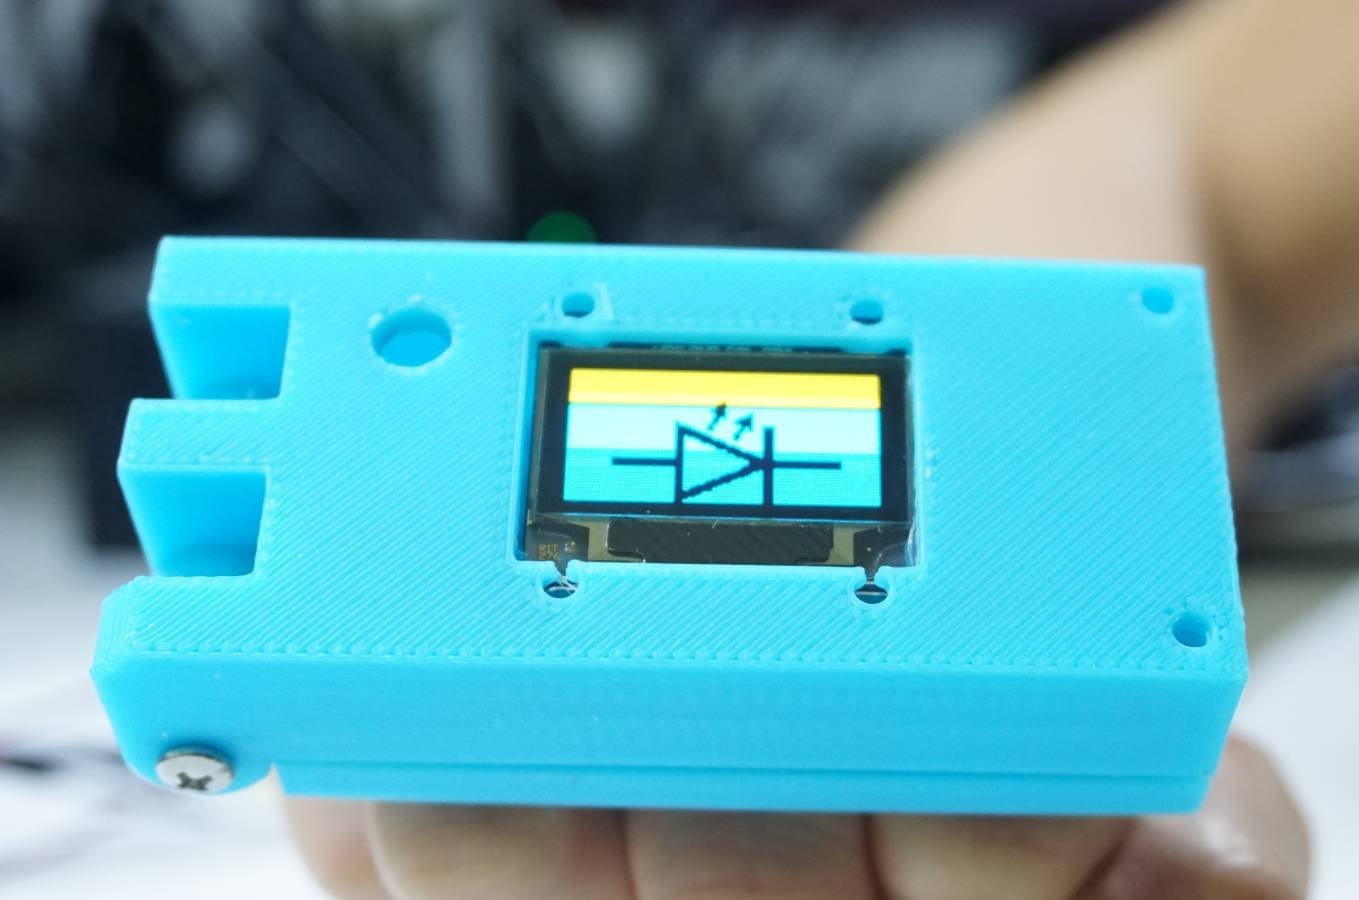
For the dangerous end of the ring, we used a 128 x 64 pixel 0.96-inch OLED screen, very similar to this screen here. The exact screen we used is permanently blue with a yellow band across the top third. The yellow top third was probably originally intended to display data like the time and the battery charge.
An Adafruit Trinket Pro 5V provided the brains. It has far more IO than is needed but that’s OK. All those extra pins and features can be used on the next version of the Screen Ring.
While the options for powering the ring are many, we went with a couple of CR2032 coin cells. Each coin cell outputs 3V so stacking two of them in series yields a handy 6 volts. This is just enough to power the Trinket and for the Trinket’s onboard MIC5225 to regulate the voltage down to 5V for the OLED screen.
Bill of Materials
Quantity 1 - OLED Display, 128x64, I2C
Quantity 1 - Tactile Switch or something roughly equivalent
Quantity 2 - Adafruit Trinket Pro 5V
Quantity 2 - CR2032 coin cells
Quantity 3 - 10k resistor
Quantity 4 – #4 x 0.5” (12.7mm) machine screws
Step 2: Design the ring.
The ring was designed in SolidWorks, but any 3D CAD software like LIBRECAD or FREECAD will work. Again, you don’t have to design anything if you don’t want to. However, for the those who would attempt it, here is a bit of design advice.
- It always helps to have at least a nebulous concept in mind.
- Start by creating 3D models of the parts you know will be used. In this case, the screen, the batteries, the button and the Trinket. The level of detail applied to each of these models is up to you. You may not need to model the Trinket down to the point where all of the components on the board are represented. However, it would be a good idea to at least make the model large enough to fill the immediate space around the Trinket.
- Start with a box big enough to hold all of these.
- Position your parts inside the box where you think you would like them.
- Start removing material where you don’t need it and adding it where necessary. For example, you might add bosses or studs for holding parts.
Once this "box full of parts" was designed, it was obvious that a single finger wasn’t going to be enough support it. For stability and coolness, it was decided that three rings bridged together would do the job. To get the size just right, a few of the ring-only sections were printed up and tested on actual hands.
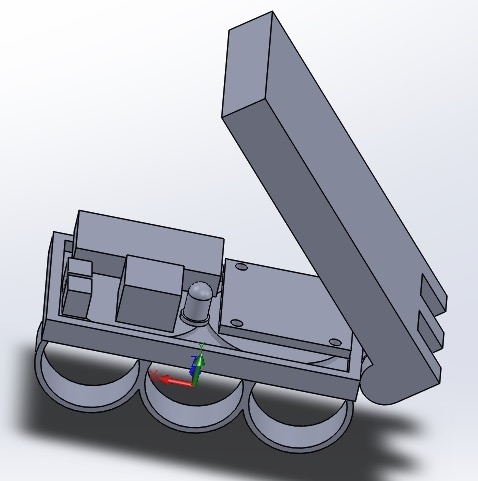
Figure 1: 3D modeling in progress. (NOTE: This image is far from the final design)
Step 3: Print the ring.
The 3D models can be sent off to a service like Shapeways or you can print them up yourself if you have access to a printer. For the ring seen here, we used our MakerGear M2. A quick shout out to MakerGear, the M2 deserves all the approbation it gets. It really is a workhorse.
We used this particular blue color (Figure 2) because it’s cool and kind of makes things look like they’re from the future. Oh, and because we had several rolls of that color already on hand.
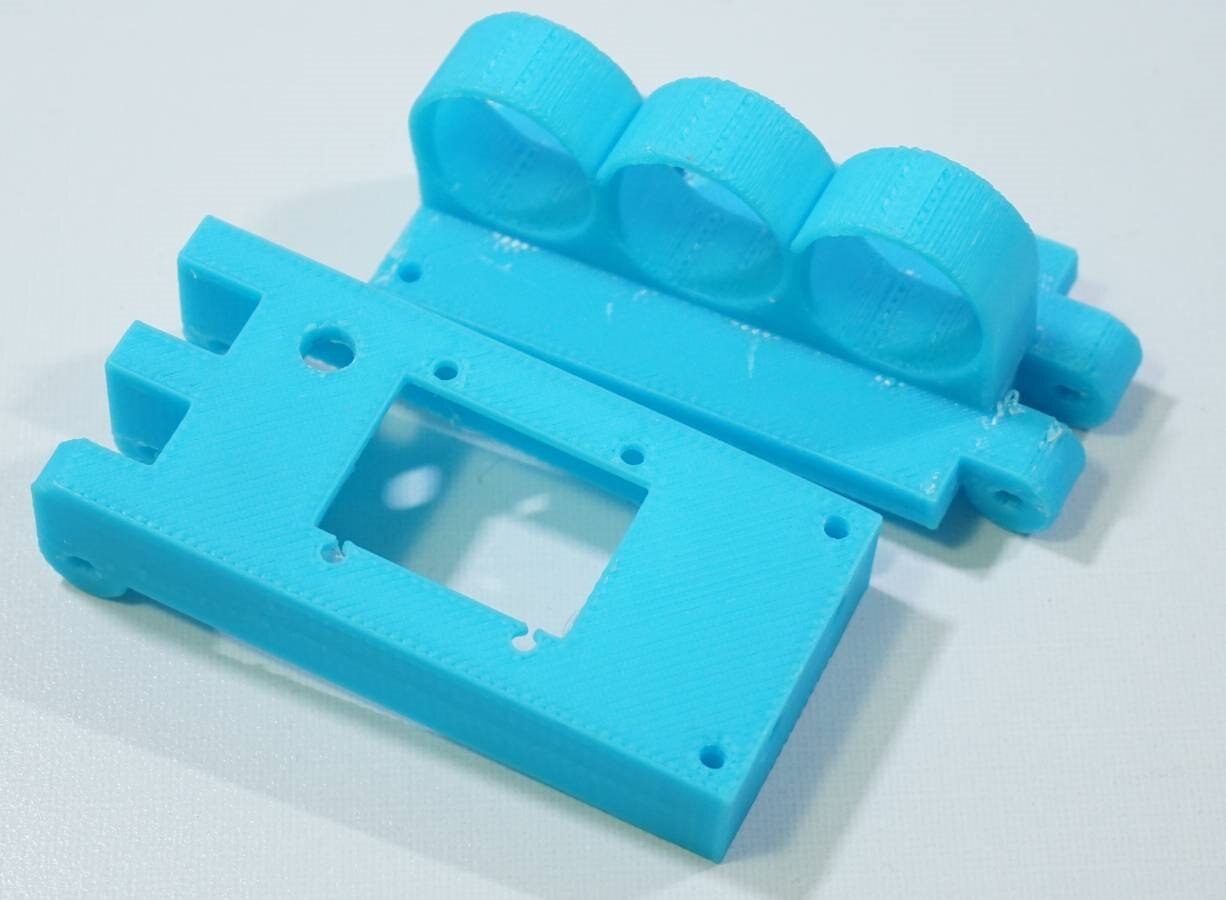
Figure 2: This blue color is so rad.
Resources: 3D Models.
Attached to this post is a collection of the 3D models used in the Three Finger Ring.
You could use this as a starting point for your custom design too.