


Medical Disclaimer
This example does not provide medical advice or diagnostic data. It is intended for informational purposes only. It is not a substitute for professional medical diagnostics, measurements, advice, diagnosis or treatment. If you think you may have a medical emergency, immediately call your doctor or dial 911.
Introduction
With COVID-19 dominating the news and our lives, we thought it would be relevant to create an Azure Sphere example application that addressed the Healthcare field.
This example demonstrates the following capabilities:
- Health measurements (the checking of health vital signs)
- Secure communication, data storage, analytics and AI of this diagnostic data (cloud-based storage and actionable insights)
- Integration with Smartphone capabilities (local display of measurements and interaction with the user)
- Calling a Direct Method from IoT Central
- Using Device Twins to control behavior of the application from IoT Central
The example is broken into two different blogs:
- Part 1: Implement the Heart Rate 4 interface along with the IoT Central application
- Part 2: Implement sending measured data to the BLE Pmod device where it will be sent to a mobile device

- Medical Disclaimer
- Introduction
- Hardware
-
Software
-
Azure Sphere Application
- Clone the Azure Sphere example repository
- Decide if you want to use IoT Central
- Create your IoT Central Application
- Upload and verify your Azure Sphere Tenant Certificate (Required if using IoT Central)
- Collect the Azure details our application needs to connect to the IoT Central Application and update the Azure Sphere Application (Required if using IoT Central)
- Build the Azure Sphere Application
- Running the Example
- IoT Central Functionality
-
Azure Sphere Application
- Video Demo
- Future Improvements
- Bonus Material
Hardware
I've listed all the hardware you need to replicate this reference design.
- Avnet Azure Sphere Starter KitAvnet Azure Sphere Starter Kit
- Heart Rate 4 Click Board
- Avnet BLE-Pmod for Azure Sphere Starter Kit (Not required for Part 1)
- I2C OLED Display
For completeness, I've listed the different Azure Sphere hardware interfaces used by each of the add on boards
- HR4: I2C interface on ISU2
- OLED Display: I2C interface on ISU2
- Avnet BLE board: UART interface on ISU0
Soldering Tasks
There are a couple of items that need to be added to the Avnet Starter Kit for this example . . .
- Soldering for beginners (If you're new to the solder iron)
- The BLE-Pmod will come with a right angle 2x6 pin connector. You need to solder this connector onto the Pmod footprint with the connector facing the outside edge of the board.
- The OLED board will need to be connected to the board with either a new 4-pin header, or by soldering the OLED display directly to the board, I recommend using the header.

Assemble the Hardware Solution
Since we're using the Avnet Azure Sphere Starter Kit, we don't require any wiring. We just need to plug in the HeartRate2 Click board into Click Socket #1, plug the BLE Pmod into the new 2x6 right angle header (not needed until the second blog), and plug in the OLED if you installed the 4-pin header.

Software
There are three pieces of software required for this example.
- Azure Sphere Application: Reads the HR4 Click board and sends telemetry data to IoT Central and to the BLE device
- BLE Application: Interfaces with the Azure Sphere application over one of the UARTs and sends/receives data to/from the mobile application (not needed until blog #2)
- Mobile Application: Displays telemetry data and interacts with the user (not needed until blog #2)
Azure Sphere Application
The Azure Sphere application runs on the MT3620 A7 core, so it's a high level application. Tasks that we need to complete in this section . . .
- Clone the GitHub repository
- Decide if you want to use IoT Central
- If you want to use IoT Central
- Create an IoT Central Application from a template
- Upload and verify your Azure Sphere Tenant Certificate
- Collect the Azure details our application needs to connect to the IoT Central Application and update the Azure Sphere Application
- Build the Azure Sphere Application
- Run the application
- Migrate our device in IoT Central to the new template
Clone the Azure Sphere example repository
- Open Visual Studio 2019
- Select the "Clone a repository" option
- Enter "https://github.com/Avnet/AzureSphereMedicalRefDesign.git" for the Repository location
- Change the Local path if you want to
- Click on the "Clone" button

- Visual Studio will download the project
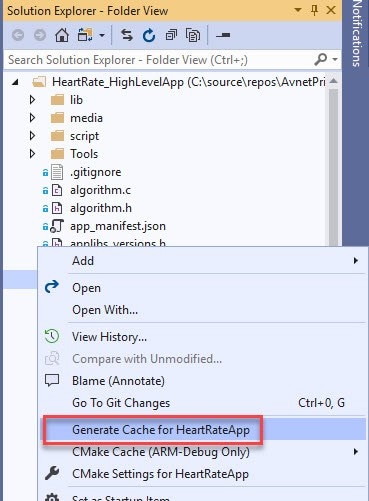
- Select the CMakeList.txt file, right click and select "Generate Cache for HeartRateApp"
- CMake will generate all the required build scripts
Decide if you want to use IoT Central
The Azure Sphere Application is written to connect to an IoT Central Application, but that's not a requirement for the example. By default the application will attempt to connect to Azure IoT Central.
- If you don't want the application to connect to the cloud make the following change in the build_options.h file
- Comment out line #5

To continue without using IoT Central skip down to the section titled "Build the Azure Sphere Application".
Create your IoT Central Application
We've created an IoT Central Application Template that can be used to stand-up your own IoT Central application in just a couple of minutes.
- Follow this link to access the template
- Modify the Application name if you wish
- Select your Pricing plan
- Provide the contact information for the Free plan
- Or provide your Billing information for one of the Standard plans
- Click on the "Create" button at the bottom of the page
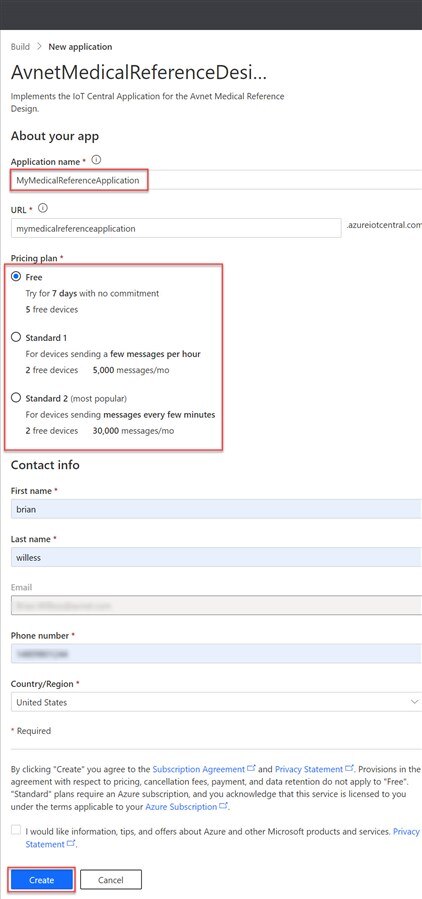
- Your Azure IoT Central Application is generated and opens
- Make a note or bookmark the IoT Central web page URL
Upload and verify your Azure Sphere Tenant Certificate (Required if using IoT Central)
By default the IoT Central application will use a Device Provisioning Service (DPS) to automatically provision Azure Sphere devices that connect to the application. We need to create a new enrollment group and provide the Azure Sphere Tenant CA Certificate to the application so that it knows to allow any device from our Azure Sphere Tenant to connect and provision into the application.
- Open the "Azure Sphere Developer Command Prompt Preview" application
- Start > Azure Sphere > Azure Sphere Developer Command Prompt Preview
- Login to your Azure Sphere Tenant
- azsphere login
- Download the Azure Sphere Tenant CA Certificate
- azsphere tenant download-ca-certificate -o <path to store certificate>\<filename>.cer
- If you receive an error verify that you're saving the file to a directory where you have write privileges
- azsphere tenant download-ca-certificate -o <path to store certificate>\<filename>.cer

- Go back to the Azure IoT Central Application
- From the left hand menu navigate to: Administration > Device Connection > "+ Create enrollment group"

- The "Create new enrollment group" dialog opens
- Type in the name for your new enrollment group.
- I typically name this after the Azure Sphere Tenant that I'm using
- Select Group type "IoT devices"
- Select Attestation type "Certificates (X.509)"
- Select "+ Manage primary" under the Certificates (X.509)" header
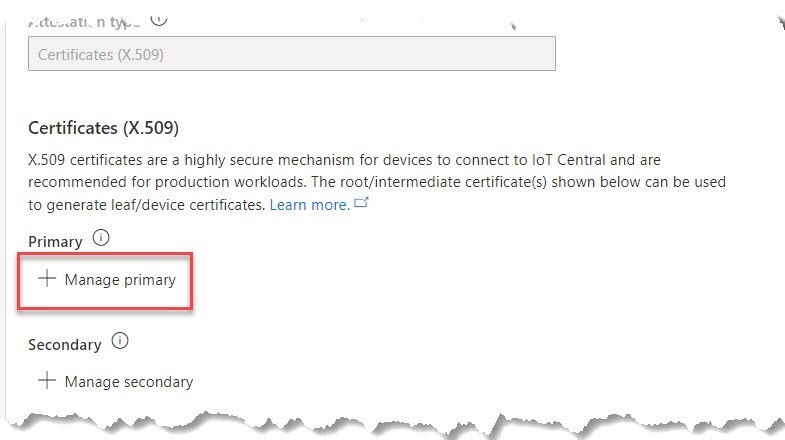
- The Primary certificate dialog opens
- Use the folder button next to "Primary" to browse to and select the certificate file we downloaded from the Azure Sphere Tenant
- Copy the verification code using the copy button next to the circle with an arrow

- Now go back to the "Azure Sphere Developer Command Prompt Preview" application to generate and download a verification certificate
- Enter the following command
- azsphere tenant download-validation-certificate --verificationcode <verification code from IoT Central application> -o <path to store validation certificate>\<filename>.cer
- This command sends the validation code to the Azure Sphere Tenant where it will generate a certificate with the validation code embedded into the certificate.
- azsphere tenant download-validation-certificate --verificationcode <verification code from IoT Central application> -o <path to store validation certificate>\<filename>.cer

- Upload the verification certificate
- Back in the Azure IoT Central Application, click on the "Verify" button
- A file browser window opens, select the validation certificate we just downloaded
- The certificate is uploaded where it's decrypted using the original CA certificate we uploaded and the verification code is matched against the supplied code
- The Primary certificate dialog is updated to show the the certificate is "Verified"
- Click the "Close" button to exit the dialog

- Click the "Save" button at the top of the form
Collect the Azure details our application needs to connect to the IoT Central Application and update the Azure Sphere Application (Required if using IoT Central)
We're going to use a tool called "ShowIoTCentralConfig.exe" to pull all the bits we need to populate our app_manifest.json file. This utility is included in the repo along with the Avnet example code.
- There are 4 pieces of information we need to provide for our application to connect to our IoT Central application
- DPS Scope ID (This is case sensitive)
- DPS Global Endpoint FQDN (This is case sensitive)
- IoT Hub FQDN(s) (These are case sensitive)
- Azure Sphere Tenant GUID
- We can find three of the four easily, however the IoT Hub FQDNs are buried deep in the IoT Central implementation. Remember that for our Azure Sphere application to be able to talk to any external server, we need to provide the FQDN or IP address in the app_manifest.json file.
- Open a command line window, or use the Azure Sphere Command Prompt Preview CLI
- Change directories to your repo/HeartRate_HighLevelApp/Tools/win-x64 directory
- Run the "ShowIoTCentralConfig.exe" utility
- The application will run and ask for different pieces of information. The utility will use this information to identify your specific IoT Central Application across all of Azure and to confirm that you have admin access to the IoT Central Application.
- Are you using a legacy (2018) IoT Central application (Y/N):
- > N, Respond N for no and press the enter key
- Enter the IoT Central App URL (e.g. https://myapp.azureiotcentral.com)
- > Enter the URL for your IoT Central Application
- Enter your Azure IoT Central application API Token
- To generate a API Token go back to your IoT Central Application
- From the left menu navigate to Administration > API tokens > "+ Generate token"

- Give your token any name you want
- Keep the Role as "Administrator"
- Click on the "Generate" button

- A token is generated and displayed

- Note that this is the only time you'll be able to see or copy the token!
- Copy the token
- Paste the token into the command prompt window in response to the "Enter your Azure IoT Central application API Token" request
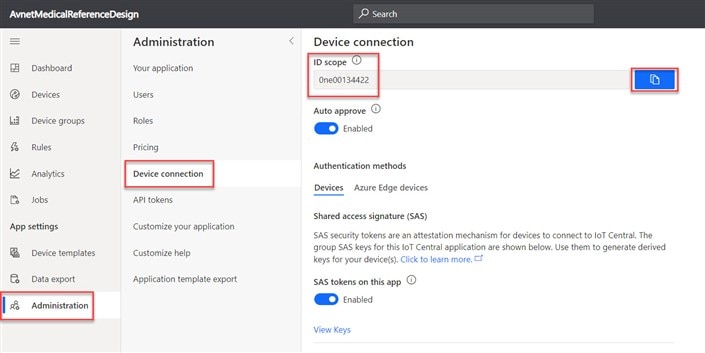
- Enter the ID Scope from the IoT Central App
- Back in the IoT Central Application from the left menu Administration > Device connection ID scope
- Copy the ID scope and paste it into your command window
- The utility gathers data we need for the app_manifest.json file and presents it to the user
- The graphic below shows all my responses in red boxes and the information we need to copy/paste into our app_manifest.json file in yellow boxes

- The last piece of information we need is our Azure Sphere Tenant GUID, enter the command below to get the GUID
- azsphere tenant show-selected

- Use the information from these two commands and update your app_manifest.json file in your Azure Sphere project
- My updated app_manifest.json file is shown below
- The interface will identify any JSON data formatting errors with red squiggly lines

Build the Azure Sphere Application
- From the Visual Studio Pull Down Menus Build > Build All
- Make sure your device is connected to WiFi
- azsphere device wifi show-status
- To add a wifi network to your device
- azsphere device wifi add -s <new SSID> -p <new SSID password> -t
- Run the application
- Select the GDB Debugger (HLCore) Target

- Sideload and run the application by clicking on the "GDB Debugger (HLCore) button:
- The application sideloads onto the device and runs
- The application will connect to the IoT Connect application and be configured into the application
- If you see a device provisioning error . . .
- Double check your scope ID and DeviceAuthentication app_manifest.json entries
- Verify that the CA certificate was correctly uploaded and verified
- If you see a IOTHUB connection error
- Verify that you entered the IoT Hub host names in the app_manifest.json file
- Review Azure Sphere network requirements here.
- Try using a different WiFi network like the hotspot on your mobile device
- If you see a device provisioning error . . .


At this point the application is running and is connected to our Azure IoT Central application. However, we need to associated the device with a device template in IoT Central so that the application knows how to manage the device.
- Go back to your IoT Central Application
- From the left menu, navigate to Devices > All devices
- You'll see an entry in the list that has your device ID listed as the Device name and Device Id
- Migrate the device into the AvnetMedicalDevice template by selecting your device, then the ellipses "..." or "Migrate" if you can see that option
- Select "Migrate" from the fly out menu

- Select the AvnetMedicalDevice template
- Click on the "Migrate" button

- The device is migrated into the new template

Running the Example
COVID-19 Precautions: See CDC guidelines on this topic
For your safety , Wash hands before and after touching equipment used in this test! It's recommended that you also sanitize the HR4 sensor and other contact areas prior to use.
To run the example you need to start the test and place a finger onto the HR4 sensor . . .
- Start the test by either . . .
- Pressing button A, (the center button)
- Running the "Start HR Test" direct method call from IoT Central
- Devices > <your device> > Overview > "Start HR Test" > Run
- You know that the test is running when the Red LED on the HR4 click is ON and the OLED displays "Place a finger on sensor"
- Place a finger on the sensor
- You may need to play with finger placement to get a good reading
- The test works better for me when I use one of my smaller fingers
- Press the finger firmly on the sensor and keep it still
- You may need to play with finger placement to get a good reading
- The application will detect the finger and transition to the "calibrate" step
- If the calibration fails, you'll be prompted to reposition your finger
- If the calibration passes, the application will take 5 - 30 data samples
- If any one data sample is bad, the test will restart
- If a stable HR is determined across 5 samples the average of the 5 samples is calculated and displayed (and sent to Azure if configured)
- If 30 samples are taken and no stable reading is found the median HR value from all the readings is reported
- The results are displayed on the OLED for 30 seconds
- The test will either automatically restart or wait for the user to restart the test using the "Auto Restart HR Test" device twin control
Note: If you elected to run the non-connected application, I encourage you to go back and setup the IoT Central Application. IoT is all about collecting data from IoT Things and doing something meaningful with the data in the cloud. This example is easy to setup. You'll be able to exercise and learn about some fundamental Cloud to Device (C2D) controls, Device Twins and Direct Methods. Additionally, as long as you don't add more than two devices it's 100% free!
IoT Central Functionality
- You can access the device dashboards (views) by selecting Devices > All devices > < your device's ID>
- There are 4 views implemented in the "AvnetMedicalDevice" template
- About
- Device Twin Control
- Overview
- Command
About (View)
This view shows static information about the IoT Device. All this information is provided by the device when it connects to the IoT Hub. The {key:value} pairs are sent up as Device Twin "reported" properties

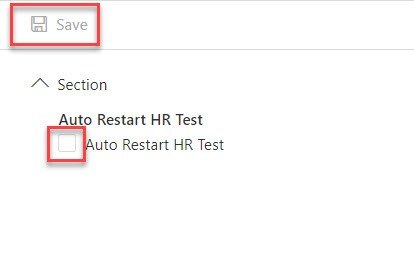
Device Twin Control (View)
There is only one device twin control in this application, "Auto Restart HR Test." If this is selected (set to true), then the Azure Sphere application will perform a HR test, display the results for 30 seconds, then start a new test. If this item is set to false or not selected, then the application will go into an idle state after displaying the test results for 30 seconds. The user would need to initiate a new test process at that time by either pressing button A or executing the "Start HR Test" command from the cloud.
To change the value, select/un-select the box then click on the save link at the top of the form.
Overview (View)
Medical Disclaimer
This example does not provide medical advice or diagnostic data. It is intended for informational purposes only. It is not a substitute for professional medical diagnostics, measurements, advice, diagnosis or treatment. If you think you may have a medical emergency, immediately call your doctor or dial 911.
The Overview view shows the telemetry data from our device.
- The three boxes at the top show the last reported values
- The Graph shows the HR and SP02 readings as well as the number of samples used to determine the measured values
- The Start HR Test will take you to the command view where you can send the Start HR Test direct method to the device

Video Demo
Future Improvements
We plan on expanding this application in the near future. Here are some ideas . . .
- Enhance the OLED interactions during testing
- Add BLE connectivity to a mobile device (planned in blog #2)
- Add user authenticating from mobile device before transmitting data to IoT Central
- Add contactless temperature measurements
- Add a thermal display to capture temperature
Bonus Material
- Link to the files for my 3D printed Azure Sphere Starter Kit case: Link
Top Comments