


Introduction
At some stage, I'm going to actually have to interact with a physical instrument. LabVIEW does this with VISA drivers (Virtual Instrument Software Architecture) which will allow control over Ethernet/LXI, GPIB, Serial, USB and other protocols - NI has an overview in this white paper. A lot (majority?) of reasonably well-branded instruments and SBCs will support at least one of these connection options so should be accessible to LabVIEW although there must be some means of actually interacting - a protocol. Again, a lot of well-branded instruments will support a SCPI (Standard Commands for Programmable Instruments) standard however, an SBC, e.g. Arduino or Raspberry Pi, will almost certainly require some form of firmware to be installed to do this. Now, it doesn't need to be SCPI, that's just a standard, and could instead be a proprietary syntax especially where memory remains tight.
Challengers have been issued with a Raspberry Pi Pico so it makes sense to use that, as well as bench instruments I have (which are already SCPI drivable via a USB interface.) In order to use the Pico I will install firmware developed by Jan Cumps, details to follow below. This post looks at getting that installed and checked and then takes a look at what is required to actually interact with an instrument.
Table of Contents
Setting up the Pi Pico
There are two stages to this: setting up a development environment for the Pi Pico and installing Jan's firmware.
Preparing the Development Environment
I'm describing this for a Windows environment so I'm afraid with Linux and MacOS some additional research will be required. By far the easiest way to do this is to use the Raspberry Pi Pico Windows Installer. Take a look at the Getting Started with pico document, section 9.2 on page 39. This provides a link to Github where the installer can be found: download the latest release, available on the Github landing page, run it and follow the installation instructions - it will install Microsoft Visual Studio Code for the IDE, if it isn't already, and the Pico SDK amongst the other necessary tools. Note that the same document provides instructions for MacOS, manual installation instructions for Windows and information for using other IDEs. When prompted, I installed the examples, built the blinky application and tested it - there is an on-board LED.
I found no issues with this approach but I did already have VS Code installed, with CMake and Build Tools for Visual Studio. This blog post by Shabaz was useful for additional information and looks like it would also be a good place to ask questions as there's some good experience on E14 now with using the Pico.
Installing the Firmware
Unsurprisingly, none of the examples that come with the SDK provide a USB/SCPI interface. Fortunately, Jan Cumps has developed the Pico SCPI LabTool (PST) to provide such a feature. I shall be climbing on the shoulders of giants and using that.
Shabaz has provided a detailed post for installing the PST firmware here and you want to start from the point where the development environment is setup. He describes installing the PST for the CLion IDE and this is where I stumbled a little as I am using Visual Studio Code. It took me a while to figure it out, as it's somewhat different, obviously, and some of what I cover below may be because I wasn't wholly sure about what I was doing but it was how I ended up with it working.
Remember where the Pico SDK was installed and where the scpi-parser library was cloned as I'll need that information.
For the Github commands, I didn't bother with the command line as detailed by Shabaz but used GitKraken.
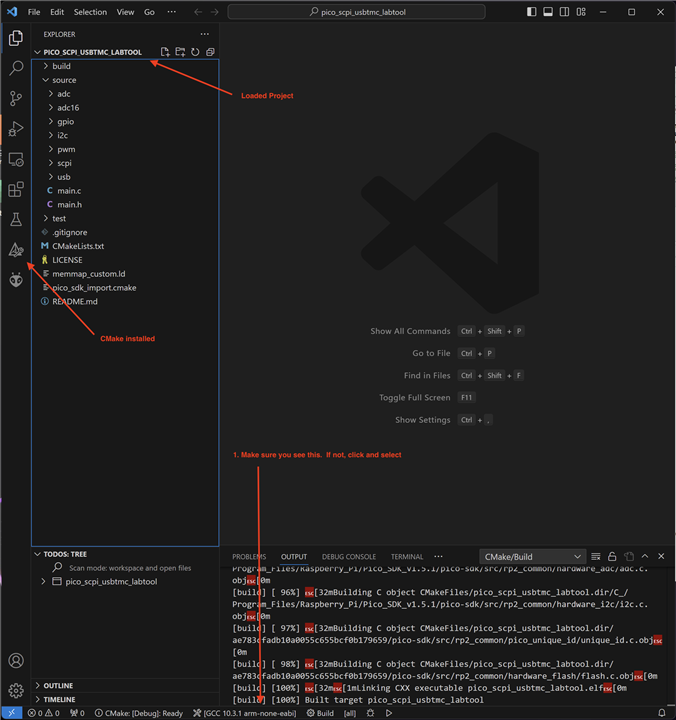
After cloning the PST firmware then open Visual Studio and load the PST project. Make sure the correct compiler is selected.
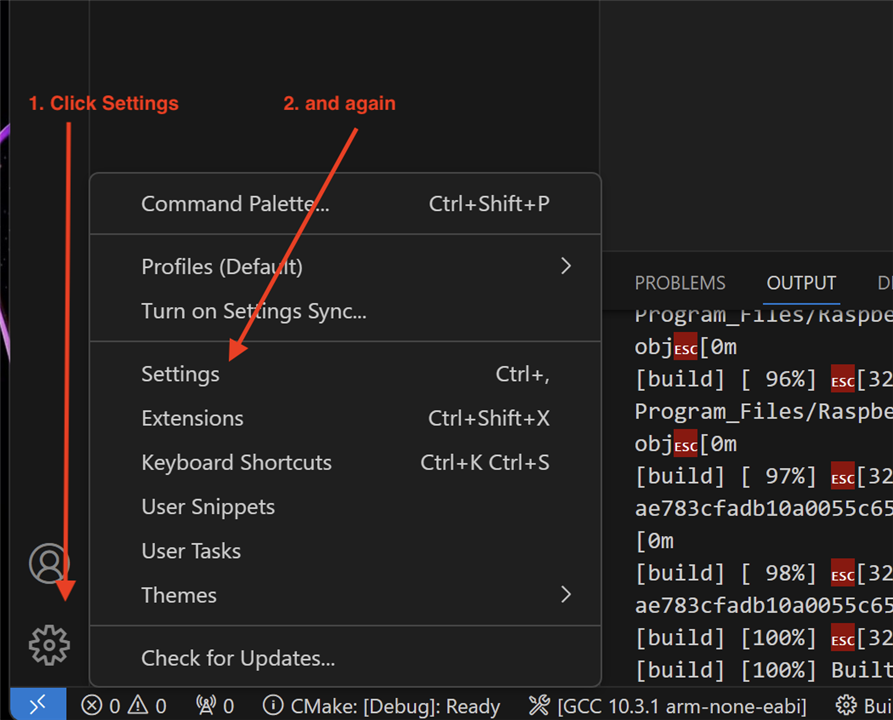
Next, some Settings need to be changed:
Add paths to the SCPI library and the Pico SDK. Its a bit garbled in the screenshot, it seems to be a bug in VSC or an issue with running it in a VM:
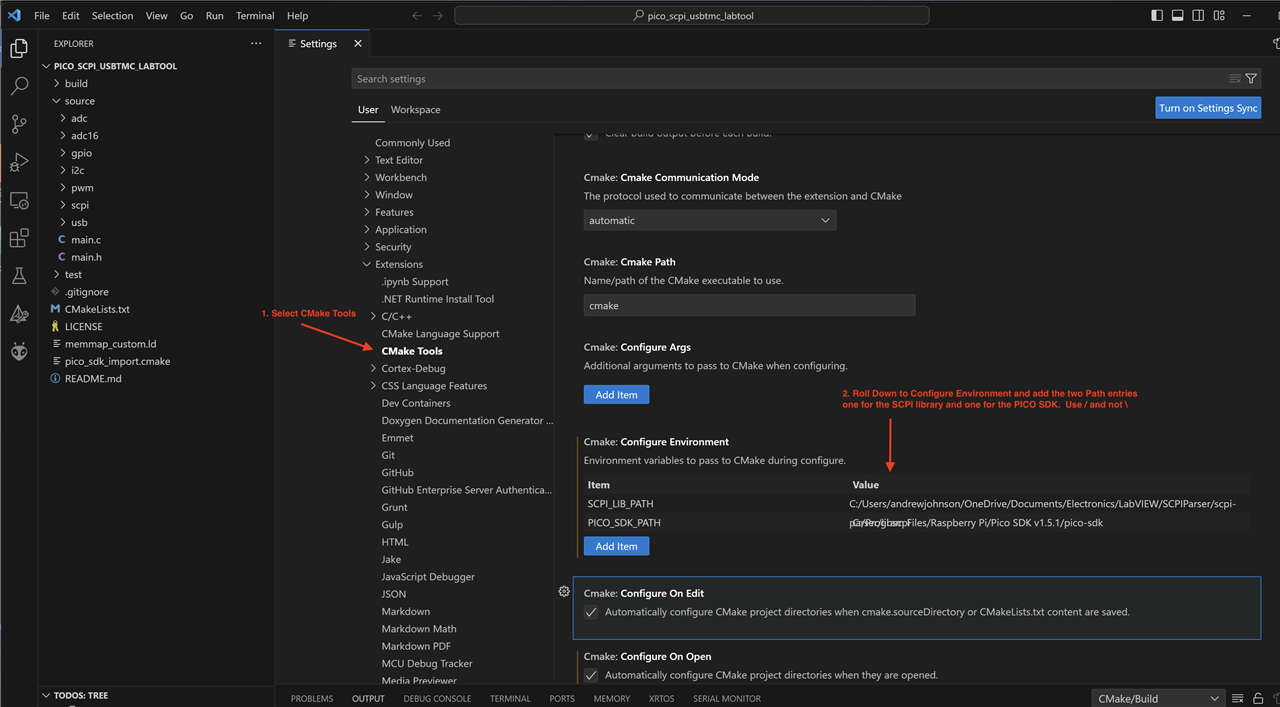
At this point, the PST should build (click the Build button at the bottom of the window) and the .uf2 file loaded to the USB connected Pico. The issue that took me the longest to work out was that the directory structure must be specified with a forward slash (/) and not a backslash (\) which is contrary to Windows - this may be because I'm running a VM on MacOS??
Testing the Firmware
Once installed, I can use NI tools to test it. Firstly, make sure the Visa Interactive Control application is installed - the download is here. Then it's worth running NI Max which was installed with LabVIEW. The Pico must be plugged in and not set to map to a drive.
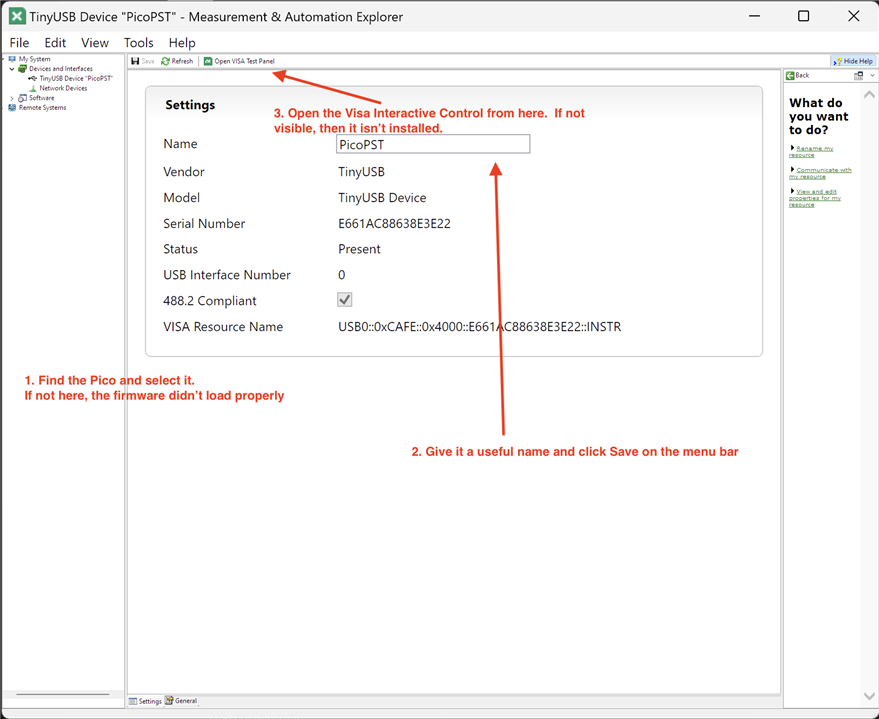
The very small font is a result of the application not playing well in the VM with a Retina screen. It's worth giving the Instrument a unique name (called an Alias in LabVIEW) to help identify it and this name can be used in a LabVIEW application rather than the VISA Resource Name which is not at all distinguishing. Launching the Visa Interactive Control (Open Visa Test Panel in NI Max):
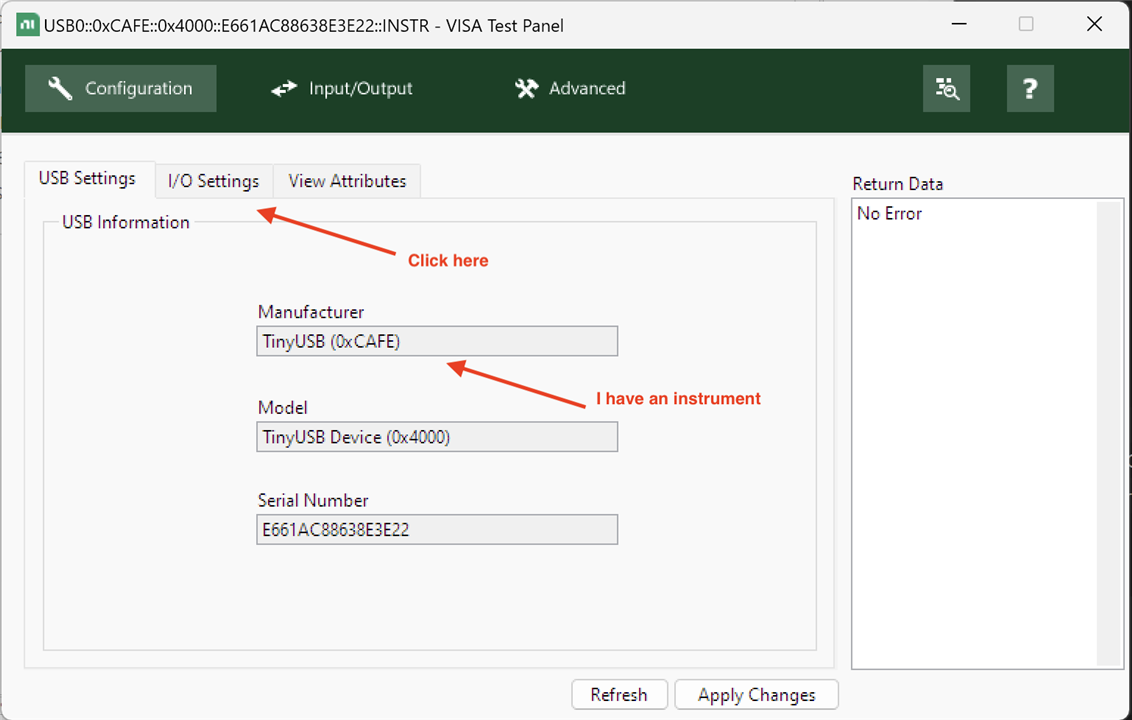
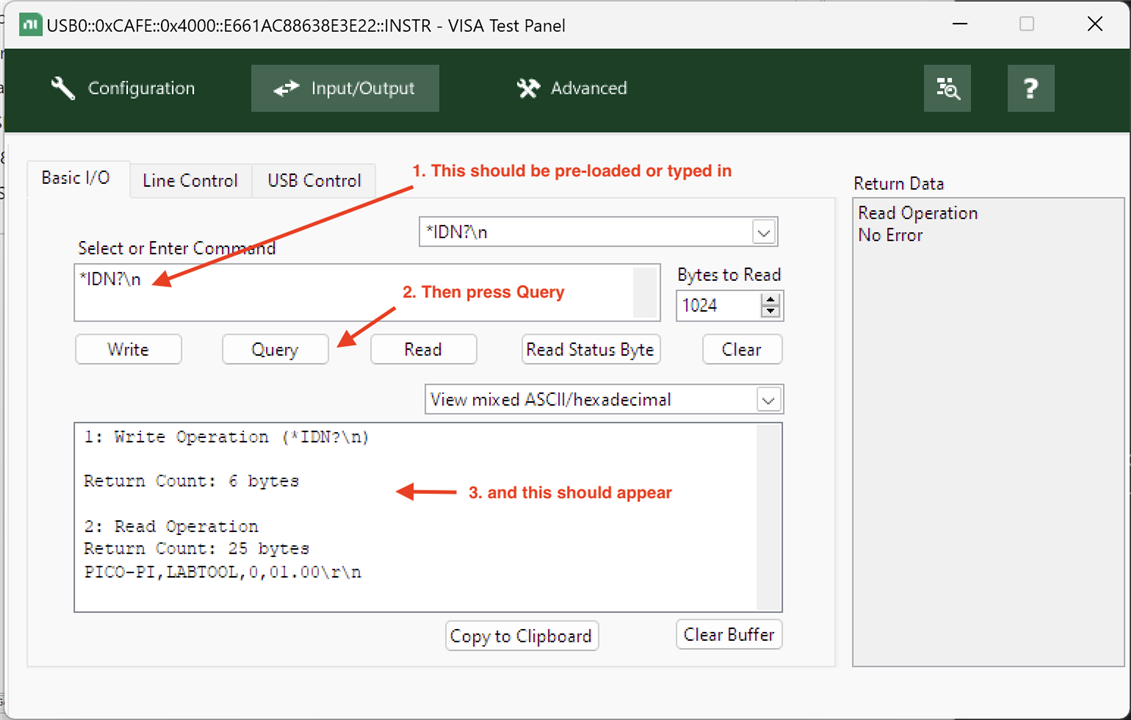
The result shows that the firmware is installed and running and responding to commands. This means the LabVIEW ought to be able to talk to it. Note the name of the instrument on the window title bar - the Canonical name in LabVIEW terms - and you'll see why assigning an alias is a good idea (although it isn't used by the Visa Test Panel for some reason.)
LabVIEW and Instruments
So, now that I can verify that the Pico is accessible using the Visa Test Panel, I want to create a simple program in LabVIEW to do the same thing and make sure that I understand at least the basics of what is required. In this video, I create the program, debug it and prove that it's actually quite a simple task to achieve.
Summary
- Use the Raspberry Pi Pico Getting Starting Guide and Windows Installer to set up the Pico for development.
- Build on Jan's work by installing his SCPI library to the Pico rather than create my own.
- Use NI-Max to give the VISA device an alias that readily identifies it. Without doing this, every connected instrument will have an unintelligible VISA Resource Name and it will be nigh-on impossible to tell them apart. NI-Max can also be used to set common settings as well, for example the baud rate for instruments that are connected serially.
- Use Visa Test Panel (VISA Interactive Control) to test that a connection can be made.
- It's not complicated to get LabVIEW interacting with an instrument: open - one or more write and read commands - close.
- Must remember to configure String controls used for a SCPI command to handle control characters correctly.
- Use NI I-O Trace to see what is actually happening between LabVIEW and the instrument to aid debugging; also LabVIEW has debugging features built in to aid in seeing what is actually happening when a program runs.
Next: Anatomy of a VI.
Top Comments