


- Introduction
- Install Visual Studio Code
- Install CMake
- Install Build Tools for Visual Studio
- Install Python 3, Git and ARM GCC Compiler
- Get Code
- Building at the Command Line
- Fixing NMake not found issues
- Building with Visual Code
- Running the Application
- Troubleshooting your Running Application
- Using Intellisense (Code Assistance)
- Creating your Own Project Folder
- Summary
Note: Also check out the following blog post which is related to the same topic, but using a development environment called CLion:
Using CLion for Easier Coding with Pi Pico and C/C++
Introduction
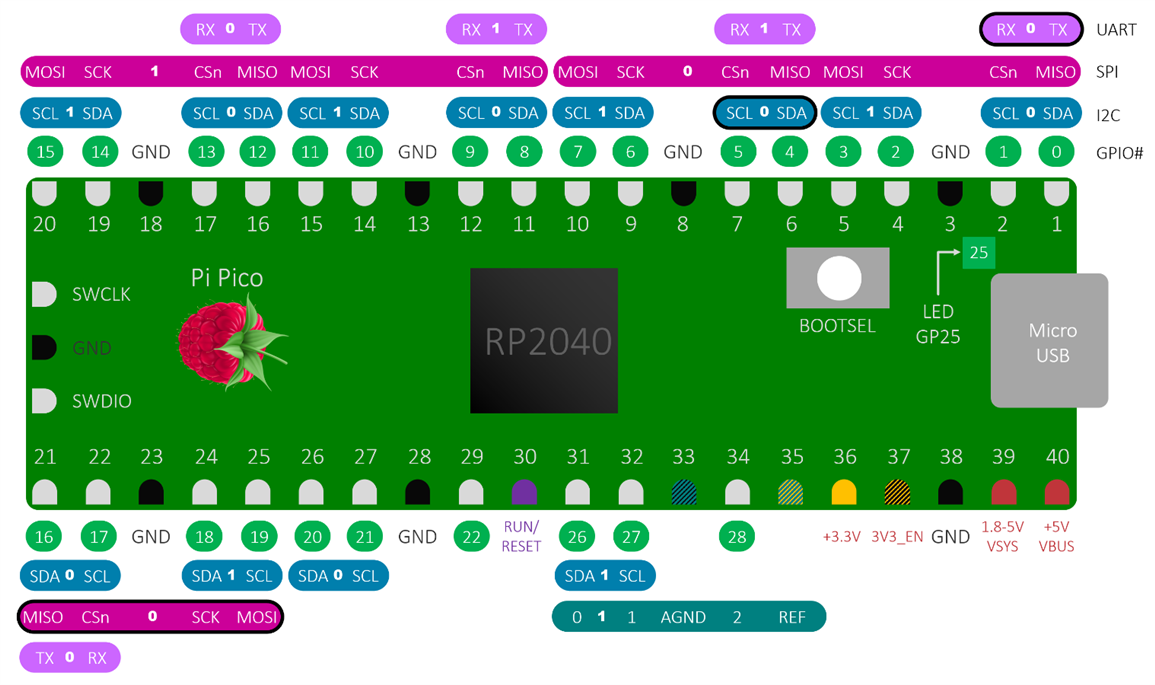
The Raspberry Pi Pico is a low-cost microcontroller board containing a chip with dual ARM Cortex-M0 cores and 256 kBytes of RAM and a mix of typical peripherals to connect to external hardware. There is also 2 MBytes of Flash memory on the board, and a USB port.
The Pi Pico can be programmed using C/C++ or Python, among other languages. Like some other microcontroller boards, when you hold down a boot button and plug the USB port into a PC, a drive letter appears just like a USB memory key. If you're using C/C++ then executables can be drag-and-dropped into the drive letter for programming the board.
This document explains what steps are needed to be performed on Windows PCs (other platforms are also supported but not documented here) in order to set it up ready for writing and building C/C++ applications to run on the Pi Pico. The steps here were done using Windows 10 64-bit (x64).
For further information, check the main document and comments here: Raspberry Pi Pico
Install Visual Studio Code
Follow the Visual Studio Code website information to install it. Then, install the extension CMake Tools as shown here:

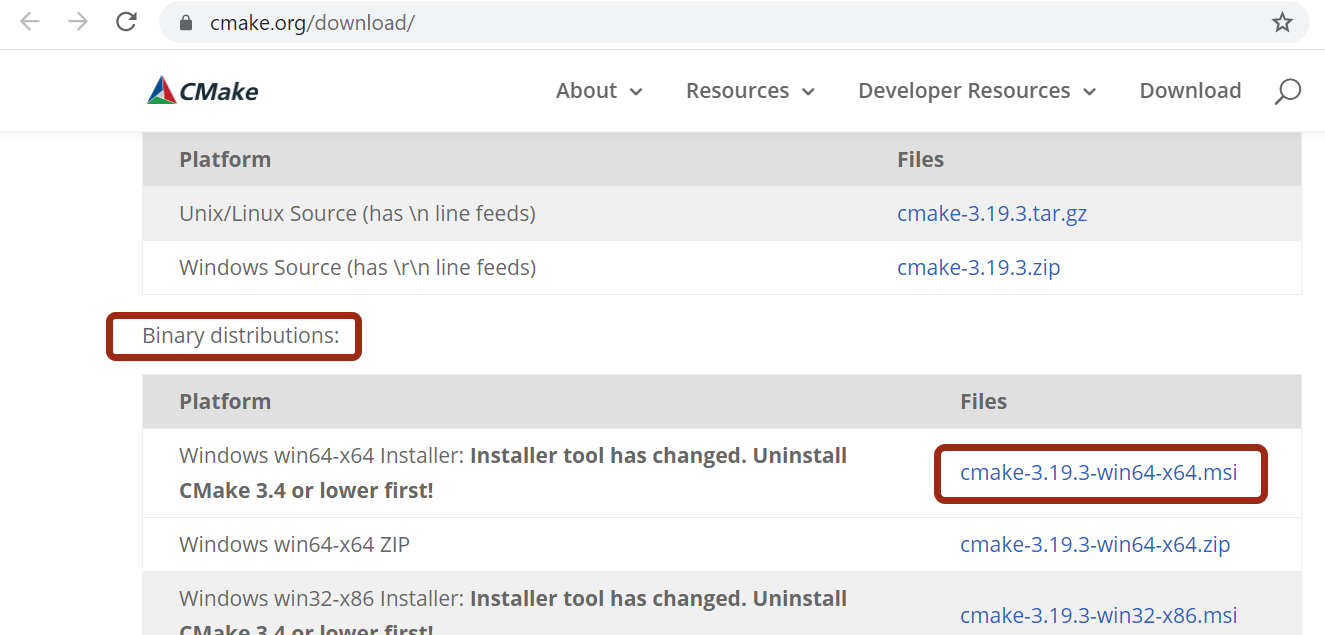
Install CMake
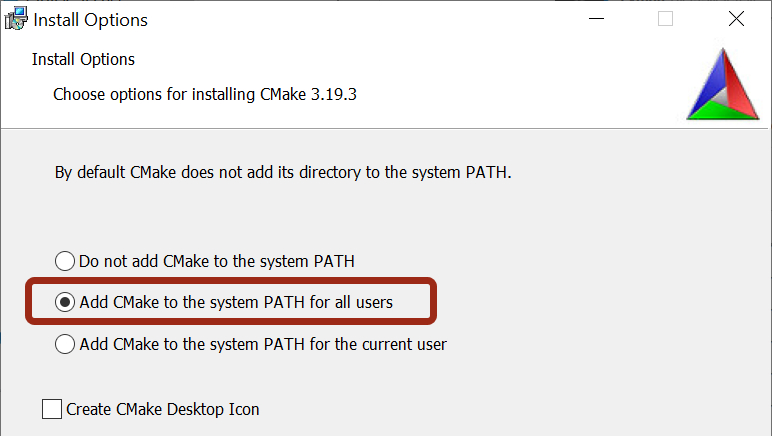
Download and install:
During install select this option:
Install Build Tools for Visual Studio
Download and install:
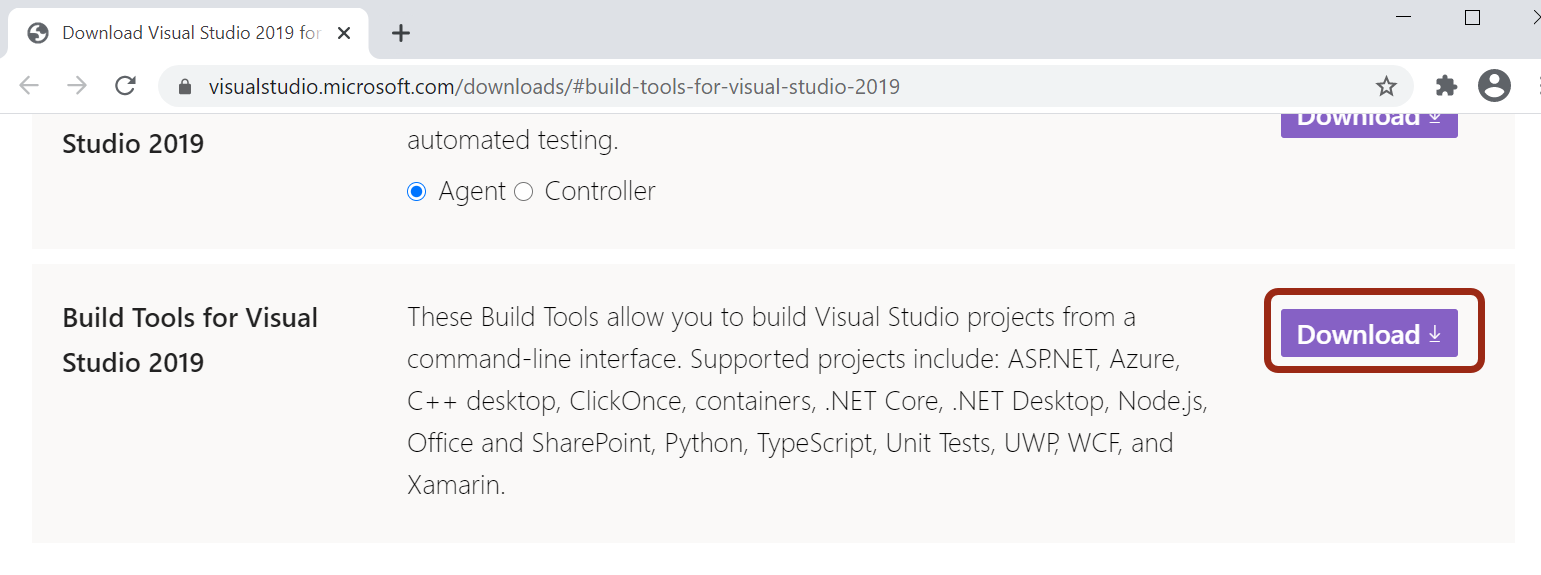
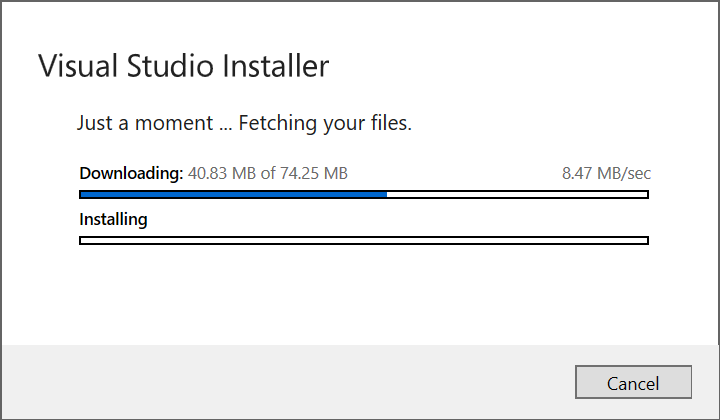
It will launch the installer:
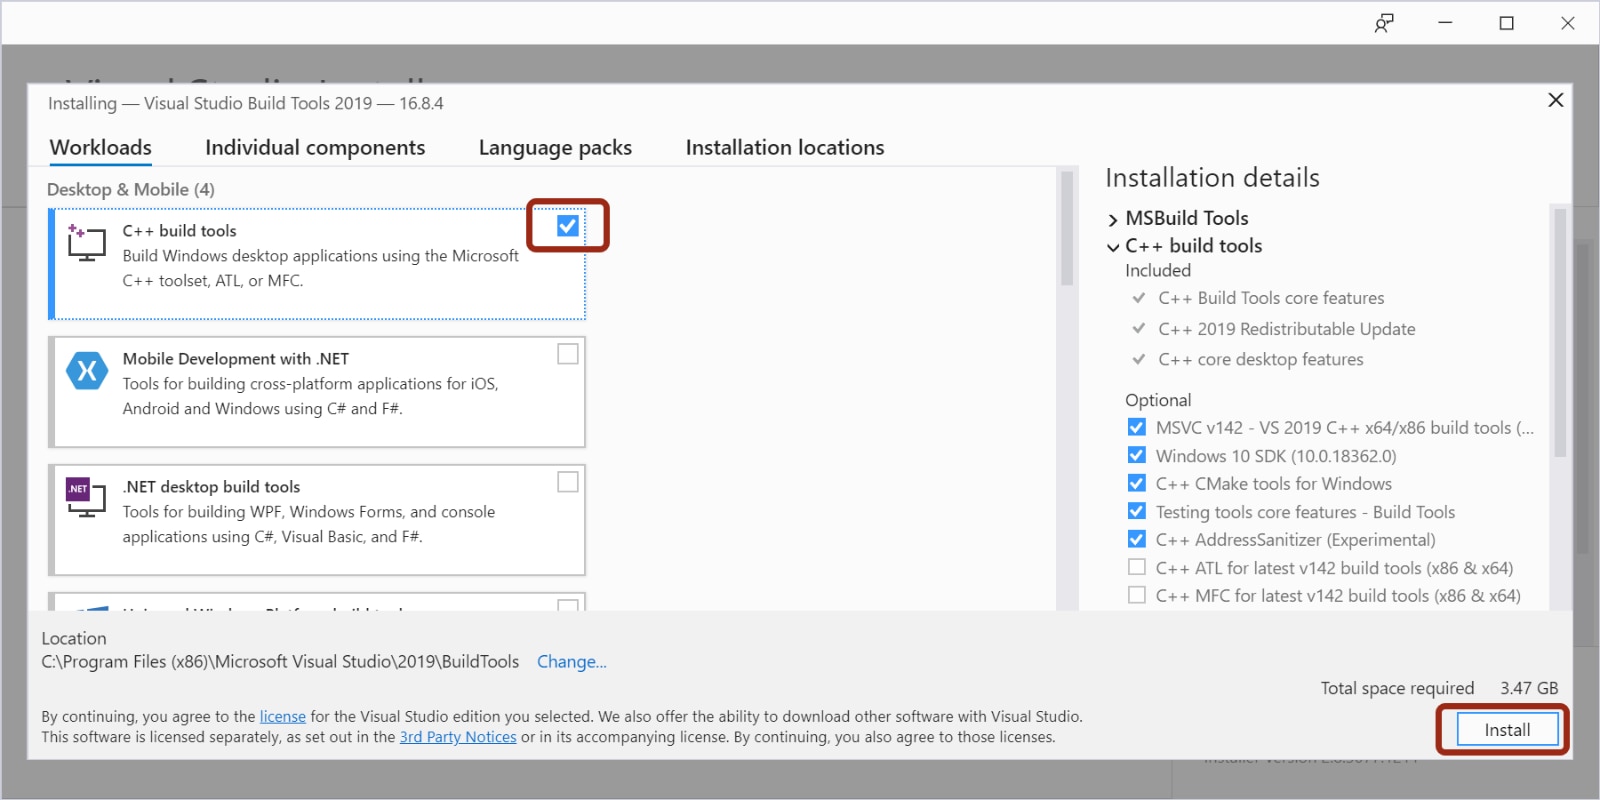
Select C++ build tools and install it. It may take several minutes to complete.
Install Python 3, Git and ARM GCC Compiler
See the Pico getting started PDF guide for this. As part of this, you'll need the ARM GNU Toolchain which will have a name like arm-gnu-toolchain-13.3.rel1-mingw-w64-i686-arm-none-eabi.zip (but use the latest version).
I already had these installed for other projects so I didn’t install these a second time. Also, see neilk blog post, which walks through these steps: Adventures with the Raspberry Pi pico - part 1
Get Code
Create a pico folder (C:\development\pico for example) and navigate to it.
Follow the Pico user guide and type commands in a Windows command prompt to download and install the SDK and examples as shown in the screenshot below (Note: If the git commands do not work, then you'll need to install git on your PC. See here for details on how to install git ).
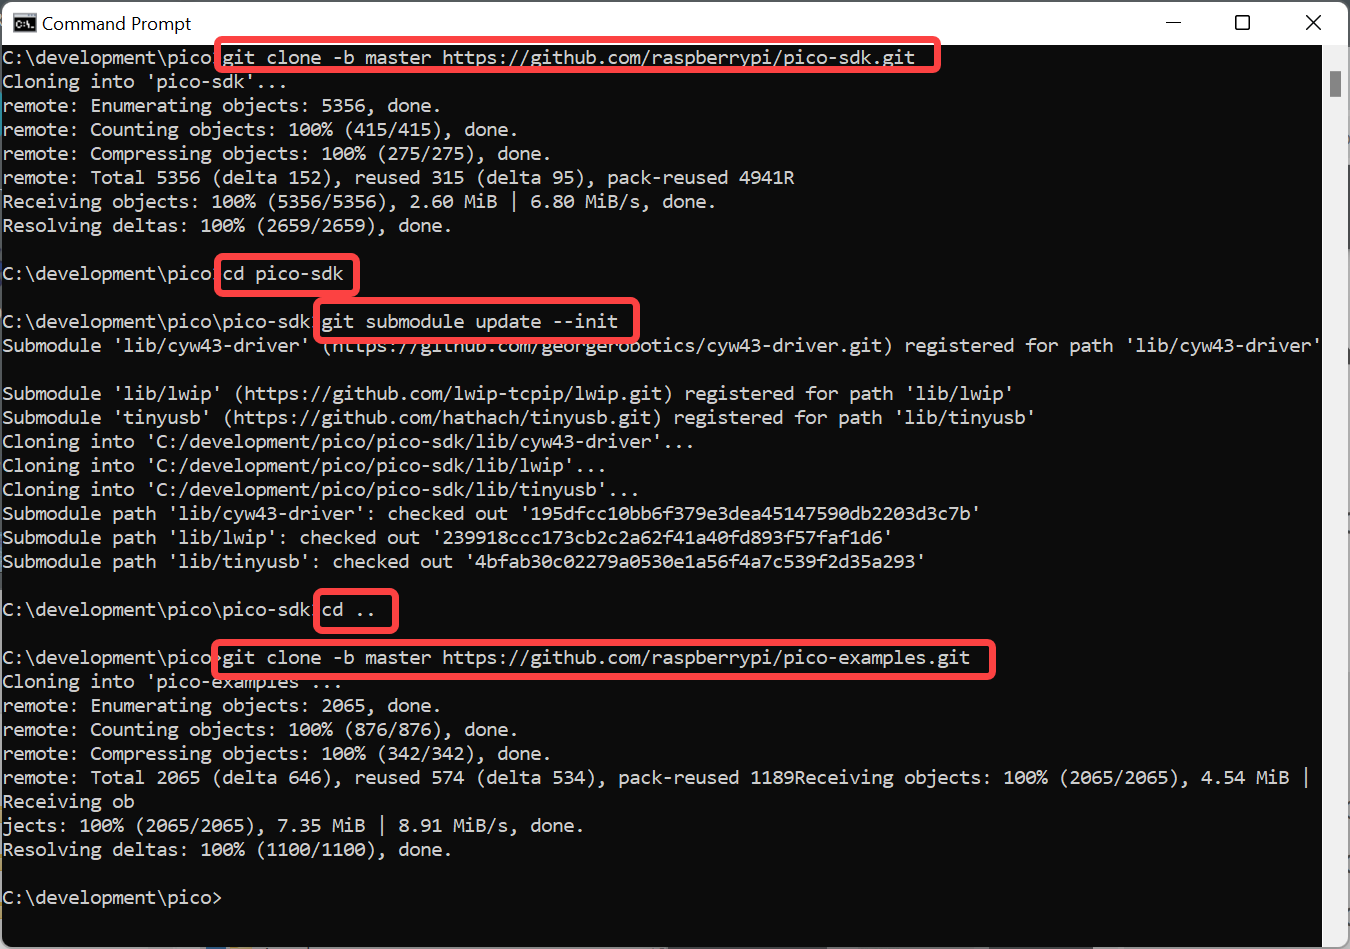
Note: In the past, it was OK to just copy the pico SDK and examples folders from GitHub but that doesn't work anymore, so definitely follow the steps shown above, because the git submodule command in the screenshot above is used to pull in content from other locations too, as part of the SDK install.
By the end of this, you should have a pico-sdk folder, and a pico-sdk-examples folder, both within the pico folder.
Building at the Command Line
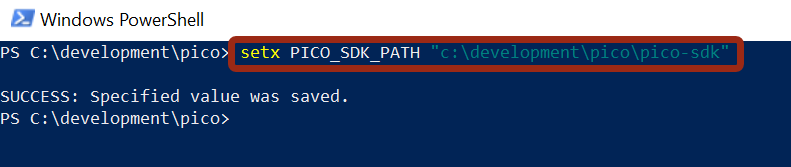
Start up PowerShell and type the following:
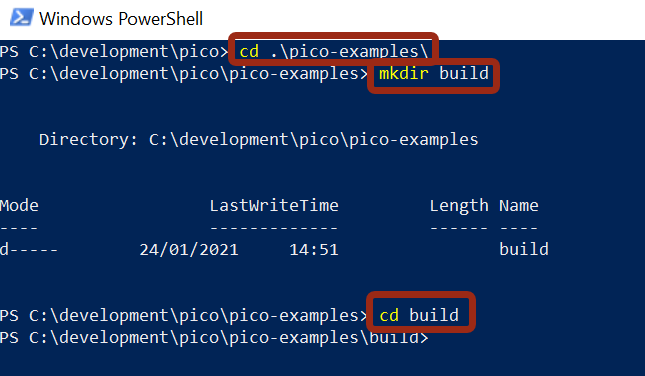
Close PowerShell and open a new PowerShell. Type the following to create a build folder inside pico-examples, and then navigate to it:
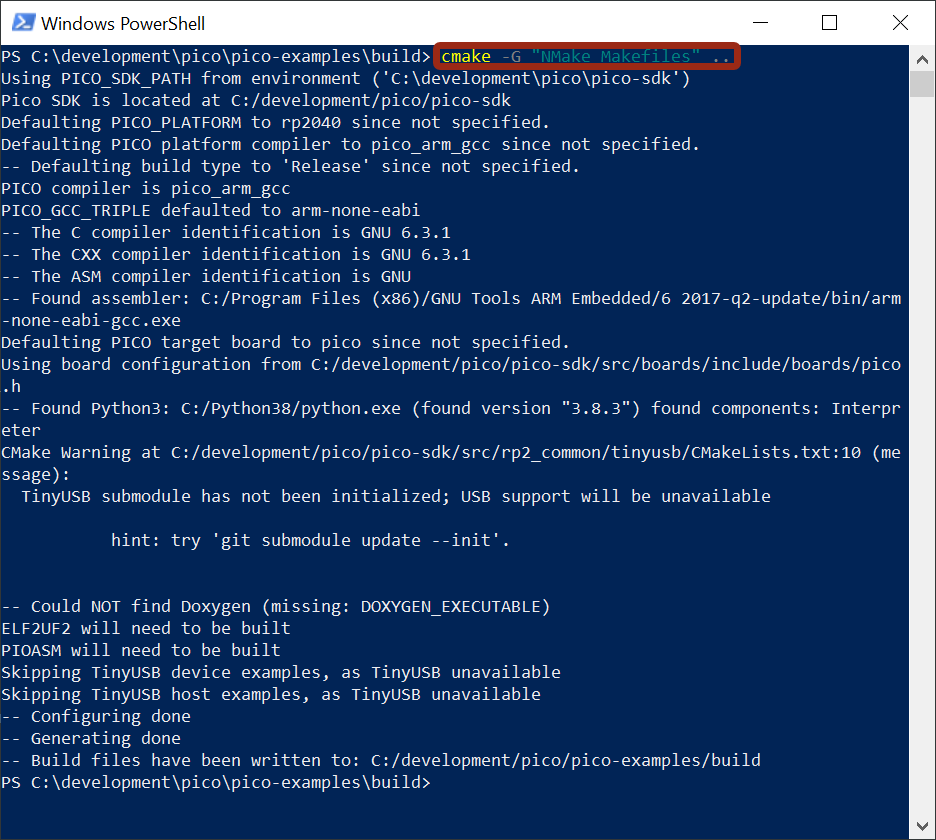
Now type:
cmake -G "NMake Makefiles" ..
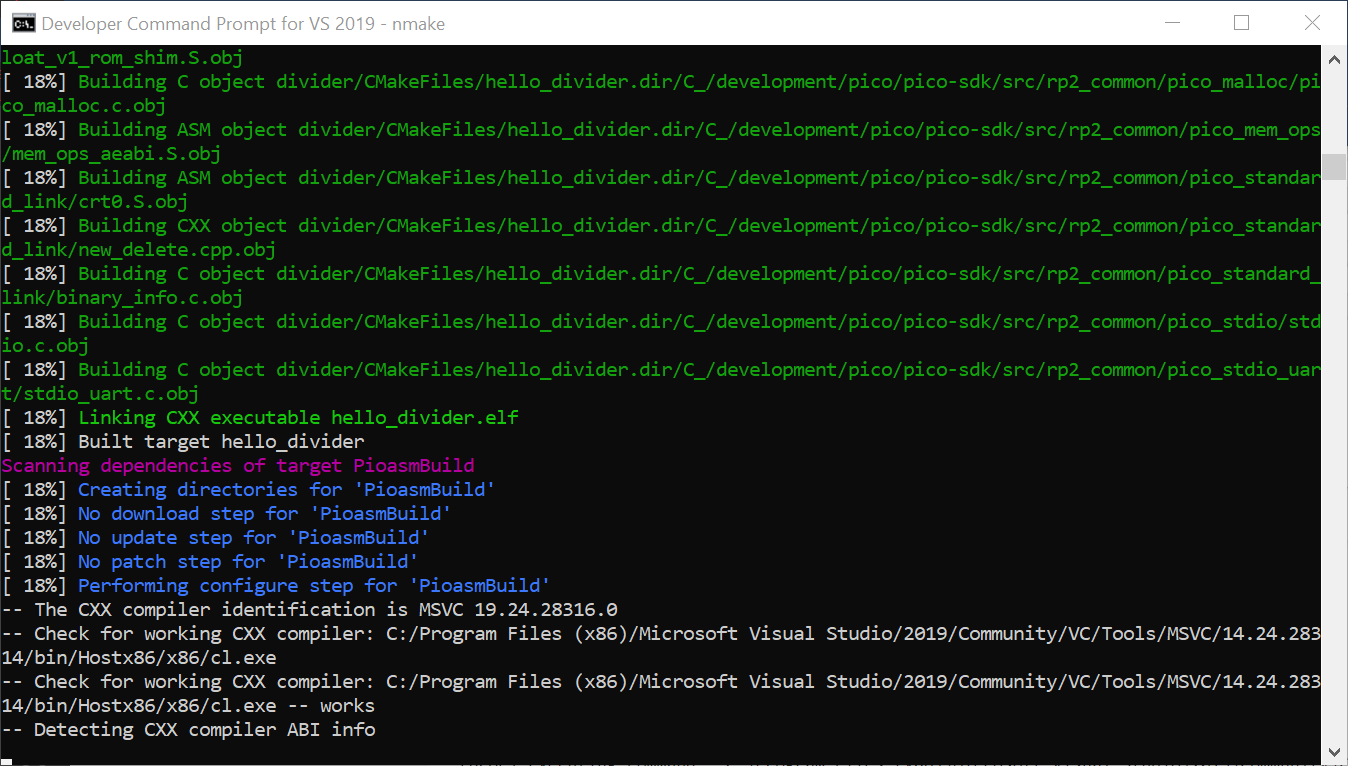
Now to build the code, the environment variables for Microsoft build tools (particularly nmake) might not be set up properly to work in PowerShell. If you get an error, switch to using Developer Command Prompt for VS 2019 instead.
Open up the prompt and navigate to the build folder as before, and then just type nmake
It will start building all the examples (it will take a while).
Fixing NMake not found issues
I had Nmake not found issues when attempting to use Visual Code to do the build. The fix for me was to go to the Environment Variables in Windows, and add this to the Path variable:

I did it for User and System variables. Note that you’ll need to check this path exists on your machine first. It may be similar but subtly different, so it needs to be checked.
Building with Visual Code
Note: Make sure you can successfully build at the command line before trying these steps.
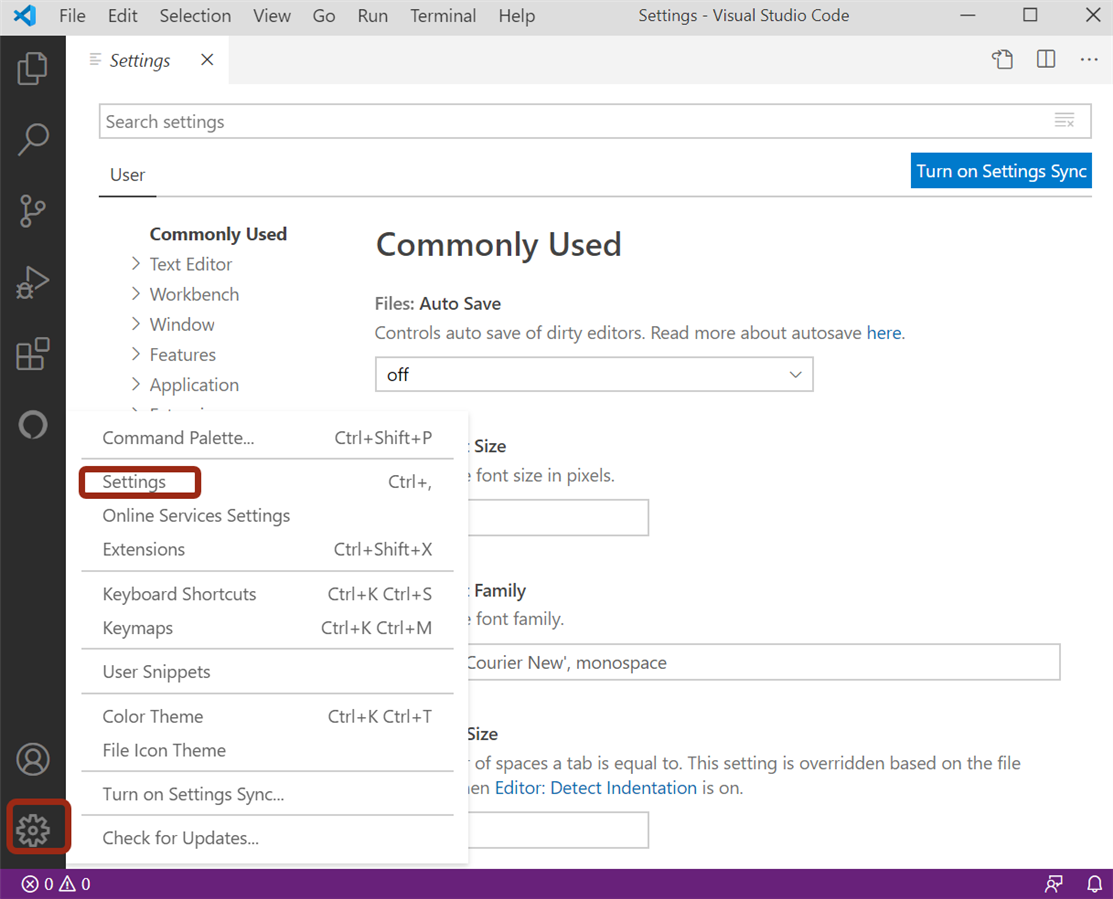
Click on the cog at the bottom-left of the window, and select Settings:
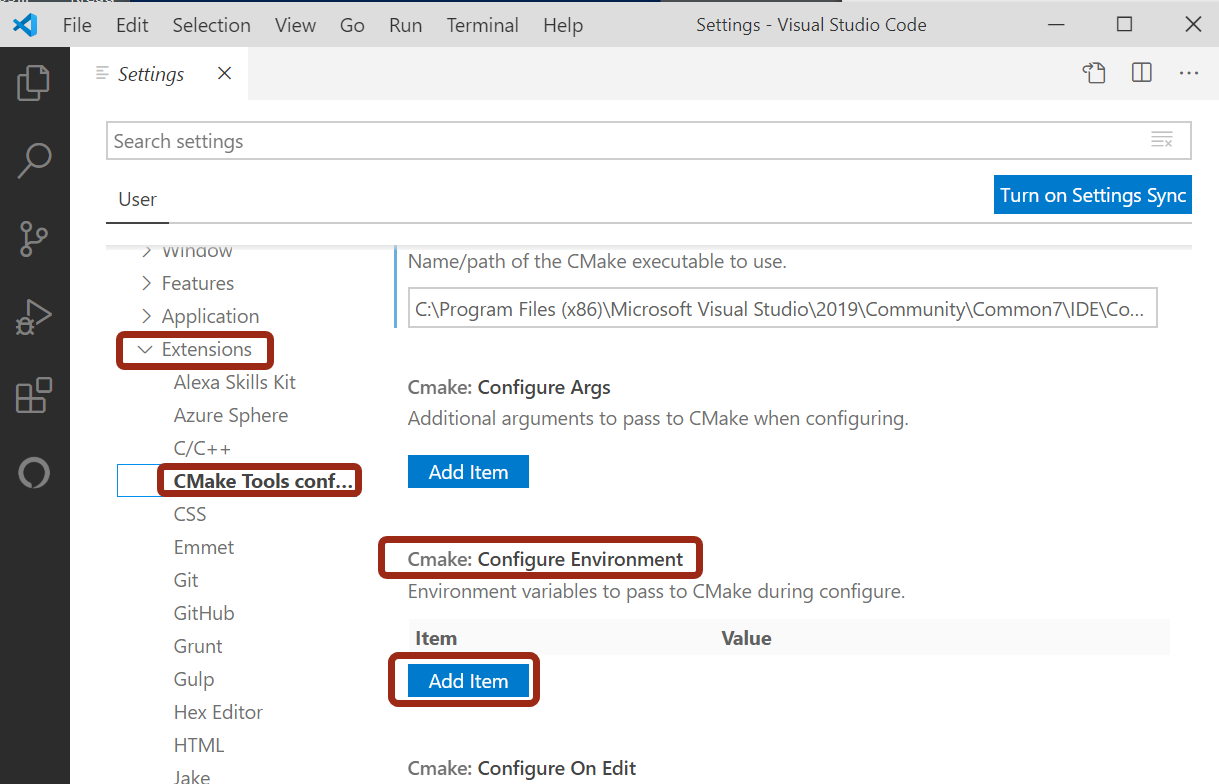
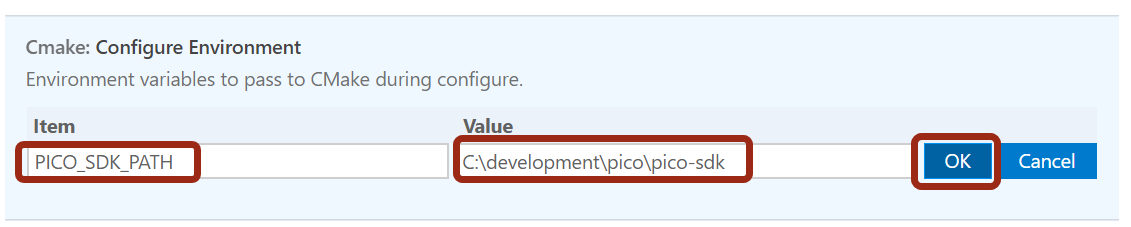
Expand Extensions, select CMake Tools configuration, scroll to Cmake: Configure Environment and click on Add Item as shown here:
Set as shown here:
Next, scroll to locate Cmake: Generator and configure as follows:

Close the Settings, and then go to File->Open Folder
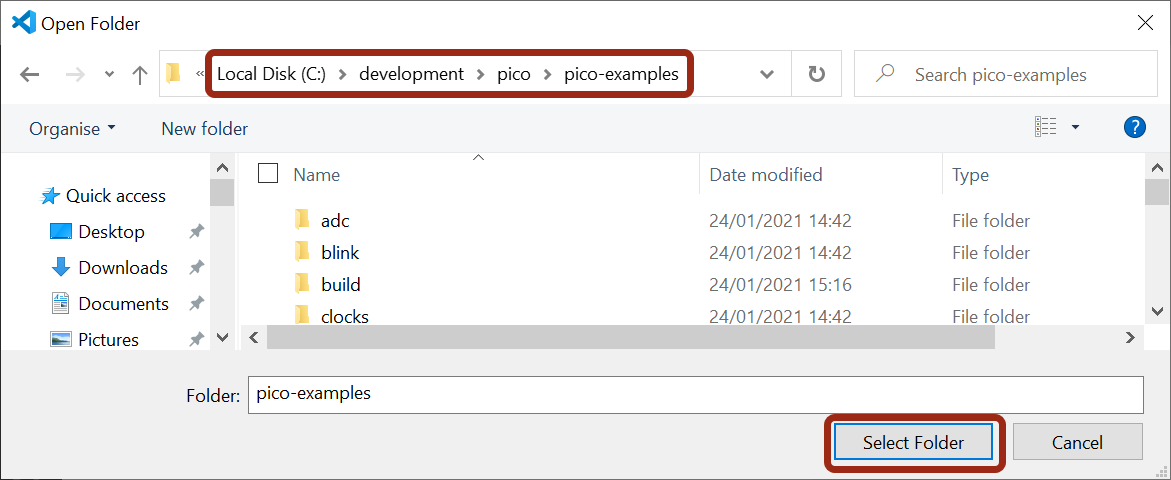
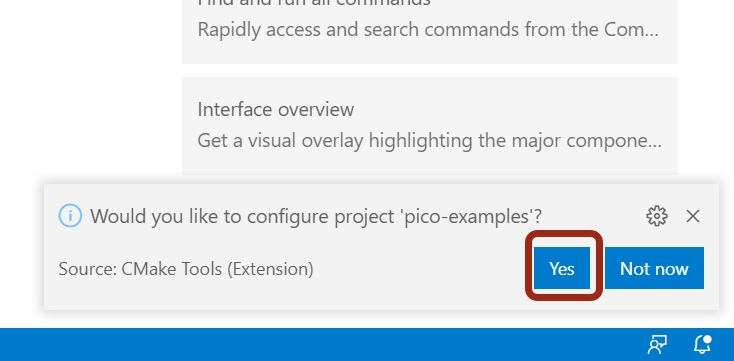
After you click Select Folder, at the bottom-right of the window, you’ll see this following pop-up. Click on Yes:
Incidentally, note that Visual Studio Code often creates plenty of pop-ups to the lower-right. You can generally ignore them (unless there is an error, or warning of interest), there is usually a flood of pop-ups whenever you open a new file and Visual Studio Code becomes eager to offer extensions and tips to work better with the files.
Then select GCC for arm-none-eabi:

If you miss seeing the popup, you can just select in the blue bar at the bottom of the window, No Kit Selected, and then select GCC for arm-none-eabi
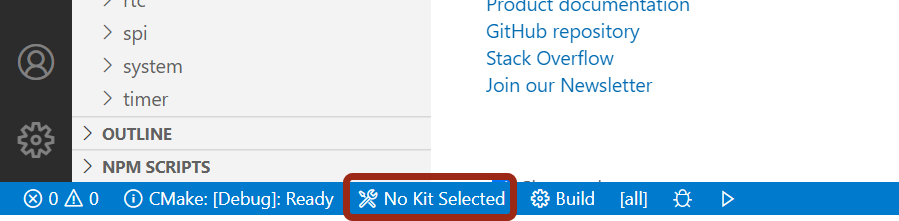
The blue bar will look like this:

In this blue bar, click on Build:

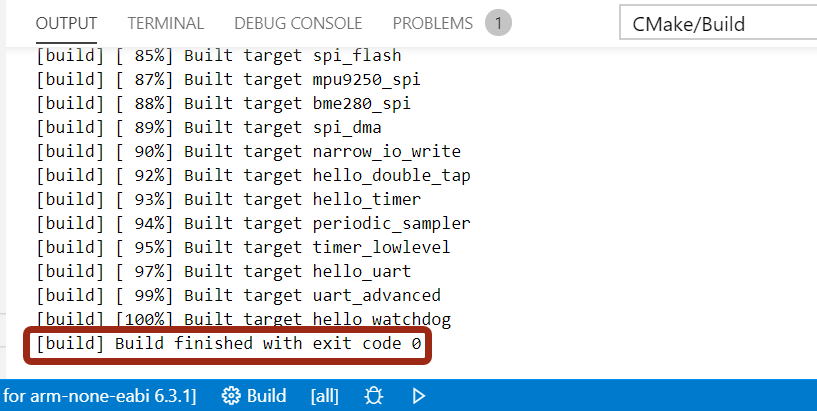
After a long time (perhaps five minutes), all the examples will be built. You can see the output by clicking on View->Output. Don’t forget to click on PROBLEMS to see any warnings or errors if the build fails.
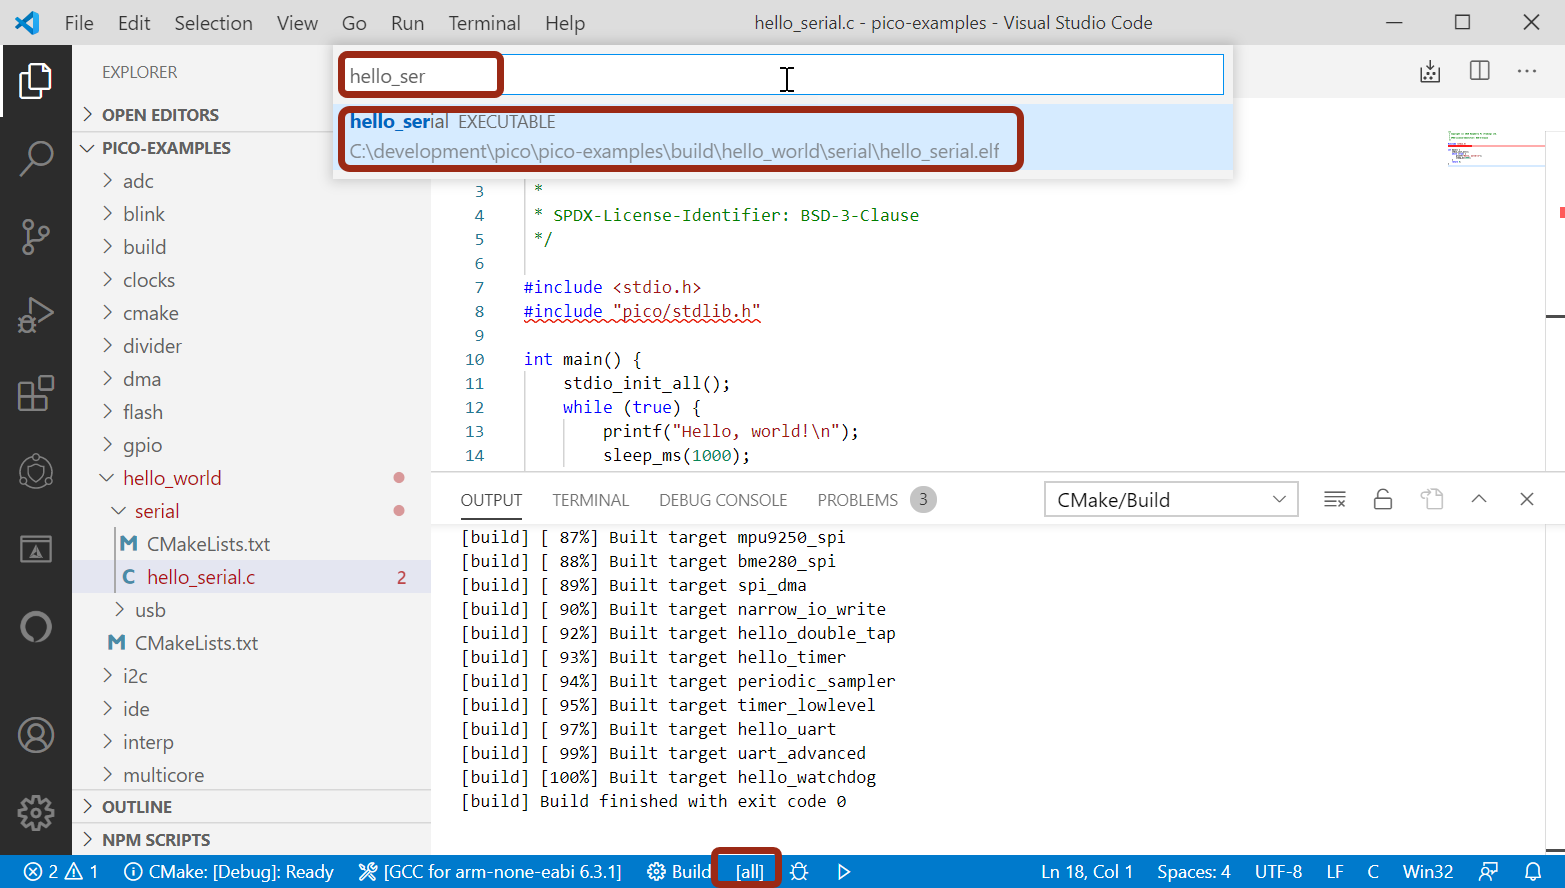
Note that if you wish to subsequently only build a single demo, you can save the build tools from traversing all the folders. To do that, click on the text [all] to the right of the Build text on that blue bar. A whole list of targets will appear. If you're only interested in (say) the hello_serial program that is in the hello_world folder, then start typing hello_serial in the box that will appear, and then select that target. From then on, clicking Build will only build that target. You can revert back to building all targets by clicking there again and this time selecting all.
Running the Application
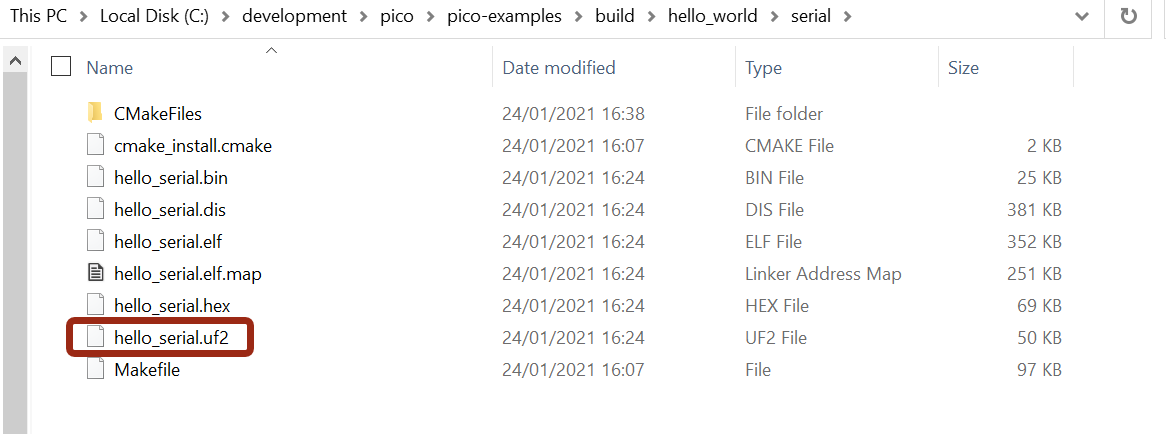
Go into the appropriate folders as shown in the screenshot below, to see the .uf2 file (if you cannot see any file suffixes you should change the View settings in File Explorer so that you can always see suffixes):
The .uf2 file can be dragged into the USB storage drive letter that appears when you hold down the BOOTSEL button and plug the Pico's USB connection into your PC (release the button after you've plugged the Pico into the PC). The application should become programmed into the Flash storage and begin execution. It may get tiresome frequently unplugging and plugging in the USB connection just to perform the reset. You can hard-wire a reset switch to the Pico. For information on this, see Debugging the Raspberry Pi Pico on Windows 10
Troubleshooting your Running Application
Some typical ways of troubleshooting running code are listed below.
- Write code to light one or more LEDs, to indicate success or failure to reach a certain point in the code, or a data value
- Use printf statements to send text based debug information via USB to the connected PC. The PC will see a serial connection that can be used with software such as PuTTY to view the debug. You can also capture user keyboard input too, using (say) the scanf function.
- Use the low-level debugger 'gdb' to precisely step through code, or to examine variable content or even memory locations. See the guide Fred ( Fred27 ) has created: Debugging the Raspberry Pi Pico on Windows 10
Using Intellisense (Code Assistance)
If you start up Visual Studio Code and select the pico-examples folder and look at any source code, you'll notice perhaps some squiggly lines like this:
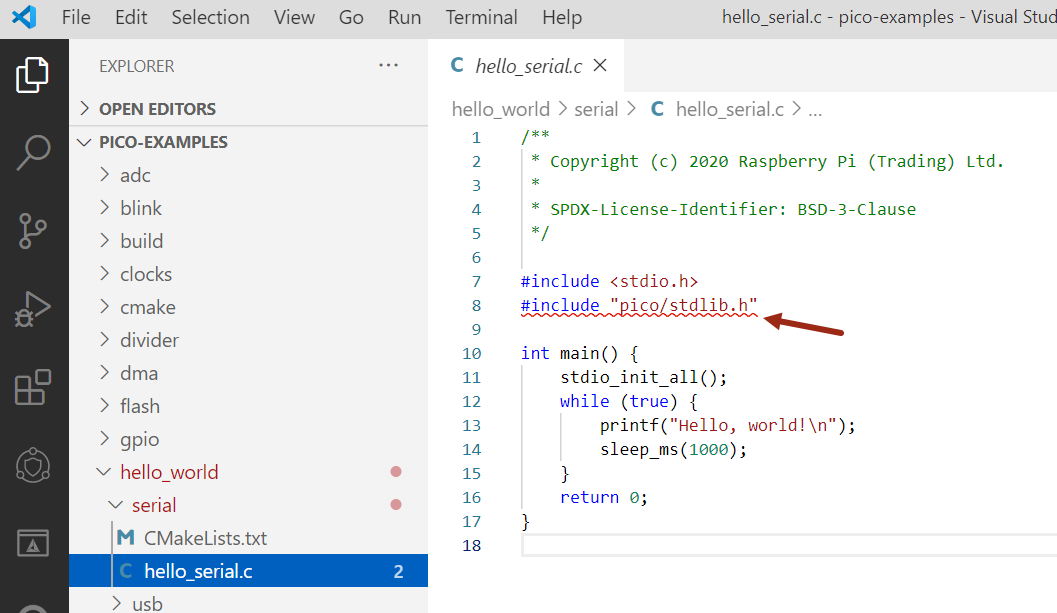
It is a benign issue to the extent that it won't affect your project when you compile it. However, you want to ideally fix the squiggly line issue, because it means that Visual Studio Code can then help you write code more easily, by allowing you to navigate across code files simply by clicking your cursor in the function name, and pressing F12 (or right-clicking and selecting Go to Definition). Intellisense will also help as you're typing code, by providing good auto-completions.
For example, if you press F12 on the line that says stdio_init_all(); if Intellisense is not working then you'll find nothing. It will not be possible to easily tell in which file the function stdio_init_all exists, nor what it does. If Intellisense was working, you'd instantly know.
To get Intellisense working, I don't know the correct way, but here's what works for me (kind-of).
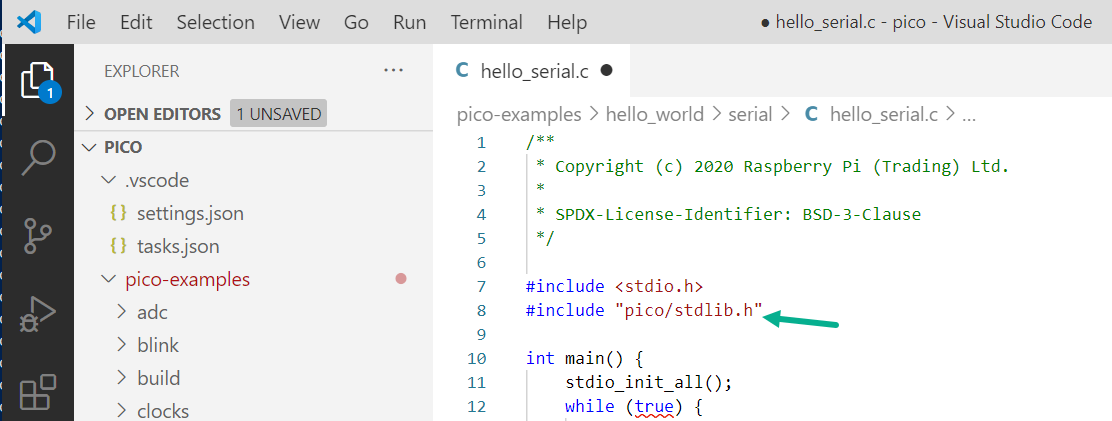
In Visual Code, select File->Close Folder. Then, instead of opening the C:\development\pico\pico-examples folder, instead select File->Open Folder and select C:\development\pico (i.e. one folder up).
Now if you open the code file, the squiggles will be gone:
(Note that there are squiggles on true and false, you can eliminate the squiggles for true and false by inserting #include <stdbool.h> into the code).
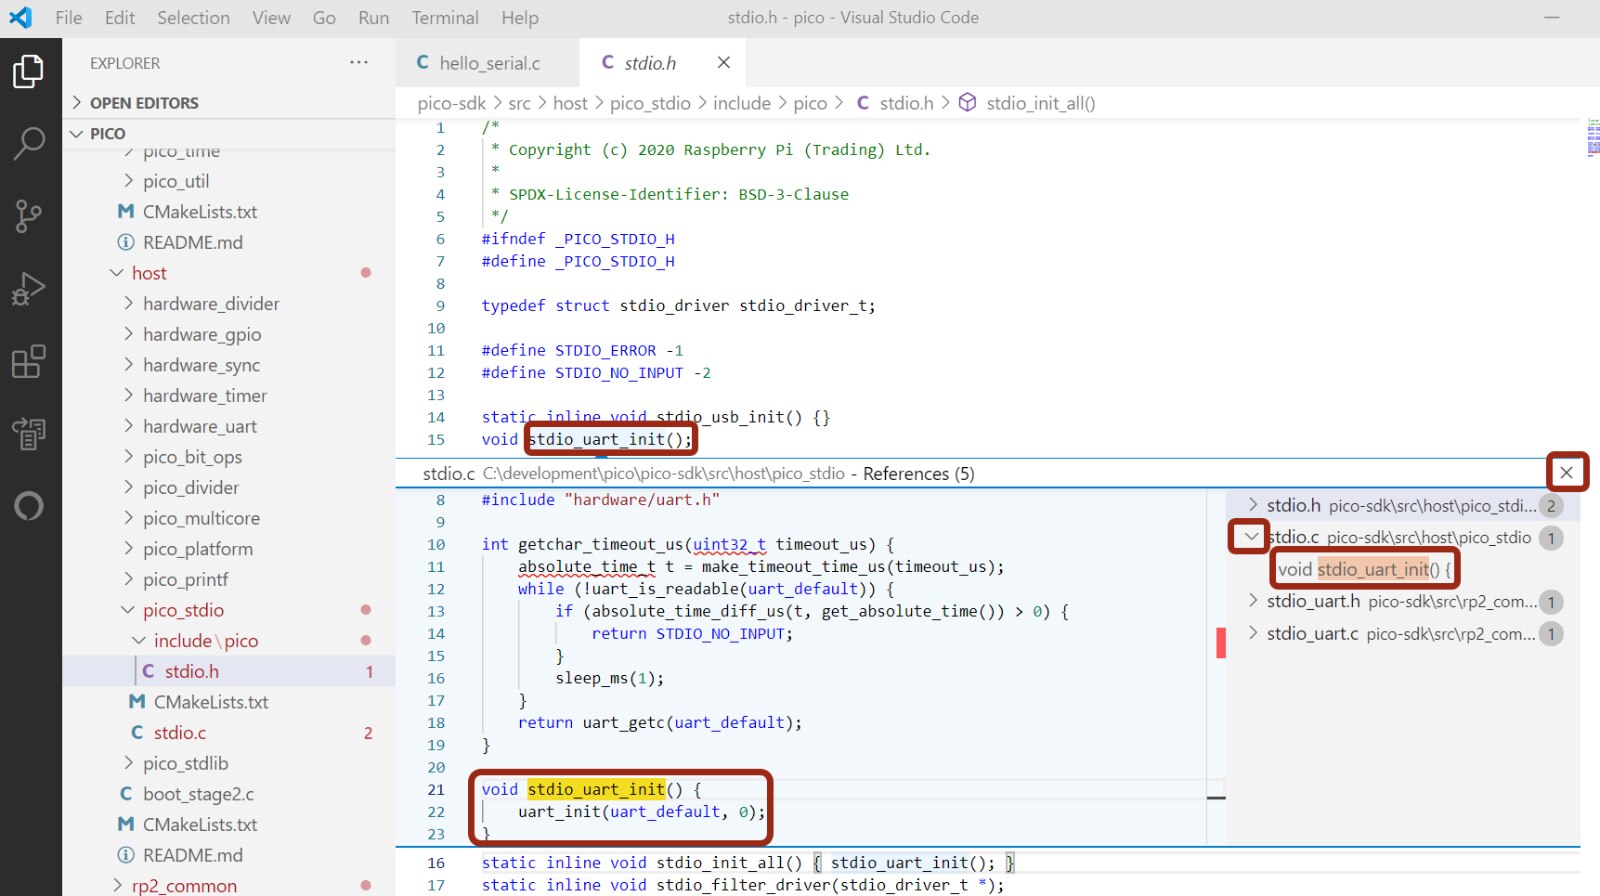
Now if you click on stdio_init_all and press F12, Visual Studio Code will instantly bring up the header file that defines that function. That header file is called stdio.h incidentally.
Another cool thing is that if you now look at this header file, you can immediately see that the function actually just calls stdio_uart_init. And if you click on that and then right-click and select Go to References (or hold Shift and press F12), a blue and gray pop-up appears. Select the closest reference on the right side in the gray area, and you'll see the implementation of the function in the blue area! Click on the X to close it at any time.
In summary, Intellisense used in that manner provides great insight when looking at existing code.
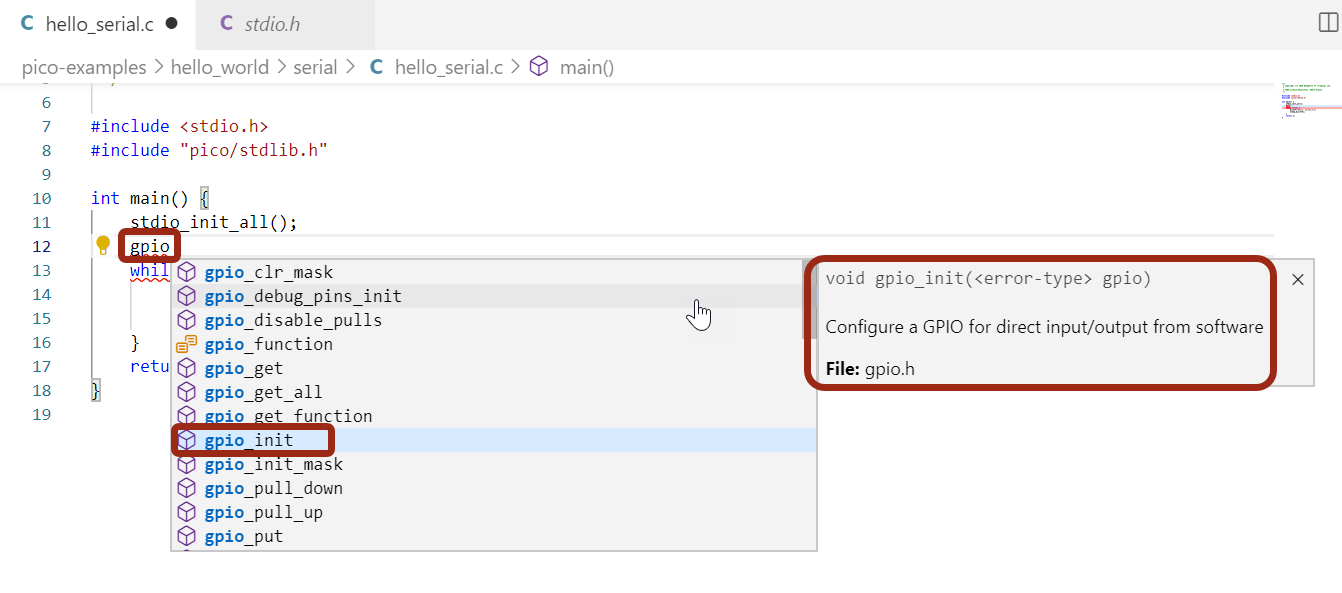
Here's another way that Intellisense helps, as you code; if you begin to type something (say gpio) then Visual Studio Code will automatically list some completions. You can use your cursor keys to choose the one you want (and it will display some helpful information too), and then press Enter to auto-complete.
Unfortunately, by opening the C:\development\pico folder instead of C:\development\pico\pico-examples folder, it breaks one (minor) thing: it is no longer possible to build the code using the blue bar at the bottom of Visual Studio Code. However, the workaround is simple. Just use a Windows Developer Command Prompt and type nmake as described before (in the section titled Building at the Command Line).
For those that want to do everything from within Visual Studio Code and not use the command prompt, then there are other ways to configure Intellisense to work such that the blue bar can still be used to perform the build, and this may be the preferable way overall. To do it, see the information from Jon in the comments section for this blog post: Raspberry Pi Pico
Currently I do not mind having to type nmake at the command line, so I will stick to the method here for now, but might change later.
Creating your Own Project Folder
At the bottom of this blog post (just before the comments section starts), there is an attachment called project1.zip. If you download that and extract it into the pico folder (for example C:\development\pico) then it will look like this:
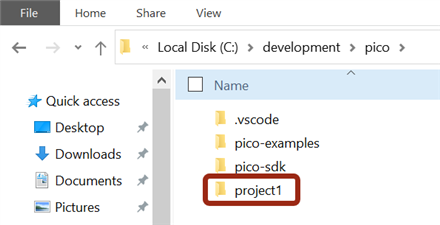
Next, rename the project1 folder to whatever you want to call your project (for example myproject1). Double-click to open the folder and these files will be present:
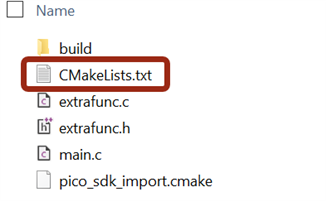
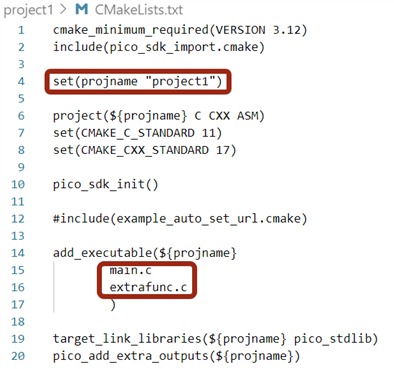
The important one to edit is CMakeLists.txt. It will contain the following (see the screenshot below). Change the text project1 to be your new project name. Also, you can see that the code is comprised of main.c and extrafunc.c - all the pico examples use a single C file, but I figured I'd create an example project with an additional file so it can be seen how to add more files.
That's it, you can now use Windows Developer Command Prompt and go into the c:\development\pico\myproject1\build folder, and type (as before):
cmake -G "NMake Makefiles" ..
After that, to perform the build, type (as before) in the Developer Command Prompt:
nmake
It will result in the myproject1.uf2 file being created in the build folder, and you can transfer it to the Pi Pico as described before.
You can repeat these steps to create as many projects as desired : )
The CMakeLists.txt creates a Makefile (Makefiles can do a lot but typically tell the compiler and assembler and linker tools what files need to be compiled and assembled and linked). In a nutshell it's the place where you need to specify the files that are to be built and will join into your executable. By typing the cmake -G "NMake Makefiles" .. command, the Makefile gets created.
By typing nmake, the Makefile is read by the nmake program, and it calls the appropriate tools (GCC compiler, assembler and linker and so on) to create the final executable.
Summary
The Pi Pico looks to be a useful microcontroller development board, because it uses the highly popular ARM Cortex-M cores. Using industry-standard tools such as the GCC compiler, CMake and Visual Studio Code, it is possible to set up a computer all ready for trying out the example projects, and for modifying them, or creating projects from scratch.
Visual Studio Code can be used to write and build the executable which can then be transferred to the Pi Pico by dragging the executable to the drive letter that appears when you hold down the boot button on the Pi Pico and insert the USB cable into the PC.
Some things currently might be better done at the command line, so Visual Studio Code can be used in conjunction with Windows Developer Command Prompt.
For those used to Arduino, the process may seem long-winded (which it is in comparison) but it only needs to be done once to get familiarity with it. These tools and all sorts of scripts are used by organizations to develop real products, so the knowledge gained is directly transferrable to engineering work environments.
Thanks for reading!
.
Top Comments