


Introduction
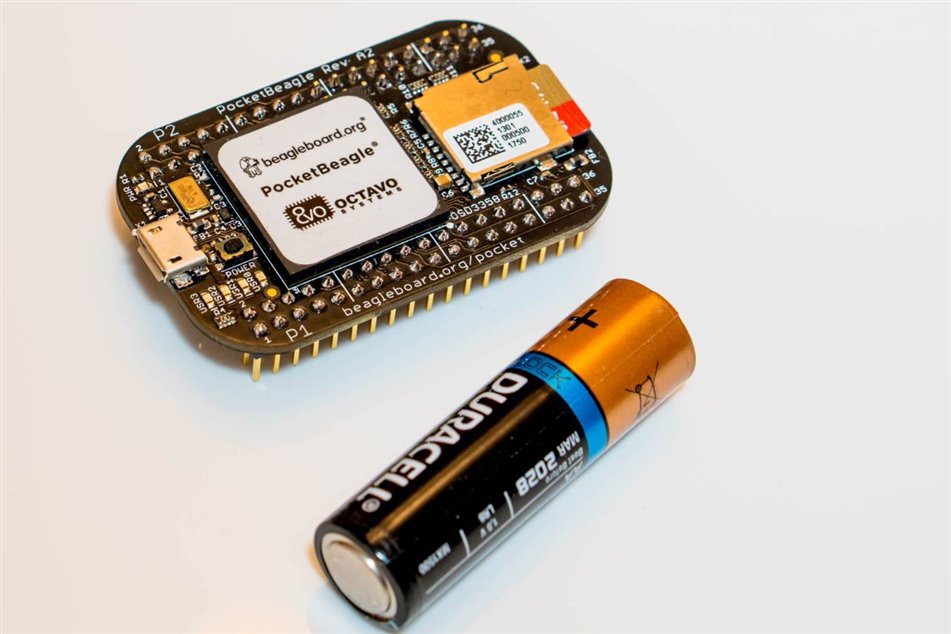
The PocketBeaglePocketBeagle single board computer (SBC) is really tiny. Apart from the size, there are lots of similarities with the larger BeagleBone BlackBeagleBone Black, and there are also some differences.
In terms of performance, it is identical. It has the same amount of memory, and runs using the same processor and the same Linux image too!
To get the size down, it is of course missing many connectors but a lot of functionality within the main chip is brought out onto the two 36-way pads (no header pins are supplied but two of these 36 way header pins36 way header pins will fit). It isn’t possible to attach HDMI displays, because the BeagleBone Black used a separate chip for that on-board, and that is not present on the PocketBeagle. Also, unlike the BeagleBone Black there is no eMMC storage on-board, but often the BeagleBone Black eMMC lays unused, because people may just stick a larger Linux image onto a Micro SD card.
Just like the BeagleBone Black, it is possible to power it from a Lithium Ion battery directly, and it can charge the battery too. This makes it great for portable applications. There is a built-in power button that could be exposed through an enclosure if desired.
There is only one connector on the PocketBeagle by default, and that is a micro USB connector. It can be connected to a PC or USB power supply. When connected to a PC, then several functions get exposed; the PC will see a drive appear called “BeagleBone Getting Started” and also a virtual Ethernet connection and a new network will appear. It is possible to communicate to the PocketBeagle from the PC, using this network connection. This is identical behaviour to the BeagleBone black.
One large difference is that the pinouts are completely different. The PocketBeagle has its pins arranged in a different order understandably, since the device is too small for the large 46-way connectors on the BeagleBone Black. Using the pins will be discussed in another blog post (see BeagleBone Black (BBB) and PocketBeagle I/O (GPIO), SPI and I2C Library for C – 2019 Edition ), but you can see the functionality that is available here: PocketBeagle GPIO Pinout
This blog post discusses briefly how to get going with the PocketBeagle.
Setting up the PocketBeagle
This is really easy. Follow the guide Getting Started with BeagleBone Black - it is PocketBeagle-compatible : )
Once you get to the Wifi and Ethernet steps, come back to this blog post, because the PocketBeagle doesn’t have WiFi and Ethernet capabilities on-board. This blog post discusses how to fix that.
What is Needed?
To use (and develop code and projects with) the PocketBeagle effectively, a few things are needed: a micro USB cable, a USB power supply or any 5V DC supply (1A or higher), two 36 way dual in line header pins36 way dual in line header pins and (for the USB add-on described below) a USB Type A receptacleUSB Type A receptacle and some jumper wiresjumper wires.
Adding a USB Host Connector
When developing applications for the PocketBeagle, it is nice to have network connectivity, so you can download patches, or download libraries and applications from (say) github. To do that, you could make use of the virtual Ethernet connection that appears when the micro USB connector on the PocketBeagle is connected to your PC. It entails setting up the PocketBeagle to route all network traffic through the PC, and setting up the PC to be able to accept traffic destined for the PocketBeagle.
There is a far easier way; just attach a USB socket to the PocketBeagle, so you can plug in a USB device such as a WiFi or Ethernet adapter (see the comments below for information on some of the WiFi adapters that have been tried and work).
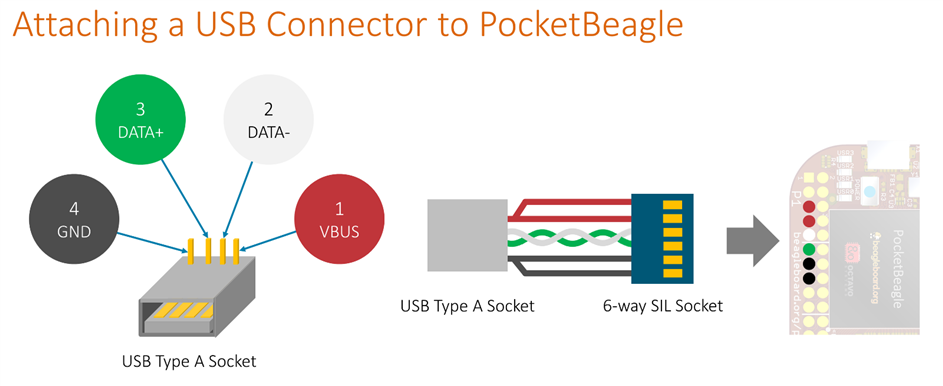
To do that, obtain a USB socket and wire it as shown in the diagram.
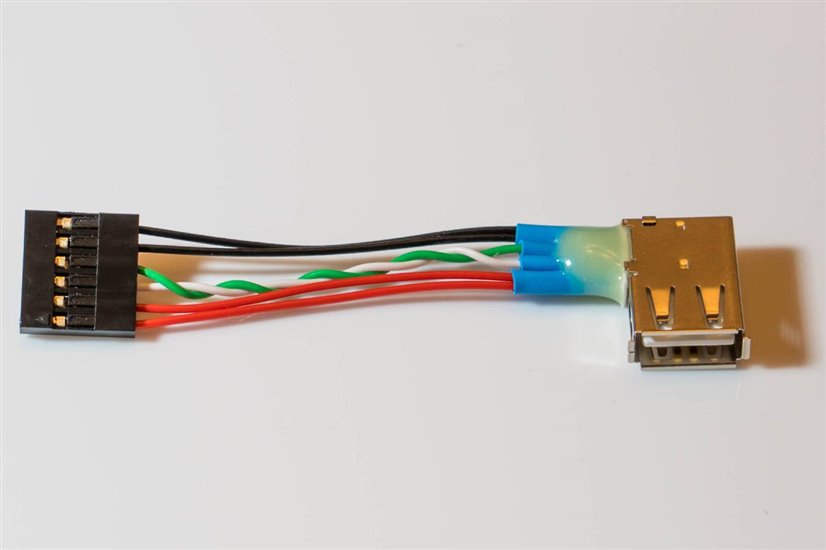
Plug the connector to the PocketBeagle header P1 pins 5,7,9,11,13,15 (they are all together in a row) and then plug in your USB device, and then power up!
Note: this is a hack, a proper way to do it would include circuitry for overload and ESD protection, and to enable/disable the power under control of the USB driver. However for development purposes while you are creating your PocketBeagle application, there’s no issue with using this hack provided you’re careful. It has limitations; you can’t power up very high current devices, and you shouldn’t connect/disconnect anything while the PocketBeagle is running. Make sure the PocketBeagle is powered down, prior to plugging or unplugging a USB device.
For those that are interested to know about the connections in some further detail, here is a description of the pins that are used (pin 3 on connector P1, i.e. P1.3 isn't used in this hack, but would be used for a real design):
P1.3: V_EN: This goes high to indicate that the USB host connector can be supplied with power.
P1.5: VBUS: This pin connects to the VBUS pin on the USB host connector, but also needs to be supplied with 5V, since we are using host mode, where the BBB needs to supply the power.
P1.7: USB HOST VIN: This pin can be used to supply power into the PocketBeagle, for the purposes of supplying power to VBUS. However if the PocketBeagle already is being supplied with power from elsewhere (e.g. the USB client connector) then USB HOST VIN will have power on it, and could be tied to VBUS.
P1.9: DN: The is the D- data pin (pin 2, white)
P1.11: DP: This is the D+ data pin (pin 3, green)
P1.13: ID: This is the ID pin, an input to the BBB. Connect it to 0V to signify USB Host mode.
P1.13: GND: This is a ground pin on the PocketBeagle.
Using It
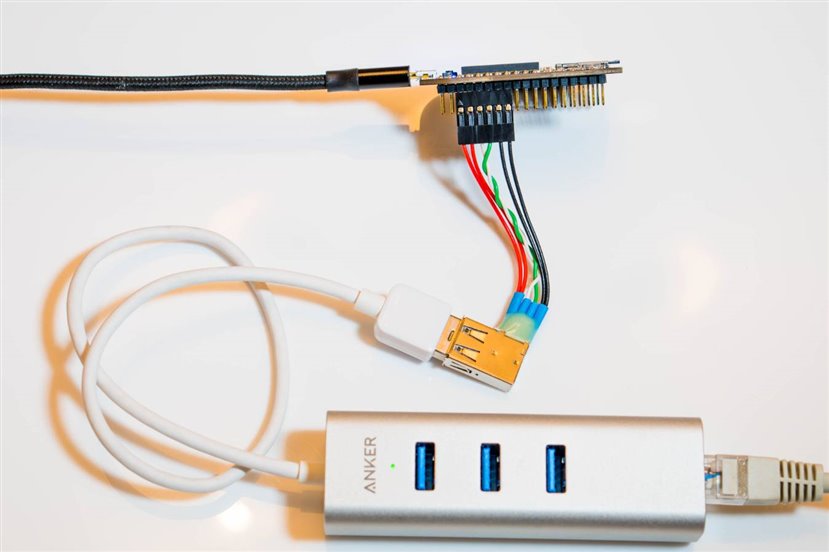
Some WiFi adapters may not work. In fact I had bad luck and none of the WiFi adapters that I had worked : ( Instead, I used an Ethernet plus 3 port USB hub adapter. That worked great, the PocketBeagle needed no configuration, and the network connection came up immediately. With such a setup, there is no need to power the PocketBeagle from the PC. Instead, the micro USB connector can be attached to a USB power supply.
Summary
The PocketBeagle is just as easy to set up as the larger BeagleBone Black, but network connectivity can be extremely useful. This blog post described how to get the PocketBeagle up and running, and then how to connect a USB adapter to it for WiFi or Ethernet connectivity (or any other USB device provided drivers are available for it).
If you find WiFi adapters that work, or other useful USB additions, or have ideas for PocketBeagle projects, it would be great to hear about them!
Top Comments