element14 Community
element14 Community
    Register Log In
  • Site
  • Search
  • Log In Register
  • About Us
  • Community Hub
    Community Hub
    • What's New on element14
    • Feedback and Support
    • Benefits of Membership
    • Personal Blogs
    • Members Area
    • Achievement Levels
  • Learn
    Learn
    • Ask an Expert
    • eBooks
    • element14 presents
    • Learning Center
    • Tech Spotlight
    • STEM Academy
    • Webinars, Training and Events
    • Learning Groups
  • Technologies
    Technologies
    • 3D Printing
    • FPGA
    • Industrial Automation
    • Internet of Things
    • Power & Energy
    • Sensors
    • Technology Groups
  • Challenges & Projects
    Challenges & Projects
    • Design Challenges
    • element14 presents Projects
    • Project14
    • Arduino Projects
    • Raspberry Pi Projects
    • Project Groups
  • Products
    Products
    • Arduino
    • Avnet Boards Community
    • Dev Tools
    • Manufacturers
    • Multicomp Pro
    • Product Groups
    • Raspberry Pi
    • RoadTests & Reviews
  • Store
    Store
    • Visit Your Store
    • Choose another store...
      • Europe
      •  Austria (German)
      •  Belgium (Dutch, French)
      •  Bulgaria (Bulgarian)
      •  Czech Republic (Czech)
      •  Denmark (Danish)
      •  Estonia (Estonian)
      •  Finland (Finnish)
      •  France (French)
      •  Germany (German)
      •  Hungary (Hungarian)
      •  Ireland
      •  Israel
      •  Italy (Italian)
      •  Latvia (Latvian)
      •  
      •  Lithuania (Lithuanian)
      •  Netherlands (Dutch)
      •  Norway (Norwegian)
      •  Poland (Polish)
      •  Portugal (Portuguese)
      •  Romania (Romanian)
      •  Russia (Russian)
      •  Slovakia (Slovak)
      •  Slovenia (Slovenian)
      •  Spain (Spanish)
      •  Sweden (Swedish)
      •  Switzerland(German, French)
      •  Turkey (Turkish)
      •  United Kingdom
      • Asia Pacific
      •  Australia
      •  China
      •  Hong Kong
      •  India
      •  Korea (Korean)
      •  Malaysia
      •  New Zealand
      •  Philippines
      •  Singapore
      •  Taiwan
      •  Thailand (Thai)
      • Americas
      •  Brazil (Portuguese)
      •  Canada
      •  Mexico (Spanish)
      •  United States
      Can't find the country/region you're looking for? Visit our export site or find a local distributor.
  • Translate
  • Profile
  • Settings
Raspberry Pi
  • Products
  • More
Raspberry Pi
Blog DogGraphicDisplayPico - control a DOG graphic display with the Raspberry Pi Pico
  • Blog
  • Forum
  • Documents
  • Quiz
  • Events
  • Polls
  • Files
  • Members
  • Mentions
  • Sub-Groups
  • Tags
  • More
  • Cancel
  • New
Join Raspberry Pi to participate - click to join for free!
Featured Articles
Announcing Pi
Technical Specifications
Raspberry Pi FAQs
Win a Pi
GPIO Pinout
Raspberry Pi Wishlist
Comparison Chart
Quiz
  • Share
  • More
  • Cancel
Group Actions
  • Group RSS
  • More
  • Cancel
Engagement
  • Author Author: bernhardmayer
  • Date Created: 13 Feb 2021 9:01 AM Date Created
  • Views 1899 views
  • Likes 7 likes
  • Comments 1 comment
Related
Recommended
  • open-source software
  • arduino mkr
  • raspberry_pi_pico
  • display

DogGraphicDisplayPico - control a DOG graphic display with the Raspberry Pi Pico

bernhardmayer
bernhardmayer
13 Feb 2021

Idea


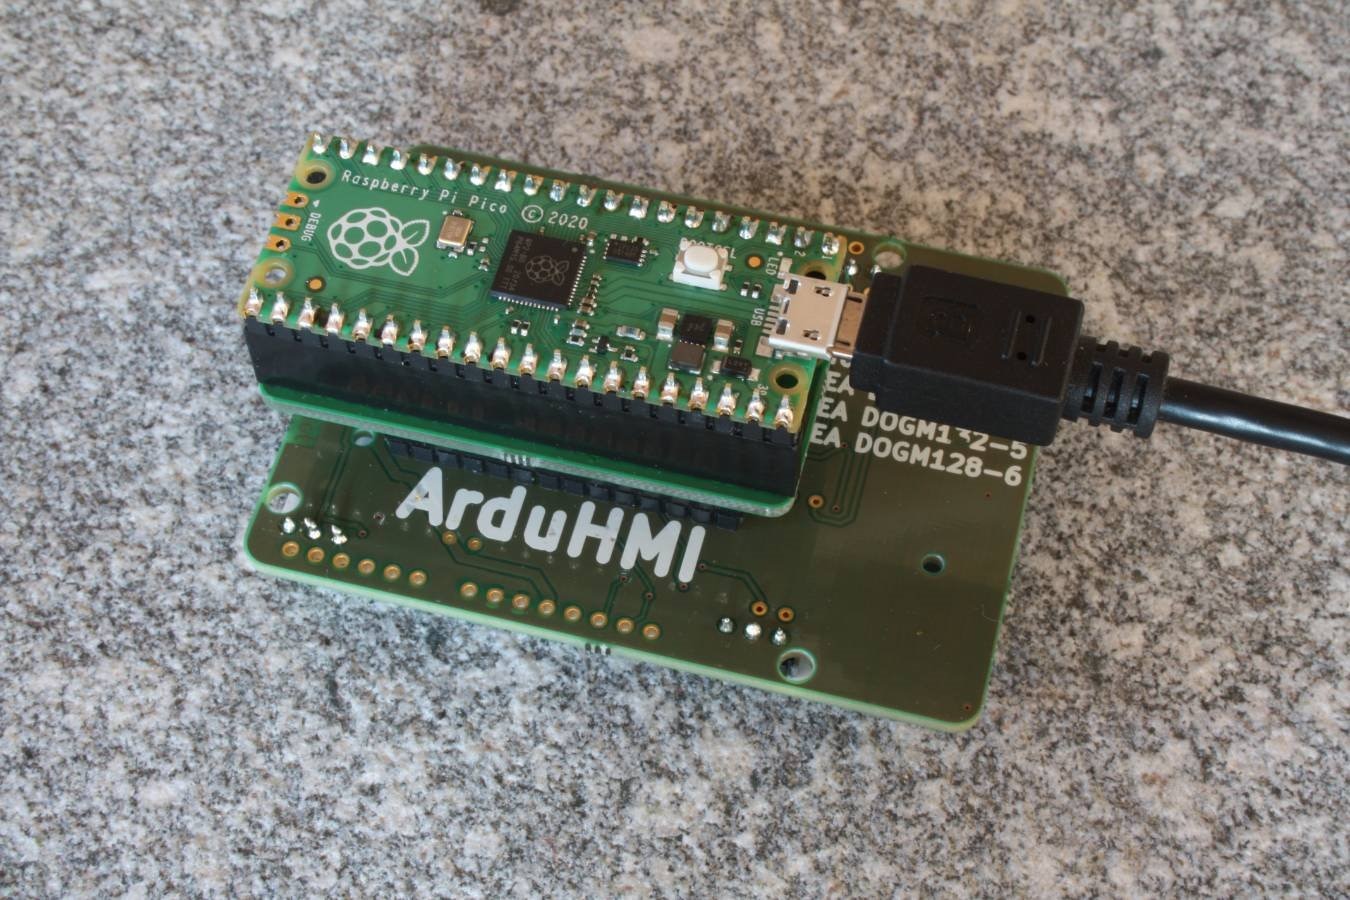
My first little project with the Raspberry Pi Pico is to control a Electronic Assembly DOGM Graphic display. I have already adopted an arduino library for the display and used it in several projects. So I know the display and how to control it quite well. This project shouldn't be to complicated. Its purpose is more to get to know the Pico and how to program it.


Hardware


For previous projects I have already made an Arduino MKR shield with the display which I described here: NFC-Badge - Update your badge with your smartphone - Design data of the HMI shield The design data of the project is available on github: https://github.com/generationmake/ArduHMIShield

Additionally I have design an adapter to use Arduino MKR shields with the Pico: PicoMKRAdapter - connect Arduino MKR Shields to Raspberry Pi Pico

So the hardware was no big deal, just stacking the boards ontop of each other.


image


Software


I really like the Arduino ecosystem where there are lots of third party libraries available to control every peace of hardware you could imagine.


It would be nice if this is also the case with the Pico.


Unfortunately this seems not to be so at the moment. There exists a document how to get started ( https://datasheets.raspberrypi.org/pico/getting-started-with-pico.pdf  ) which shows you how to create your own projects. But as far as I have seen there is no concept how to use third party libraries.


The only way is to make your own directory along-side the examples directory and place all your project files in this directory.

image

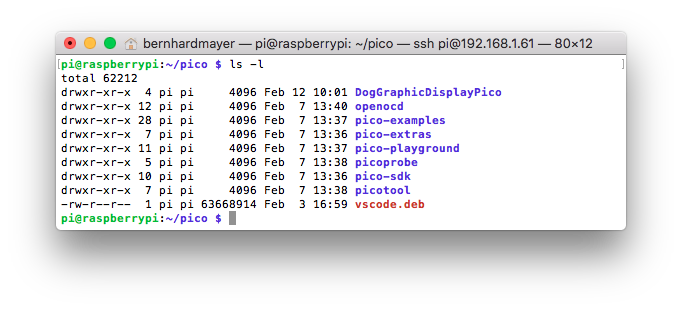
I named my project DogGraphicDisplayPico. This screenshot shows where the project directory is located. If you use a raspberry pi as build system it should be in /home/pi/pico

image

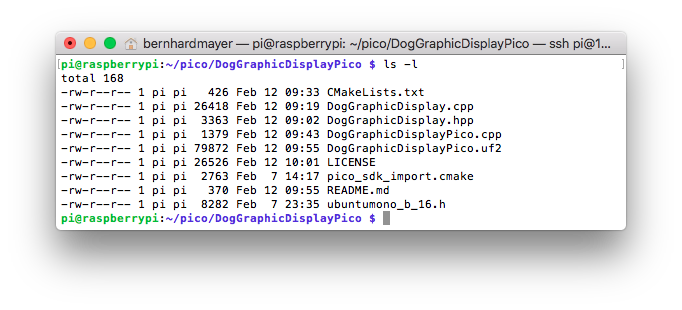
The files are all in one directory and glued together and connected to the pico sdk by a cmake file.


This project is highly based on my library for the Arduino https://github.com/generationmake/DogGraphicDisplay

The adoption for the pico was quite simple. Just replace the functions to access the GPIO pins. So change from digitalWrite() to gpio_put() and the same for the hardware SPI access.


The programm itself doesn't do very much. It just displays a text and scrolls it to the left.


Source code


The main program is quite straight forward. Unlike the Arduino sketches it doesn't have a setup and a loop function but only one main function and the programm stays in an infinite loop there.


#include <stdio.h>
#include "pico/stdlib.h"
#include "hardware/gpio.h"
#include "pico/binary_info.h"
#include "DogGraphicDisplay.hpp"
#include "ubuntumono_b_16.h"

const uint LED_PIN=25;
const uint BACKLIGHT_PIN=20;

DogGraphicDisplay DOG;

int main(){

  bi_decl(bi_program_description("DogGraphicDisplayPico."));

  stdio_init_all();

  gpio_init(LED_PIN);
  gpio_set_dir(LED_PIN,GPIO_OUT);
  gpio_init(BACKLIGHT_PIN);
  gpio_set_dir(BACKLIGHT_PIN,GPIO_OUT);
  gpio_put(BACKLIGHT_PIN,1);

// DOG.begin(14,7,6,0,1,DOGM128); //CS = 14, 7,6= use Software SPI, A0 = 0, RESET = 1, EA DOGM128-6 (=128x64 dots)
  DOG.begin(14,0,0,0,1,DOGM128); //CS = 14, 0,0= use Hardware SPI, A0 = 0, RESET = 1, EA DOGM128-6 (=128x64 dots)

  DOG.clear(); //clear whole display
  DOG.string(0,0,UBUNTUMONO_B_16,"RaspberryPi Pico", ALIGN_CENTER); // print text in line 0 at position center

  static int offset=DOG.display_width(); // static variable with the size of the display, so text starts at the right border

  while(1){
    DOG.string(offset,3,UBUNTUMONO_B_16,"Hello to the scrolling World on Pico!"); // print "Hello World" in line 3 at position offset

    offset--; // decrasye offset so text moves to the left
    if(offset<-292) offset=DOG.display_width(); //our text is 232 pixels wide so restart at this value

    gpio_put(LED_PIN,0);
    sleep_ms(20);
    gpio_put(LED_PIN,1);
    sleep_ms(40);
  }
}


The complete source code with the make file is available on github: https://github.com/generationmake/DogGraphicDisplayPico


Build process and programming


The build process is also very straight forward. Just create a build directory and generate the make files there.


mkdir build
cd build
cmake ..
make


This generates a file DogGraphicDisplayPico.uf2 (amongst others). Then connect the Pico to your computer in the bootloader mode by holding the BOOTSEL switch while plugging in. The Pico will appear as a mass storage device. Just copy DogGraphicDisplayPico.uf2 to this device and it will be programmed and you are ready to go.


Video


You don't have permission to edit metadata of this video.
Edit media
x
image
Upload Preview
image

  • Sign in to reply

Top Comments

  • DAB
    DAB over 4 years ago +1
    Nice post. The new RPi has potential. DAB
  • DAB
    DAB over 4 years ago

    Nice post.


    The new RPi has potential.


    DAB

    • Cancel
    • Vote Up +1 Vote Down
    • Sign in to reply
    • More
    • Cancel
element14 Community

element14 is the first online community specifically for engineers. Connect with your peers and get expert answers to your questions.

  • Members
  • Learn
  • Technologies
  • Challenges & Projects
  • Products
  • Store
  • About Us
  • Feedback & Support
  • FAQs
  • Terms of Use
  • Privacy Policy
  • Legal and Copyright Notices
  • Sitemap
  • Cookies

An Avnet Company © 2025 Premier Farnell Limited. All Rights Reserved.

Premier Farnell Ltd, registered in England and Wales (no 00876412), registered office: Farnell House, Forge Lane, Leeds LS12 2NE.

ICP 备案号 10220084.

Follow element14

  • X
  • Facebook
  • linkedin
  • YouTube