


|

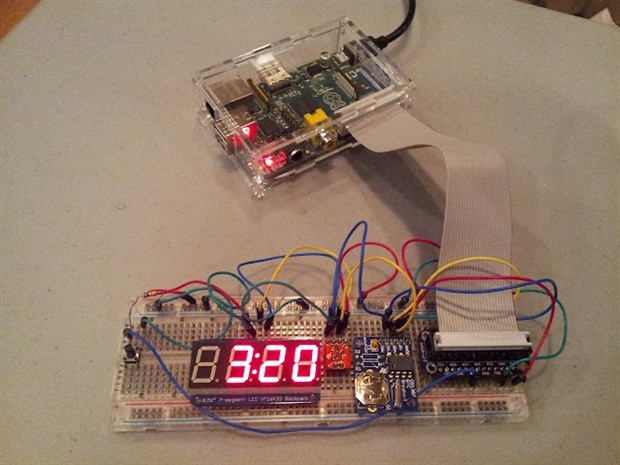
I previously wrote about adding a real-time clock and temperature sensor to the Raspberry Pi. I've now added an Adafruit I2C 7-segment display to create a time & temperature display:
simon.monk conveniently ported Adafruit's Arduino library for the display to Python for the Pi as he covers in his blog post: Led Clock using Raspberry Pi. His i2c7segment Python library is available on Google Code. Simon describes the setup and installation process:
I had to do the following to get I2C to work, following the instructions here:
sudo apt-get install python-smbus
sudo apt-get install i2c-tools (usefull but not essential)
sudo modprobe i2c-dev
sudo modprobe i2c-bcm2708
To simplify the process of using the display, I have created a Python library modelled on the Adafruit library for Arduino. You can download this from here and then cd into the extracted folder and do:
sudo python setup.py install
I also had to install the PySensors Python library which enables reading the temperature sensor via lm-sensors. I downloaded the library and then installed with:
sudo python setup.py install
I'm using Adafruit's Occidentalis v0.2 image, but I believe this should also work on the latest Raspbian Wheezy image. Before I go further into the software, I'll go over the hardware setup which is shown in this Fritzing diagram:
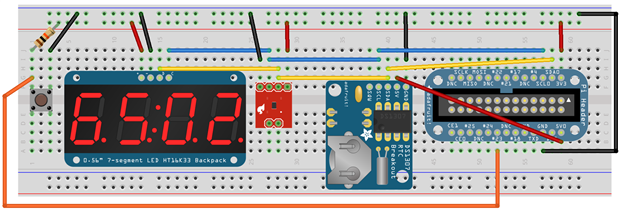
I must WARN that I have removed the resistors from the Adafruit DS1307 RTC. It runs at 5V so Adafruit recommends removing them so that it doesn't damage the Pi's 3.3V pins. Aside from that, the SparkFun TMP102, Adafruit RTC and Adafruit 7-segment display are all connected to the Pi's I2C bus via the Adafruit Pi Cobbler breakout board. There is also a pushbutton which is connected to the Pi's GPIO #23. A 10K resistor pulls it up to 3.3V when the pushbutton is not being pressed. The software displays the temperature for 3 seconds when the button is pressed:
This Python script, timetemp.py, runs the show:
It is based on Simon's example clock script as well as Adafruit's tutorial on using buttons with the Pi. I soon realized that I wanted this script to run automically when the Pi boots up rather than having to login in to run it. I first created this bootup "init" script which is placed in /etc/init.d/timetemp:
I then actived this init via this command:
sudo update-rc.d timetemp defaults
Then I created a wrapper shell which the init script calls. It initilizes the RTC and temperature sensor on the I2C bus and then sets the system time from the RTC:
However, it turned out that there were other init scripts interfering with the time after I set it. I disabled these conflicting scripts with the commands:
sudo update-rc.d -f hwclock remove
sudo update-rc.d -f fake-hwclock remove
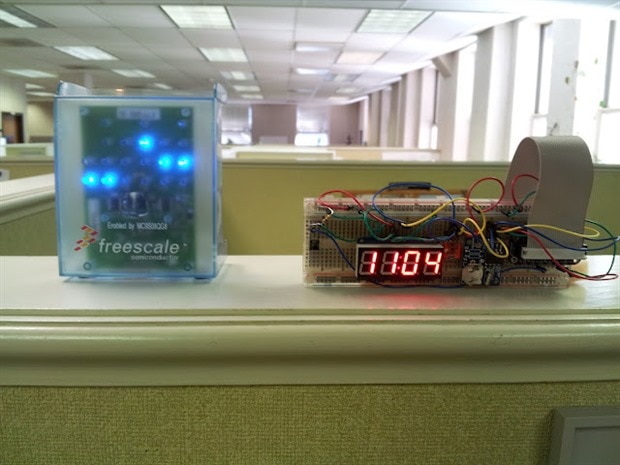
The 7-segment display now displays the correct time everytime I turn on my Pi. Here it is perched atop my cube next to a nice Freescale clock: it's a binary and decimal friendly workplace now 
Cheers,
Drew
| Product Name* | Description | Supplier | ||
| Raspberry Pi Model B | Raspberry Pi model B | Raspberry Pi |
| |
| Optical Mouse | Basic USB optical mouse | IONE / Pro Signal |
| |
| Raspberry Pi Power Supply | 120-240v to 5V power supply with micro USB connector | Raspberry Pi |
| |
| Keyboard | Basic USB keyboard | Gear Head / A4 Tech |
| |
| Pre-programmed 4GB SD card | 4GB Class 4 SD card preloaded with Debian 6 Linux | Samsung |
| |
| Adafruit Pi Cobbler | GPIO breakout kit for Raspberry Pi | Adafruit Industries |
| |
| Breadboard | Basic breadboard with 830 connection points | Twin Industries |
| |
| Jumper wire bundle | Jumper wires for use on breadboard | Bud Industries |
| |
| 10k resistor | 10K ohm, 250mW carbon film resistors | Multicomp |
| |
| DS1307 RTC breakout | DS1307 I2C real time clock on breakout board | Adafruit Industries |
| |
| TI TMP102 breakout | TI TMP102 I2C temperature sensor on breakout board | TI / Sparkfun electronics | ||
| Adafruit 4-Digit 7-Segment Display | Adafruit 0.56 4-Digit 7-Segment Display w/I2C Backpack, red | Adafruit Industries |
| |
| SPST tactile switch | Small SPST tactile switch with through hole connections | Apem |
|
*Products and resources listed are listed to help members build their own Pi Projects. They are suggestions and listed for educational purposes. For substitutions of any parts, please post a question asking the original author.
