


Table of Contents
Introduction
This short project can be used to output WAV format sound effects for animatronic displays (such as at model train exhibitions), but it could have other applications, too. It was created after a requirement was mentioned by colporteur . The requirement was to be able to generate farm animal sounds in synchronization with the physical movements that the animals make.
This project uses a Pi Pico with up to 8 (for now) trigger inputs to accept when a sound needs to be played out. The sound recordings (recorded in WAV format) are then played through a speaker. Since all animals are equal, the Pi Pico will mix the WAV recordings on-the-fly, so you can have a whole menagerie of animals all making their sounds whenever required.
The entire project is through-hole soldered because it relies on using ready-made modules. It is a quick-to-solder project because I originally designed the board for construction by kids in a project described here: Pocket Scarface – Pi Pico Python Based MP3 Clip Player
This new project reuses all the same hardware from that earlier project; only software changes were required!
There is a quick video demo here; it’s a bit repetitive because it was tempting to keep hitting buttons on it!
How Does it Work?
The general idea is simple; there are a bunch of inputs on a Pi Pico microcontroller, and whenever they are activated (the precise method of activation is for further study! For now, I used buttons), then the Pico will output digital sound information (in 24kbit/sec mono format for now) to an audio DAC module which plays it out. That’s it for the hardware; all the interesting stuff happens in software.

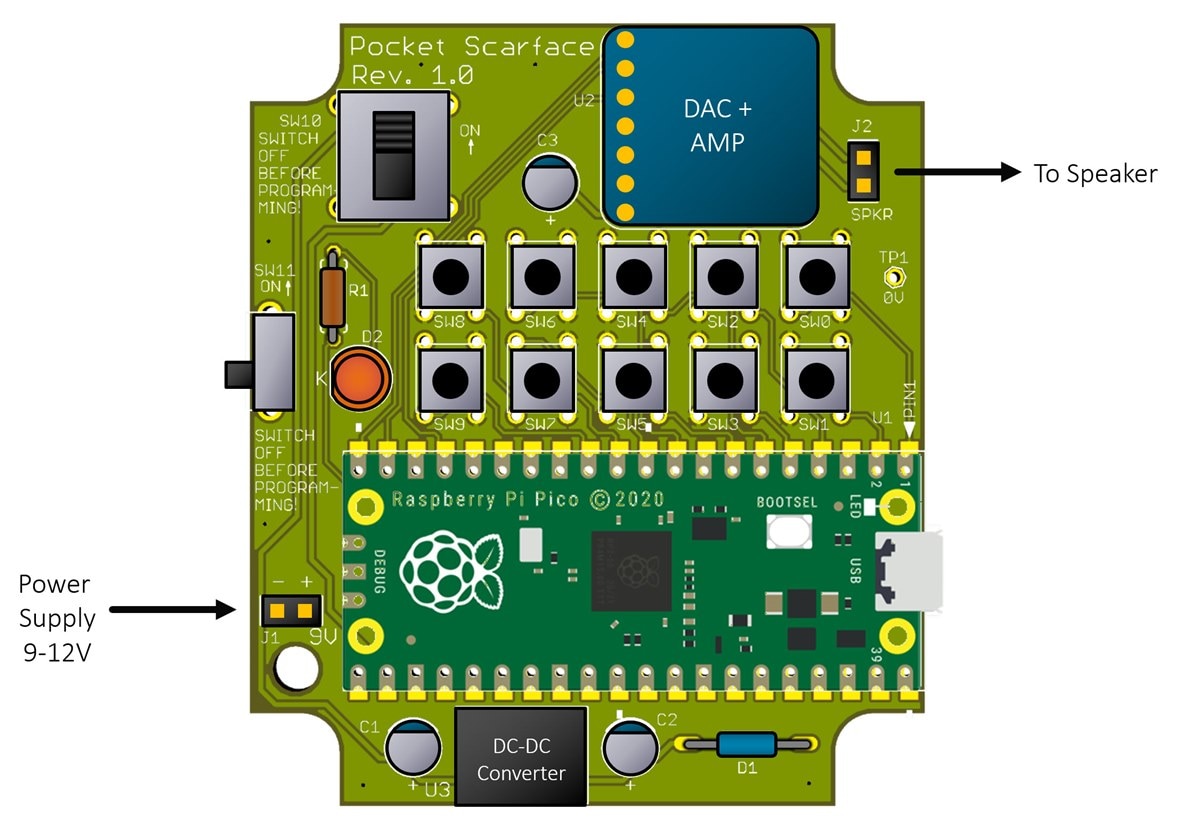
The PCB layout below shows how everything fits on the board. As mentioned, this board was used for an earlier project, so the PCB and circuit won’t be described here since there’s zero hardware difference from the earlier project. You can refer to that earlier blog to build the board if desired. The only difference is the software, which will be discussed next.
The way the software works is that it continually fills a buffer array with sound samples whenever a memory buffer is free. The Pico’s low-level PIO functionality uses the buffer content to clock out data in I2S format to the DAC. All the main.c file code has to do is figure out what to put in the buffer! The way that is achieved, is that whenever a trigger is activated, the sample values for the WAV sound get added to the sample values for whatever other trigger sounds have been activated. Up to 8 sounds can be played simultaneously (or 'voiced') in this way. The same trigger can occur repeatedly if desired (e.g., hitting the same button quickly repeatedly), because, as long as at least one voice is free, then sound samples can be assigned to it. The C code merely sums up the 8 voice samples to create a single output sample and repeats until the buffer is full.
Using the Ready-Built Code
If you already have a Pi Pico and an I2S DAC board (it doesn't have to be the same board as I used, but that is tried-and-tested), then all you need to do is wire them up (there are three wires which make up the I2S interface, plus GND), and then you’re ready to use the code.
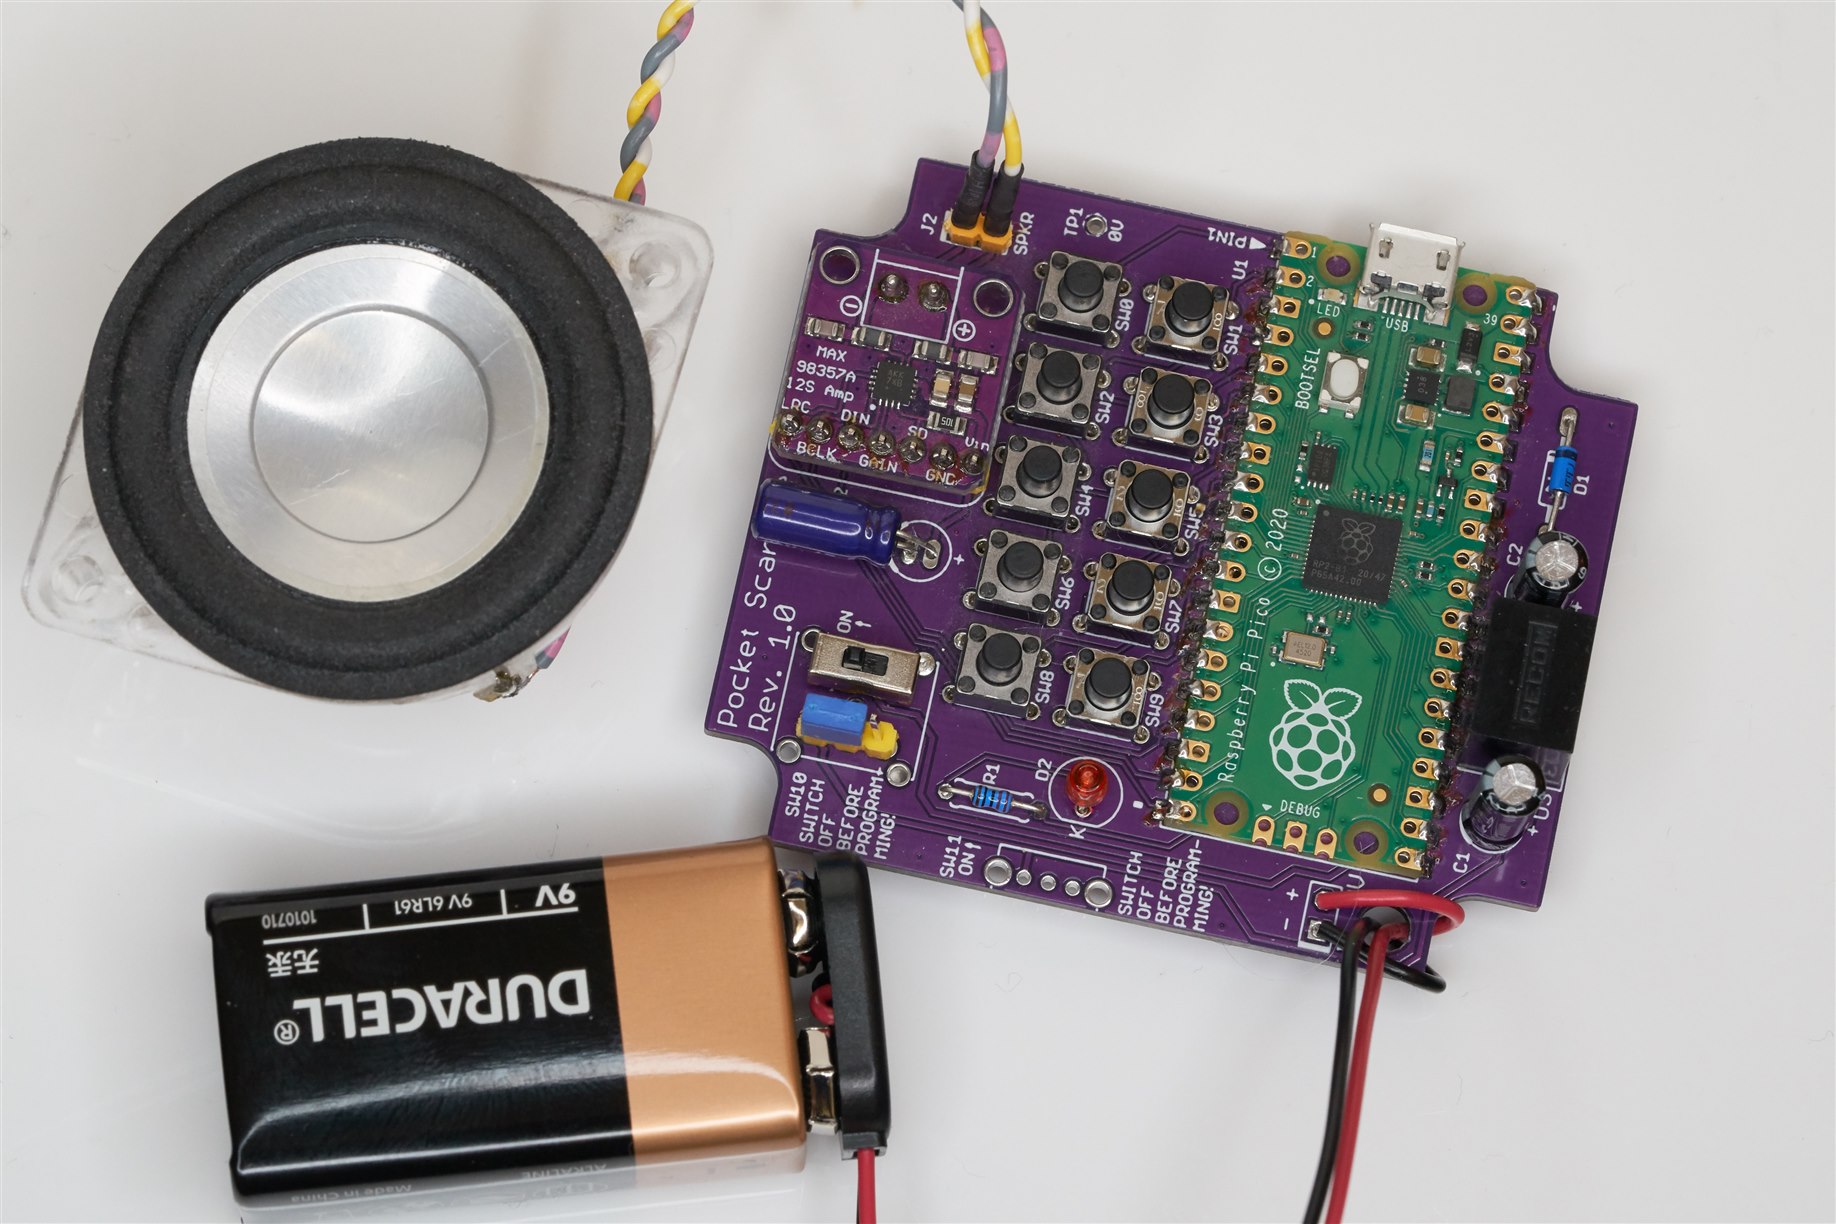
With the board unpowered (no 9-12V source) hold down the BOOTSEL button on the Pi Pico (it is the only button on the Pi Pico), and then plug in the USB connector to the PC, and then release BOOTSEL. A drive letter will appear on the PC, and you can drag-and-drop the ready-built sound_fx_mixer.uf2 file onto it. After a minute or so, it will be programmed. Now the USB can be disconnected and a 9-12V battery can be attached (only connect it when the PC is disconnected). Shorting any trigger input GPIO pins to GND will make an animal sound! The PCB layout above has buttons connected to the trigger inputs.
The ready-built code uses the following sound assignments for the 8 triggers:
Cat, Cow, Dog, Goat, Hen, Rooster, Snake, Wolf.
The assignments are easy to modify in the code. You can also add any custom sounds.
If you wish to make such custom modifications to the code, then the next section explains what needs to be done. You need to be familiar with building C/C++ code for the Pi Pico – there are several blogs written by various people, explaining this on element14 and other websites.
Source Code
The software is written in C/C++ and requires ARM developer tools and the Pico C/C++ SDK to be installed; this is not discussed here; there are other blogs that explain how to set up the computer environment for this. This blog will assume a top-level path c:\development\pico, and then within that folder, there is a folder called pico-sdk which contains that Pico C/C++ SDK.
You’ll also need to install code known as pico-extras. To do that, type the following at c:\development\pico (or whichever top-level path you’re using):
git clone https://github.com/raspberrypi/pico-extras.git
Now you’ll have a pico-extras folder too.
Add the following environment variables to your system (how to do this is described in the blogs that explain how to use the Pico C/C++ SDK).
PICO_SDK_PATH=c:\development\pico\pico-sdk;PICO_EXTRAS_PATH=c:\development\pico\pico-extras
The triggered sound FX project source code is on GitHub. Download and extract that to C:\development\pico, so that a folder called sound_fx_mixer appears there. You could use the git clone command to do this:
git clone https://github.com/shabaz123/sound_fx_mixer
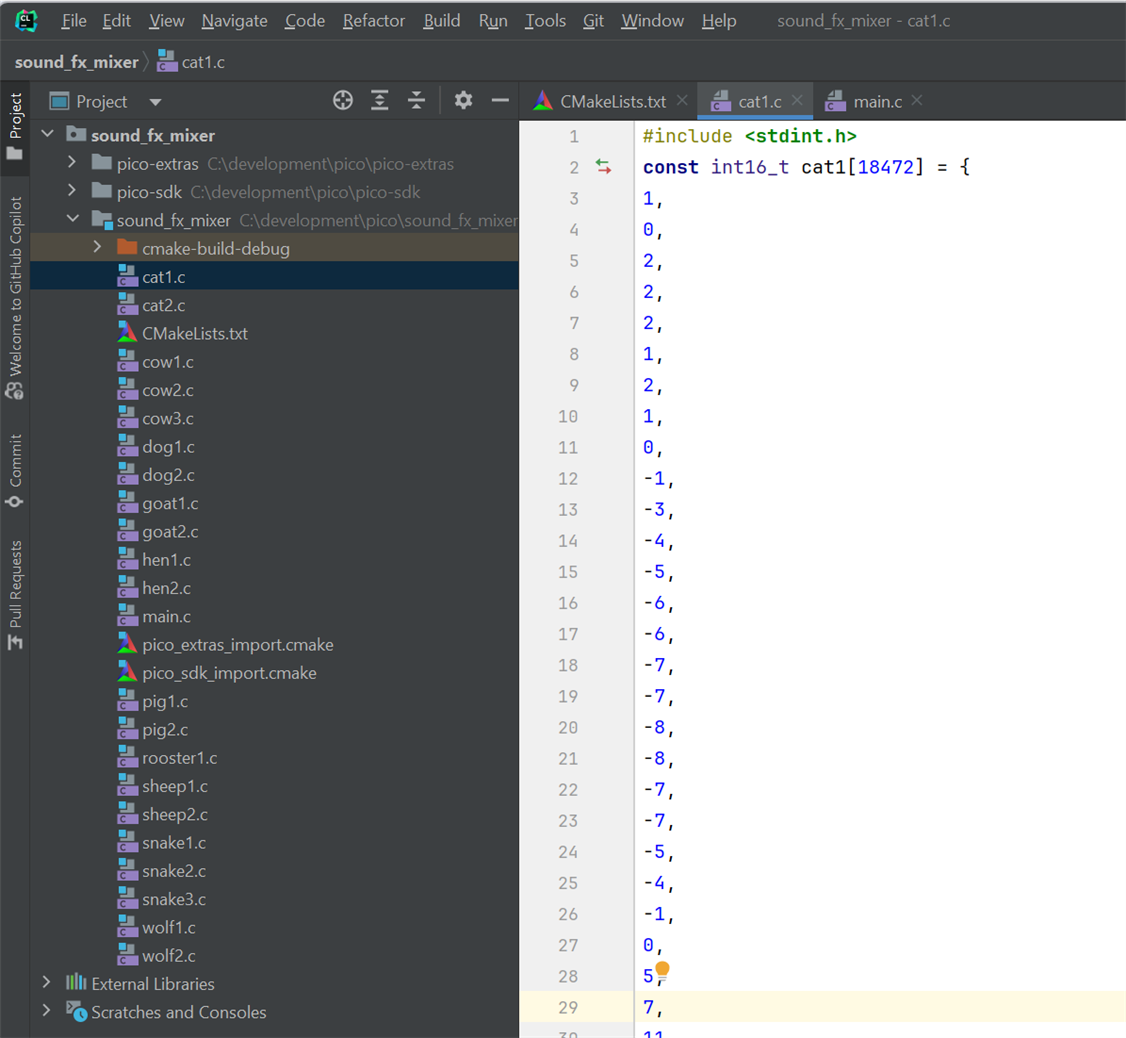
Now you can build the code in the usual way; follow any existing Pi Pico C/C++ SDK tutorial blogs. I used the CLion development environment for Pi Pico C/C++ projects (screenshot below), but there are tutorial blogs that show how to use Visual Code instead, and there are other tutorials that demonstrate how to build code directly from the command line.
Changing the Sounds
The code predominantly consists of a main.c file and a load of C files containing the animal sounds in C arrays.
If you wish to use different sounds, you must convert your desired sound files (in WAV format) to C array files. To do that, there is a Python script in the wav_convert folder. It will convert every .wav suffixed file placed in the wav_files sub-folder, into C files placed in the output sub-folder. You can then copy-paste the C files into the ~/development/pico/sound_fx_mixer folder. The C files will contain arrays that have the same name as the original WAV files, so it’s important to give good names to the WAV files before converting them. For instance, if you want a bird sound, call the WAV file something like bird1.wav and then the wav_convert.py Python program will generate a C file called bird1.c, containing a C array called bird1.
Note that only mono 24 kbit/sec WAV files must be used. Software such as Audacity may be able to convert files into that format.
In the code, the following changes need to be made.
First, add the file names to the CMakeLists.txt file:
add_executable(sound_fx_mixer main.c cat1.c cat2.c cow1.c
The remainder changes all need to be made in the main.c file.
Declare the C arrays in a similar style as shown below.
/********* extern declarations for all the sound arrays *********/extern const int16_t cat1[18472];extern const int16_t cat2[15190];extern const int16_t cow1[36258];
Next, ensure that the desired new sound is part of the sound_array:
// array of pointers to the sound arraysconst int16_t *sound_array[21] = { cat1, /* 0 */ cat2, /* 1 */ cow1, /* 2 */
Make sure that there are defines for the sounds:
// definitions for convenience#define CAT1 0#define CAT2 1#define COW1 2
Fill in the sound_array_len array, with the entry for your new sound:
// array of lengths of the sound arraysconst int sound_array_len[21] = { COUNT_OF(cat1), COUNT_OF(cat2), COUNT_OF(cow1),
There are 8 triggers supported currently (there are 10 buttons on the board, but only the first 8 are used for now).
The button_sound_map defines what sounds you want played whenever the trigger occurs. If the first button is pressed, the cat1 sound will be played with the example sound map below:
const int button_sound_map[8] = {CAT1, COW1, DOG1, GOAT1, HEN1, ROOSTER1, SNAKE1, WOLF1};
Now the code can be re-built.
Summary
It was nice to see that experimenting with audio using C programming with the Pi Pico is not difficult. It would be interesting to extend the project with (say) simultaneous background music capability!
As another project idea, the animal sounds could be replaced with musical instrument notes for up to 8-note polyphony, for a simple children’s toy.
If you have ideas for this project, it would be great to hear about them!
Thanks for reading.
Top Comments