


Table of Contents
Introduction
There is often a need to store data in some form of non-volatile memory. It may be just a few bytes or much more!
I came across a situation with the Pi Pico a while back, where I was using the Pico’s Flash memory chip (which contains the application firmware for whatever you’re using the Pico for, but it also often has some spare space) to store my own data. Occasionally, there was corruption, which presumably occurred if the device was being power-cycled at the same time as the memory was being written. I didn’t explore that further at the time but have been meaning to consider alternative solutions, that might work with the Pico and other microcontrollers too. At that time, I swapped to using a micro SD card, which is fine but can be overkill if the card doesn’t ever need to be removed.
Recently another requirement came up, which was to be able to read memory chips desoldered off the boards from other products.
This project was the result, of a mash-up of several separate requirements!
This blog post discusses three main points:
- How to connect cheap Flash memory to a microcontroller (I’ll be using the Pi Pico)
- How to read/write Flash memory contents
- How to use a file system to read/write files to the Flash memory
I also recommend checking out work by Jan Cumps and by Michael Kellett, who have been investigating high-quality C++ software techniques for working with SPI Flash, and working with PSRAM, respectively.
My needs were a little different as mentioned, so I won’t cover other memory types, and my code is pretty basic, it blocks during SPI communication, only allows one instance, and is not thread-safe, so it’s not all that fantastic (unless these limitations do not matter for your app!). There may also be bugs since my testing of it is minimal. Please fix it if you spot a bug!
Connecting Flash Memory to Microcontrollers
Flash memory is available in various packages, often surface-mount, but also through-hole. This blog post will only consider typical 8-pin SPI NOR Flash memory.
Only six wires need to be connected to the microcontroller. The datasheet for the Flash memory should be checked, to confirm that it is of the same pinout and that it supports the logic voltages involved (3.3V in the case of the Pi Pico).

As can be seen, the circuit is trivially simple.
(Note: you could optionally wire the WP# and HOLD# pins (pins 3 and 7 respectively) to GPIO and then set them high, and on some memory ICs it is OK to leave pin 7 disconnected, but it is not recommended to wire just the WP# pin to GPIO and leave pin 7 disconnected, because that might not be supported on all ICs.
The simplest most compatible way is to either (a) wire up the chip as shown in the diagram above, or (b) wire both WP# and HOLD# to GPIO and set them both high, or (c) wire up the chip as shown in the diagram above and wire WP# to GPIO and set it high. Check the datasheet for the specific memory IC if you're unsure, but I believe the diagram shown above will be compatible with all memory ICs with this pinout).
Due to the component shortage, one might be forced to use surface-mount memory parts, but fortunately, the 8 pads are very widely spaced usually, and so they are quite easy to hand-solder.
You can also get flip-top sockets for them if you’re planning to program a lot of chips of a specific size. I got such a socket from AliExpress.

Photo of a few memory chips for size comparison (they can be a lot smaller! but these sizes are easy to hand-solder):

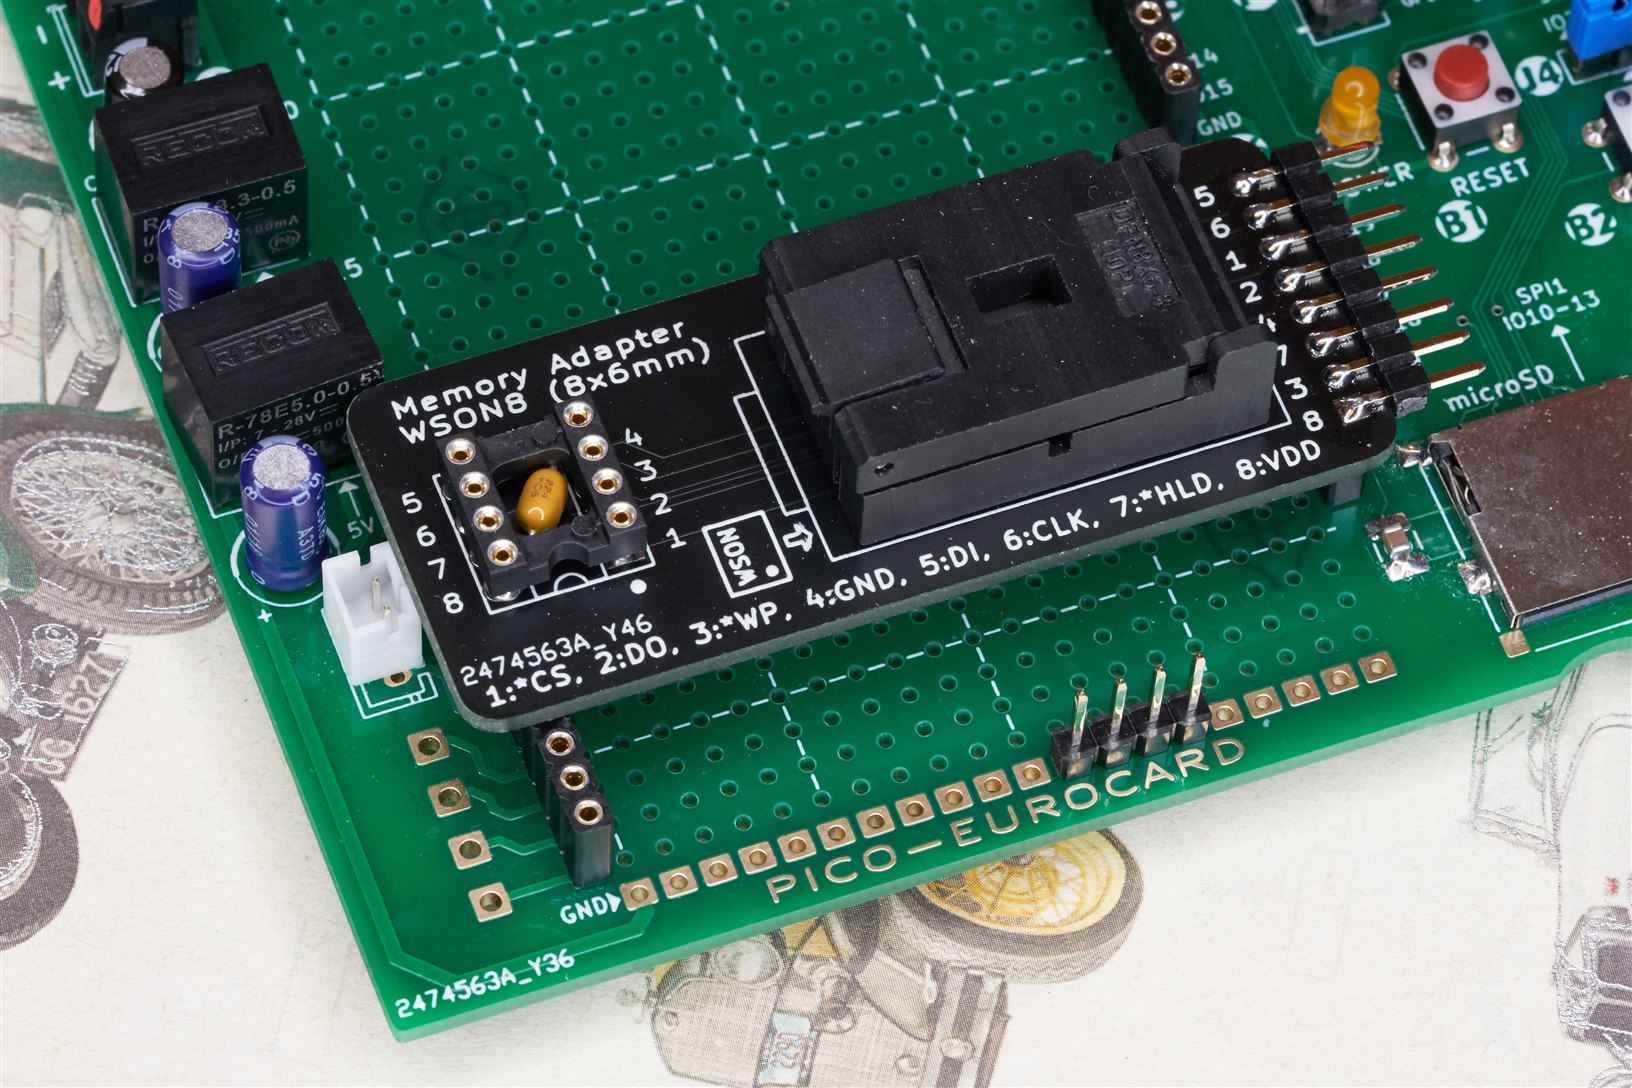
The bottom of the blog post has downloadable files for a test board for 8x6mm WSON-8 chips.

They are pretty large for SMD packages, with 1.27 mm spaced pads, so a socket isn’t essential if you’re just experimenting. The particular memory chip I used for testing was MX25L12833FZ2I-10G

The SIL header pins on the right side can directly plug into the Pico Eurocard, or you could just use jumper wires to connect it to any microcontroller board.
Reading/Writing to Flash Memory
I really like Mbed, so I searched around and found some Mbed code developed by ARM, called spif-driver. It neatly contains an entire SPI Flash memory driver in a single file (plus a header file) so I took that, and made a few slight modifications to get it working with the Pi Pico. The modifications remove references to the SPI handling in Mbed, replaced with SPI functions from the Pi Pico C/C++ SDK instead. If you’re using a different microcontroller board, it would be very easy to do a diff and see what changes I made and replace with the SPI functions for your microcontroller.
The main.cpp code can be examined to see how to use spif-driver (just search for the text ‘spif’). The commands are simple, for instance to erase a block of Flash:
spif.erase(addr, len)
where addr is an address (must be a value of 0, 4096, 8192, 12288 etc) and len must be a value of 4096, 8192 and so on.
To write memory, use the following command:
spif.program(buffer, addr, len);
where buffer contains the data to write, and addr is any value from 0 to 16777215 (for a 128 Mbit Flash, which equals 16 Mbytes of memory), and len is any value from 1 upwards.
To read memory, use this command:
spif.read(buffer, addr, len);
where buffer is the destination for the read data, and addr and len are the same as for spif.program().
Using a File System
The spif-driver mentioned above is great for directly reading or writing to specific locations on the Flash chip, however, sometimes a file system will be handy. I searched around and found a nice project called littlefs which implements features such as wear leveling, and some power loss resilience, so that if power is lost during a write operation, hopefully the file system won’t be corrupted (obviously, one should still take precautions, such as limiting the time that data is written, and perhaps consider power failure detection and backup, and write your code to recover from unexpected file content).
The littlefs code requires an interface to the underlying memory, and this is implemented in the lfs_adapter.cpp file. It merely calls the appropriate spif-driver functions.
To see how to use it, search the main code for lfs (short for little file system). You’ll see commands such as lfs_mount(), lfs_format(), lfs_file_open(), lfs_file_write(), lfs_file_read() and so on. The code example creates two files, one which contains the number of reboots of the system, and the other which contains an IP address (it is an example configuration file).
Trying out the Code
To quickly try the code without building it, there is a prebuilt firmware file that can be transferred to the Pico. There are screenshots further below of what to expect to appear over the USB Serial with the prebuilt firmware.
Otherwise, to build the code, assuming you have GitHub capability installed, type the following (I did this in a Windows terminal, but Linux would work fine too; I did this from a C:\development\pico folder:
git clone https://github.com/shabaz123/flashtester.gitcd flashtestergit clone https://github.com/littlefs-project/littlefs.git
Next, I started up CLion (see this web link to see how to configure it: Using CLion for Easier Coding with Pi Pico and C/C++ or you could use Visual Code if you prefer).
Click on Open, then select the C:\development\pico\flashtester folder and the project will load up and you’ll see an Open Project Wizard. Nothing needs to be done here, except one line needs typing, in the Environment box:

Type in the box:
PICO_SDK_PATH=c:\development\pico\pico-sdk
(That’s if your Pico SDK is installed there; otherwise, type the correct location).
Click on OK, and you’ll see the project all loaded into CLion. You can explore the project files just like with any development environment.

The code can be built by clicking on the hammer icon.

The binary file called flashtester.uf2 will be in the C:\development\pico\flashtester\cmake-build-debug folder, all ready for running on the Pico.
Serial terminal software (such as PuTTY or SecureCRT) can be used to see what the code does. The code will dump a lot of debug so that things like wear leveling can be examined. In a real project, the debug should be disabled.
The debug will show the size of the Flash memory chip:

You’ll also see how the file system writes and reads two files and displays the contents:

To develop code for the Pico faster, then PicoProbe can be used. The CLion web link mentioned earlier shows how to use PicoProbe. If you’re using Visual Code, then check out this link: Debugging the Raspberry Pi Pico on Windows 10
Summary
This blog shows how to connect 8-pin SPI Flash memory to a microcontroller, and how to read and write directly to the memory, and how to use a file system intended for providing some resiliency for constrained embedded systems.
Thanks for reading!


