


Hi All!  This is my first blog post about the Aim-TTi SMU4201 Source Measure Unit (SMU) I recently received for a Road Test.
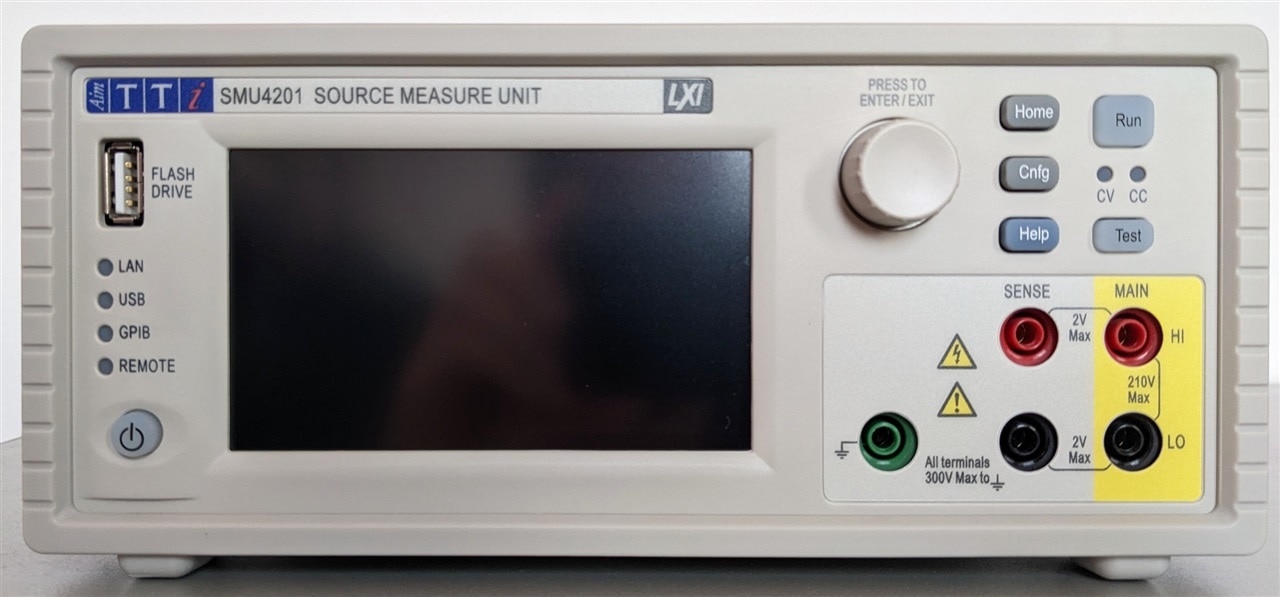
1. Introduction
A Source Measurement Unit (SMU) in not a conventional instrument. At the first look on the front panel it looks like a power supply, but it is much more than that.
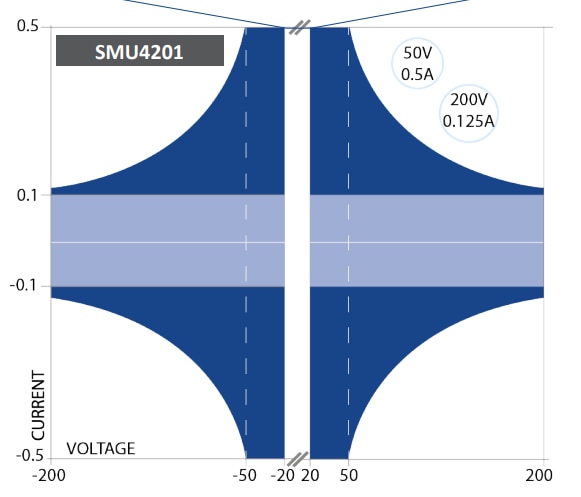
First of all an SMU is a four quadrant instrument, which means that it can not only provide positive and negative voltages, but it can also sink current, acting like an electronic load.
Along that, SMU-s are usually high precision instruments, and they include a multimeter capable of accurately measuring the sourced / sink voltage and current.
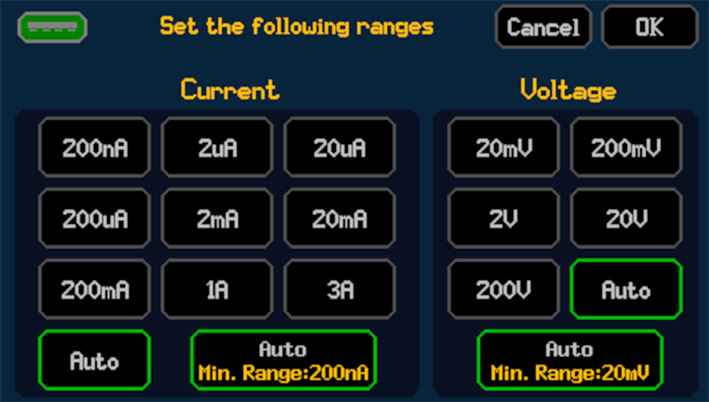
The Aim-TTi SMU4201 is the higher model from Aim-TTi's SMU4000 series source measure units, and it source and sink up to ±210V and up to ±3.15A. The instrument comes with a 6½ digit resolution multimeter, and it has a 0.015% basic accuracy. The available voltage measurement ranges start from 20mV and go up to 200V, while current measurement ranges go from 3A down to 200nA.
The instrument also comes lots of advanced features like sweep modes and remote control over LAN / LXI, and I plan to use these later in the road test. 
2. Packaging and First Look
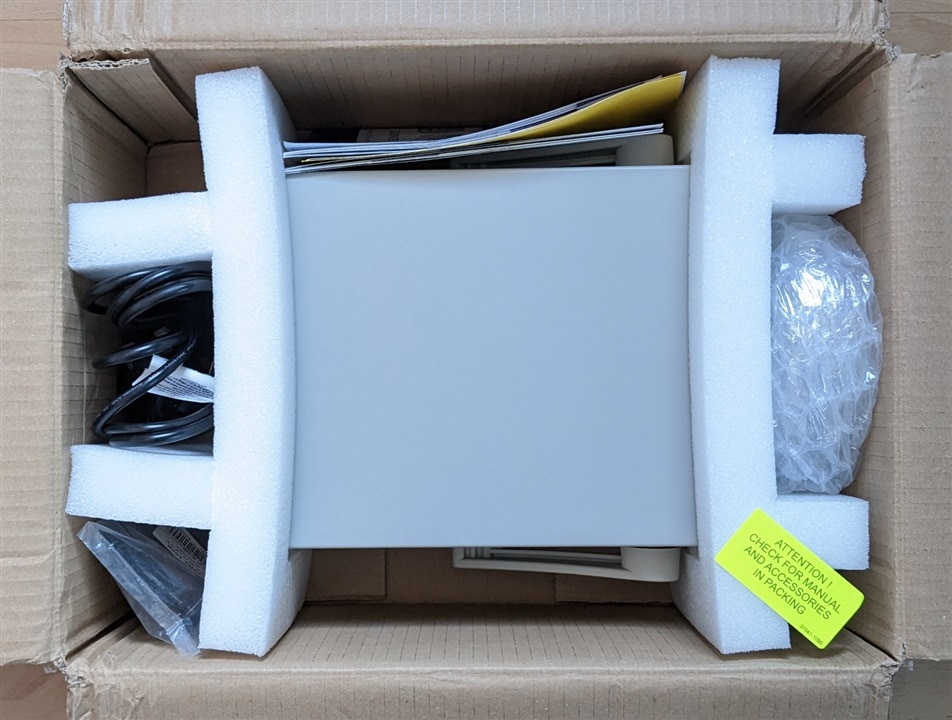
The Aim-TTi SMU4201 came in a generic cardboard box, and it looks to be well packaged. With the instrument we get some documentation (safety docs, certificate of conformity and warranty info) and couple of accessories (power cords and USB cable):
| {gallery}Packaging and Accessories |
|---|
Packaging |
|
Documentation |
|
Accessories |


No instruction manual is included in the box, but that along with the rest of the documentation it can be easily download from Aim-TTi's SMU4000 product page.
The SMU is fairly compact, Aim-TTi claims that is "smallest bench top smu on the market" it measures 250mm (W) x 97mm (H) x 295mm (D) with handles and bumpers, and 213.5mm (W) (½ rack) x 86.5mm (H) (2U) x 269mm (D) when rack mounted (with the accessories removed).
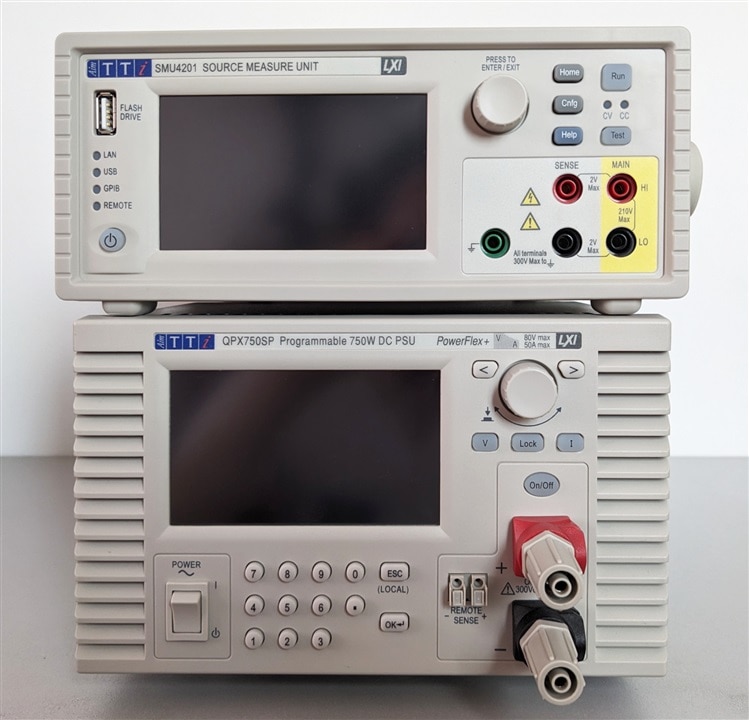
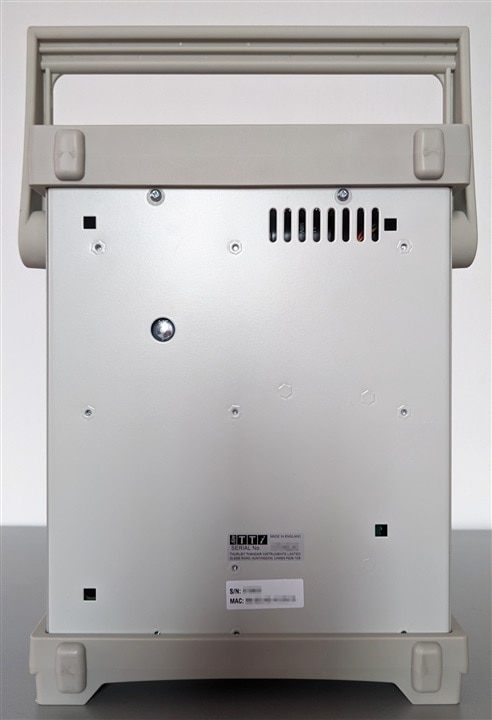
Bellow is what the SMU looks like along the Aim-TTI QPX750SP power supply, which will be also featured in the road test.
| {gallery}Size Comparision: SMU4201 vs QPX750SP |
|---|
|
Front
|
|
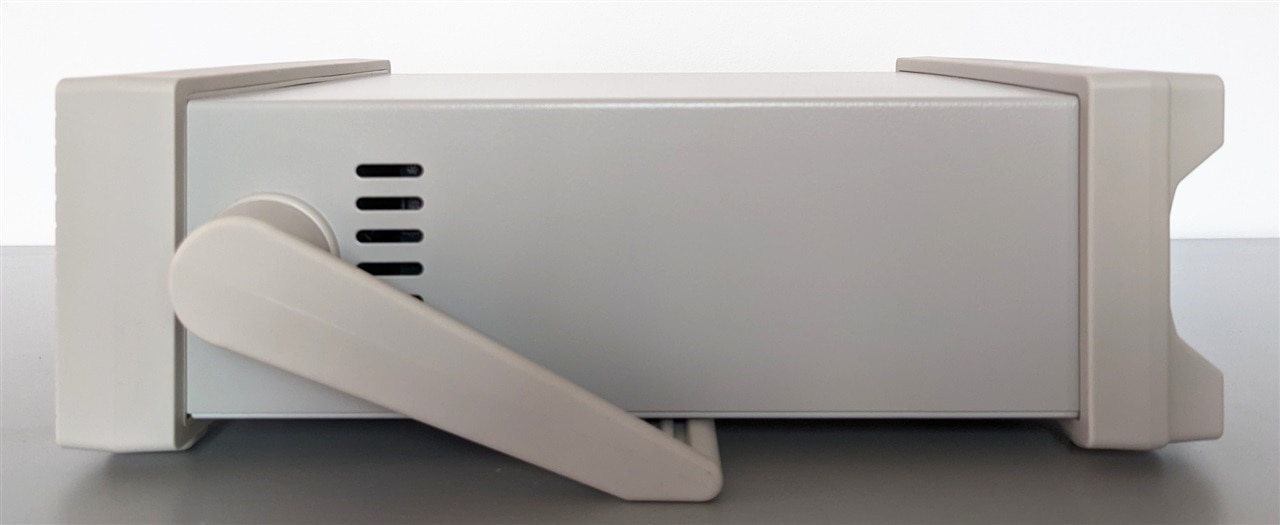
Side |
|
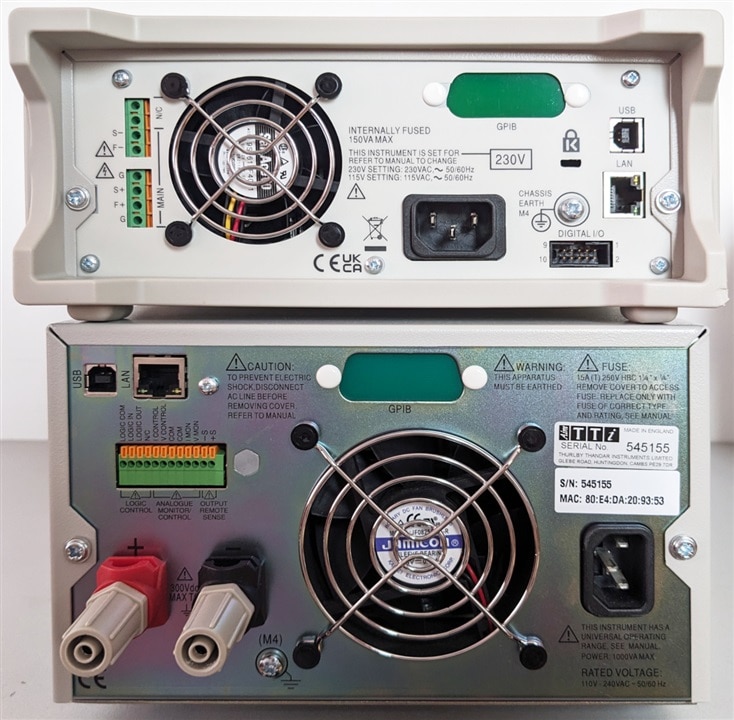
Back |
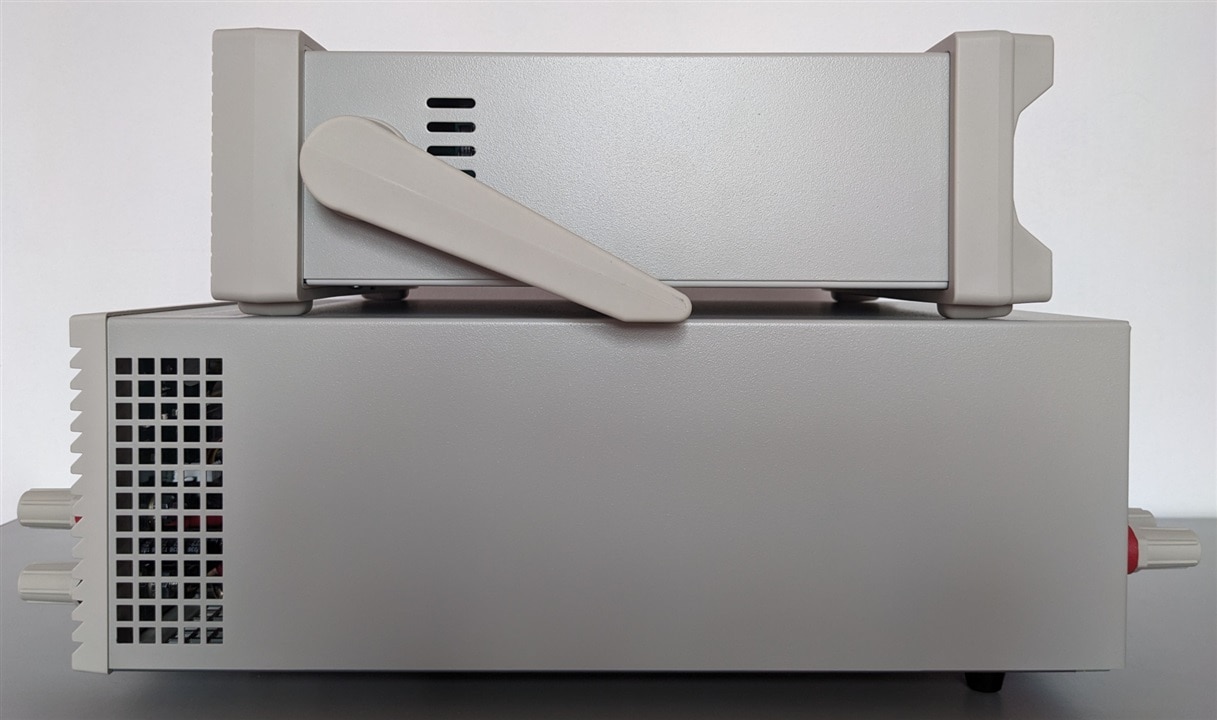
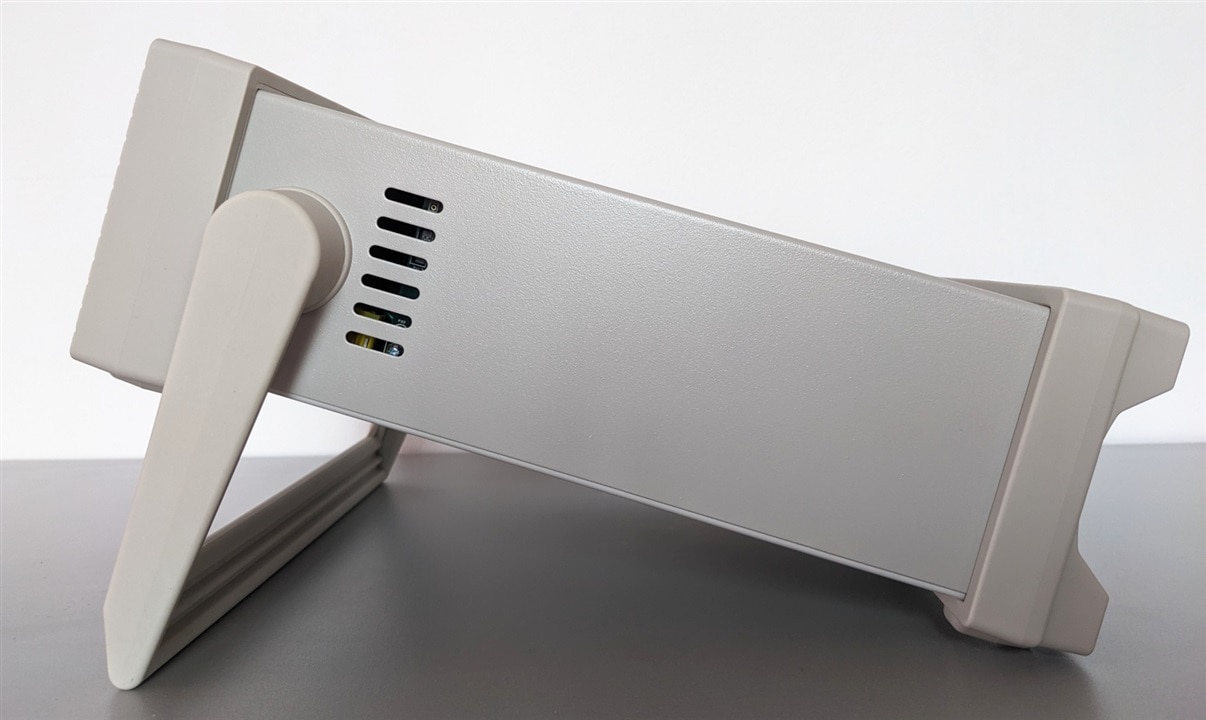
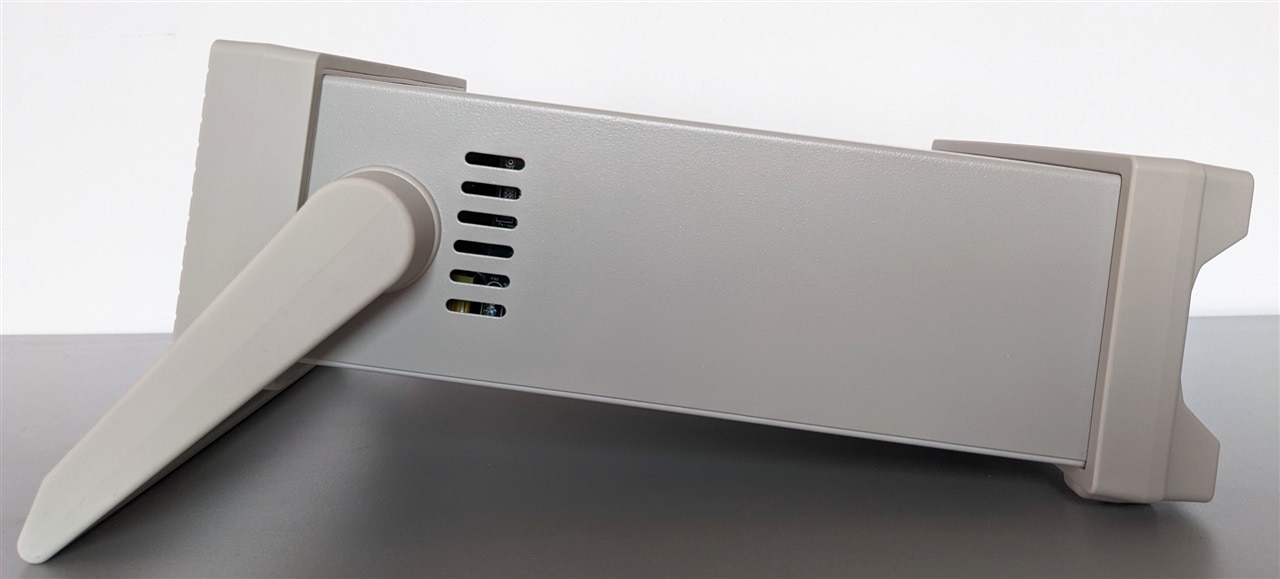
A combined handle + stand is fitted to the instrument. This can be set in 4 positions, from which 3 position are standing, while 4th is for carrying. Compared to leg style stands, the combined handle + stand is maybe a bit bulky, but I think it also allows more comfortable settings. I tend to use it the uppermost setting, which gives o good viewing angle with the instrument sitting on the bench.
| {gallery}Stand / Handle Positions |
|---|
|
Position 1 / Front |
|
Position 2 / Front |
|
Position 3 / Front |
|
Position 1 / Side |
|
Position 2 / Side |
|
Position 3 / Side |
|
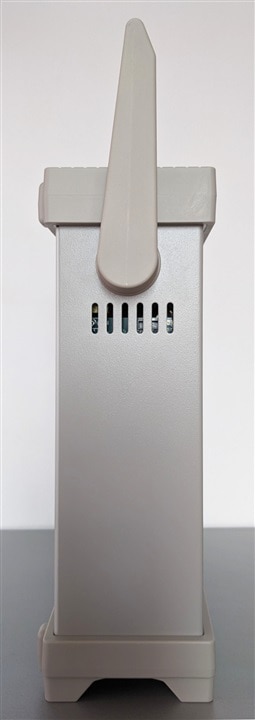
Handle / Side |
|
Handle Bottom |

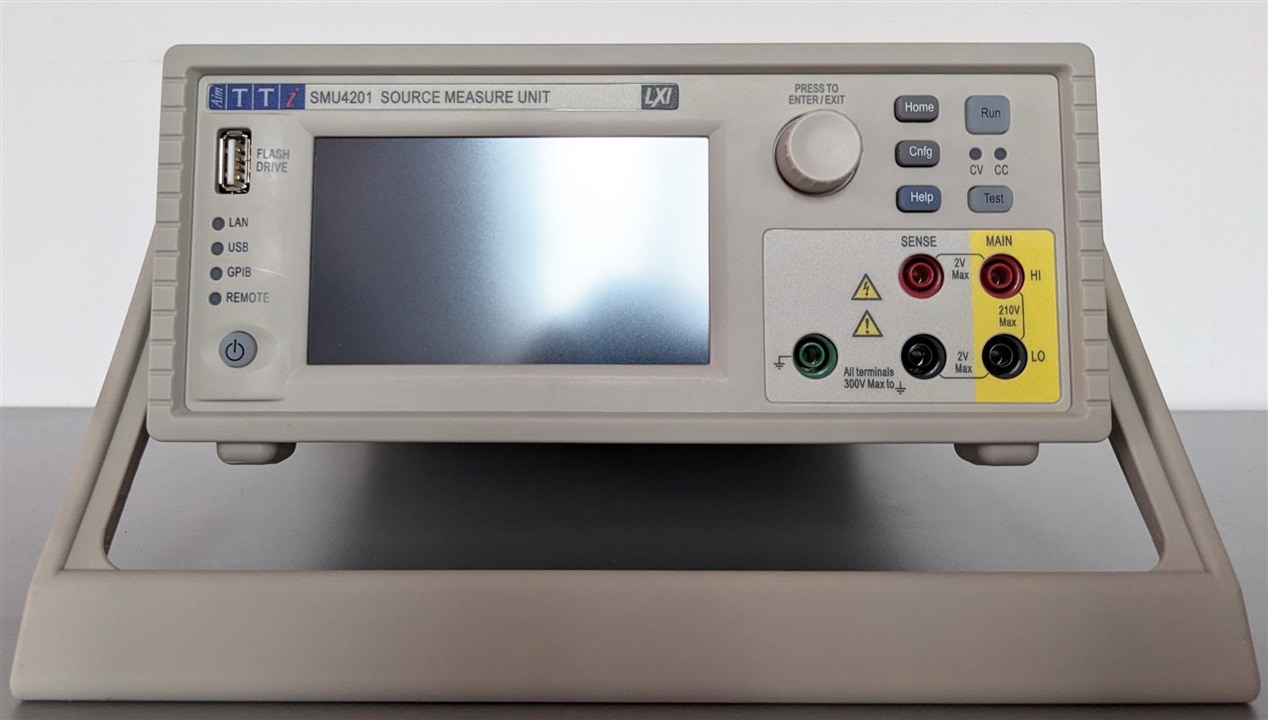
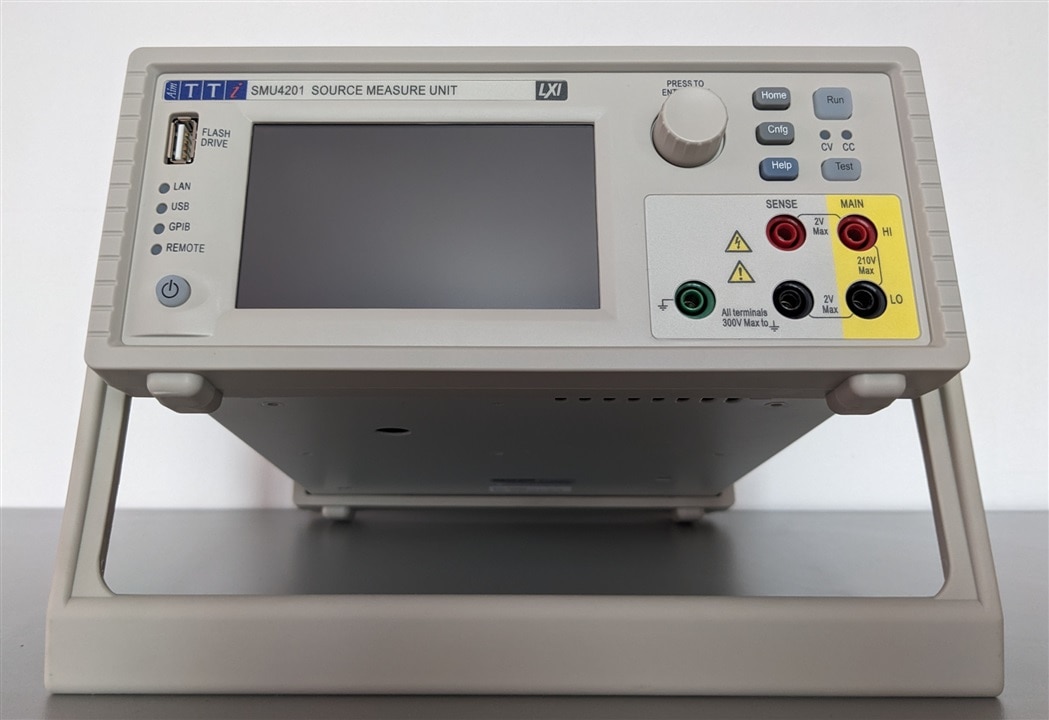

The front panel of the SMU comes with a touch screen (about ~11 cm in diameter), rotary knob, a couple buttons, 4 + 1 terminal posts and an USB port.
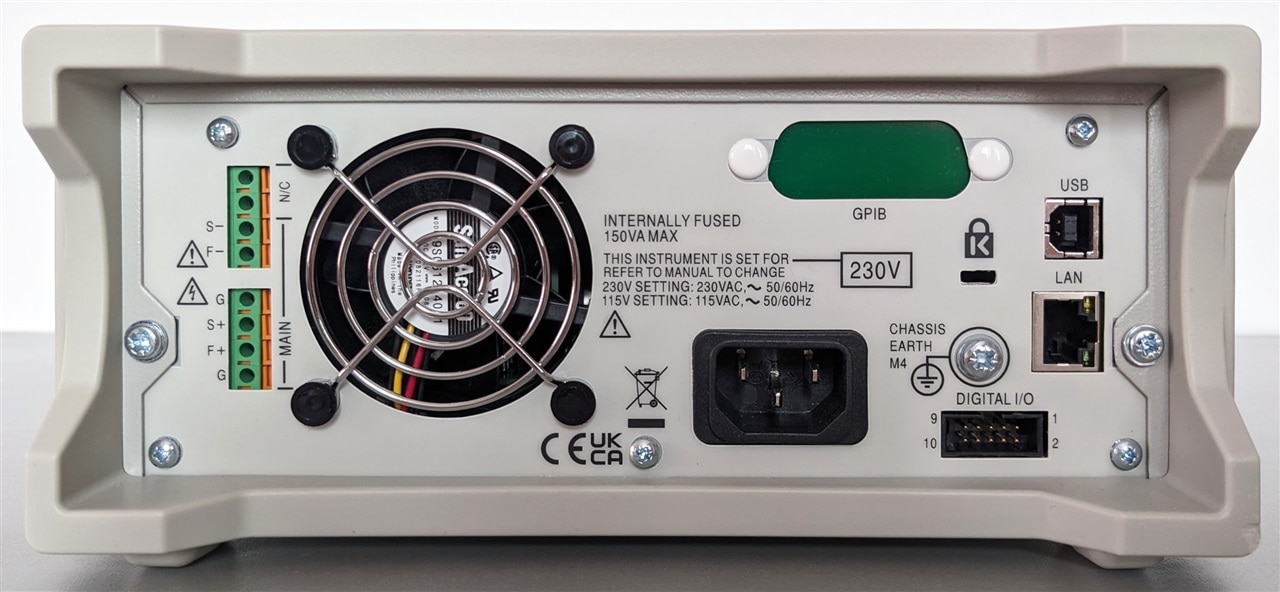
The back panel comes with screw-less terminals, power socket, digital I/O interface and LAN and USB ports.
The build quality of the instrument fields pretty good, as expected for the price. The only complain I have is that the on the front the 5 terminal posts and the casing are quite misaligned.
3. User Interface
In terms of user interface we have a ~ 11 cm / 4.3 inch touch screen with 480 x 272 px resolution, a rotary knob, and a couple of buttons (Power, Home, Cnfg, Help, Run, Test), and an USB socket:

The interface of the instrument is intuitive, and it can be controlled using either the touch screen or the rotary knob. Although some ui items like the buttons from the confirmation prompts are accessible only from the touchscreen.
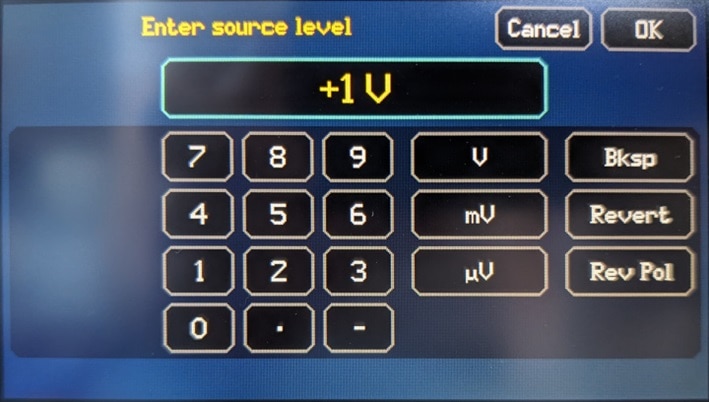
The main screen of the instrument is divided in two parts. On the top we get the main settings (like voltage and current limit in source mode), while on the bottom two measurement values are shown. We also get some useful touch buttons that allow quickly changing the measurements, ranges or jumping into a graph view. The source and sink parameters can be changed either using the rotary knob, or via the touch screen using a virtual keypad.
The rest of the settings can be accessed via the Configuration menu, which is accessible via the "Cnfg" button: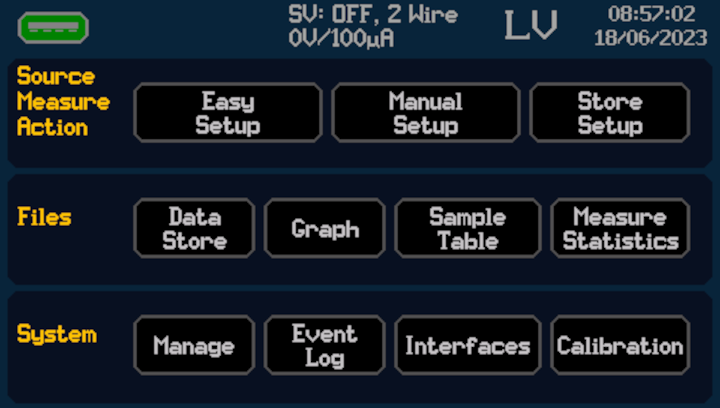
Note: I captured most of the menu interfaces using screenshots saved to the USB interface. Weirdly this feature is not active on some of the screens, although the USB icon is shown, but it is grayed out as there was no USB stick inserted. On other screens there is no USB icon. So, for these screens I made screen shots using my phone camera.
The Configuration Menu has the following structure:
- Source Measure Action
- Easy Setup - allows quick configuration of the instrument for common tasks
- Manual Setup - is the place for more advanced / fine grained settings
- Store Setup - allows saving / loading configurations
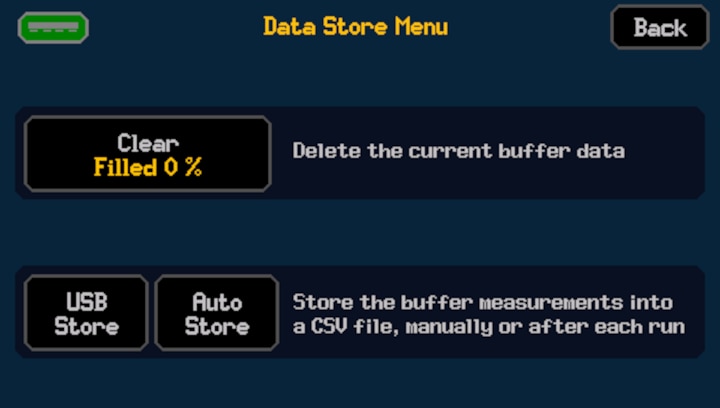
- Files
- Data Store - setting of the measurement / sample memory
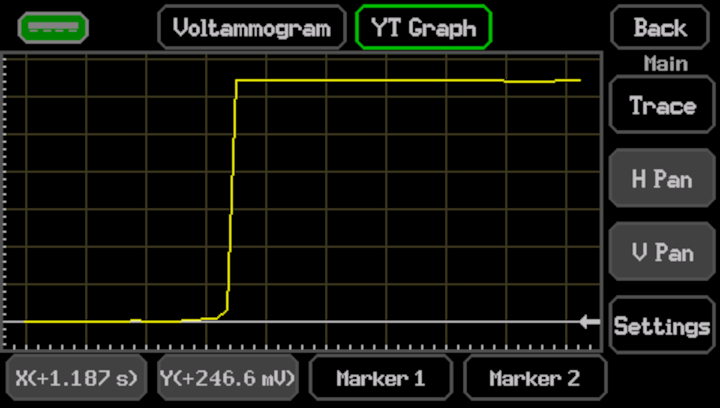
- Graph - displays measurements in a graph
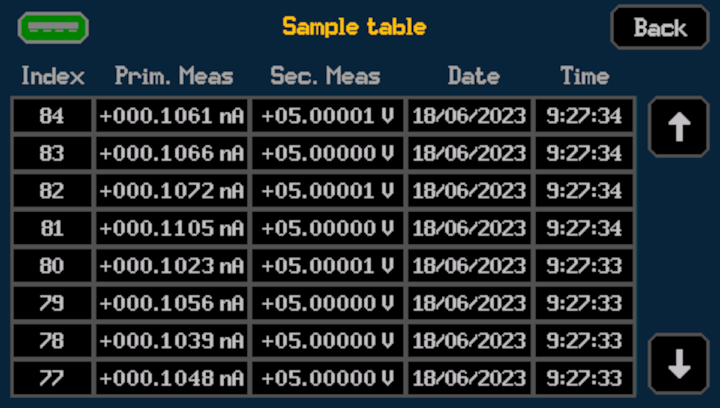
- Sample Table - displays measurements as a table
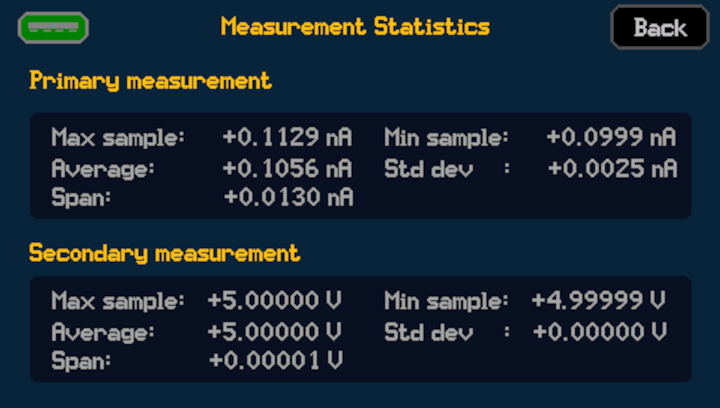
- Measure Statistics - show statistics about the measured values
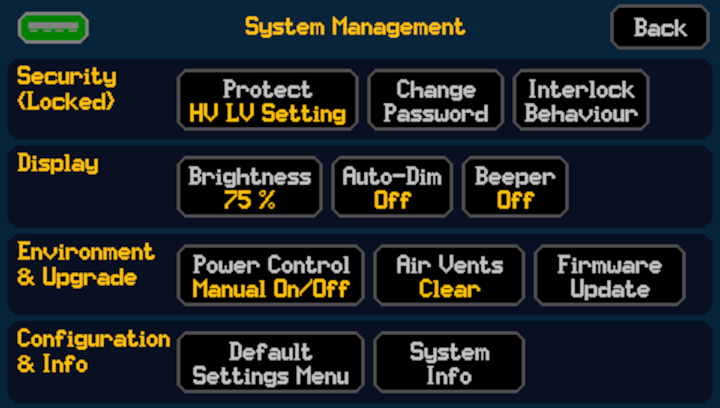
- System
- Manage - miscellaneous settings
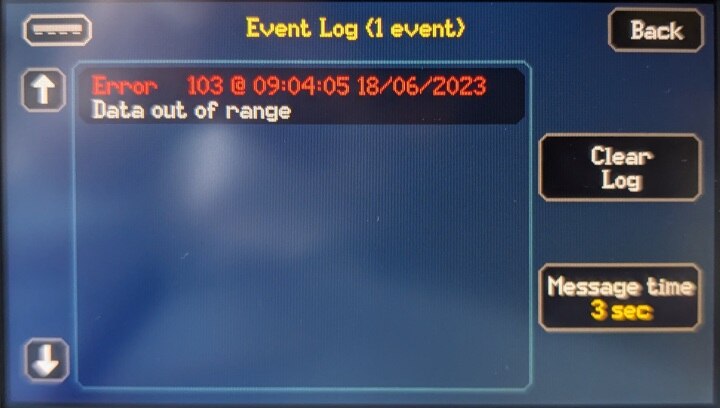
- Event Log - information, warning and error messages
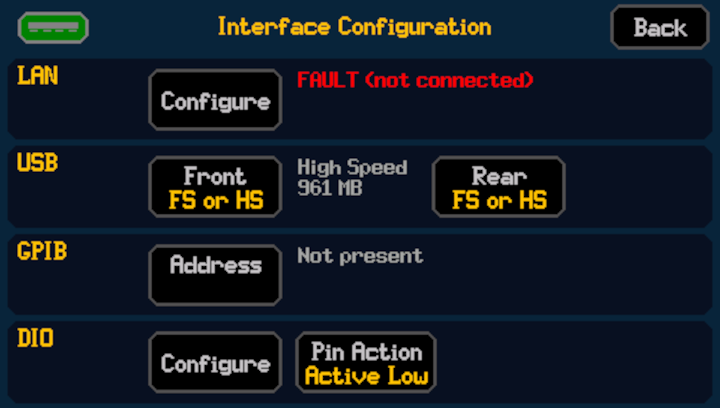
- Interfaces - interface configuration
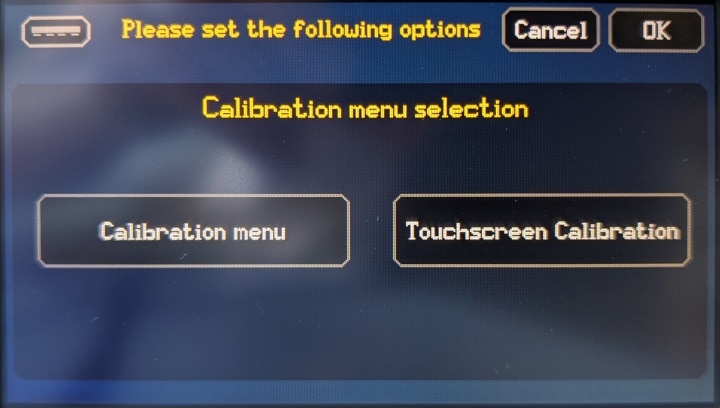
- Calibration - instrument and touchscreen calibration
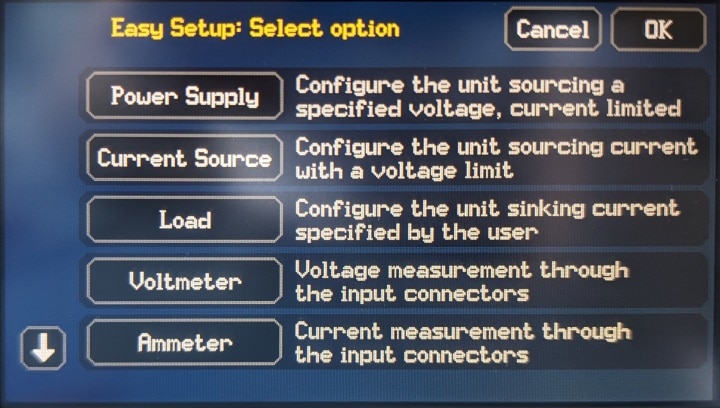
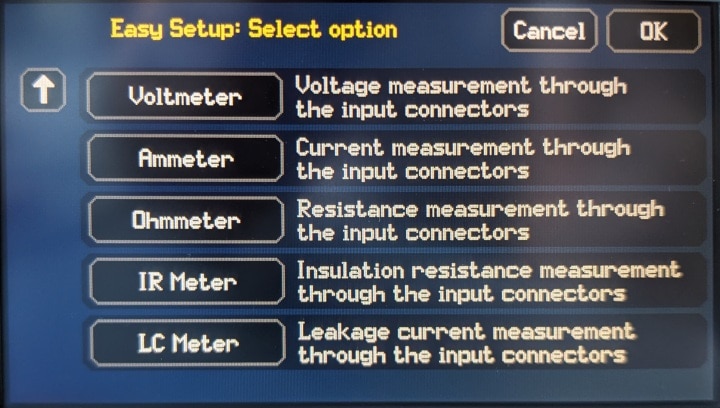
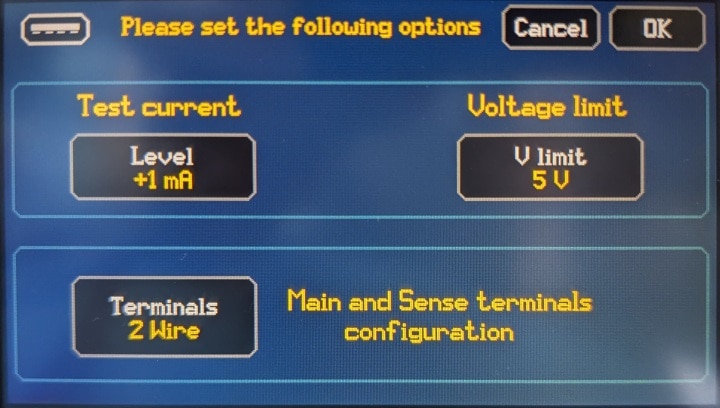
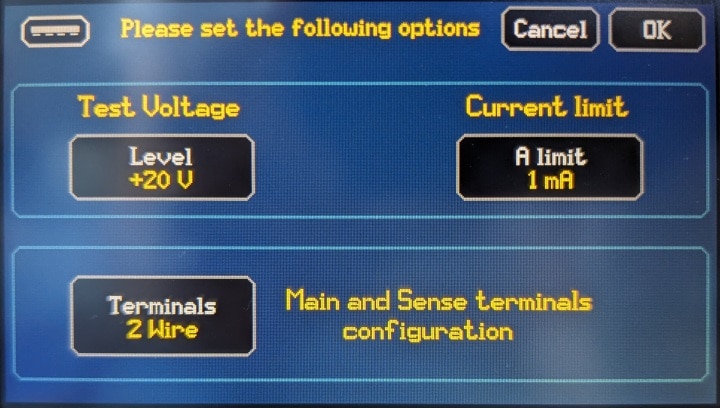
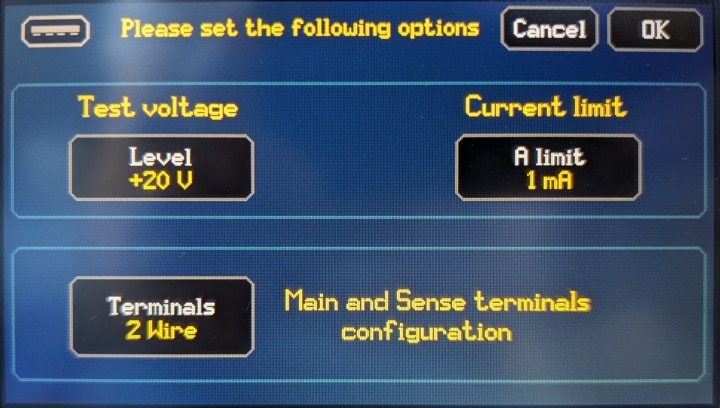
The Easy Setup menu allows us to quickly set up the instrument for the following functions:
- Power Supply - current limited voltage source (2 quadrants)
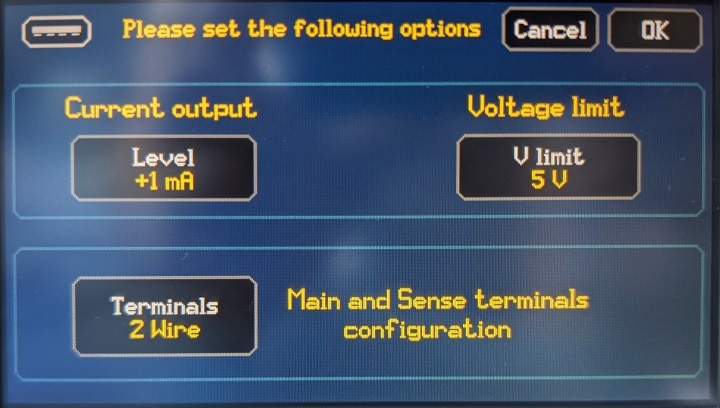
- Current Source - voltage limited current source (2 quadrants)
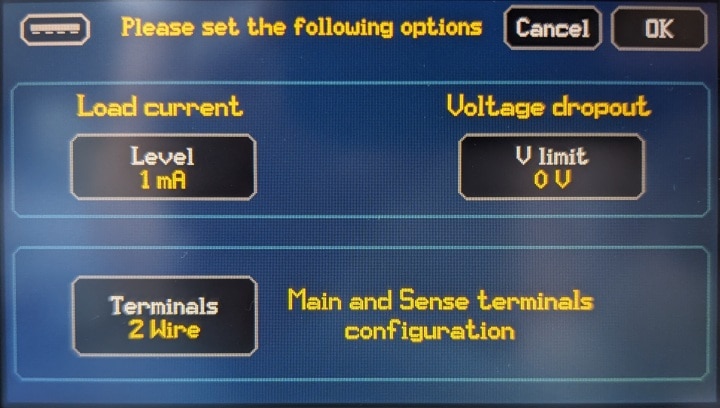
- Load - programmable load (2 quadrants)
- Voltmeter - allows measuring voltages
- Ammeter - allows measuring currents
- Ohmmeter - allows measuring resistances (with various voltage and current settings)
- IR Meter - insulation resistance meter
- LC Meter - leakage current meter
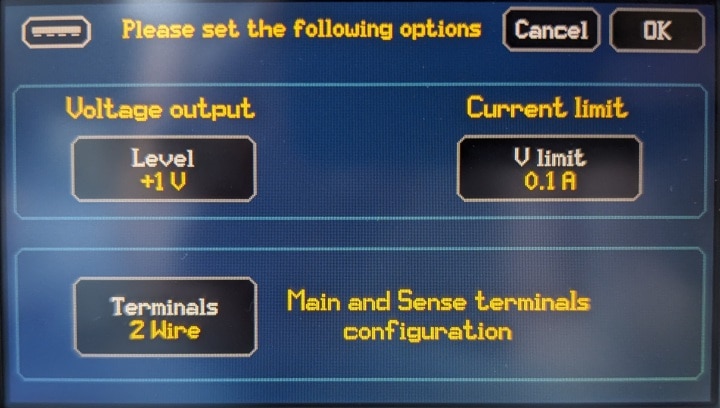
| {gallery:width=720,height=408}Easy Setup |
|---|
|
Options (1) |
|
|
|
Power Supply |
|
Current Source |
|
Load |
|
Voltmeter (no configuration options, after a warning / confirmation prompt it jumps to the home screen) |
|
Ammeter (no configuration options, after a warning / confirmation prompt it jumps to the home screen) |
|
Ohmmeter |
|
IR Meter |
|
LC Meter |
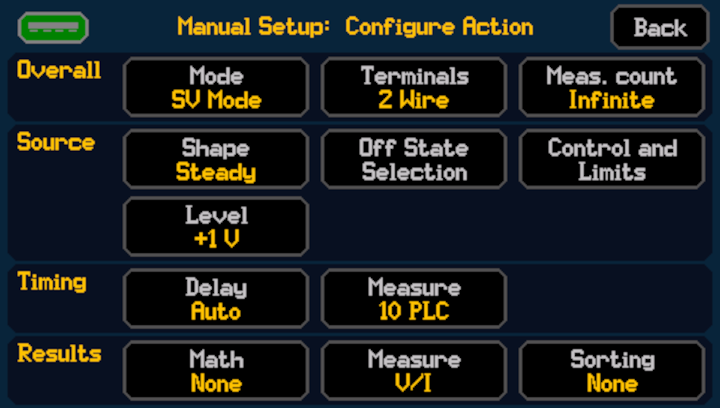
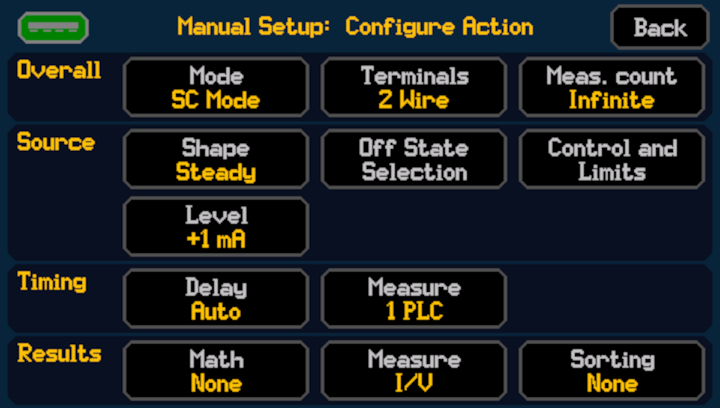
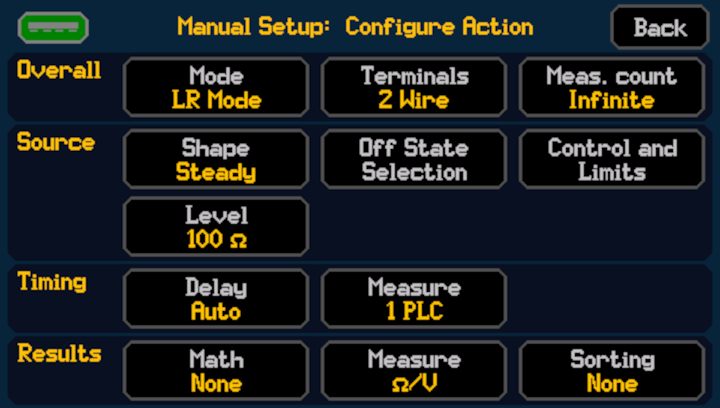
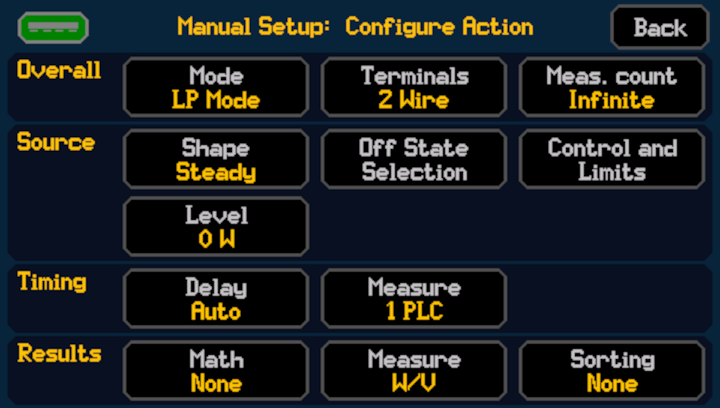
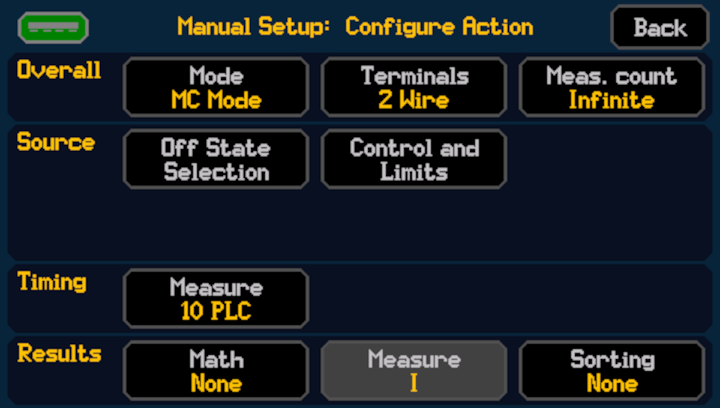
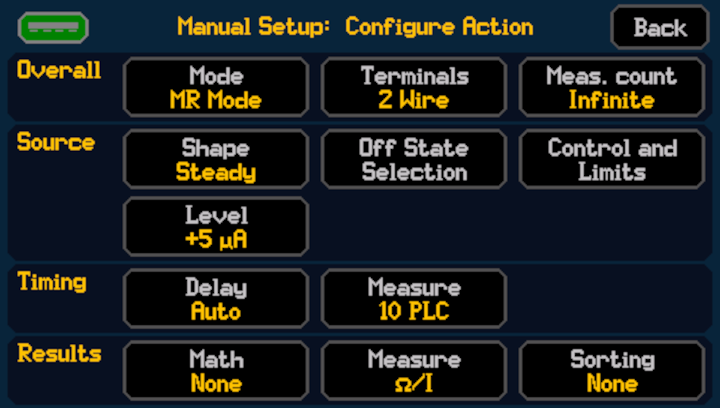
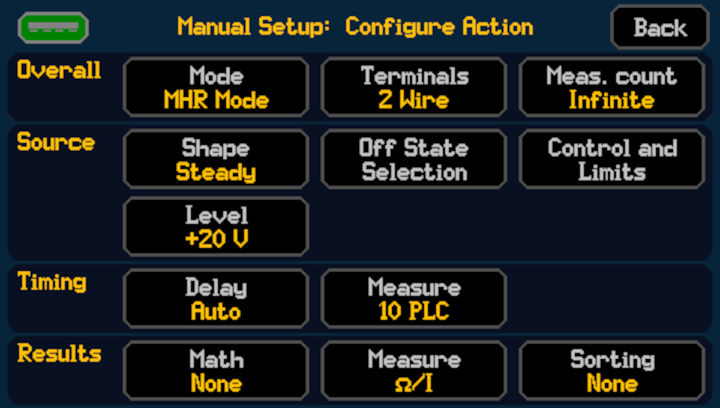
For more advanced features the Manual Setup screen offers a large set configuration options:

The screen is divided in four sections, which remain mostly the same in all of the available modes (except sequence mode):
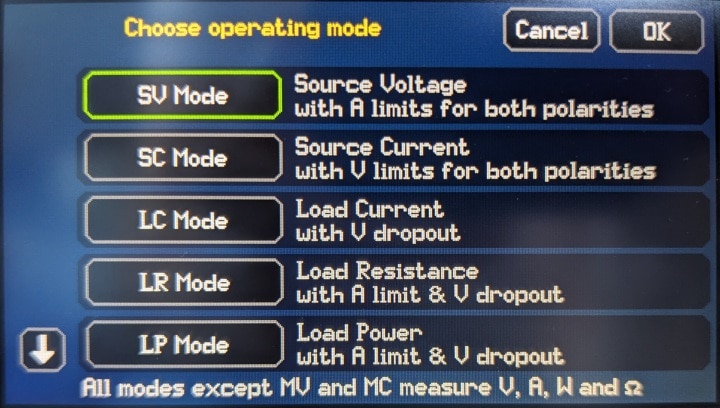
- Overall
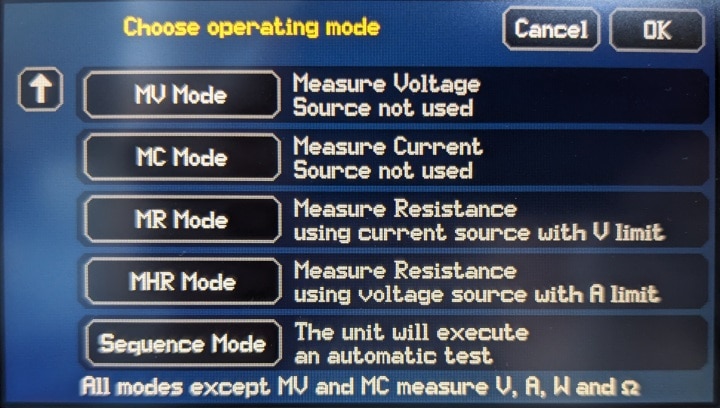
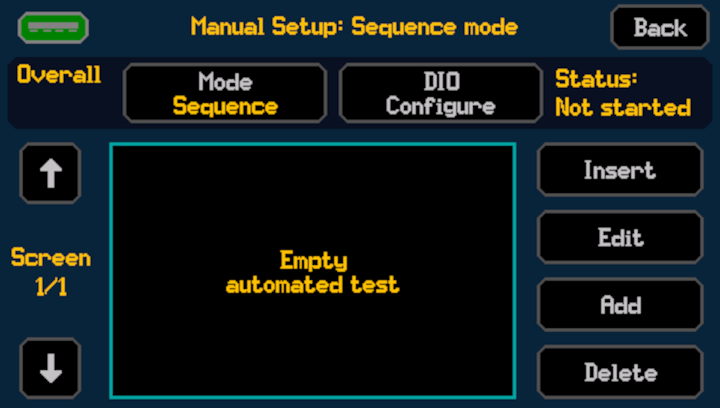
- Mode - allows select between a Source (SV, SC), Load (LC, LR, LP) and Measurement (MV, MC, MR, MHR) modes, along with the Sequence mode
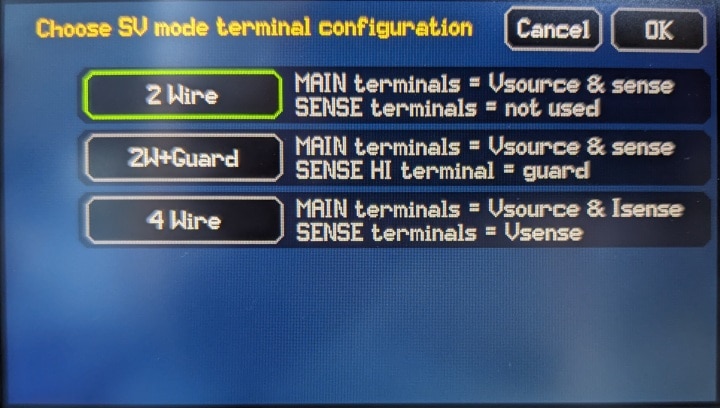
- Terminals - we can choose between 2 wire, 2 wire + guard and 4 wire measurement modes
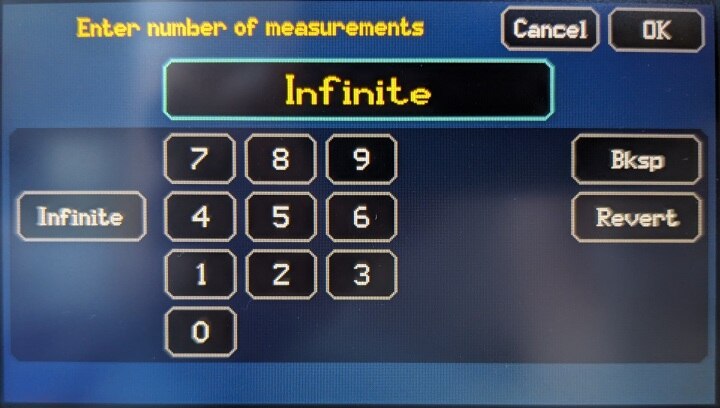
- Meas. count - allows as limit then number of measurement
- Source
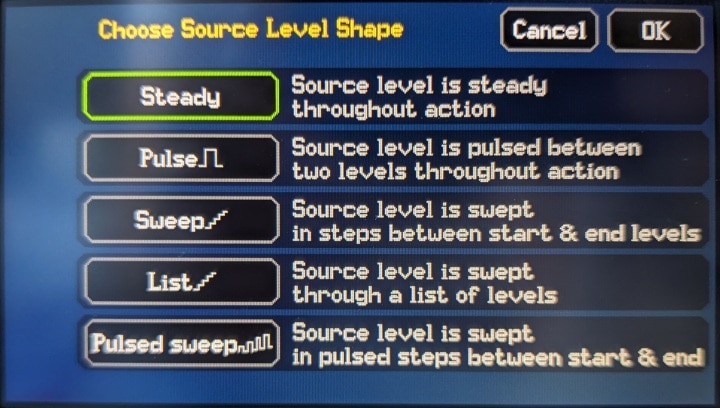
- Shape - allows choosing between Steady, Pulse, Sweep, List and Pulsed Sweep modes
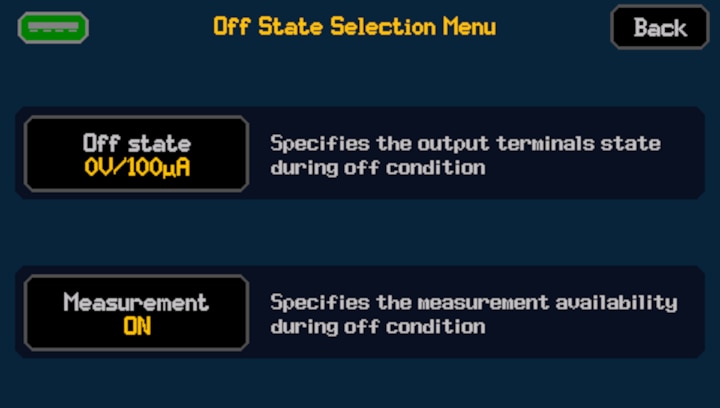
- Off State Selection - lets us set the choose Off state mode (0V/100uA, isolated, etc.)
- Control and Limits - place for various control and protection settings
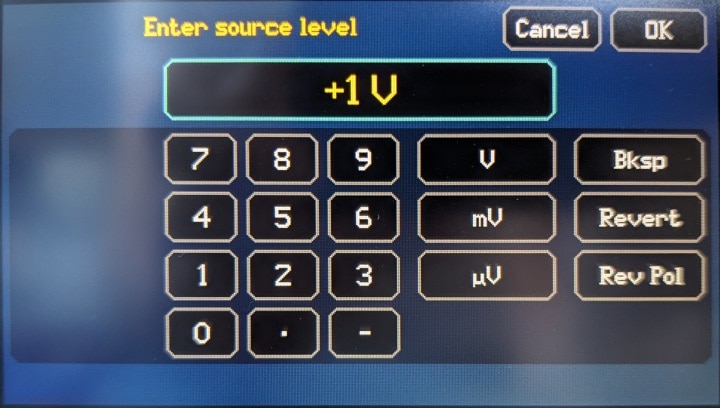
- Level - source level in volts or amperes
- Timing
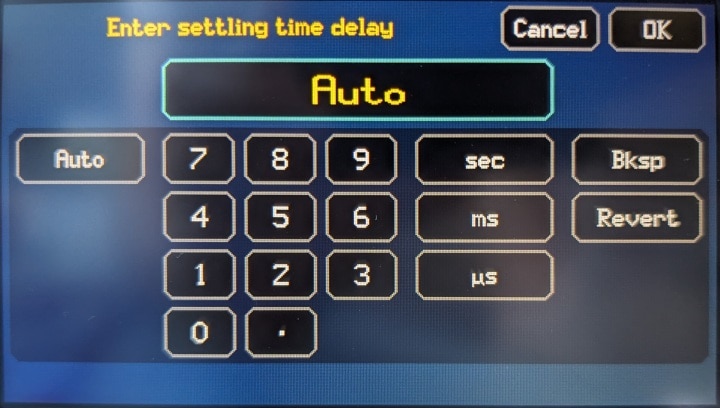
- Delay - turn-on delay settings
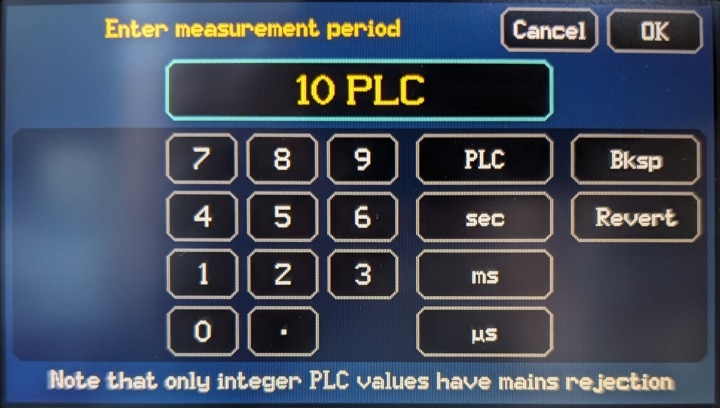
- Measure - power line cycle filtering (PLC)
- Results
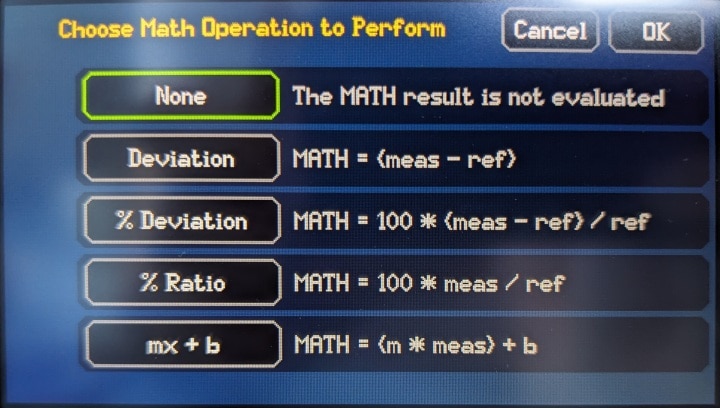
- Math - apply math / statistics functions on the measurements
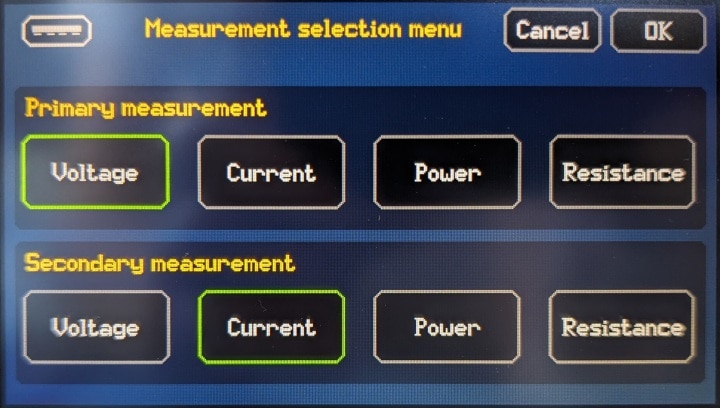
- Measure - choose the main and secondary measurements
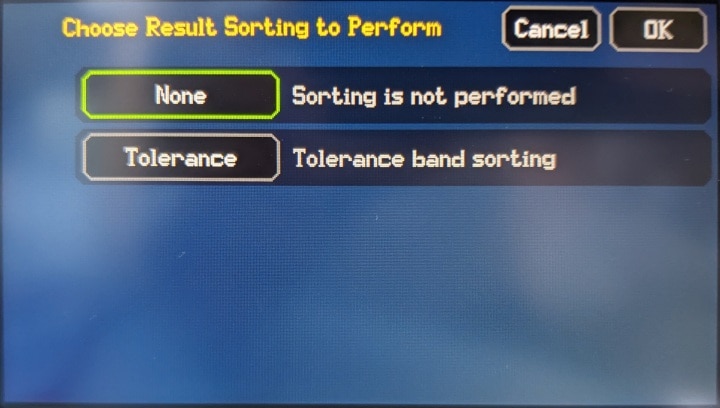
- Sorting - none or tolerance band sorting
|
{gallery:width=720,height=408}Manual Setup |
|---|
|
Operating Modes (1) |
|
Operating Modes (2) |
|
Terminals |
|
Measurement Count |
|
Source Shape |
|
Off State Selection |
|
Control and Limits |
|
Source Level |
|
Delay |
|
Measure cycles |
|
Math Operations
|
|
Measurement Selection |
|
Sorting |
|
Source Voltage (SV) Mode |
|
Source Current (SC) Mode |
|
Load Current (LC) Mode |
|
Load Resistance (RC) Mode |
|
Load Power (LP) Mode |
|
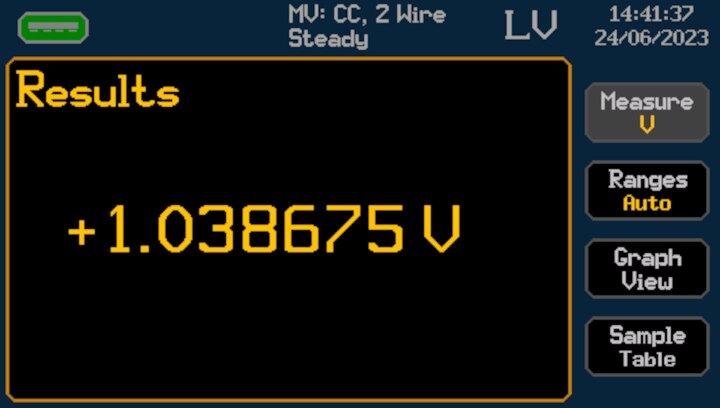
Measure Voltage (MV) Mode |
|
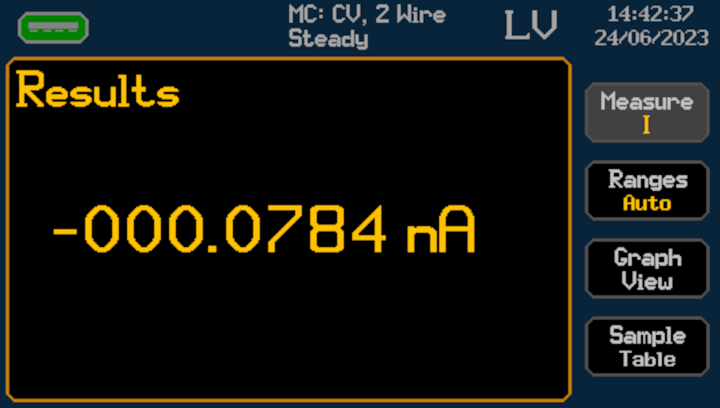
Measure Current (MC) Mode |
|
Measure Resistance (MR) Mode |
|
Measure High Resistance (MHR) Mode |
|
Sequence Mode |


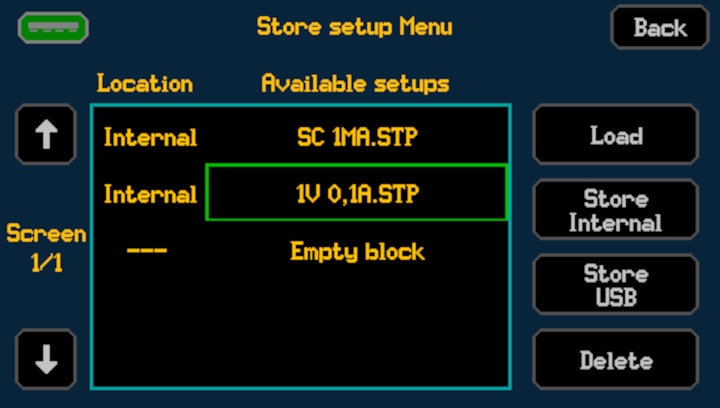
The Store Setup menu allows us to quickly save and restore the parameters we configured in the Easy and Manual Setup menus. Setups can be either saved to the Internal memory or to an USB stick.
The Files section from the main configuration menu contains link to various features involving the measurement memory of the instrument:
| {gallery:width=720,height=408}Files / Measurement Memory |
|---|
|
Measurement buffer status |
|
Graph View of Measurement Value |
|
Measurement Sample Table |
|
Measurement Statistics |
The System section takes us to the menus of system configuration, remote interfaces, event log, calibration and firmware upgrade:
| {gallery:width=720,height=408}System Configuration |
|---|
|
|
|
Event Log |
|
Interfaces |
|
Calibration |
Note: I tried to upgrade the firmware of the instrument, and to be honest I found it to be a bit sketchy. First of all the correlation between the firmware version displayed by the instrument "1.4.1-1.1-1.6-1.2-1.0", and the firmware version from Aim-TTi's website "SMU4000 Series Composite Firmware Update V1.08" is beyond me  . As I was confused even after reading the manual, I wrote an email to Aim-TTi. A couple of days later they confirmed an upgrade was needed (still no info about what the version numbers mean), so I went ahead and did the upgrade as described in the instructions. This ended up being a bit scary, as although the upgrade apparently succeeded (new version number "1.4.5-1.1-1.7-1.2-1.0"), during the process the instrument threw a couple of boot errors at me.
4. Next Steps
The plan is to continue this Road Test with some experiments to characterize the basic performance of the instrument it's four quadrants, while using its source and sink operation modes:
- During Source Experiments (quadrants Q1 and Q3) the instrument will act as a power source, and it will be loaded with passive and dynamic loads. The performance indicators such as output ripple, noise, recovery time will be measured using an oscilloscope. These would be similarly to the experiments I made in my review of the Aim-TTi QPX750SP of the lab power supply
- During Sink Experiments (quadrants Q2 and Q4) - The instrument will act as a power sink, and it will be powered with sources like power supplies and batteries. The SMU will be configured as a resistive load in the constant resistance, current and power modes. The power supplies then will be used to supply constant and dynamic voltage. The behavior of the SMU will be observed using an oscilloscope.
Then we will get on with some automated experiments done using the LAN / LXI interface. This we include experiments involving among others low power wireless devices, battery characterization and simulation.
Hope you enjoyed this blog post!
