element14 Community
element14 Community
    Register Log In
  • Site
  • Search
  • Log In Register
  • About Us
  • Community Hub
    Community Hub
    • What's New on element14
    • Feedback and Support
    • Benefits of Membership
    • Personal Blogs
    • Members Area
    • Achievement Levels
  • Learn
    Learn
    • Ask an Expert
    • eBooks
    • element14 presents
    • Learning Center
    • Tech Spotlight
    • STEM Academy
    • Webinars, Training and Events
    • Learning Groups
  • Technologies
    Technologies
    • 3D Printing
    • FPGA
    • Industrial Automation
    • Internet of Things
    • Power & Energy
    • Sensors
    • Technology Groups
  • Challenges & Projects
    Challenges & Projects
    • Design Challenges
    • element14 presents Projects
    • Project14
    • Arduino Projects
    • Raspberry Pi Projects
    • Project Groups
  • Products
    Products
    • Arduino
    • Avnet Boards Community
    • Dev Tools
    • Manufacturers
    • Multicomp Pro
    • Product Groups
    • Raspberry Pi
    • RoadTests & Reviews
  • Store
    Store
    • Visit Your Store
    • Choose another store...
      • Europe
      •  Austria (German)
      •  Belgium (Dutch, French)
      •  Bulgaria (Bulgarian)
      •  Czech Republic (Czech)
      •  Denmark (Danish)
      •  Estonia (Estonian)
      •  Finland (Finnish)
      •  France (French)
      •  Germany (German)
      •  Hungary (Hungarian)
      •  Ireland
      •  Israel
      •  Italy (Italian)
      •  Latvia (Latvian)
      •  
      •  Lithuania (Lithuanian)
      •  Netherlands (Dutch)
      •  Norway (Norwegian)
      •  Poland (Polish)
      •  Portugal (Portuguese)
      •  Romania (Romanian)
      •  Russia (Russian)
      •  Slovakia (Slovak)
      •  Slovenia (Slovenian)
      •  Spain (Spanish)
      •  Sweden (Swedish)
      •  Switzerland(German, French)
      •  Turkey (Turkish)
      •  United Kingdom
      • Asia Pacific
      •  Australia
      •  China
      •  Hong Kong
      •  India
      •  Korea (Korean)
      •  Malaysia
      •  New Zealand
      •  Philippines
      •  Singapore
      •  Taiwan
      •  Thailand (Thai)
      • Americas
      •  Brazil (Portuguese)
      •  Canada
      •  Mexico (Spanish)
      •  United States
      Can't find the country/region you're looking for? Visit our export site or find a local distributor.
  • Translate
  • Profile
  • Settings
3D Printing
  • Technologies
  • More
3D Printing
3D Printing Forum Having a hard time starting out [Prusa i3] e3D v6 hotend, pla clogging all the time
  • Blog
  • Forum
  • Documents
  • Events
  • Polls
  • Files
  • Members
  • Mentions
  • Sub-Groups
  • Tags
  • More
  • Cancel
  • New
Join 3D Printing to participate - click to join for free!
Actions
  • Share
  • More
  • Cancel
Forum Thread Details
  • State Suggested Answer
  • Replies 10 replies
  • Answers 2 answers
  • Subscribers 328 subscribers
  • Views 1585 views
  • Users 0 members are here
  • i3
  • 3d-printing
  • 3d_printer
  • prusa
Related

Having a hard time starting out [Prusa i3] e3D v6 hotend, pla clogging all the time

Former Member
Former Member over 10 years ago

So I've assembled my first 3D printer out of mostly spare parts and bits..

Got everything setup, at first i used a all metal hotend from china, E3D v6 replica's for 10$


image

The beginning of the test cube, 3 different attempts, learning about the settings..

In each case, i stopped the printer early because it was not moving high enough Z axis,

meaning it ended up, grinding around inside the previous layer.


Unfortunally it constantly failed, sometimes in the beginning, sometimes mid print. It failed by clogging up,

I thought i'd better get a "decent" hotend, so I puchased a E3D V6 hotend 0.4mm nozzle. and set it all as a bowden setup.

Still fails.


image

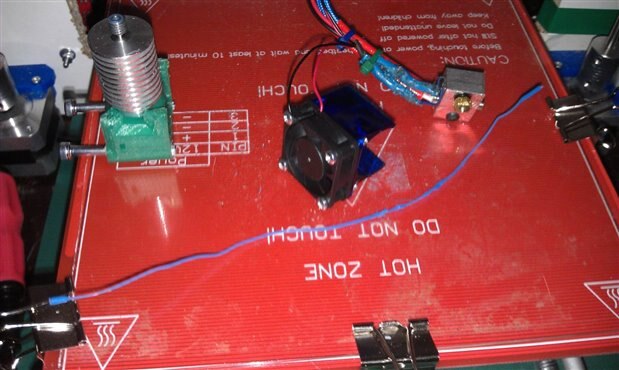
This is how my printer looks most of the time, me cleaning out clogging. image


My main issues


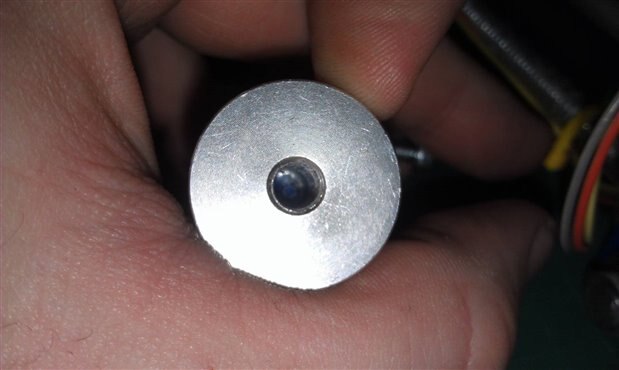
1) Hotend clogging up, "way up in the cold part"  as if it's retracting melted plastic upwards.

Result,  nozzle + entire insides of the hotend is clogged up, I'm fairly quick now to remove the clogging, but it does not really help me out.


2) Z-axis is not raising enough. It' appears 1st layer is printet "into" the glass, meaning 1st layer is invisible, then second layer is barely visible.

My Z-axis is connected via 5mm rods, (M5) to 2x nema 17, 1.8(200) steppers. and used the prusa calculator via google and set the step to 75..

not sure about the 0.8/0.8*1 in the firmware so i left it..


Things I tryed allready,

- Calibrating PID temperature for the hotend.

- Calibrating / leveling the bed to the hotend, allowing only 1 single sheet of paper to fit under it at anylocation at Z-home

- Printing pla with to high temperatures, not a good idea image what a mess.


I'm not sure weither it's my Marlin setup, my G-code or whats up, but I'm kinda frustrated right now image


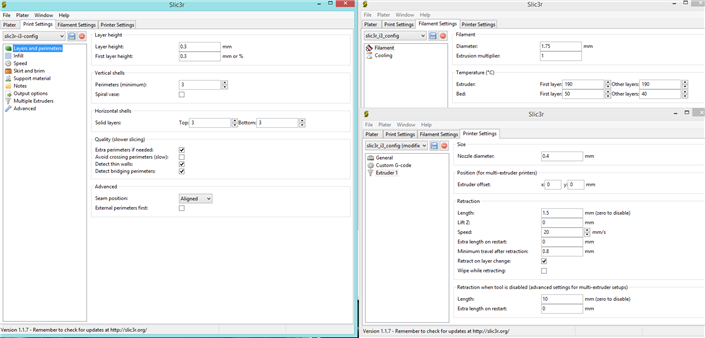
This is my typical slic3r settings(hope you can see, not sure about the resolution on the webpage)

image


And promterface.. (havent really done anything here, except when i was calibrating the hotend temp for marlin.)

image


Attached files


- Marlin for Ramps 1.4

- 20mmx20mmx20mm test cube


Any help would be appriciated... 

Attachments:
Marlin.zip
20mm_cube.g.zip
  • Sign in to reply
  • Cancel
  • bwelsby
    0 bwelsby over 10 years ago

    Hi Martin,  First things first lets try and sort the Z axis, the E3D clogging may be partly due to the Z axis not lifting enough causing too much back pressure on the extruder.


    How you got 75 is confusing so lets start from scratch.

    Your stepper motor requires 200 full steps for one rotation, however it is usual to have your stepper drivers configured for micro stepping and it is common to have this set to 16 times.  Check what your stepper drivers are and what links have you on your RAMPS  for this.


    So lets assume that this is the case, the stepper motor will require 200 x 16 micro steps for one full revolution thats 3200

    A standard M5 rod has a pitch of 0.8 mm  so 3200 steps will move the z axis by 0.8mm

    Therefore to move the z axis by 1mm you require 3200/0.8 * 1 steps  = 4000

    What I see in your firmware is:

    #define DEFAULT_AXIS_STEPS_PER_UNIT   {100, 100, (75.0*8/0.8)*1, 800}

    (75.0 *8 / 0.8) * 1 = 750


    Try this

    #define DEFAULT_AXIS_STEPS_PER_UNIT   {100, 100, 4000, 800}

    Use pronterface to raise the z axis by say 10mm and measure to confirm.

    • Cancel
    • Vote Up 0 Vote Down
    • Sign in to reply
    • Verify Answer
    • Reject Answer
    • Cancel
  • Former Member
    0 Former Member over 10 years ago in reply to bwelsby

    Very nice..


    That Z-axis is moving a lot faster now, i will try to make a test print with the new setting, even though it seems fine with promterface.

    • Cancel
    • Vote Up 0 Vote Down
    • Sign in to reply
    • Verify Answer
    • Cancel
  • Former Member
    0 Former Member over 10 years ago in reply to Former Member

    Update


    Clearly the Z axis is much much better now, and it both sounds and feels "as I expect it should"

    I raised the Z axis around 20mm and tryed extruding via pronterface also working, extruded quite a bit, and it was ok. (i did not retract at all)


    I rechecked my endstops @ home also 1 paper height from the glass plate in all 4 corners.

    Eiger to try, i started the printer on the cube again,


    However, even the 1st layer came out blank, and i could see the extruder wheel feeding filament into the hotend.

    yet nothing came out, i stopped the printer, raised the Z-axis again, tryed manual extruding, nothing came out.


    Turn off heating, removed the bowden tupe, pulled carefulle the filament out of the hotend,

    there was probably 150mm inside, curled up. like a screw.


    image

    The filament i pulled out of the hotend "topside" is right there.


    Just to be safe i disassembled the hotend and it was clear, seems i was able to pull it all out, before it completely cooled.

    It was around 150 degress during disassembly.


    Is there a way to calibrate the extruder ?

    • Cancel
    • Vote Up 0 Vote Down
    • Sign in to reply
    • Verify Answer
    • Cancel
  • bwelsby
    0 bwelsby over 10 years ago in reply to Former Member

    If you are using 1.75mm filament the bowden tube should fit into the hot end as far as it can up to the heat break there shouldn't be any room for the filament to curl up. See E3D instructions E3D-v6 Assembly - E3D-Online


    Calibrating the extruder steps per mm:

    Disconnect the bowden from the drive end and mark a point on the filament at the drive exit.

    Tell extruder to extrude 100mm and mark at same exit point.

    measure length between the two points, it should be 100mm.

    Adjust the extruder steps per mm to correct.   New value = (100 / measured length) * old value

    In your config you have it currently set to 800

    new value would therefore be      (100 / measured length )  * 800

    • Cancel
    • Vote Up 0 Vote Down
    • Sign in to reply
    • Verify Answer
    • Reject Answer
    • Cancel
  • Former Member
    0 Former Member over 10 years ago

    Hi again, sorry for my late reply, but after doing "another" test that day,

    It worked great, when i was extruding manually, and calibrated the extruder.


    However, when i then turned to printing a test, it was stuck again, i disassemblyed the hotend and found the block to be located in the upper part. image

    During disassembly i also broke the hotend, so i had to wait for a new one.


    image

    This is the part, where the pla is stuck as you can see..


    Today i received a new hotend replacement, so later today when i get home, i will reassembly and retry printing..

    Might need to recalibrated the PID temp, because I'm also changing the heater element and thermistor.


    I will let you know how it goes..  Tonight CET..

    • Cancel
    • Vote Up 0 Vote Down
    • Sign in to reply
    • Verify Answer
    • Cancel
  • Former Member
    0 Former Member over 10 years ago in reply to Former Member

    Hi Martin.


    Not sure if this will help but I had the same probelm with my Makerbot and discovered that it was due to my filament spool snagging on the spool holder.  It would streach the filament then push more through causing the blockage.  That could also explain why when hand feeding it it worked well.


    This could be complete rubbish but thought it might help as I spent 3 days, meters of filament and burnt fingers on trying to find out why.


    Good luck

    • Cancel
    • Vote Up 0 Vote Down
    • Sign in to reply
    • Verify Answer
    • Cancel
  • Former Member
    0 Former Member over 10 years ago

    This file is my setting for PLA, you can refer to it.

    Hope it will help you.

    http://www.geeetech.com/wiki/index.php/File:Printer_settings_for_PLA.rar

    • Cancel
    • Vote Up 0 Vote Down
    • Sign in to reply
    • Verify Answer
    • Cancel
  • Former Member
    0 Former Member over 10 years ago

    What brand the printer is ? It looks different from Geeetech Prusa i3.

    • Cancel
    • Vote Up 0 Vote Down
    • Sign in to reply
    • Verify Answer
    • Cancel
  • Former Member
    0 Former Member over 10 years ago in reply to Former Member

    Has nothing to do with Geeetech, mine is made of plywood and bit's and pieces I've been collecting.

    • Cancel
    • Vote Up 0 Vote Down
    • Sign in to reply
    • Verify Answer
    • Cancel
  • Former Member
    0 Former Member over 10 years ago

    Hey one thing E3d fails to mention in their literature is you need to cool the heat sink with the fan after you are finished printing until the heater block cools off otherwise the heat travels up the heat sink and makes the filament stick to the upper area where it can not be melted easily when you start it up the next time.  Also a good idea to retract the filament while it is above 180 degrees and remove it from the extruder after printing to make it easy to change colors and prevent clogs.

    • Cancel
    • Vote Up 0 Vote Down
    • Sign in to reply
    • Verify Answer
    • Cancel
element14 Community

element14 is the first online community specifically for engineers. Connect with your peers and get expert answers to your questions.

  • Members
  • Learn
  • Technologies
  • Challenges & Projects
  • Products
  • Store
  • About Us
  • Feedback & Support
  • FAQs
  • Terms of Use
  • Privacy Policy
  • Legal and Copyright Notices
  • Sitemap
  • Cookies

An Avnet Company © 2025 Premier Farnell Limited. All Rights Reserved.

Premier Farnell Ltd, registered in England and Wales (no 00876412), registered office: Farnell House, Forge Lane, Leeds LS12 2NE.

ICP 备案号 10220084.

Follow element14

  • X
  • Facebook
  • linkedin
  • YouTube