


I haven't seen this mentioned on E14, so I thought that I'd post since I think it would be of interest to the community. This really is a case of ICYMI as I first saw this in a Hackster post, Seeed Studio Partners with Vijay Janapa Reddi for a Machine Learning Systems Edge AI Hardware Kit, last August. I've had this on my list to look at, but just got around to it since I was finally able to purchase the Seeed XiaoML kit that is used in some of the labs.
The textbook was developed (created, edited, and curated) by Professor Vijay Janapa Reddi from material used in the CS249r course at Harvard University.
The book is somewhat unique in that it is open source and is a collaborative work. The source is at the github repo.
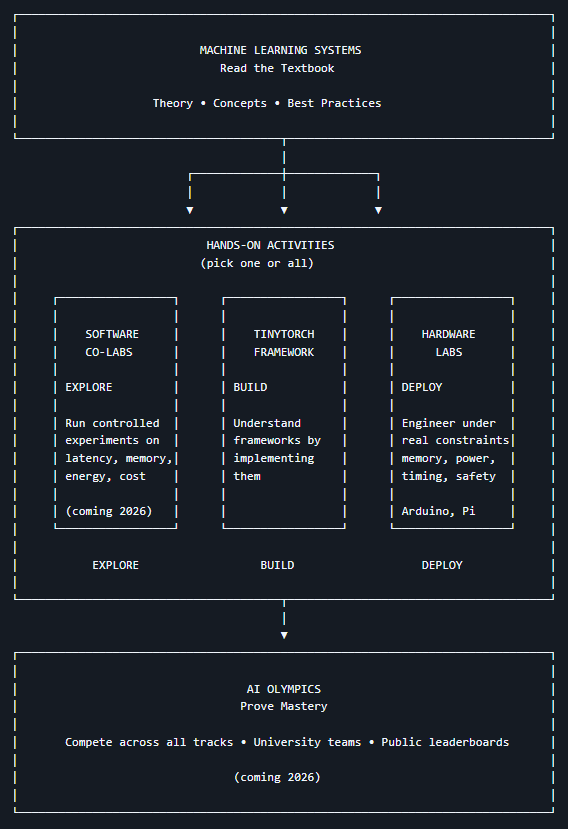
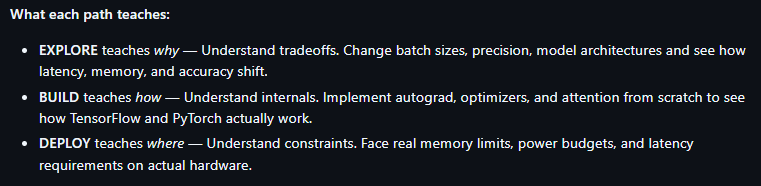
The book is really a deep dive into ML (theory, concepts, best practices, ethics) - some 2000+ pages worth. What really interests me are the hands-on activities that help to understand implementation constraints and optimization strategies. Here is an overview of the learning flow:
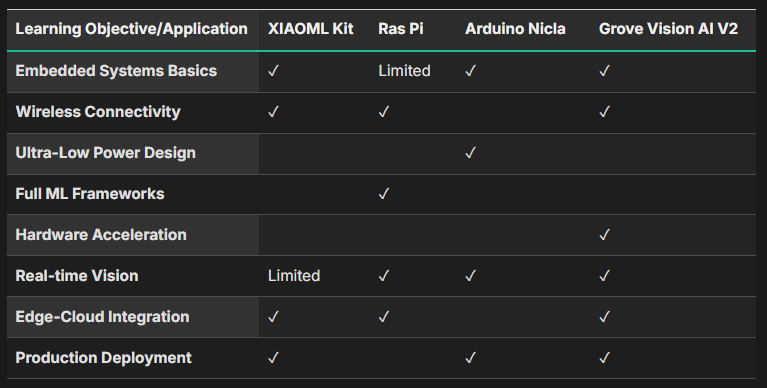
The XiaoML kit is one of four platforms that have labs provided in the book. Here is a summary of the platforms:
Overview:
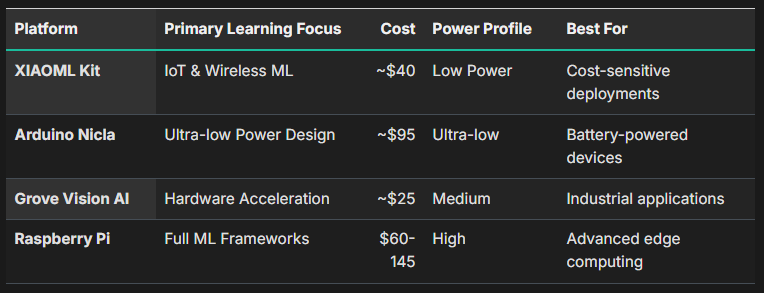
Comparison:

Selection Guidelines:
The good news is that I've actually used all 4 platforms in ML projects using Edge Impulse to create the models. The Xiao ESP32S3 Sense modules that I've used had the OV2640 camera and no IMU expansion board. And I've used various flavors of RPi's (Zero 2W, Pi 3, Pi 4, and Pi 5 with Coral and Hailo accelerators). I'm looking forward to taking a more formal approach to the topic and hopefully fill in gaps in my knowledge. It will be interesting to see if I can improve some of my previous projects. Obviously, it will take me a while to get through the material.
Seeed XiaoML Kit
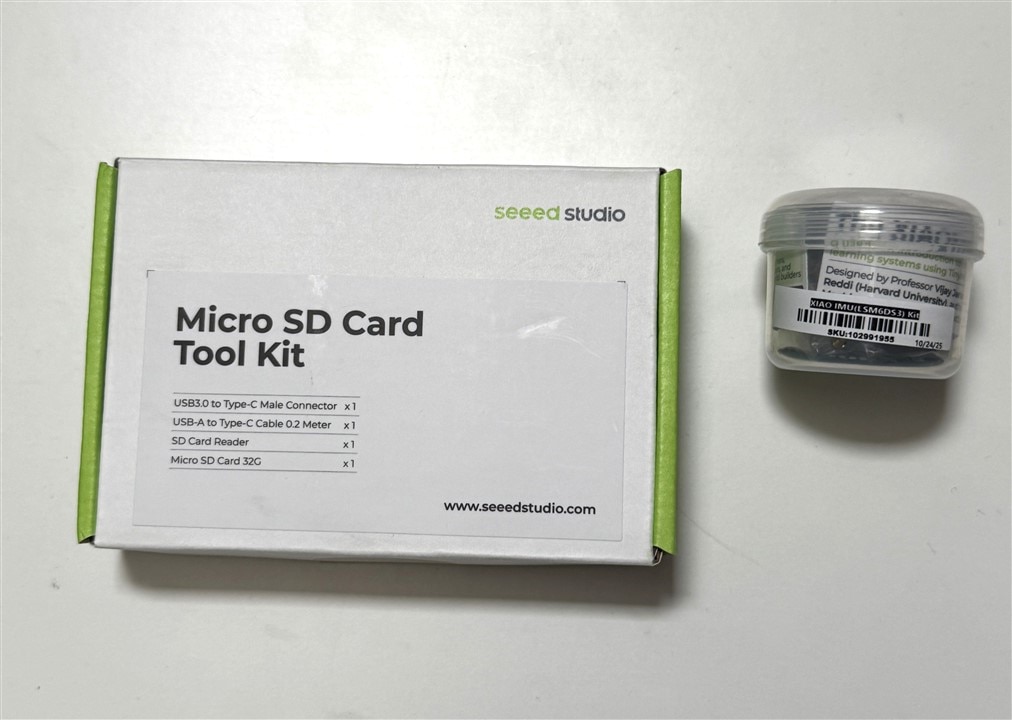
The Seeed kit is currently being sold as a bundle of the XiaoML kit and a MicroSD toolkit. The XiaoML kit is comprised of a Xiao ESP32S3 Sense module (Xiao ESP32S3 + Camera/SD card board) plus an IMU Expansion board. The MicroSD Toolkit is a 32GB SD card, USB-C cable, and microSD card reader adapters. Hopefully, Seeed will offer these parts as separate items in the future. The newer ESP32S3 Sense modules uses the OV3660 camera.
Here is what comes it the kit:
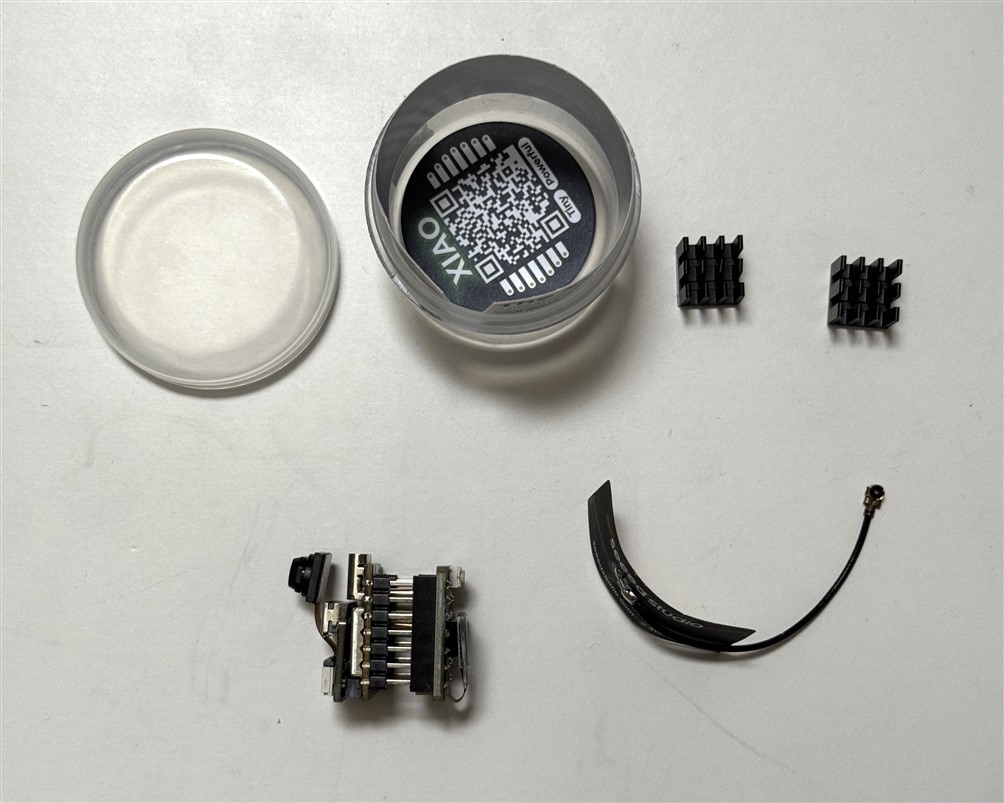
And the contents of the cannister:
Two Xiao heatsinks that are used for continuous high power operation like video streaming over WiFi. Unfortunately, these cannot be used with the IMU expansion board shown plugged onto the bottom of the Xiao module on the lower left. And also an external WiFi/BLE antenns.
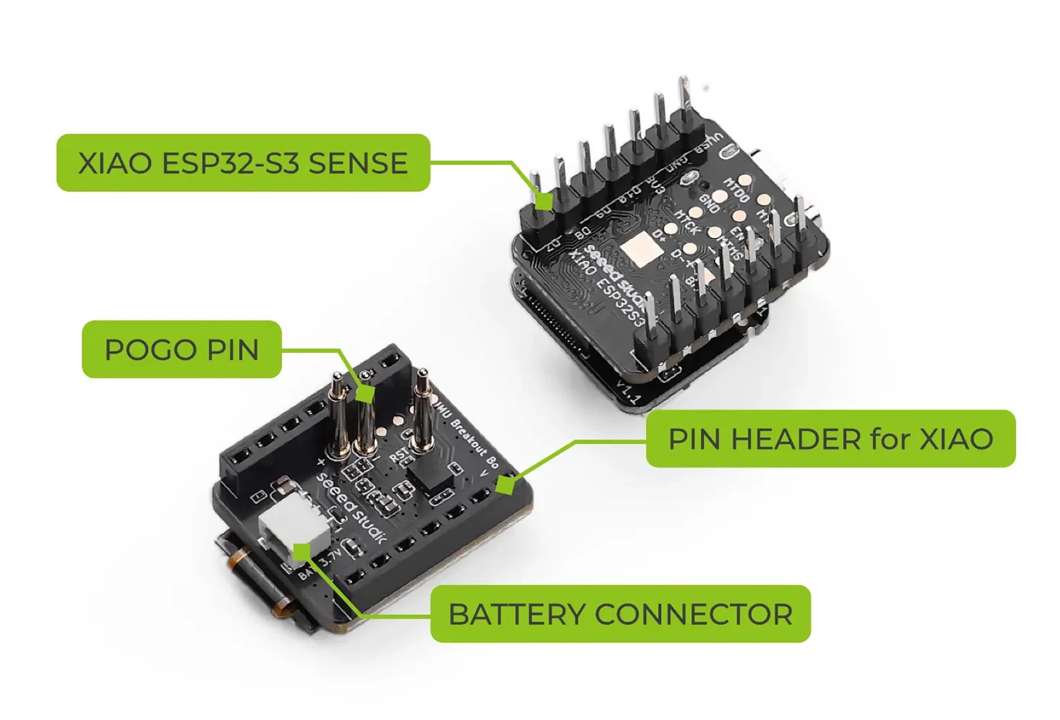
A little better view of the components from their documentation:
The top of the IMU expansion is shown in the upper right. It adds a larger Reset button and a small monochrome 72x40 display. The other tiny Reset button can be seen on the camera board just to the left of the camera - it is really a pain to use...

The bottom of the IMU expansion board has the IMU and the Battery connector. Without the expansion board you need to solder wires to the bottom of the Xiao board to use a battery. The pogo pins are used to connect the Battery +/- and Reset between the boards.
-

cstanton
-
Cancel
-
Vote Up
0
Vote Down
-
-
Sign in to reply
-
More
-
Cancel
Comment-

cstanton
-
Cancel
-
Vote Up
0
Vote Down
-
-
Sign in to reply
-
More
-
Cancel
Children