|
I connected an Arduino MKR WAN 1310 to The Things Network (TTN). Then tested if the Arduino integrates with TTN MQTT service. Now I'm working with the Arduino's payload in Node-RED. This post is my log of the activity.
Read this post first: Arduino MKR WAN 1310 integration with The Things Network MQTT . This posts starts at the point where the Arduino is working with TTN MQTT. |
The Example setup
An Arduino MKR WAN 1310 is integrated with the TTN MQTT server ( Arduino MKR WAN 1310 integration with The Things Network MQTT ).
Data that the Arduino uplinks via LoRaWan, arrives on in your Node-RED flow.
Data that's published in your Node-RED flow, arrives on the Arduino as a downlink.
To have something tangible, I created a dashboard to show the Arduino's LED status.

image: the architecture. Exactly the same as in the earlier TTN + MQTT post
Assumptions:
- you have your Arduino MKR WAN 1310 integrated with TTN MQTT service.
- you have Node-RED installed and know how to work with it.
Steps:
- configure and enable access to the TTN MQTT service from Node-RED
- test uplink to Node-RED flow and
- test downlink from Node-RED flow.
We don't have to change the Arduino code or modify existing TTN setup.

Create and Test the integration with Node-RED
TTN has written a good manual for that too: TTN Node-RED. I followed the exact steps and it worked.
uplink from Arduino
This is the first flow, so we'll set up the connection while building it. Create a brand new Node-RED flow and drop an MQTT in node on it. In its configuration pane, add a new MQTT broker.
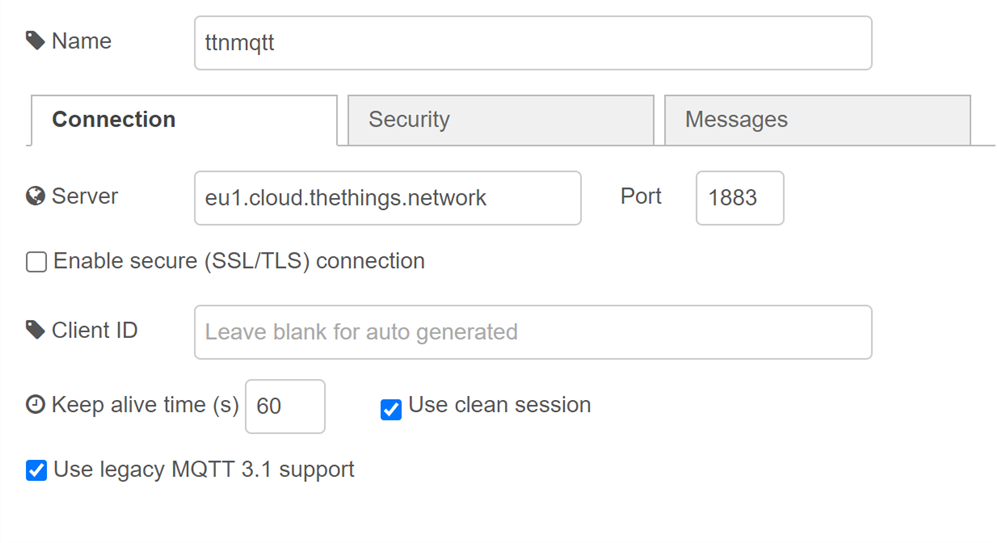
Take over the settings from your console. The password (on the security tab) is the one you saved in the previous post when generating the new API key. Set the MQTT compatibility to 3.1. Else the connection will fail.
I'm not too happy yet, because I couldn't get TLS working. I'm still searching for the right certificates. I wrote a follow-up, to enable secure MQTTS with TLS connection: Secure MQTT integration between Node-RED and The Things Network . Use that procedure for real deployments always. It's way safer than the plain MQTT connect that I suggest in this post.
On the MQTT node, set the topic, and quality of service.
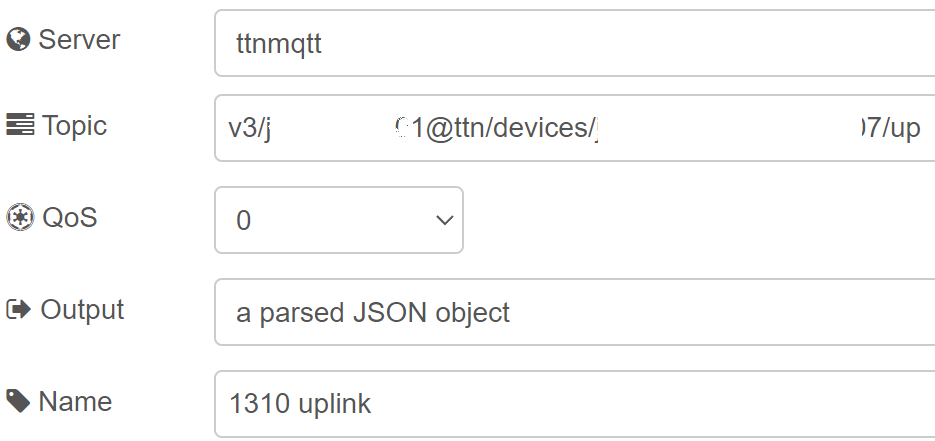
The topic is again v3/*****-01@ttn/devices/****7/up. (pattern: v3/{application id}/devices/{device id}/up).
Connect a debug node to the MQTT in output. Deploy the flow. As soon as your Arduino sends a message over LoRaWan, the payload will appear in the Node-RED debug pane . Here's a capture of an incoming payload:

downlink to Arduino
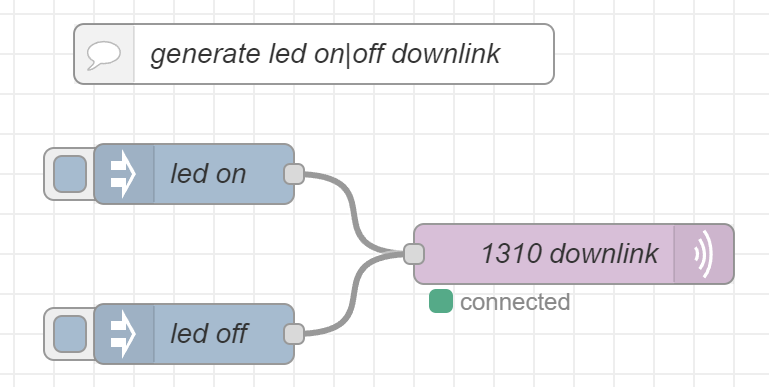
We can test that with Node-RED too. Publish a message to the v3/********-01@ttn/devices/*************7/down/push topic. (pattern: v3/{application id}/devices/{device id}/down/push). I used two inject nodes to create a LED on or off payload. It's again the same as in the previous blog:
Payload:
{
  "downlinks": [{
    "f_port": 1,
    "decoded_payload": {
      "ledState": "on"
    },
    "priority": "NORMAL"
  }]
}
Drop a MQTT out node on the canvas, and connect the two inject nodes to its input.
Setting up that node is very easy. Just select the server definition you created for the uplink flow. That 'll be it.
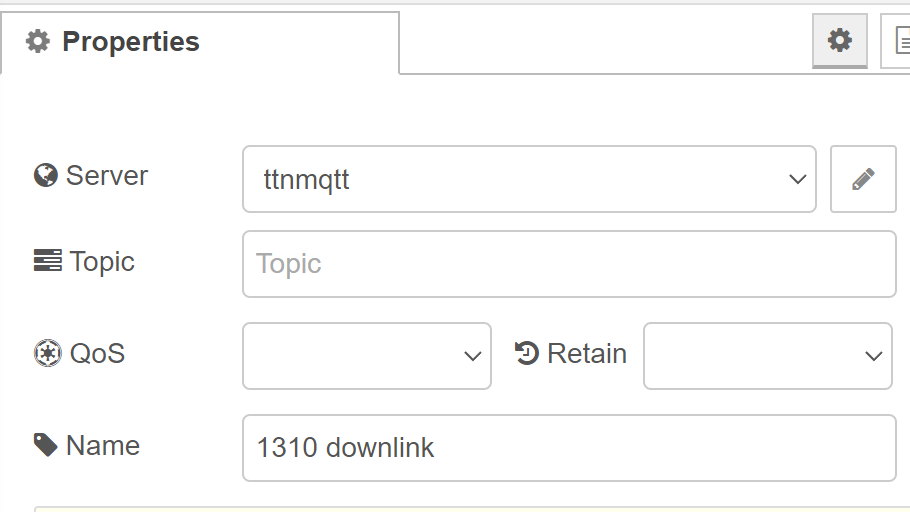
Deploy. Push one of the inject nodes to start the process (keep TTN fair use limits in mind). The message will immediately appear in the live data log in the TTN console
![]()
But will not yet arrive on the Arduino. That's because we'll only get downlink data when we start a communication (design choice in my sketch). Once we receive an uplink from the Arduino, the downlink is sent back:
![]()
And the LED will light up
Working with the data in Node-RED
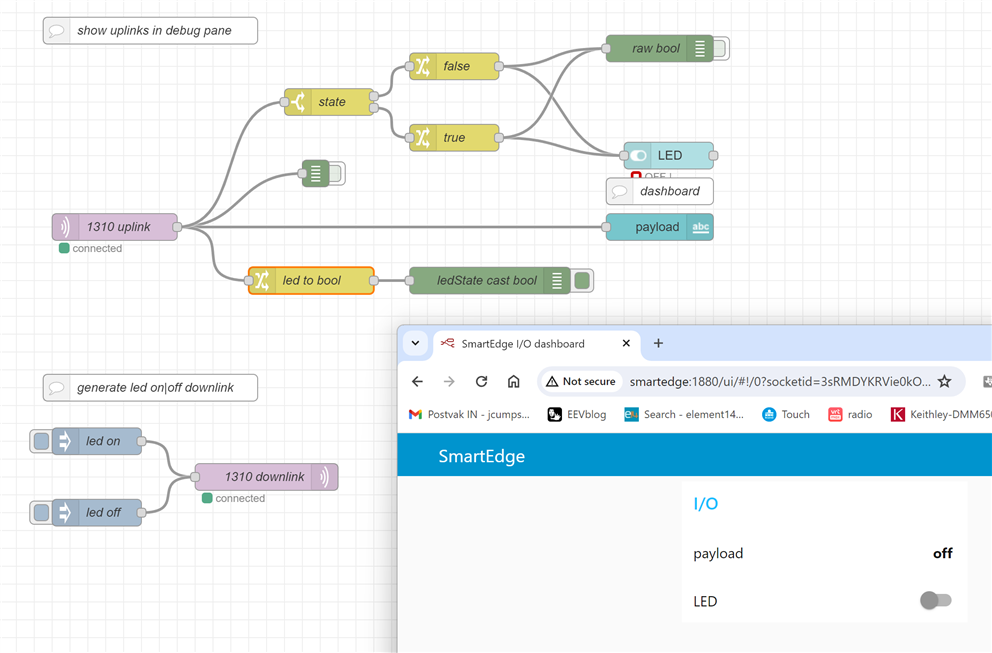
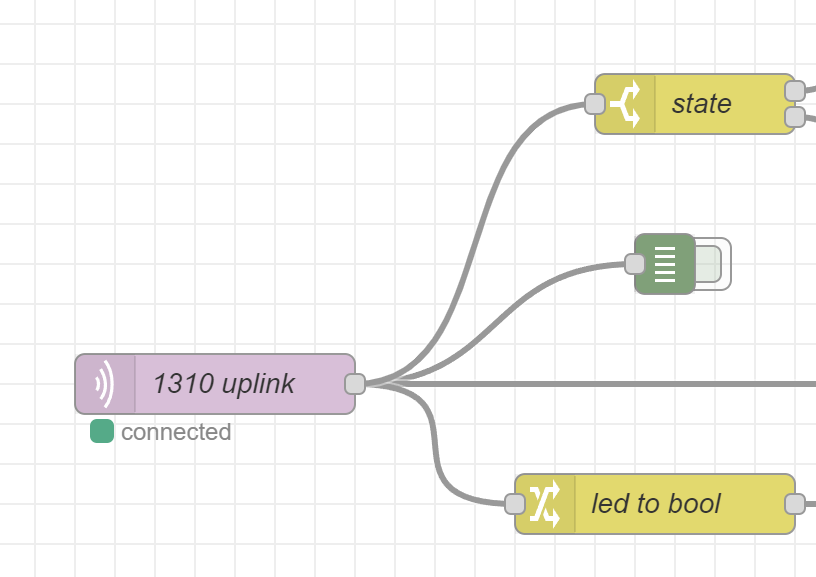
Now that we have Arduino metrics in our application layer, let's play around a bit. I create 3 different processes. They kick of when we receive an upload from the Arduino.
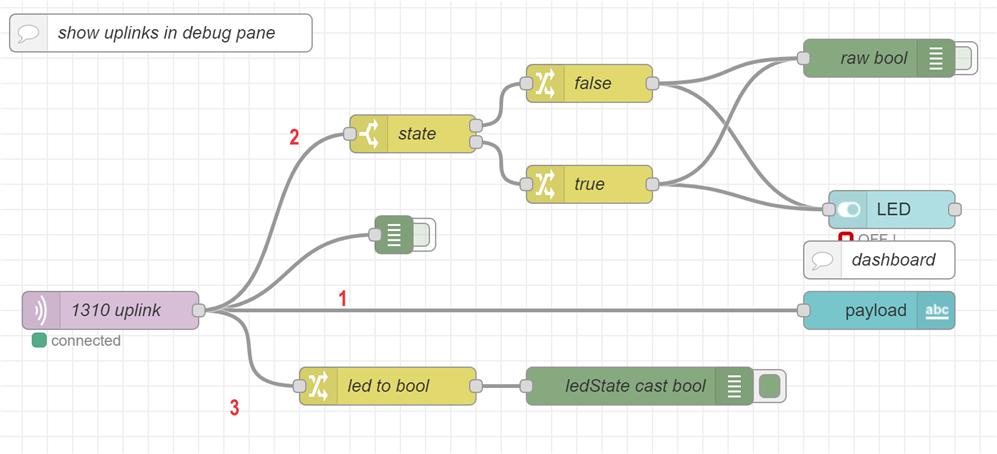
image: a more elaborate upstream handling flow
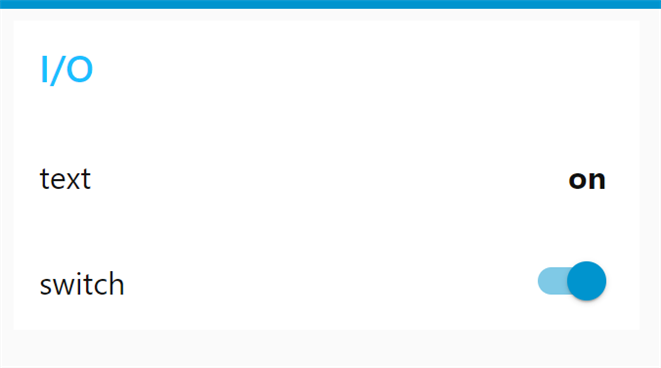
image: Node-RED dashboard showing the Arduino LED state in two ways
1: create a dashboard that shows the LED status as a text
The MQTT in node streams the payload as a JASON object. I showed its structure in the uplink section. We can directly attach a dashboard text node to it. On that node, we can define what part of the JSON object to show. I filtered it down to the ledState attribute:
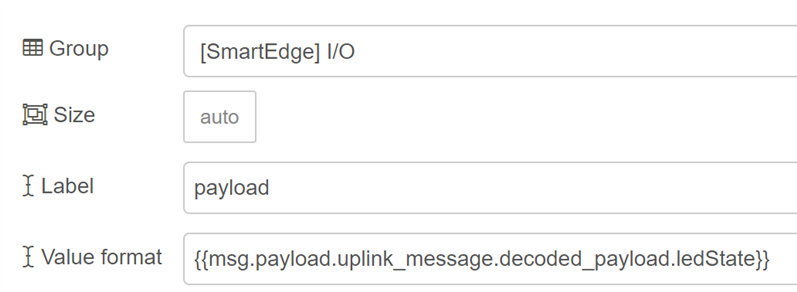
image: configuration of the dashboard text control
2: add a dashboard on-off indicator that shows the LED status
I used a dashboard switch for that. Set it up as an output indicator:
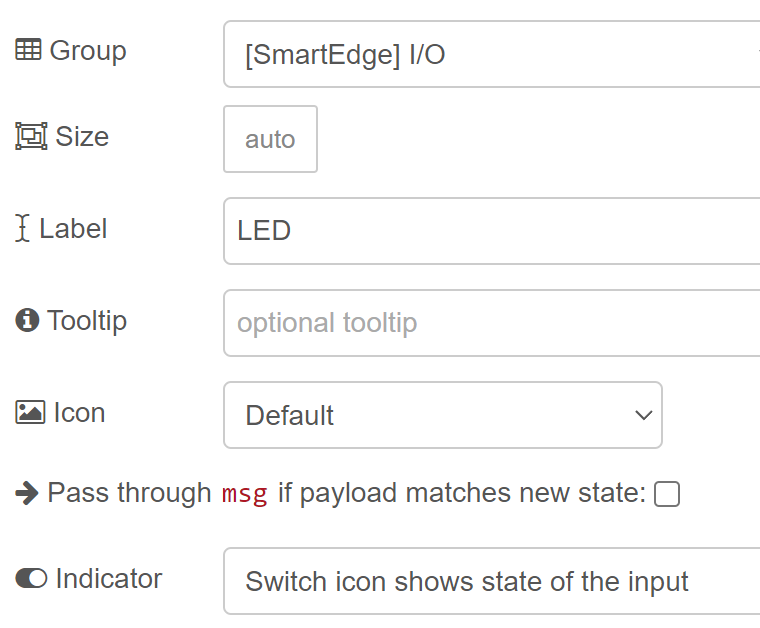
image: the switch configuration
There is a little bit of configuration work needed to go from payload to switch status. The switch doesn't have an option to retrieve its value from a JS payload. It needs a raw Boolean as input. I created this flow to do that:

I created a switch element, that splits the flow based on the payload's ledState value. Then in each branch, I created a change node that replaces the JSON payload with a single boolean.
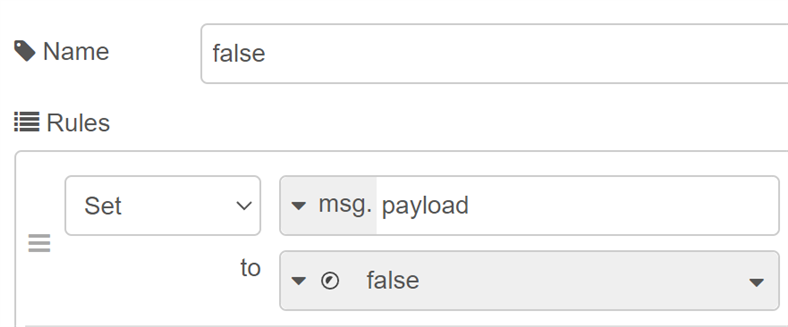
Their output is the source to control the indicator's status.
|
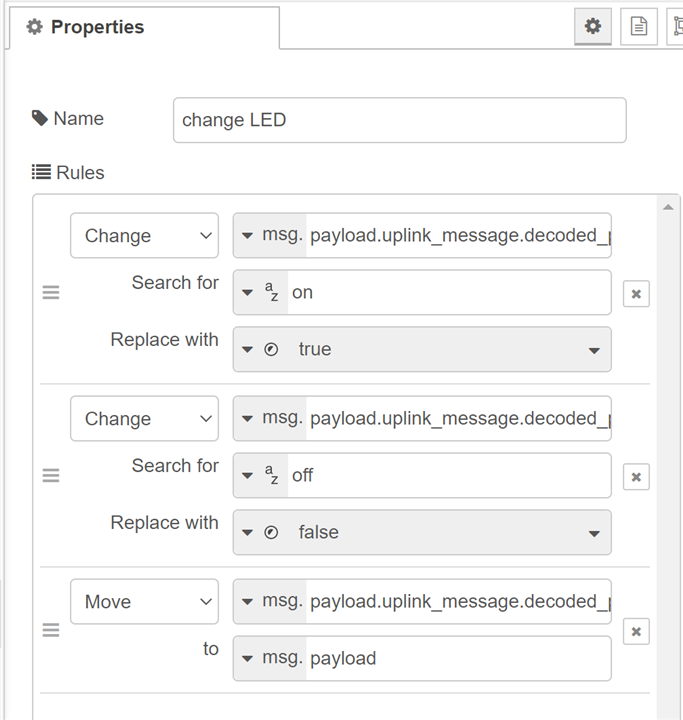
In Node-RED, there's many ways to skin a cat. I'm sure you can come up a with neater method. Here is two other ways to retrieve the LED status from the payload, and send it on as a boolean payload: 1: using a js function:
js code: var led = false;
if (msg.payload.uplink_message.decoded_payload.ledState === "on") {
led = true;
}
msg.payload = led;
return msg;
It's simpler and smaller - but code instead of a set of nodes... 2: using only a "change" node:
First 2 rules change the property from "on | "off" to true | false. The 3rd rule moves the result to the root of the payload, ready to send to the indicator. |
3: change the type of the ledState attribute
Just to see if it can be done. TTN sends the value of ledState as a string. on or off. This little flow uses a change node to turn that to true or false.
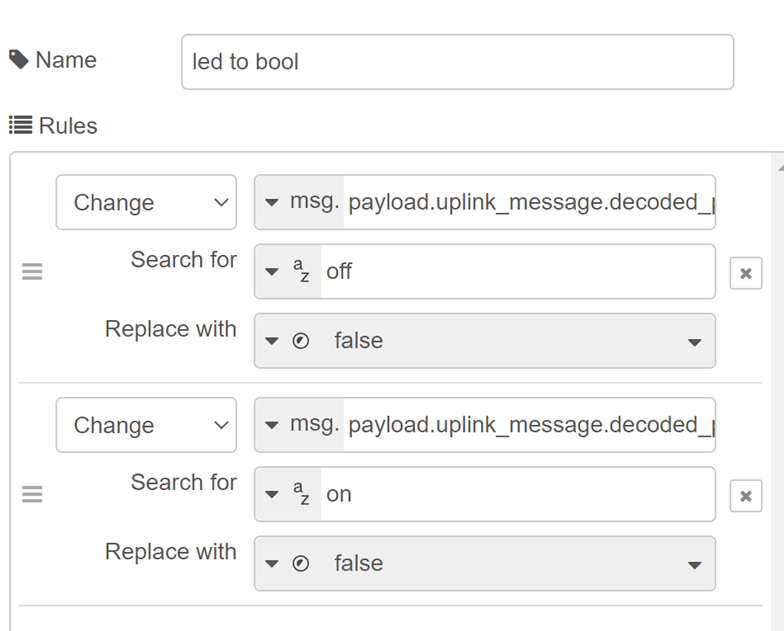
The flows in this "working with the data" section are no longer related to LoRaWan or TTN. Just a showcase that it's possible to do something with LoRaWan metrics.
The End. Enjoy.



-

Jan Cumps
-
Cancel
-
Vote Up
0
Vote Down
-
-
Sign in to reply
-
More
-
Cancel
Comment-

Jan Cumps
-
Cancel
-
Vote Up
0
Vote Down
-
-
Sign in to reply
-
More
-
Cancel
Children