element14 Community
element14 Community
    Register Log In
  • Site
  • Search
  • Log In Register
  • Community Hub
    Community Hub
    • What's New on element14
    • Feedback and Support
    • Benefits of Membership
    • Personal Blogs
    • Members Area
    • Achievement Levels
  • Learn
    Learn
    • Ask an Expert
    • eBooks
    • element14 presents
    • Learning Center
    • Tech Spotlight
    • STEM Academy
    • Webinars, Training and Events
    • Learning Groups
  • Technologies
    Technologies
    • 3D Printing
    • FPGA
    • Industrial Automation
    • Internet of Things
    • Power & Energy
    • Sensors
    • Technology Groups
  • Challenges & Projects
    Challenges & Projects
    • Design Challenges
    • element14 presents Projects
    • Project14
    • Arduino Projects
    • Raspberry Pi Projects
    • Project Groups
  • Products
    Products
    • Arduino
    • Avnet Boards Community
    • Dev Tools
    • Manufacturers
    • Multicomp Pro
    • Product Groups
    • Raspberry Pi
    • RoadTests & Reviews
  • About Us
  • Store
    Store
    • Visit Your Store
    • Choose another store...
      • Europe
      •  Austria (German)
      •  Belgium (Dutch, French)
      •  Bulgaria (Bulgarian)
      •  Czech Republic (Czech)
      •  Denmark (Danish)
      •  Estonia (Estonian)
      •  Finland (Finnish)
      •  France (French)
      •  Germany (German)
      •  Hungary (Hungarian)
      •  Ireland
      •  Israel
      •  Italy (Italian)
      •  Latvia (Latvian)
      •  
      •  Lithuania (Lithuanian)
      •  Netherlands (Dutch)
      •  Norway (Norwegian)
      •  Poland (Polish)
      •  Portugal (Portuguese)
      •  Romania (Romanian)
      •  Russia (Russian)
      •  Slovakia (Slovak)
      •  Slovenia (Slovenian)
      •  Spain (Spanish)
      •  Sweden (Swedish)
      •  Switzerland(German, French)
      •  Turkey (Turkish)
      •  United Kingdom
      • Asia Pacific
      •  Australia
      •  China
      •  Hong Kong
      •  India
      •  Korea (Korean)
      •  Malaysia
      •  New Zealand
      •  Philippines
      •  Singapore
      •  Taiwan
      •  Thailand (Thai)
      • Americas
      •  Brazil (Portuguese)
      •  Canada
      •  Mexico (Spanish)
      •  United States
      Can't find the country/region you're looking for? Visit our export site or find a local distributor.
  • Translate
  • Profile
  • Settings
Internet of Things
  • Technologies
  • More
Internet of Things
Blog Xiao BLE Sense nRF52840
  • Blog
  • Forum
  • Documents
  • Quiz
  • Events
  • Polls
  • Members
  • Mentions
  • Sub-Groups
  • Tags
  • More
  • Cancel
  • New
Join Internet of Things to participate - click to join for free!
  • Share
  • More
  • Cancel
Group Actions
  • Group RSS
  • More
  • Cancel
Engagement
  • Author Author: ralphjy
  • Date Created: 12 Feb 2022 12:02 AM Date Created
  • Views 16088 views
  • Likes 13 likes
  • Comments 16 comments
  • seeed xiao ble nrf52840
  • imu
  • pdm microphone
Related
Recommended

Xiao BLE Sense nRF52840

ralphjy
ralphjy
12 Feb 2022

In my quest to find wireless IoT solutions, I find a lot of interesting and useful products manufactured by Seeed Studio.  I posted about a WiFi dev board yesterday: Wio RP2040 Mini Dev Board.

In addition to WiFi, I've been looking for BLE solutions.  Seeed has a small form factor (21 x 17.5mm) module, the Xiao, that I've used before: Samd21 Mini Modules.  And Adafruit makes a footprint compatible Qt Py module that I tried recently with a RP2040 version: Qt Py RP2040.  Seeed recently came out with two Xiao BLE modules that use the nRF52840 as the MCU.  Seems like the nRF52840 is showing up everywhere - just like the RP2040.  It is used in one of my favorite Arduino boards the Arduino Nano 33 BLE Sense.

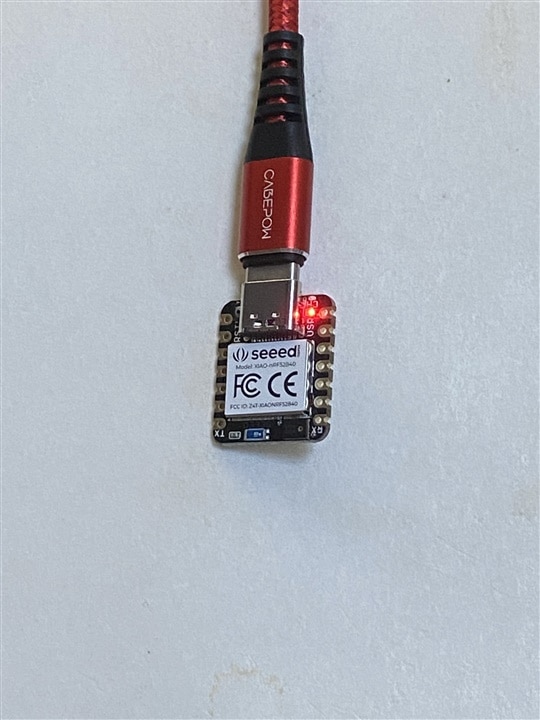
After a long postal journey from China, I received a Xiao BLE and a Xiao BLE Sense yesterday. 

XIAO BLE nRF52840                  $9.90
XIAO BLE Sense nRF52840    $15.99

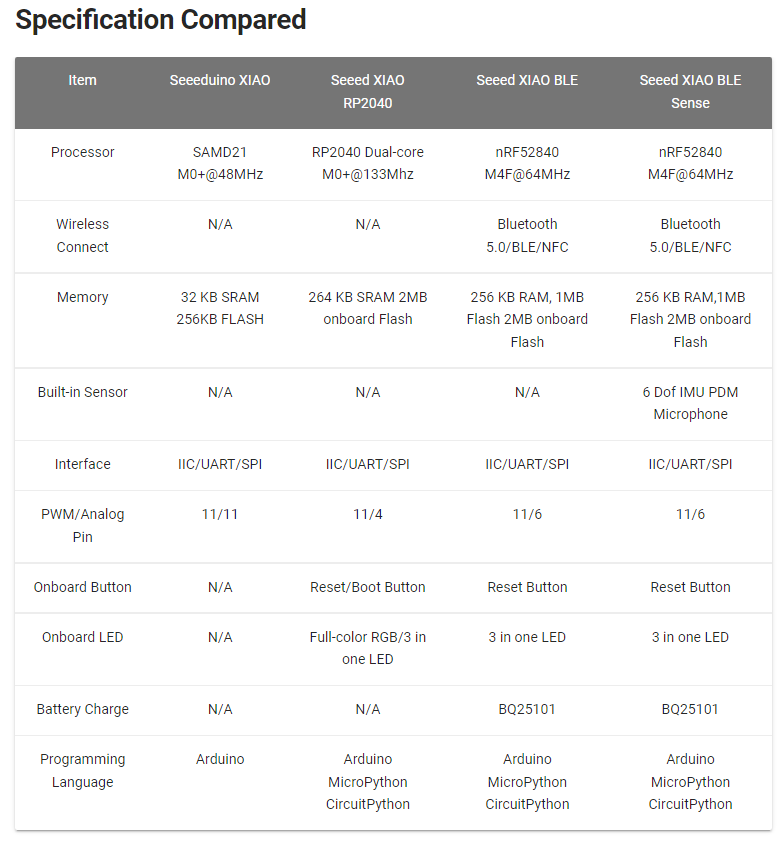
Here is a spec comparison of the Seeed Xiao boards:

image

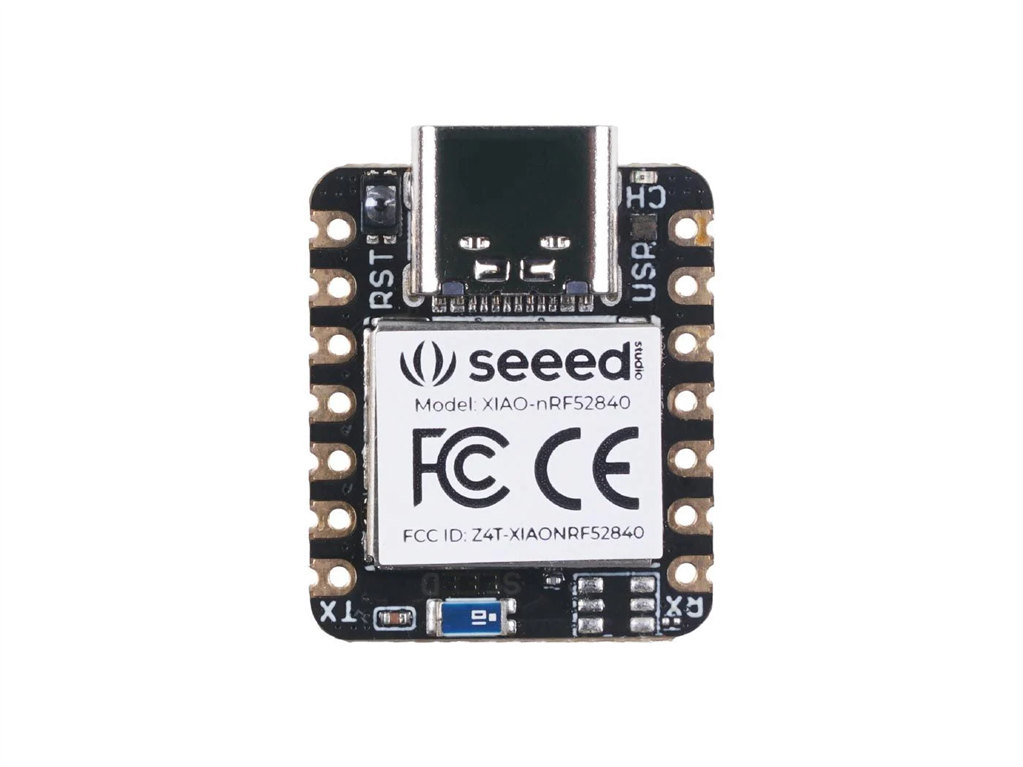
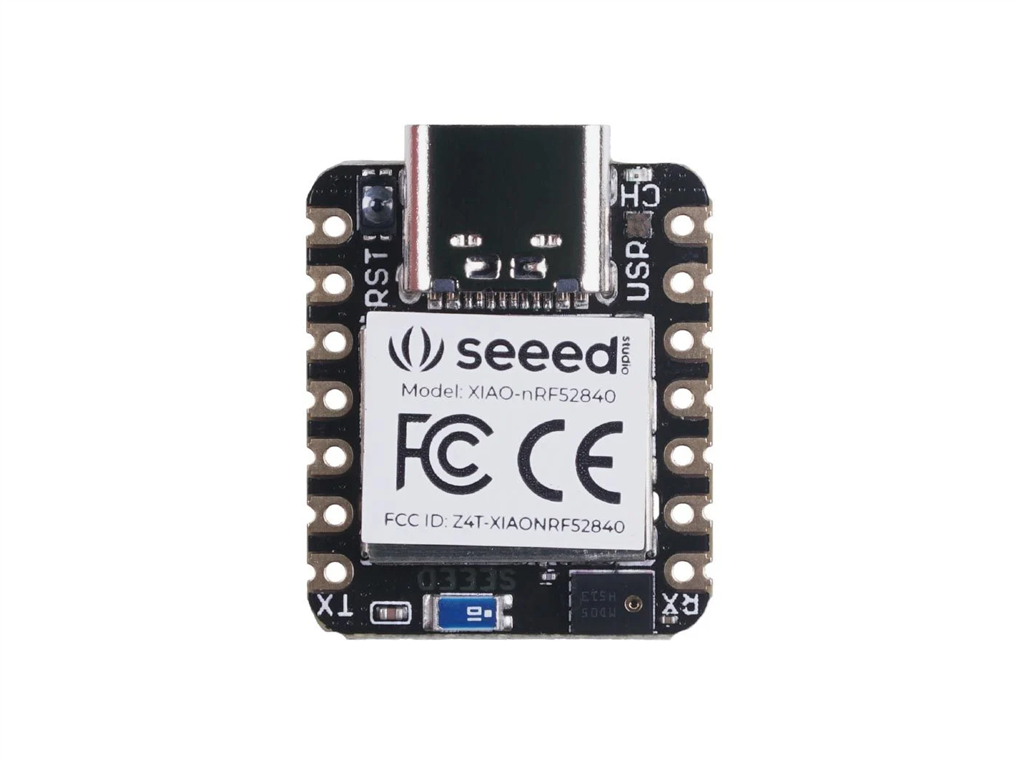
The only way to differentiate the two boards is if the PDM microphone is populated or not in the lower right of the board.  The IMU is internal to the shield and the labels are identical Scream.

image

image

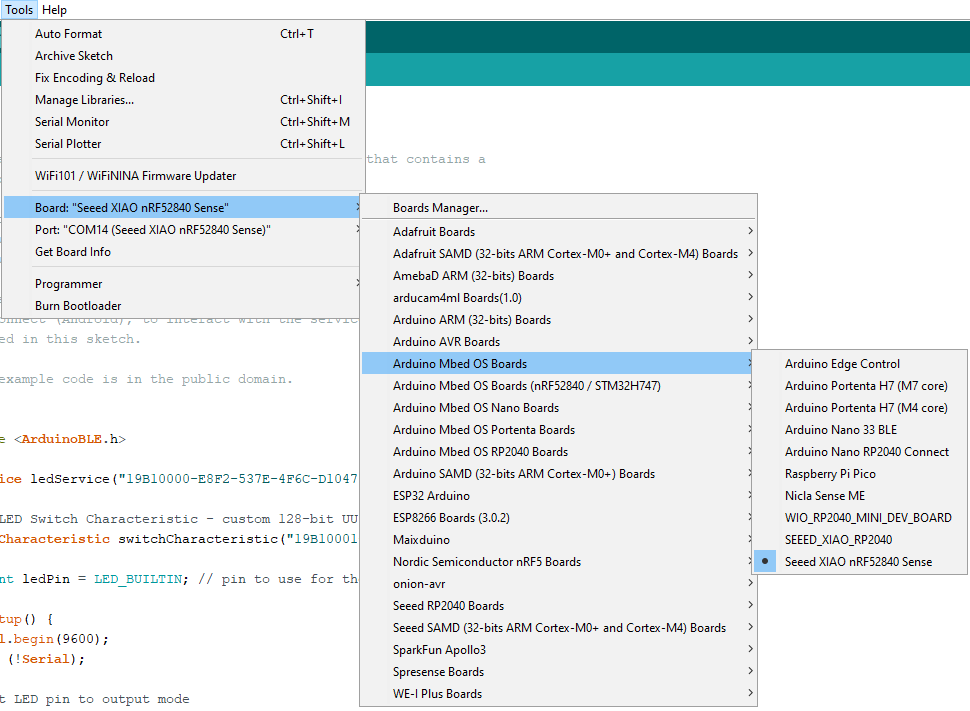
These boards are supported in the Arduino IDE, so start up is easy.

 image

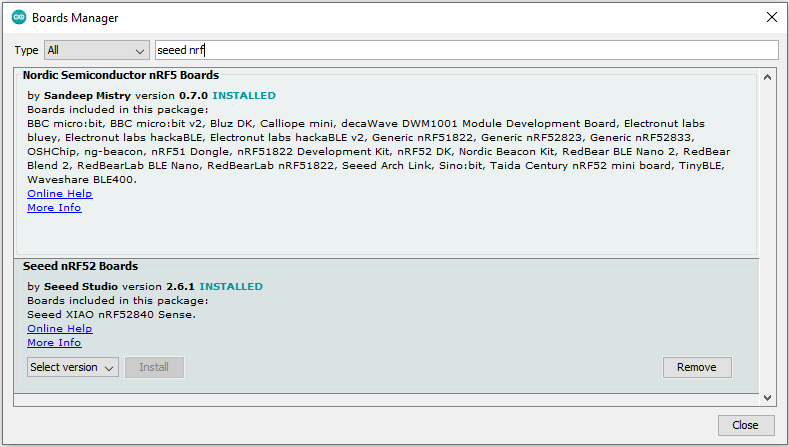
Finding where it installed confused me for a second as it was with the Arduino Mbed OS boards.

image

And to find the ArduinoBLE example you had to look under the "INCOMPATIBLE" library examples.

image

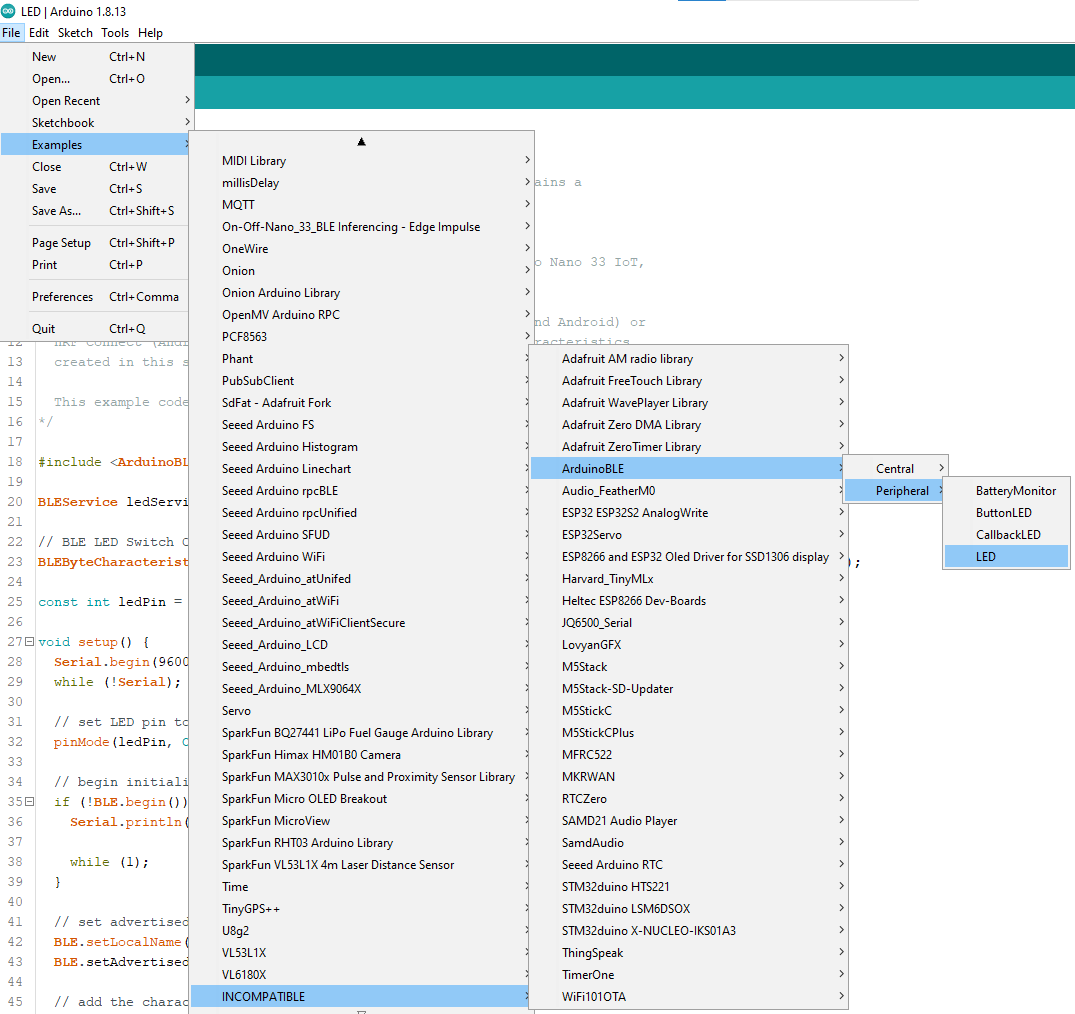
I decided to try a Peripheral example with the with the board connected with my iPhone as the Central to test out the BLE operation.

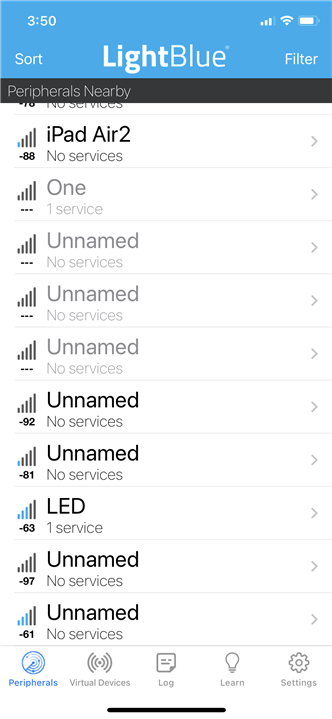
I'll use the "LightBlue" iOS app from PunchThrough.

LED.ino

/*
  LED

  This example creates a BLE peripheral with service that contains a
  characteristic to control an LED.

  The circuit:
  - Arduino MKR WiFi 1010, Arduino Uno WiFi Rev2 board, Arduino Nano 33 IoT,
    Arduino Nano 33 BLE, or Arduino Nano 33 BLE Sense board.

  You can use a generic BLE central app, like LightBlue (iOS and Android) or
  nRF Connect (Android), to interact with the services and characteristics
  created in this sketch.

  This example code is in the public domain.
*/

#include <ArduinoBLE.h>

BLEService ledService("19B10000-E8F2-537E-4F6C-D104768A1214"); // BLE LED Service

// BLE LED Switch Characteristic - custom 128-bit UUID, read and writable by central
BLEByteCharacteristic switchCharacteristic("19B10001-E8F2-537E-4F6C-D104768A1214", BLERead | BLEWrite);

const int ledPin = LED_BUILTIN; // pin to use for the LED

void setup() {
  Serial.begin(9600);
  while (!Serial);

  // set LED pin to output mode
  pinMode(ledPin, OUTPUT);

  // begin initialization
  if (!BLE.begin()) {
    Serial.println("starting BLE failed!");

    while (1);
  }

  // set advertised local name and service UUID:
  BLE.setLocalName("LED");
  BLE.setAdvertisedService(ledService);

  // add the characteristic to the service
  ledService.addCharacteristic(switchCharacteristic);

  // add service
  BLE.addService(ledService);

  // set the initial value for the characeristic:
  switchCharacteristic.writeValue(0);

  // start advertising
  BLE.advertise();

  Serial.println("BLE LED Peripheral");
}

void loop() {
  // listen for BLE peripherals to connect:
  BLEDevice central = BLE.central();

  // if a central is connected to peripheral:
  if (central) {
    Serial.print("Connected to central: ");
    // print the central's MAC address:
    Serial.println(central.address());

    // while the central is still connected to peripheral:
    while (central.connected()) {
      // if the remote device wrote to the characteristic,
      // use the value to control the LED:
      if (switchCharacteristic.written()) {
        if (switchCharacteristic.value()) {   // any value other than 0
          Serial.println("LED on");
          digitalWrite(ledPin, HIGH);         // will turn the LED on
        } else {                              // a 0 value
          Serial.println(F("LED off"));
          digitalWrite(ledPin, LOW);          // will turn the LED off
        }
      }
    }

    // when the central disconnects, print it out:
    Serial.print(F("Disconnected from central: "));
    Serial.println(central.address());
  }
}

Compile and upload the program.

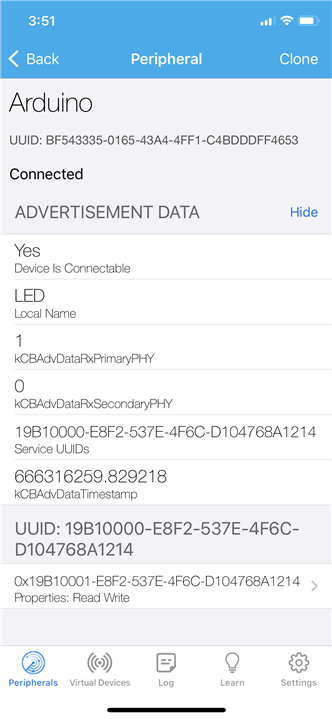
Start scanning with LightBlue.

The Peripheral shows up as LED

image

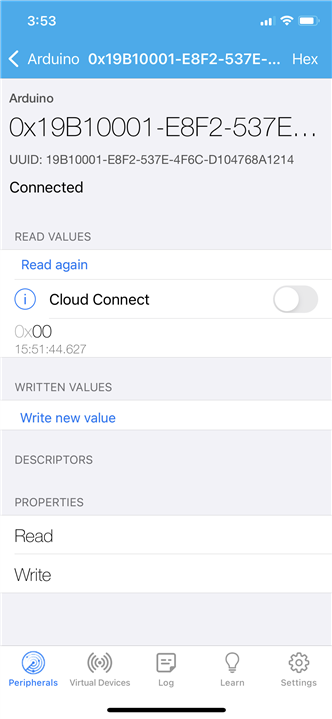
Locate the LED characteristic

image   image   image

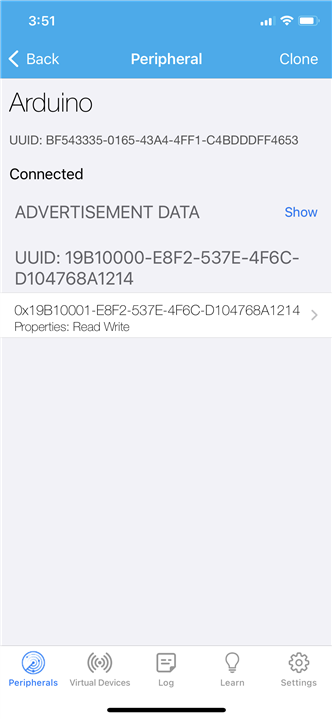
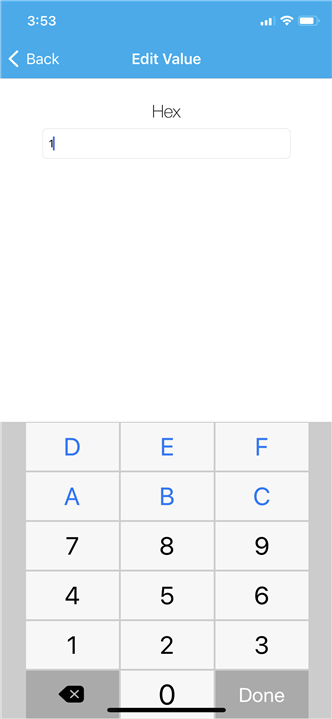
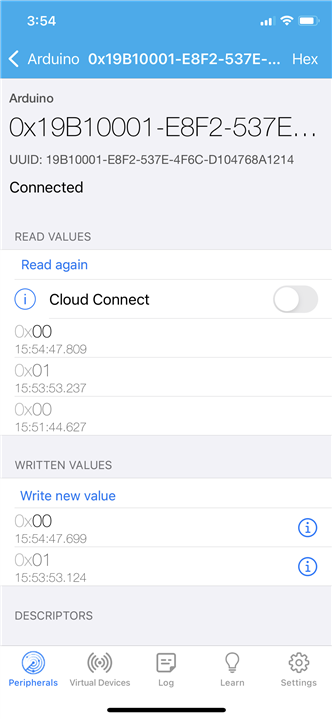
Write values to "1" and "0" (looks like I missed a screenshot, but you get the idea)

image   image

The output on the Serial Console

image

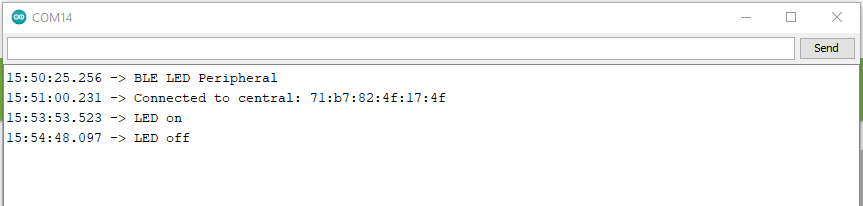
And the response on the board (I did not do a video).  Worked as expected except that ("1" was "Off" and "0" was "On").

image

Off to a good start.  I think I'll try some ML with the microphone and IMU using Edge Impulse.  I'll post that later.

  • Sign in to reply

Top Comments

  • rafeh1
    rafeh1 over 3 years ago +1
    had compile error. but example blimk led is working Arduino: 1.8.19 (Windows Store 1.8.57.0) (Windows 10), Board: "Seeed XIAO nRF52840 Sense, S140 7.3.0, Level 0 (Release)" WARNING: library ArduinoBLE…
Parents
  • embeddedguy
    embeddedguy over 3 years ago

    Hi Ralf

    Are you in application development with QT? 

    This board is something interesting one can do with BLE, ML, and sensors.  I have used Nimble from Apache mynewt. It is a portable and fully open-source BLE stack. 

    I used nRF52840-dongle along with riot-os to interface ble with BME280 sensors...

    • Cancel
    • Vote Up 0 Vote Down
    • Sign in to reply
    • More
    • Cancel
Comment
  • embeddedguy
    embeddedguy over 3 years ago

    Hi Ralf

    Are you in application development with QT? 

    This board is something interesting one can do with BLE, ML, and sensors.  I have used Nimble from Apache mynewt. It is a portable and fully open-source BLE stack. 

    I used nRF52840-dongle along with riot-os to interface ble with BME280 sensors...

    • Cancel
    • Vote Up 0 Vote Down
    • Sign in to reply
    • More
    • Cancel
Children
  • ralphjy
    ralphjy over 3 years ago in reply to embeddedguy

    I haven't used riot-os or nimble.  I'd be interested in reading about your experiences.  

    Not sure if the QT question was relative to GUI development, but I'm not actively doing anything with it.

    • Cancel
    • Vote Up 0 Vote Down
    • Sign in to reply
    • More
    • Cancel
element14 Community

element14 is the first online community specifically for engineers. Connect with your peers and get expert answers to your questions.

  • Members
  • Learn
  • Technologies
  • Challenges & Projects
  • Products
  • Store
  • About Us
  • Feedback & Support
  • FAQs
  • Terms of Use
  • Privacy Policy
  • Legal and Copyright Notices
  • Sitemap
  • Cookies

An Avnet Company © 2025 Premier Farnell Limited. All Rights Reserved.

Premier Farnell Ltd, registered in England and Wales (no 00876412), registered office: Farnell House, Forge Lane, Leeds LS12 2NE.

ICP 备案号 10220084.

Follow element14

  • X
  • Facebook
  • linkedin
  • YouTube