


I had a small request from a friend to produce a night-light that spelled out his kids' names.
This turned out to be a very easy project.
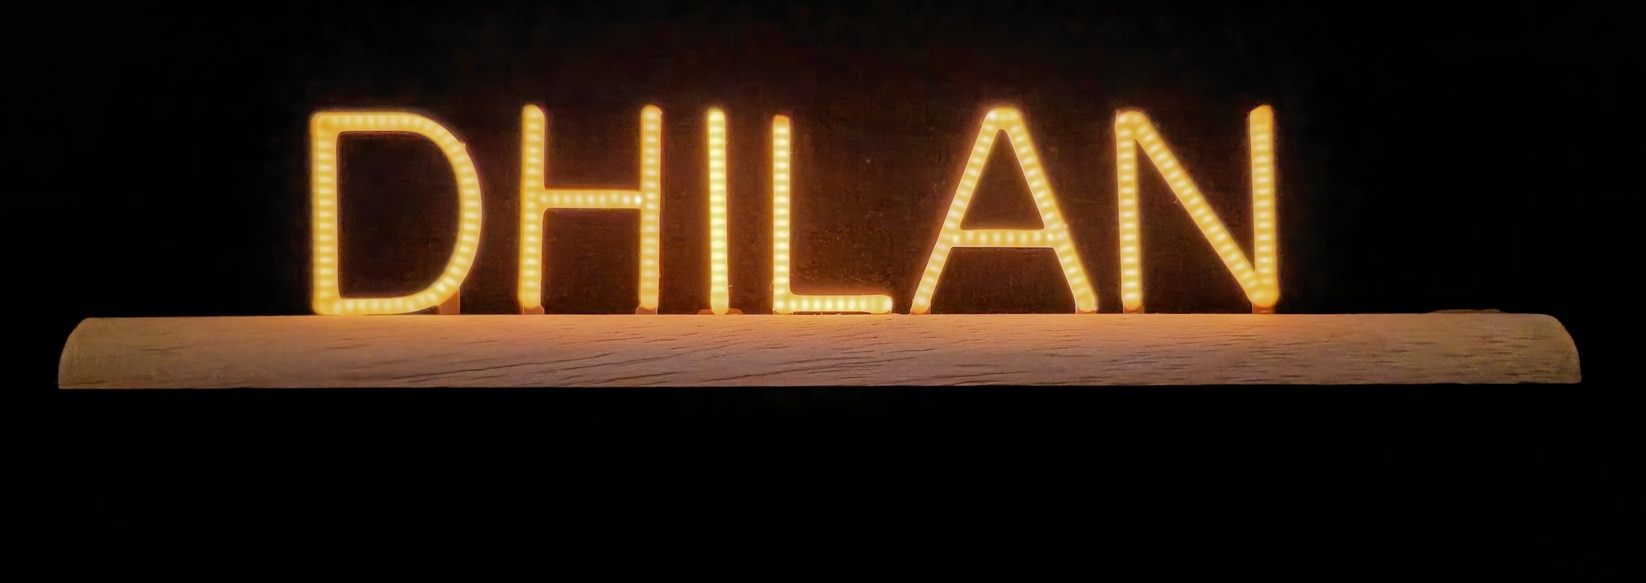
I obtained quarter-circle wood dowel with a 45-degree cut on the inside, instead of a sharp 90 degree corner. This is a standard thing from DIY stores.
Good quality double-sided tape was applied to an inside edge, and then I stuck on 30mm-high LED characters obtained from AliExpress. They are soldered in series, using thin bare wire, and then a length of two-core wire can be attached to the two remaining ends.
After that, more double-sided tape was applied on top, and then the second dowel piece was pushed against it, to form a semi-circle. Everything was then secured with epoxy glue. Some black adhesive tape (maybe fabric or felt) can be put on the underside afterwards, to hide wires.

Here's the end view:

I don't know the specifications of the LED characters, so I just drove them with constant current. Each character has a forward voltage of about 3V.
I used a ready-made DC-DC converter board that accepts 5V from a USB phone charger and outputs about 23V. That's the blue board in the photo below.
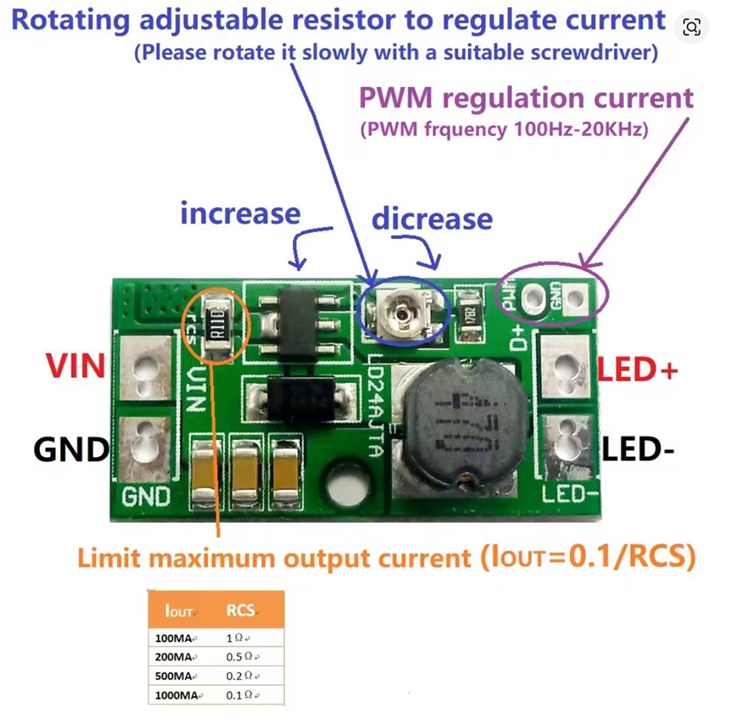
The green board in the photo is a constant current driver that accepts 6-24V input, and outputs an adjustable current value (there is a tiny trimmer potentiometer).
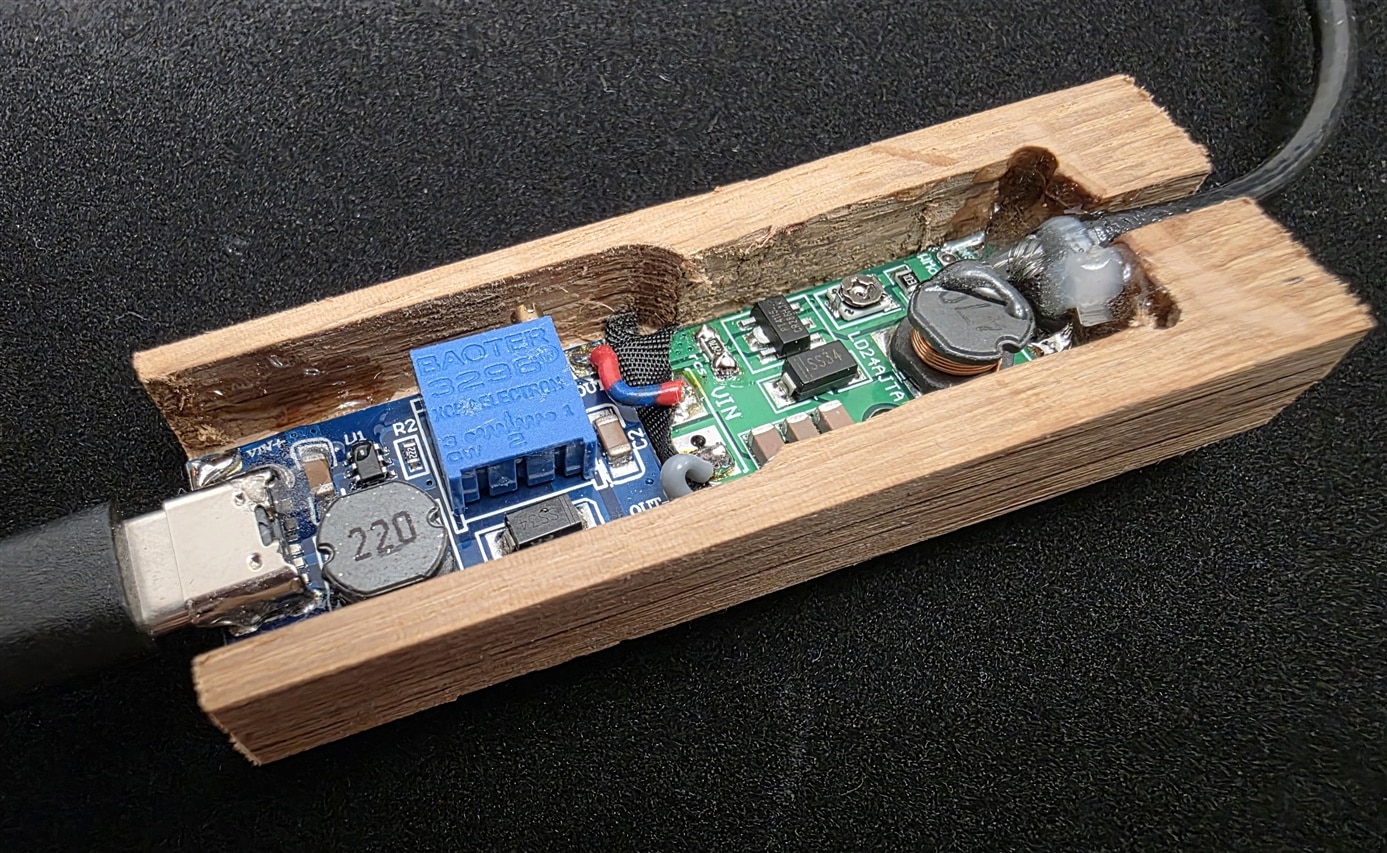
As well as the trimmer potentiometer, there is also a small resistor that sets the maximum current. I desoldered that resistor and swapped it with a 2.7 ohm part, which should limit the maximum current to a few tens of milliamps (I didn't measure). The brightness seems fine with the trimmer resistor just set to the middle position.
 (Image source: AliExpress)
An enclosure could be 3D-printed, but I crudely milled out a piece of wood. I will fill one end with black PolyDoh, and then close it up with a thin piece of wood.
Of course, this project could be improved a lot, it would be great to hear your thoughts.
Thanks for reading!


