


Table of Contents
Introduction
If you’ve read the previous blog post, you’ll be familiar with what GitHub is all about, and how to use it with Visual Code, which is convenient for working with software written in any language.
A key point is that GitHub allows you to store your code in repositories, one per project, and you or others can incrementally add new functionality, or fix code bugs, in different revisions that can always be revisited in case a problem occurs, and therefore it becomes quicker to fix problems that might be introduced as the code becomes more complex over time, as more and more lines of code is added to your project. As code is written, it can be periodically labeled (in an operation known as a commit) so that you can keep track of what has been added. The entire history of commits in a sequence is known as a code branch.
A nice way of working is to create a separate branch of code whenever you wish to add a new feature, commit code on that branch as you develop it, and merge it into the main branch once the feature is complete, reviewed, and tested. This blog post shows how to do exactly that. It covers just that scenario since that is likely to be the most useful one for newcomers to GitHub.
If you’re completely new to GitHub, then it is suggested to at least read the first part of the earlier blog post, which explains how to understand the following diagram. The diagram is near-identical to the previous blog diagram. Otherwise, no other background knowledge is required, to make sense of this blog.

The diagram above shows what will be covered in this blog (assuming that an initial code repository is already created, perhaps containing some code), and the diagram is interpreted from left to right, and you may wish to open it up in a separate window while following along with the rest of the content.
The screenshots in this blog are taken from PyCharm, but they will be near-identical regardless of whichever JetBrains Interactive Development Environment (IDE) product is used (such as CLion).
Cloning a Repository
At startup, in the Welcome to PyCharm window, click on Get from VCS (Version Control System):

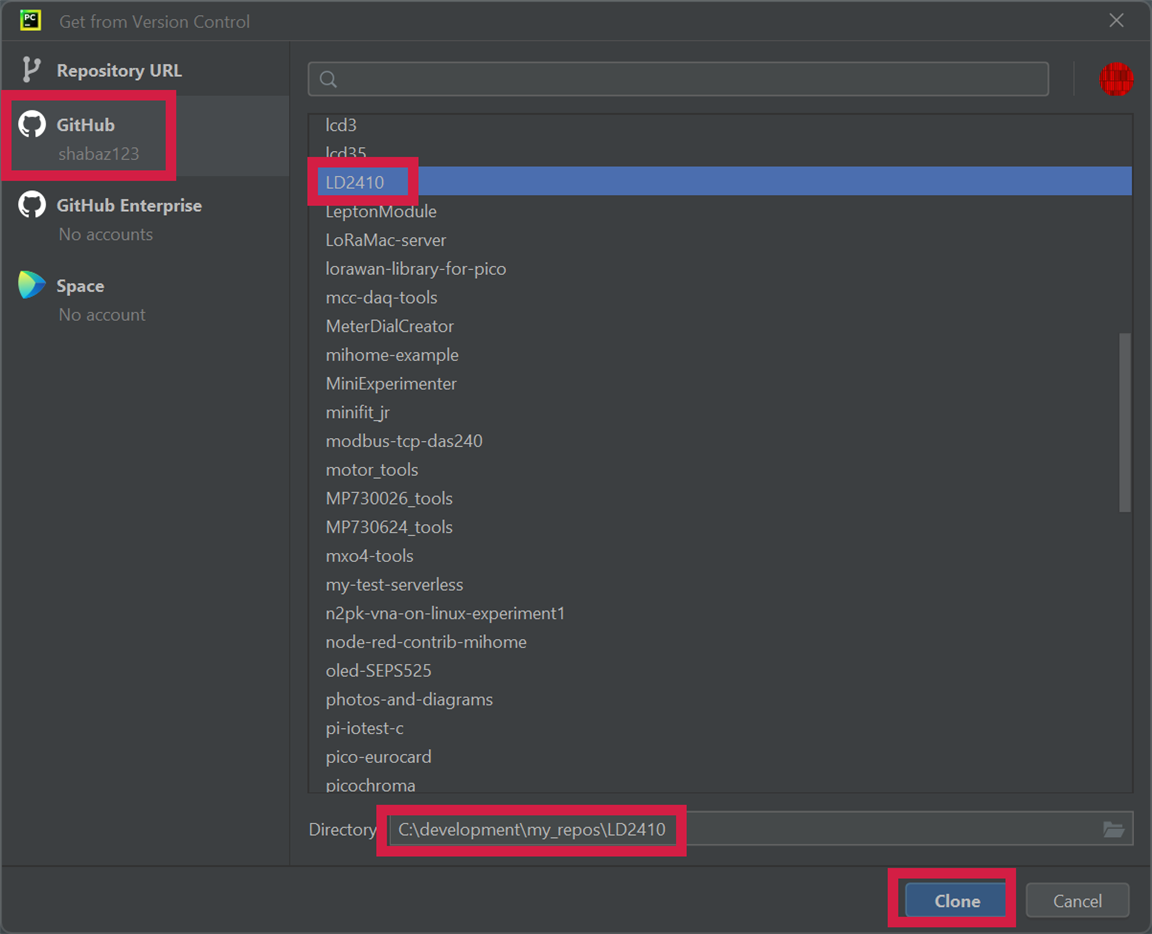
If you wish to work on your own code, select GitHub and then log in; a browser window will open up for entering your GitHub credentials:

Select your project repository, and then confirm that the destination (local) directory folder on your PC is fine, and click clone. In the example screenshot below, the GitHub repository is called LD2410, and the destination path is C:\development\my_repos\LD2410
PyCharm will download the code into the local folder C:\development\my_repos\LD2410 and PyCharm will launch into its main layout, which can be examined. All the key areas that will be used in this blog post are highlighted in the screenshot below.

Note: If you can't see the branch name displayed at the lower-right, then you may need to go to View->Appearance->Status Bar Widgets and then ensure that Git Branch is checked.
Creating a Branch and Publishing the Branch
If you wish to develop a new feature, the first thing you’ll want to do is to create a new branch for it.
Use the Git menu to select New Branch:

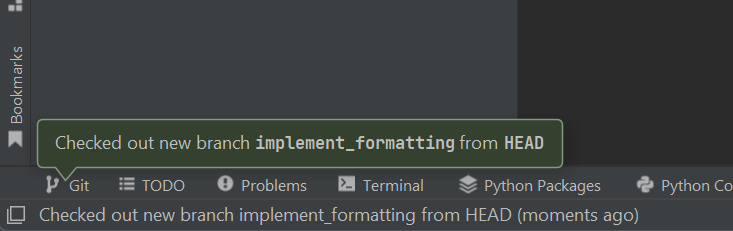
You’ll be prompted for a new branch name. Ensure that the Checkout branch box is checked, as shown in the example screenshot below. In the example, the new branch is called implement_formatting:

The lower-left corner will show a popup speech bubble indicating success:
You can open up the Git lower window if you like, to see that the new branch has been created. Ensure that the new branch is indicated at the lower-right corner of PyCharm.

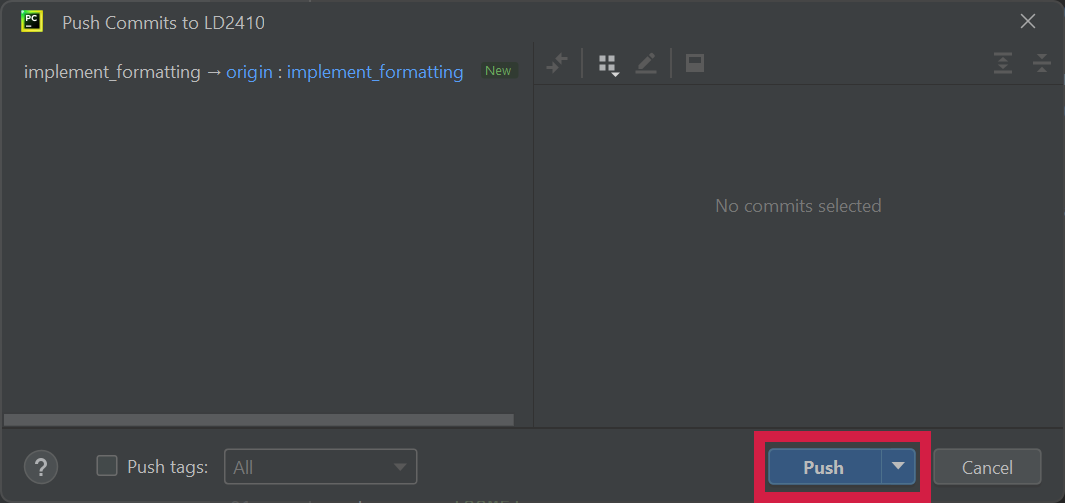
Now any code changes you make in the project folder (C:\development\my_repos\LD2410 in this example) will occur for the new branch. This is just a local folder, so at some stage you will wish to update the cloud repository with the same branch information. You can do that by clicking on the Push icon in the Git toolbar at the top-right:
![]()
A pop-up window will appear; click on Push:
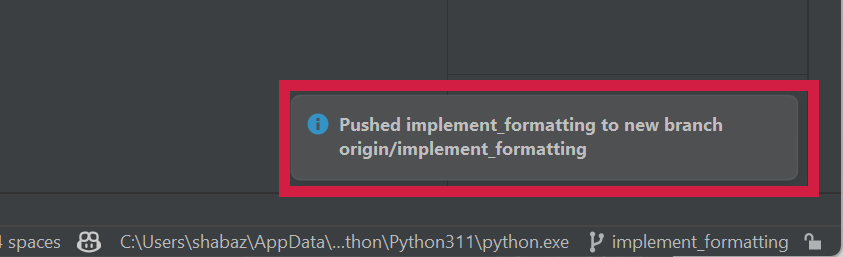
A pop-up notification at the lower-right will show success:
Now anyone can see that you’ve created the branch, in the online GitHub repository:

Editing Code and Committing your Code
PyCharm is excellent for editing code and testing code. As you reach key points in the development of your code, you can periodically checkpoint your code locally with text descriptions, so that you can always revert back in case you need to. The checkpointing procedure is more formally known as a commit operation. This is done by either clicking on the Commit button in the Git toolbar, or selecting the Commit pane from the left side:
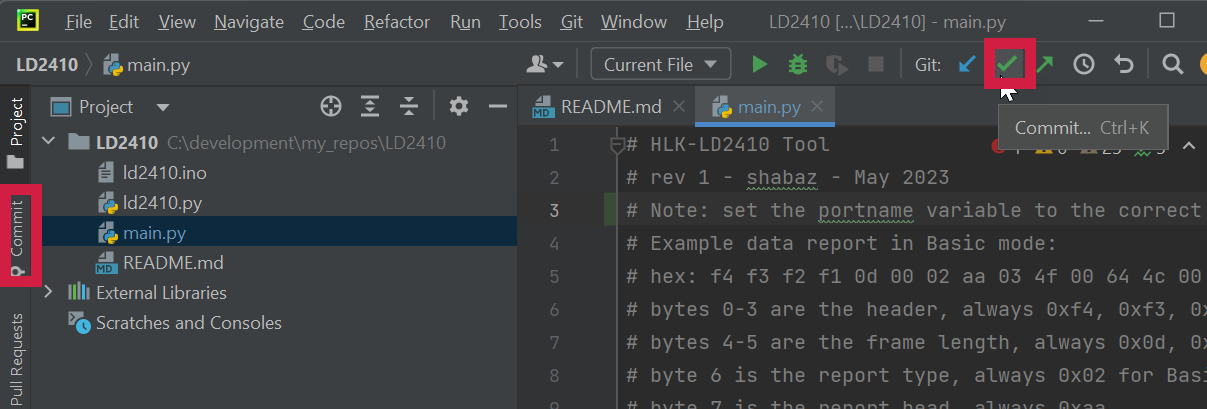
Type a commit description, and then press the Commit button:
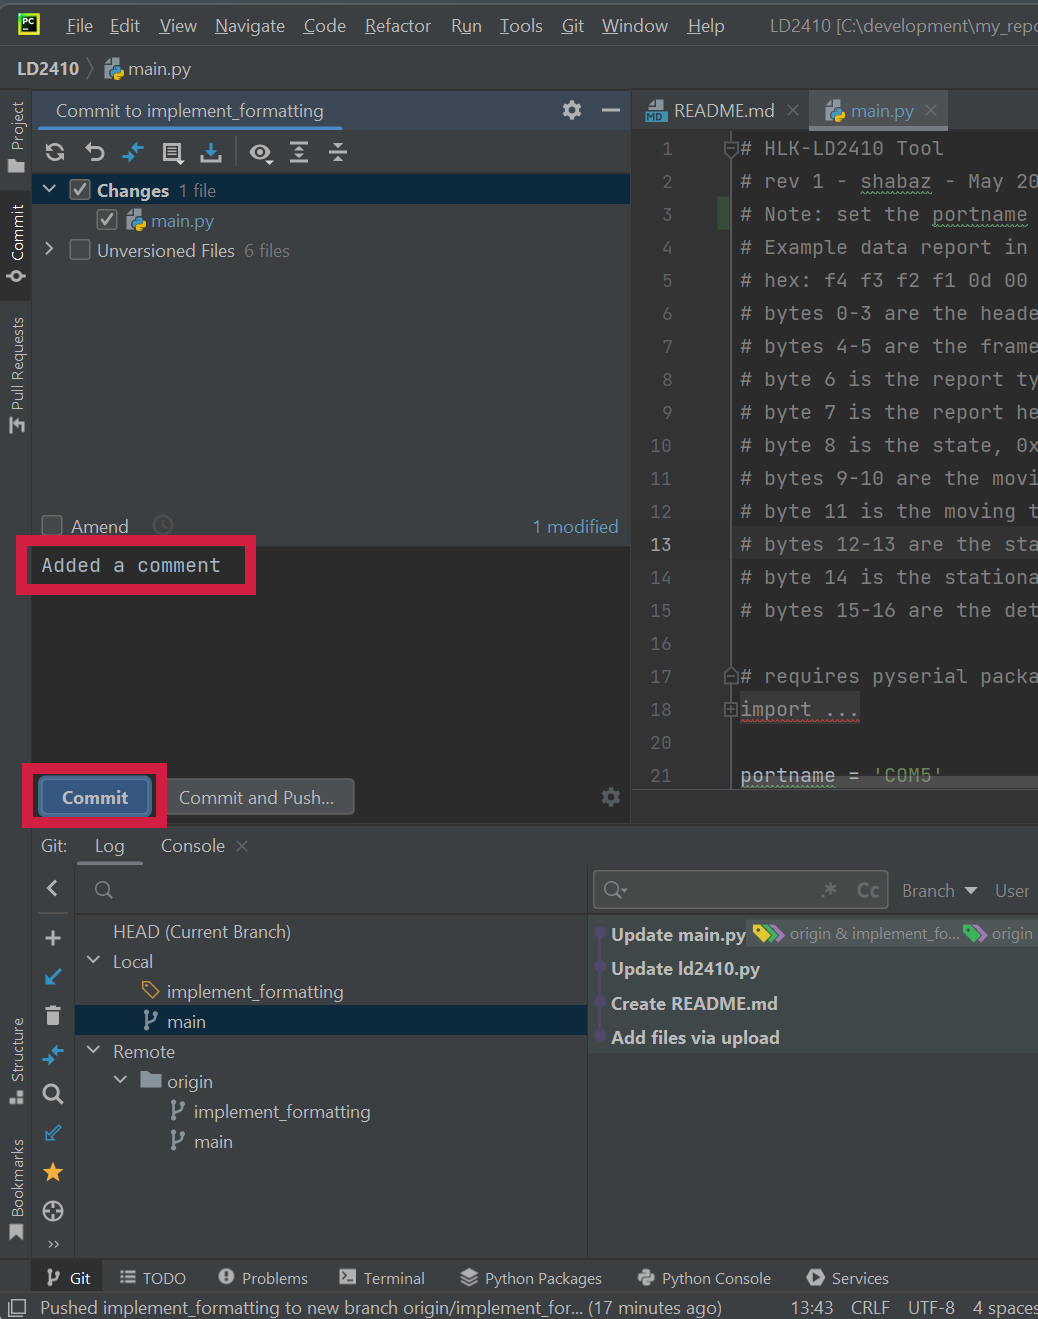
Note that all these commits are in the local folder, and not in the cloud. When you’re happy to do so, transfer the commits to the cloud, by using the Push icon as before:
![]()
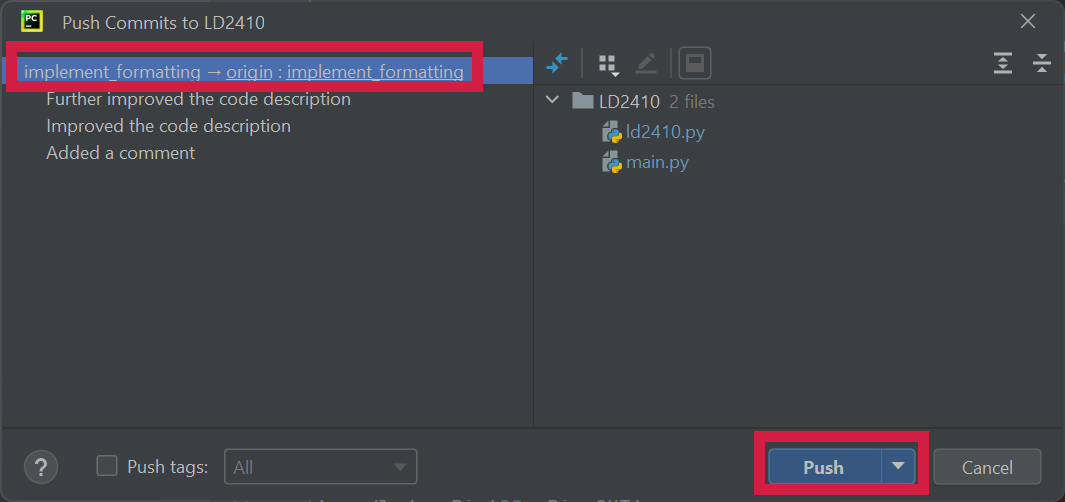
The pop-up window will indicate the feature branch name, and underneath that, it will indicate all the commit operations. In the example screenshot below, three commits were done, and they all need to be sent to the cloud. On the right side, you can see the affected files where the code changes were made. Ensure that the branch name is selected on the left, and then click on Push:
Now anyone looking at your branch on GitHub can see the changes:

Once all the coding is complete and tested, you may wish the code to be merged into the main branch. The way to do that is to first create a Pull Request, to advertise the fact that you wish your code to be reviewed and merged. That is discussed next.
Creating a Pull Request
The Pull Request will send a message that you wish your code on the feature branch in GitHub to be code-reviewed and eventually merged into the main code. Select Git->GitHub->Create Pull Request from the PyCharm menu bar.

The Create Pull Request pane will appear on the left side, all ready for you to type in comments and click on Create Pull Request:

The Pull Request is now visible in the GitHub repository:

Now the code owner can inspect it, examine your code changes, and perform the merge. My example has a typo as can be seen in the screenshot above!
If you own the code repository, then you can perform the merge operation yourself, although a code review is recommended.
Merging the Code to the main branch
By this point, the feature development is complete, the feature has been tested, and a Pull Request has been created, and the code has been reviewed. The code is ready to be merged into the main branch.
If you have just performed the Pull Request, then a Merge button will already be visible, so that can be clicked to perform the merge operation.

Otherwise, from the PyCharm menu bar, select Git->GitHub->View Pull Requests. You should either see the request as shown in the screenshot below, or you may see the text “No pull request matching filters. Clear filters”. If you see that text simply click in the search box (the box with a magnifier) and hit Enter. That should clear the filter and allow the request to be visible as shown in the screenshot:

Double-click the request, and you should see the following display. Click on Merge and confirm on any pop-up window.

The merge is complete! Now the main branch on GitHub contains your feature branch content.
Creating your Next Feature
You’re now ready to update your local copy of the main branch, and then create a brand new feature branch.
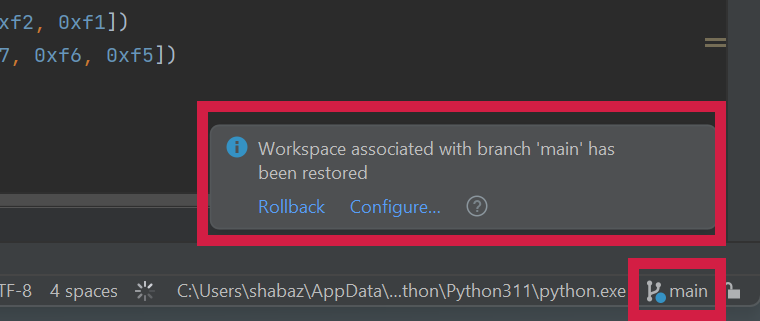
At the lower-right corner of PyCharm, click on the old feature branch name, and select main and then Checkout:

A pop-up message will indicate that the project’s local folder branch has been changed. The code in the project folder now contains the original old main branch content.
You can update the local folder to contain the latest main branch content from GitHub, by clicking on Update Project from the Git toolbar:

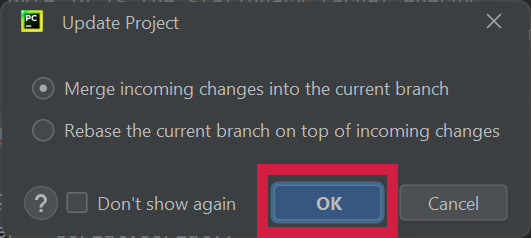
Click on OK in the Update Project pop-up window:
In the background, a Fetch and Merge operation is actually being performed. Now the main code in your local folder contains the same content as the latest main code on GitHub.
To develop a new feature, create a new branch as before.
Viewing Branches Graphically
Sometimes it can be useful to see the branches in a graphical view. Open up the lower Git window and the Log tab will show the branches on the right.

If desired, operations can be performed from the graphical view. For instance, if you wished the code to be switched to an earlier version, you could right-click on that version and select Reset Current Branch to Here.
Summary
PyCharm makes it very easy to add new features to code residing in GitHub. At startup, a VCS (Version Control System) project can be selected, to download (clone) the code into any destination local folder on the PC.
The Git menu can be used to create a new branch for the feature. Code can be committed locally, and then pushed to the cloud using the Commit and Push icons from the PyCharm Git toolbar.
The Git menu can be used to create a Pull Request, allowing others to review your code. The final Merge operation, to get the feature branch content into the main branch can be performed directly from PyCharm too if desired.
Thanks for reading!


