


Table of Contents
- Introduction
- Getting Started
- Adding CapSense Buttons
- How To Configure The OLED Display
- Device Assembly
- Programming, Test and Troubleshooting
- Summary
**********************************************************************************************************************
Schematic Diagram
Now it's time to modify the code from the previous chapter in order to experiment with the flow of water through the CapSense buttons and CapSense slider. Below I show you the schematic diagram:

How Does It Work?
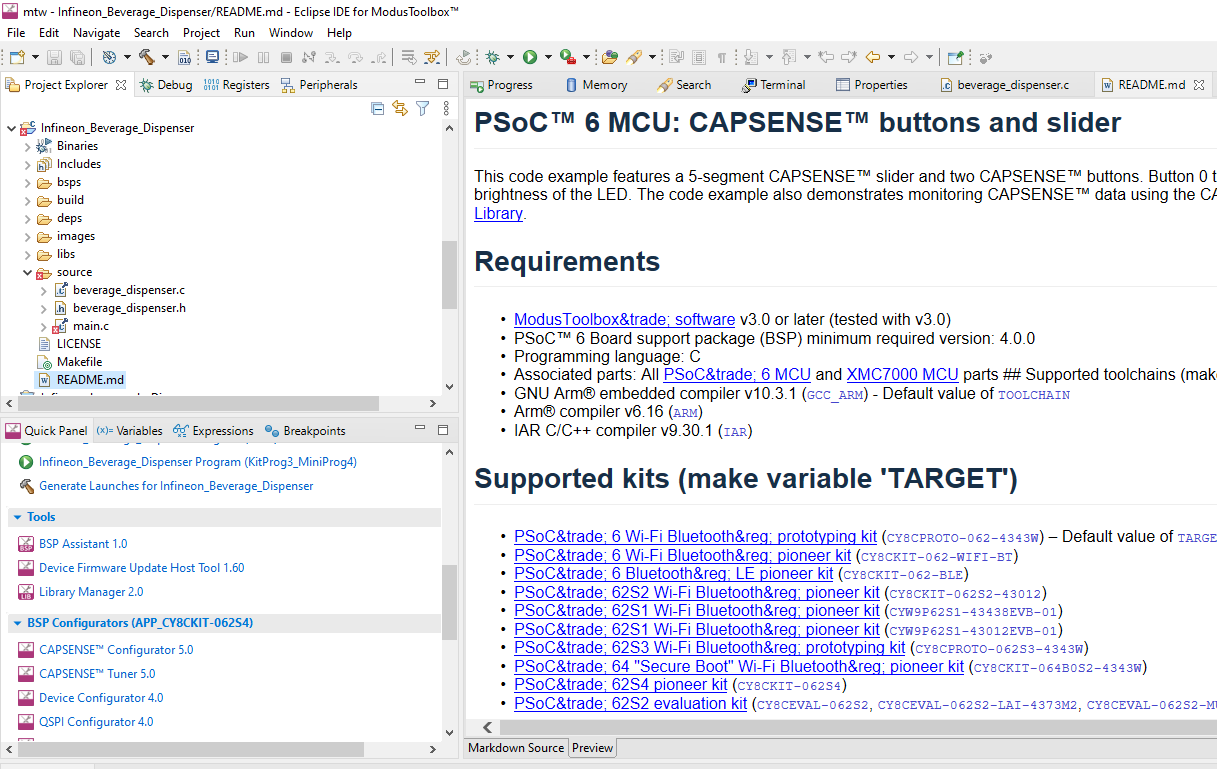
First we create the project, just like we saw in the previous chapter. I have assigned the name of Infineon_Beverage_Dispenser
Next, we create the file "beverage_dispenser.c" where we will put our code. The global constants are:
led_state_t led_state_cur = LED_OFF;
cyhal_pwm_t pwm_led;
cyhal_pwm_t pwm_dispenser;
We initialize the output ports and the PWM source.
cy_rslt_t initialize_led(void)
{
    cy_rslt_t rslt;

    rslt = cyhal_pwm_init(&pwm_led, CYBSP_USER_LED, NULL);
    rslt = cyhal_pwm_init(&pwm_dispenser, P2_4, NULL); // added
    rslt = cyhal_gpio_init(P0_2, CYHAL_GPIO_DIR_OUTPUT, CYHAL_GPIO_DRIVE_STRONG, CYBSP_LED_STATE_ON);
    rslt = cyhal_gpio_init(P0_3, CYHAL_GPIO_DIR_OUTPUT, CYHAL_GPIO_DRIVE_STRONG, CYBSP_LED_STATE_ON);

    if (CY_RSLT_SUCCESS == rslt)
    {
        rslt = cyhal_pwm_set_duty_cycle(&pwm_led,
                                        GET_DUTY_CYCLE(LED_MAX_BRIGHTNESS),
                                        PWM_LED_FREQ_HZ);
        if (CY_RSLT_SUCCESS == rslt)
        {
            rslt = cyhal_pwm_start(&pwm_led);
        }

    }

    if (CY_RSLT_SUCCESS == rslt)
    {
        led_state_cur = LED_ON;
    }

    return rslt;
}
The code that controls the PWM signal of the CapSense slider is the one shown below. Remember that this PWM signal comes out of port P2_4, and feeds water pump 1.
    if ((LED_ON == led_state_cur) || ((LED_OFF == led_state_cur) && (ledData->brightness > 0)))
    {
        cyhal_pwm_start(&pwm_led);
        uint32_t brightness = (ledData->brightness < LED_MIN_BRIGHTNESS) ? LED_MIN_BRIGHTNESS : ledData->brightness;
        uint32_t PWM_DUTY_CYCLE_DISPENSER = brightness;

        /* Drive the LED with brightness */
        cyhal_pwm_set_duty_cycle(&pwm_led, GET_DUTY_CYCLE(brightness),
                                 PWM_LED_FREQ_HZ);

        cyhal_pwm_set_duty_cycle(&pwm_dispenser, PWM_DUTY_CYCLE_DISPENSER, PWM_FREQUENCY);
        cyhal_pwm_start(&pwm_dispenser); // dispenser

        led_state_cur = LED_ON;
    }
Finally, the code that controls the CapSense on and off buttons is used to control the water pump 2 (port P0_2).
    if ((led_state_cur == LED_OFF) && (ledData->state == LED_ON))
    {
        cyhal_pwm_start(&pwm_led);
        led_state_cur = LED_ON;
        ledData->brightness = LED_MAX_BRIGHTNESS;
        cyhal_gpio_write(P0_2, CYBSP_LED_STATE_OFF);
    }
    else if ((led_state_cur == LED_ON) && (ledData->state == LED_OFF))
    {
        cyhal_pwm_stop(&pwm_led);
        led_state_cur = LED_OFF;
        ledData->brightness = 0;
        cyhal_gpio_write(P0_2, CYBSP_LED_STATE_ON);
    }
The complete code of the "beverage dispenser.c" file is shown below:
 // Author: Guillermo Perez

/*******************************************************************************
* Header files includes
*******************************************************************************/
#include "beverage_dispenser.h"
#include "cybsp.h"
#include "cyhal.h"
#include <stdio.h>
#include <math.h>

/*******************************************************************************
* Global constants
*******************************************************************************/
#define PWM_LED_FREQ_HZ    (1000000lu)  /* in Hz */
#define GET_DUTY_CYCLE(x)    (100 - x)

#define DELAY_LONG_MS           (3000)   /* ADD 2 milliseconds */
/* PWM Frequency */
#define PWM_FREQUENCY (50u)

/*******************************************************************************
* Global constants
*******************************************************************************/
led_state_t led_state_cur = LED_OFF;
cyhal_pwm_t pwm_led;
cyhal_pwm_t pwm_dispenser;

/*******************************************************************************
* Function Name: update_led_state
********************************************************************************
* Summary:
*  This function updates the LED state, based on the touch input.
*
* Parameter:
*  ledData: the pointer to the LED data structure
*
*******************************************************************************/
void update_led_state(led_data_t *ledData)
{
    if ((led_state_cur == LED_OFF) && (ledData->state == LED_ON))
    {
        cyhal_pwm_start(&pwm_led);
        led_state_cur = LED_ON;
        ledData->brightness = LED_MAX_BRIGHTNESS;
        cyhal_gpio_write(P0_2, CYBSP_LED_STATE_OFF);
    }
    else if ((led_state_cur == LED_ON) && (ledData->state == LED_OFF))
    {
        cyhal_pwm_stop(&pwm_led);
        led_state_cur = LED_OFF;
        ledData->brightness = 0;
        cyhal_gpio_write(P0_2, CYBSP_LED_STATE_ON);
    }
    else
    {
    }

    if ((LED_ON == led_state_cur) || ((LED_OFF == led_state_cur) && (ledData->brightness > 0)))
    {
        cyhal_pwm_start(&pwm_led);
        uint32_t brightness = (ledData->brightness < LED_MIN_BRIGHTNESS) ? LED_MIN_BRIGHTNESS : ledData->brightness;
        uint32_t PWM_DUTY_CYCLE_DISPENSER = brightness;

        /* Drive the LED with brightness */
        cyhal_pwm_set_duty_cycle(&pwm_led, GET_DUTY_CYCLE(brightness),
                                 PWM_LED_FREQ_HZ);

        cyhal_pwm_set_duty_cycle(&pwm_dispenser, PWM_DUTY_CYCLE_DISPENSER, PWM_FREQUENCY);
        cyhal_pwm_start(&pwm_dispenser); // dispenser

        led_state_cur = LED_ON;
    }
}

/*******************************************************************************
* Function Name: initialize_led
********************************************************************************
* Summary:
*  Initializes a PWM resource for driving an LED.
*
*******************************************************************************/
cy_rslt_t initialize_led(void)
{
    cy_rslt_t rslt;

    rslt = cyhal_pwm_init(&pwm_led, CYBSP_USER_LED, NULL);
    rslt = cyhal_pwm_init(&pwm_dispenser, P2_4, NULL); // added
    rslt = cyhal_gpio_init(P0_2, CYHAL_GPIO_DIR_OUTPUT, CYHAL_GPIO_DRIVE_STRONG, CYBSP_LED_STATE_ON);
    rslt = cyhal_gpio_init(P0_3, CYHAL_GPIO_DIR_OUTPUT, CYHAL_GPIO_DRIVE_STRONG, CYBSP_LED_STATE_ON);

    if (CY_RSLT_SUCCESS == rslt)
    {
        rslt = cyhal_pwm_set_duty_cycle(&pwm_led,
                                        GET_DUTY_CYCLE(LED_MAX_BRIGHTNESS),
                                        PWM_LED_FREQ_HZ);
        if (CY_RSLT_SUCCESS == rslt)
        {
            rslt = cyhal_pwm_start(&pwm_led);
        }

    }

    if (CY_RSLT_SUCCESS == rslt)
    {
        led_state_cur = LED_ON;
    }

    return rslt;
}

/* [] END OF FILE */
The final step is to test and improve the project.
Assembling The Test Module
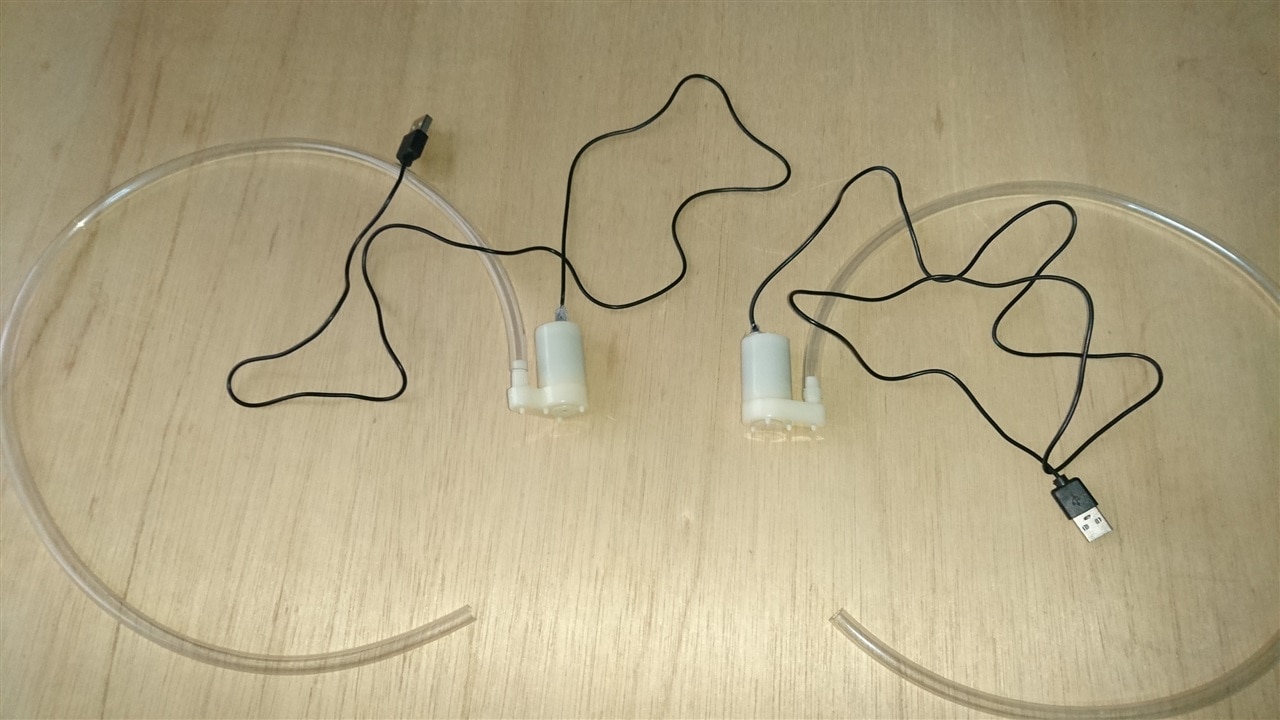
Below I show you the two mini water pumps with their respective hoses.These water pumps are powered from 3 to 6 VDC.
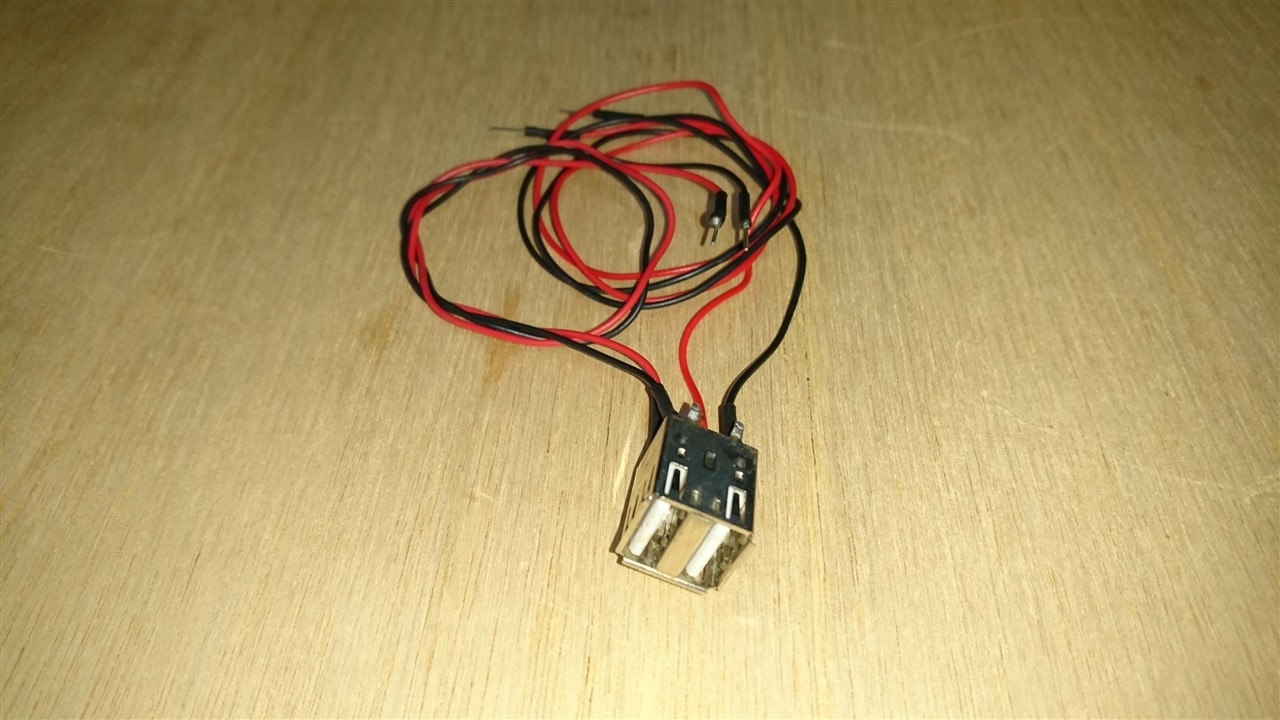
Two USB adapters will also be needed to power the water pumps. Please note that I only need the USB VCC and ground pins. In my case, this device was recycled from old hardware.
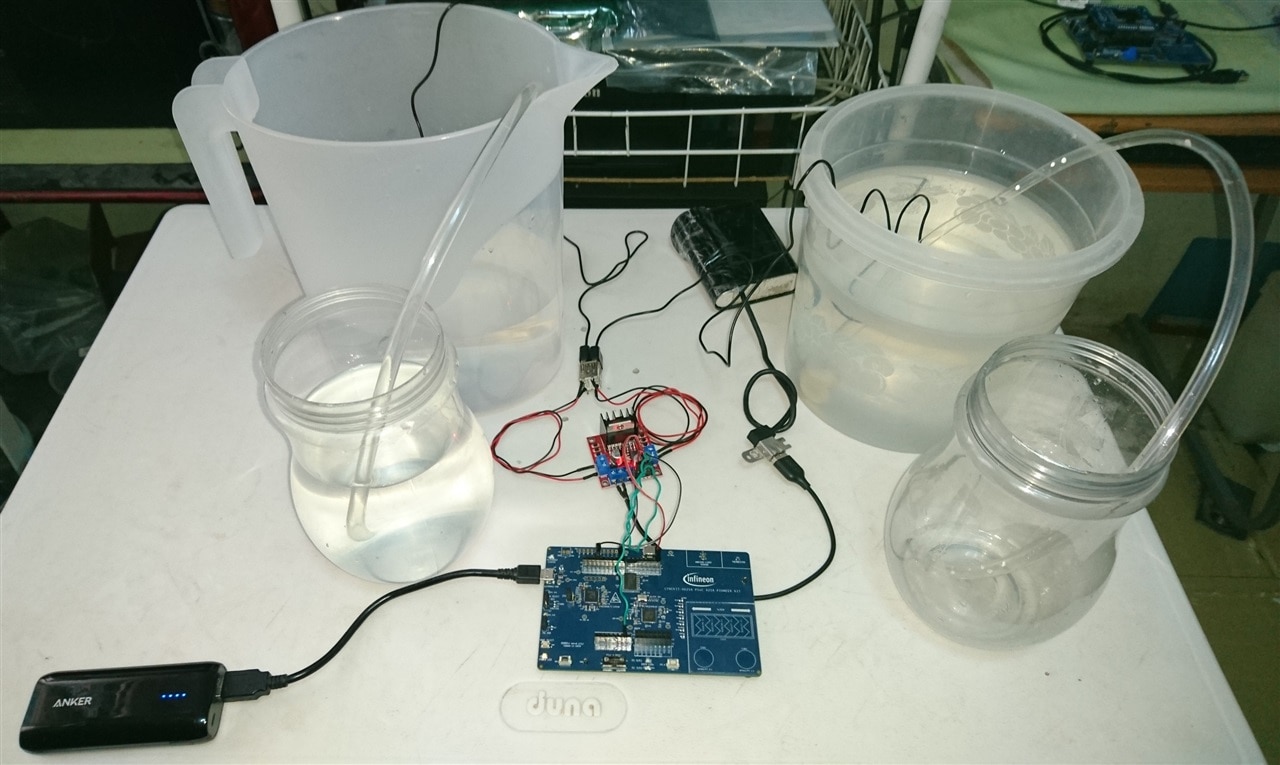
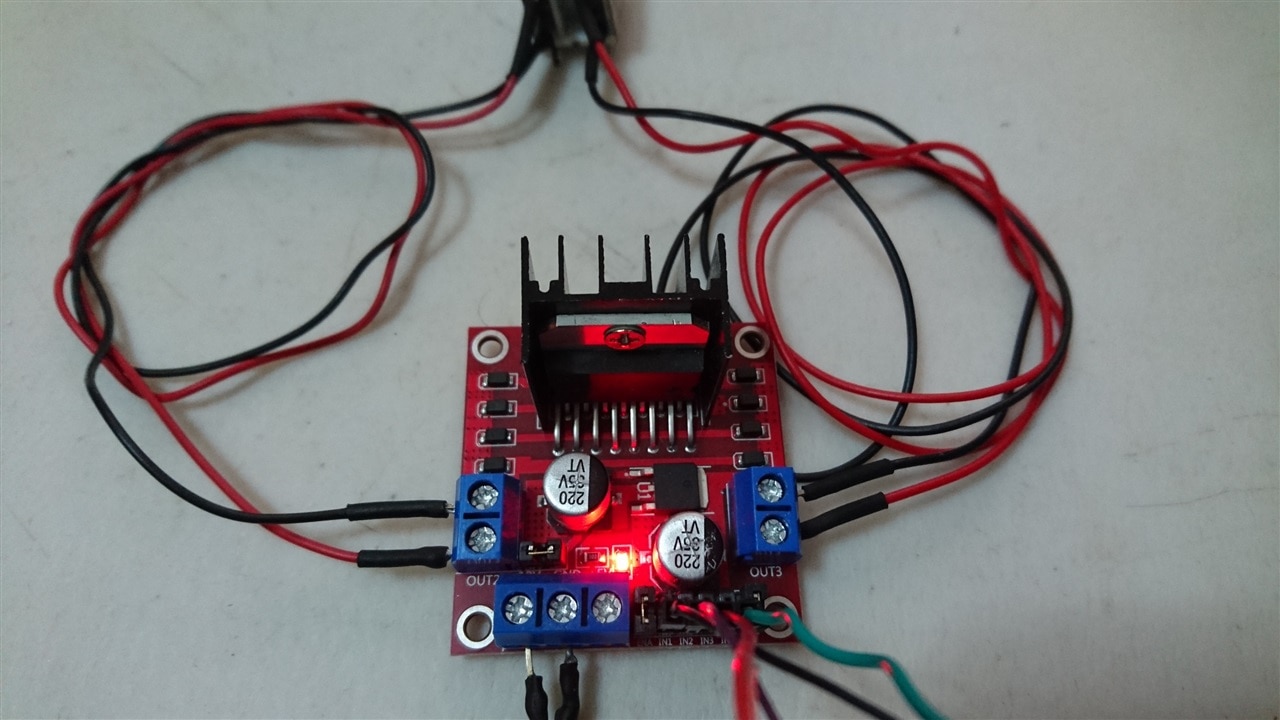
Finally, according to the schematic diagram we assemble the L298N driver, two 5V batteries, and two water containers. Below I show you the test module already assembled.
Test
Below I show you two tests carried out. In the first test I will use the CAPSENSE buttons to pump water into two bottles simultaneously. In the second test I will use the CAPSENSE Slider to pump water to the first bottle, here I will use PWM signal to control the speed of water flow.
Conclusion
- Please note that I have fed the L298N driver with 5 VDC through the +12V pin, this has helped me to feed the water pumps with 3 VDC. Which is the reason? Experimenting, I found that feeding 5VDC through the +5V pin to the output I got 1.5 VDC, which is insufficient to work the water pumps.
- I have achieved my goal of using the CAPSENSE buttons and the CAPSENSE slider to pump water. This will help me to make corrections to the design and improve it. I just wanted to go ahead and test my ideas. In the next chapter I will test another module that I intend to integrate into my final design.
Top Comments