


Hello and welcome to my final blog post. As my project is complete, I'm going to summarize all the information about my developments and the system's structure. Anybody interested in exploring further is invited to download the Beagle Bone files attached to this post, as well as to visit the GitHub page of the Blend part of this project.
What I've learned
1. More about web development than I've ever thought I'd need
HTML. I haven't written a single line of HTML since the school days. I would never think I'd use IFrames at any point of my life. Also CSS, which I've literally never used, even though I only put some extremely basic style information in my HTML (didn't even make a proper style file!). The biggest hurdle, but also a nice adventure and a ton of education, came from JavaScript, which I had to employ to give my interface actual interactivity. I've mercilessly copy-pasted and modified little scripts dozens of times and banged them together long enough for them to stick and start doing what I wanted. It's so nice that websites are not compiled and F5 is enough to test a new jury rig feature.
2. Lots about Bluetooth Low Energy
In the old days, me and my friends used to put an HC-05 module into any electronics that needed Bluetooth connectivity, and perhaps accounted for a bigger battery. The magical near-zero-power-consumption BLE has been a mystery, and the chips were more expensive than the good old HC-05. After this Design Challenge, nothing will ever be the same. I plan to desolder an nRF8001 from the Blend board, as a friend to make me a tiny PCB for an adapter and start plugging it into the smallest available Arduinos to add some proper BLE functionality to my projects. Having zero idea on internet security, I am not a huge fan of ESP8266 and similar devices, and my adventures with JavaScript are enough for me for a while, so BLE will probably become my focus in wireless technologies for the time being.
I managed to make hcitool, gatttool, and GATT SDK for Python work to my advantage, learned BLE characteristic UUIDs from a PDF I stumbled upon when googling around, and finally found nice libraries both in Python and Arduino to make interfacing between the Beagle Bone and the Blend quite pleasant. It was a ride on unknown territory, but definitely not something I'm going to regret, and probably very useful in the future.
3. OpenCV
System components
1. My Hero boards - RedBear Blends
The Blends are Arduino Leonardos with an nRF8001 BLE module, used in the project as Animators - the brains behind LED strips themselves. They are connected with the Beagle Bone via BLE and use the UART-like RX and TX characteristics to receive commands. As far as hardware goes, they connect to WS2812 addressable LED strips, with the data line on pin 6. The number of LEDs varies across strips (they don't work in their full lengths and are each cut to a different size, having been used in a plenty of projects before), and it is known to the Blend board, being written to the Flash memory when programming. There is no way for the Blend to know how many LEDs are there, so that's done manually. Other than the WS2812 strips and a power supply, that's all in terms of hardware connected to the board.
In terms of software, the Blend runs a heavily modified Funkboxing LED strip effects example, optimised, cleaned up and with added BLE functionality to make it compatible with the nRF8001. Details of firmware operation are laid out in the linked post, but the general structure is like this:
- On power on, initialize BLE and run a rainbow pattern on your LEDs
- Keep listening for incoming transmissions on the BLE link
- Run your current pattern's logic
- When new bytes arrive over BLE, parse them and apply any neccessary changes to your patterns
- Go back to #2 and run forever
The code uses HSV colour space:
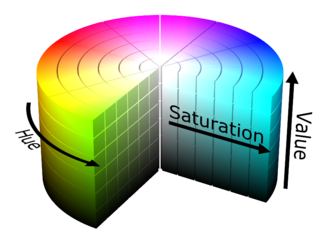
Here's a nice writeup on why this is a good thing. It also interfaces very nicely with my colour picker, and in my opinion makes the user experience far smoother.
2.The Beagle Bone
Beagle Bone Black Wireless has proven invaluable in this project. Serving as the brains of the system, it creates the Web interface and also makes and maintains the BLE connections with Animators. It runs a single Python script, main.py, that covers everything from Bluetooth to Flask web interface to image recognition, each elaborated on in separate updates. The components are also briefly described below. They are all connected together by Python's Multiprocessing, running one loop continuosly for the BLE, and one function when the image analysis has to be performed. The Flask app is the main one, it starts first and runs in the foreground. The subprocesses exchange information via Queue and Value objects provided by the Multiprocessing module. Here is a graphical overview:

3. HTML & JavaScript
No web interface is possible without some HTML documents or HTML embedded in Python code well technically a plain text interface can also be served, so after walking through tons of tutorials, I managed to make something that doesn't really look great, but it does the job:
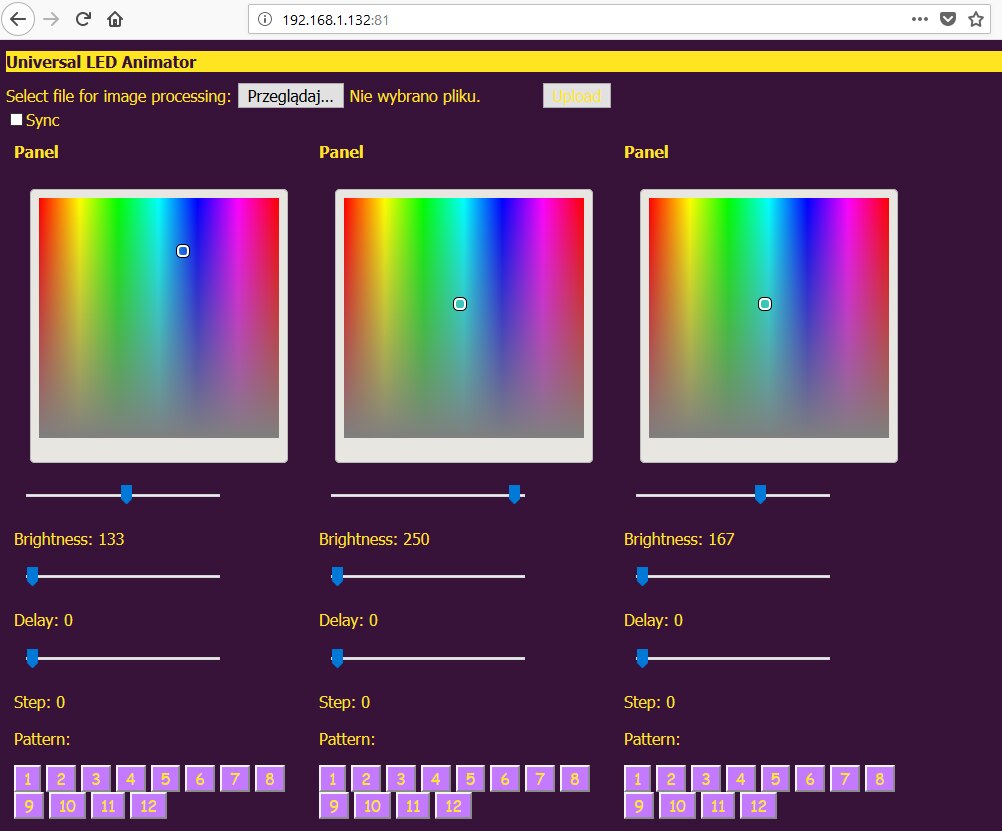
The index.html holds just the title bar, file selection form and sync checkbox. All other parameters are accessed via IFrames that I want to dynamically generate based on the number of connected BLE peripherals, but at the moment there are always three. The colour picker, sliders and buttons are described here, and everything is served via Flask. Style is provided by <style> markups directly embedded into the HTML docs:
  <style>
  html *
{
   font-size: 1em !important;
   color: #ffe521 !important;
   font-family: "Tahoma", "Tahoma", cursive;
}
    </style>
JavaScript does a ton of work in here, and describing each part would take a little long, but let me just mention that
4. Flask
Let me say that first: Flask rocks. As a huge fan of Python's simplicity, I am an even bigger fan of Flask's amazing ability to reduce solutions to complex web-related problems into a few lines of code. As I have a very limited idea of how web frameworks and servers work, I had great fun working with Flask. Its deployment is described here in more detail, but a few features have been added since that time , most importantly the image upload:
@app.route('/upload', methods=['POST'])
def upload_file():
    global new_ids
    file = request.files['image']
    f = os.path.join(app.config['UPLOAD_FOLDER'], file.filename)

    file.save(f)
    multiprocessing.Process(target=analyse, args=(num, num2, num3)).start()
    return render_template('index.html')
Developing this feature wouldn't be possible without this tutorial.
5. OpenCV
The analyse() function ran by Multiprocessing in the code snippet above is the OpenCV script I'm using, with most debugging features removed. It fires up immediately after the upload is complete and runs in the background. Here is more on the algorithms used, let me just repost this pic that I really like, presenting the effects of line-tracing on a photo taken of the LED strip setup:

Unfortunately due to time constraints I could not implement direction recognition like I originally planned to - a big problem here was making some calculations on the Blend side, while the Blend is grossly overworked at the moment, with hardly any Flash and just a small bit of SRAM left unoccupied. Also, recognizing strips' orientation is implemented, but the IFrame titles are not changed based on this - again, not enough time to add the feature. Still, OpenCV serves very well to identify which strip went where, turning IDs based on when the BLE connection was established into real-life relative locations.
And let me also mention again that when learning for this project, I taught myself how to algorithmically put emoji on people's faces:
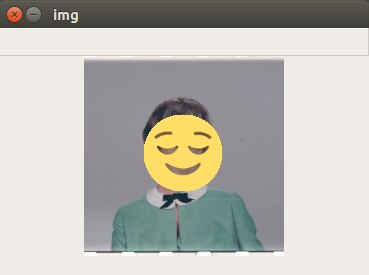
No people were harmed.
6. Video demo
Let's watch it all put to action in this video featuring me, my phone, three Blends, a Beagle Bone Wireless and over a hundred of WS2812, with me taking a photo of the setup, uploading it, and making the interface enumerate the LED strips:
Top Comments