Intro
This blog in the Experimenting With Extreme Environments design challenge is to satisfy the requirement for a deep-dive into the kit components.
The deep-dive blog is worth up to 20 points so I will endeavor to make at least 20 comments or points about features of kit components, especially features that I like.
The Kit
Hammond 1554VA2GYCL IP68 Enclosure
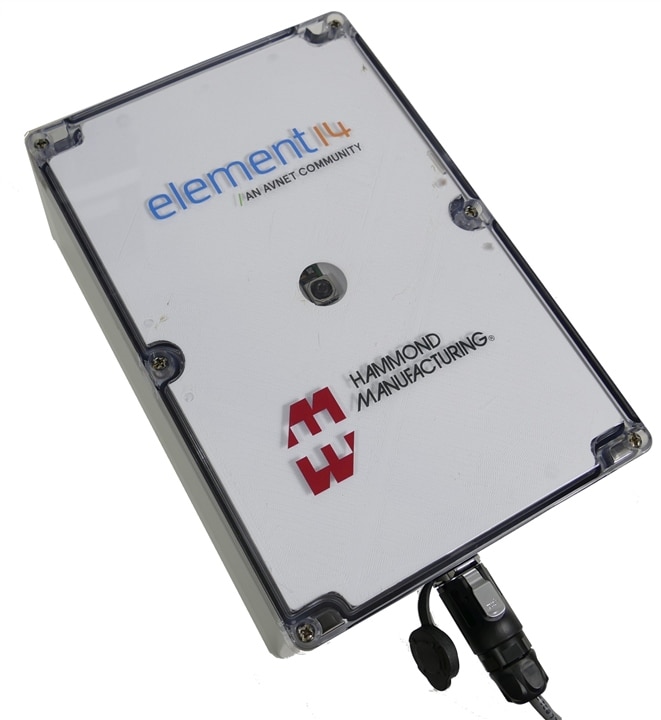
Point 0: This rugged polycarbonate box measures 88.9mm high x 160mm wide x 240mm long and it has a clear lid held on with 6 captive mounting screws.
Point 1: The lid has a rubber gasket and the screw mounts are metal inserts, allowing the lid to be removed multiple times without compromising the seal and the metal mounting threads will not get stripped or damaged by the metal screws, as they would with just plastic threads. The metal inserts make the lid installation process very smooth, positive and easy.
Point 1a: These mounting screws and inserts are outside of the gasket, so there is no possibility of water ingress through the screw holes.
Point 2: The lid screws are captive in the lid, so when the lid is unscrewed, the screws stay loosley in the lid. I like this feature since the screws can’t get misplaced when the lid is removed.
Point 3: Internally there are 14 mounting bosses. The 4 bosses in the corners have M3 metal inserts, allowing any internal chassis to be removed regularly. The other 10 mounting bosses accept #6 self-tapping screws.
Point 3a: There are also 4 built-in grooves or card guides, perfect for standard 1.6mm thick PCBs. I like that there are lots of mounting options that don’t involve drilling holes in the case – which could compromise its waterproof properties.
Point 4: Hammond provides a service to customize their enclosures with machined cutouts, and in this case, there is a perfect “D” hole machined for the Amphenol BrightConnX connector included in the kit. This service provides precise, professional customization and simplifies project builds.
Point 5: Providing a rugged, clear, waterproof lid is a great feature. Making a clear lid is just not possible with my 3D printer. The clear lid in this case is highly useful and actually necessary for my application where I have cameras that need to see through the lid while it protects them from the elements.
Point 6: Note that the materials Hammond used for this enclosure are UV resistant, which is very important for plastics exposed to sunlight.
Point 7: All the great features of this box combine to make this project simpler and faster to implement with better performance and aesthetics. In fact I am using2 of these enclosures as well as 3 other Hammond enclosures in this project.
There are even accessories available that allow mounting to a pole etc.
This project used two of these enclosures:
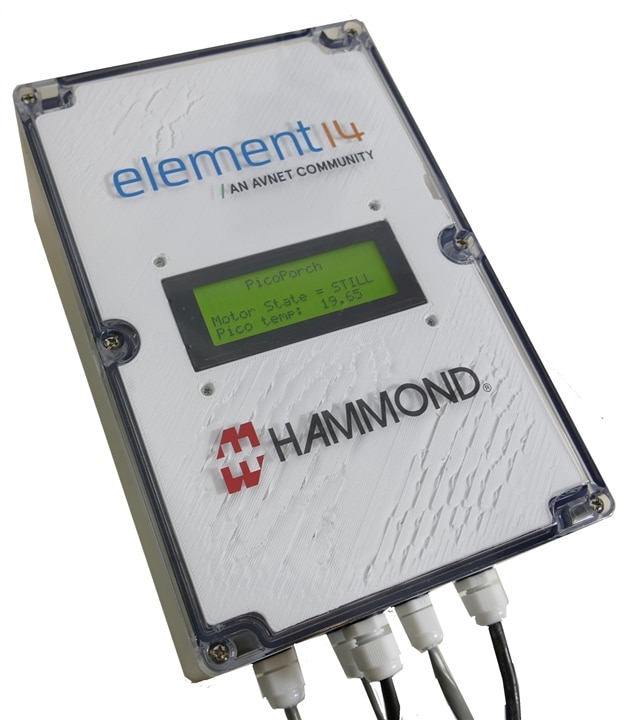
Raspberry Pi CM4104000 Compute Module 4 Lite
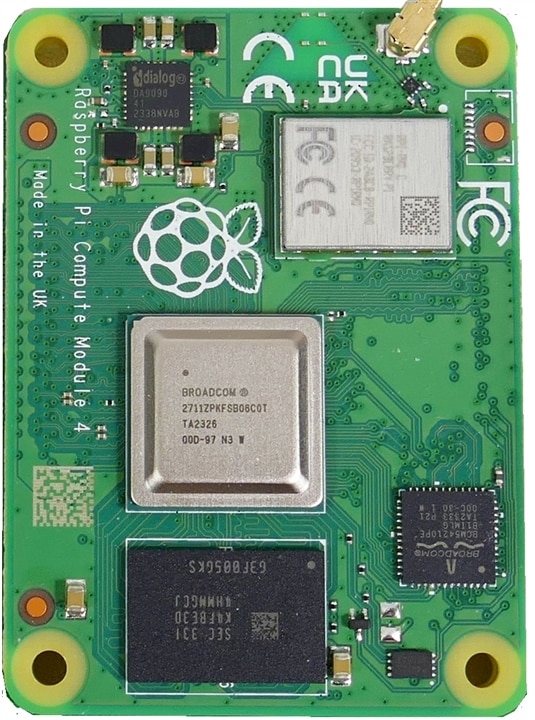
Point 8: CM4 Specs
Broadcom BCM2711 SOC - Quad core ARM Cortex A72, 1.5GHz, 4GB RAM, Wi-Fi, Bluetooth 5.0, BLE. H.265 (HEVC) (4Kp60 decode), H.264 (1080p60 decode, 1080p30 encode), OpenGL ES 3.1, Vulkan 1.0
Raspberry Pi modules have come a long way from the first model are continuing to be successful and crucially they have managed to keep the price down and the software free. There is a huge amount of examples and applications to learn from.
Point 9: CM4 Applications
The Raspberry Pi Compute Module 4 is a powerful, tiny form factor, computer module designed for industrial and embedded systems such as:
- edge computing
- IoT controllers
- digital signage
- industrial panels
- energy management
- building automation
- thin clients
- MQTT servers
- process automation
- video camera systems/processors
There are several 3rd party carrier cards now becoming available that use the CM4 as their compute engine.
There are lots of images of Raspberry Pi 4 Compute Modules on the internet, but I didn’t see any that looked exactly like the one I received-, so here it is:
Point 10: The Raspberry Pi Compute Module 4 has all the power and speed I need to make a great IP camera or camera server over Wi-Fi. There is even example software available that allows the CM4 to stream video through an IP connection. Unfortunately, there is something wrong with my CM4 (or something I am missing) since it does not recognize cameras attached to its camera connectors. However everything else works and it is still a useful computer that I can use for tasks like writing this blog. I have workstations at 3 locations in my house, so I can use this small, low cost computer in work areas away from my main computer to keep track of what is happening on element14 for example.
Raspberry Pi CM4IO Compute Module I/O Interface Card
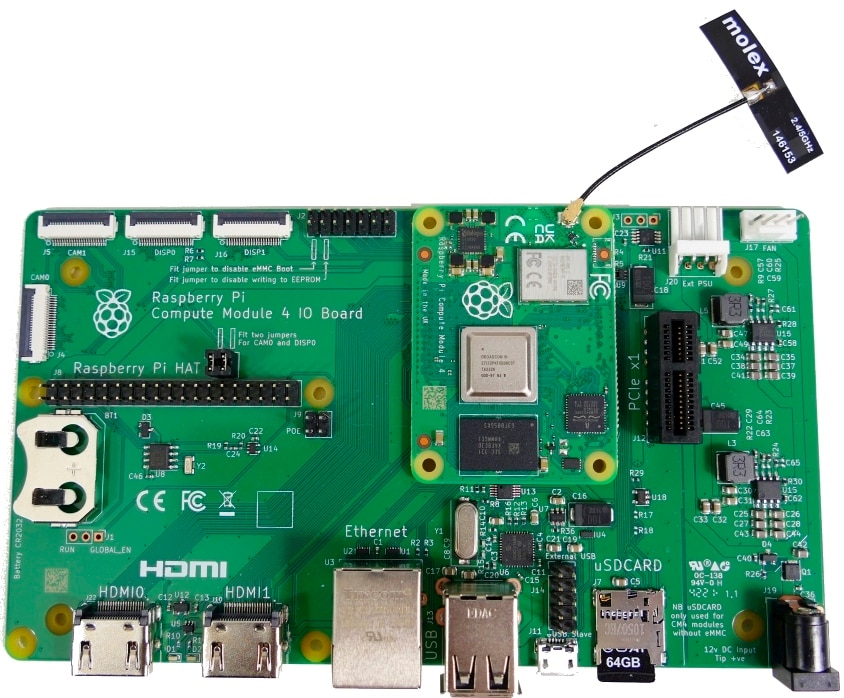
Point 11: The CM4IO board provides a full set of interfaces and connectors to turn a Compute Module 4 into a general purpose computer- it has:
- 2 full size HDMI 2.0 ports
- 28 user GPIO pins
- Gigabit Ethernet - RJ45 with PoE
- 2-lane MIPI DSI display port + FPC connector
- 4-lane MIPI DSI display port + FPC connector
- 2-lane MIPI DSI camera port + FPC connector
- 4-lane MIPI DSI camera port + FPC connector
- PCIe Gen 2 x 1 socket
- 2 x USB2.0 ports + header for two additional connectors
- +5V or +12V PSU input
- MicroSD card socket
- Fan connector
- Rasperry Pi Hat header
- RTC with battery socket
I really like the dual HDMI connectors since most of my work flows require 2 monitors.
Point 12: The Pi CM4IO board is perfect for allowing immediate development of Compute Module 4 applications. I will make use of the microSD card socket and the camera connectors as well as the USB ports and HDMI outputs.
My most likely application for this computer is as an MQTT server since I need a low cost, low power computer that can handle Ethernet and Wi-Fi.
Midas MC42005A6W-SPTLYI-V2 four line by 20 character LCD with I2C interface
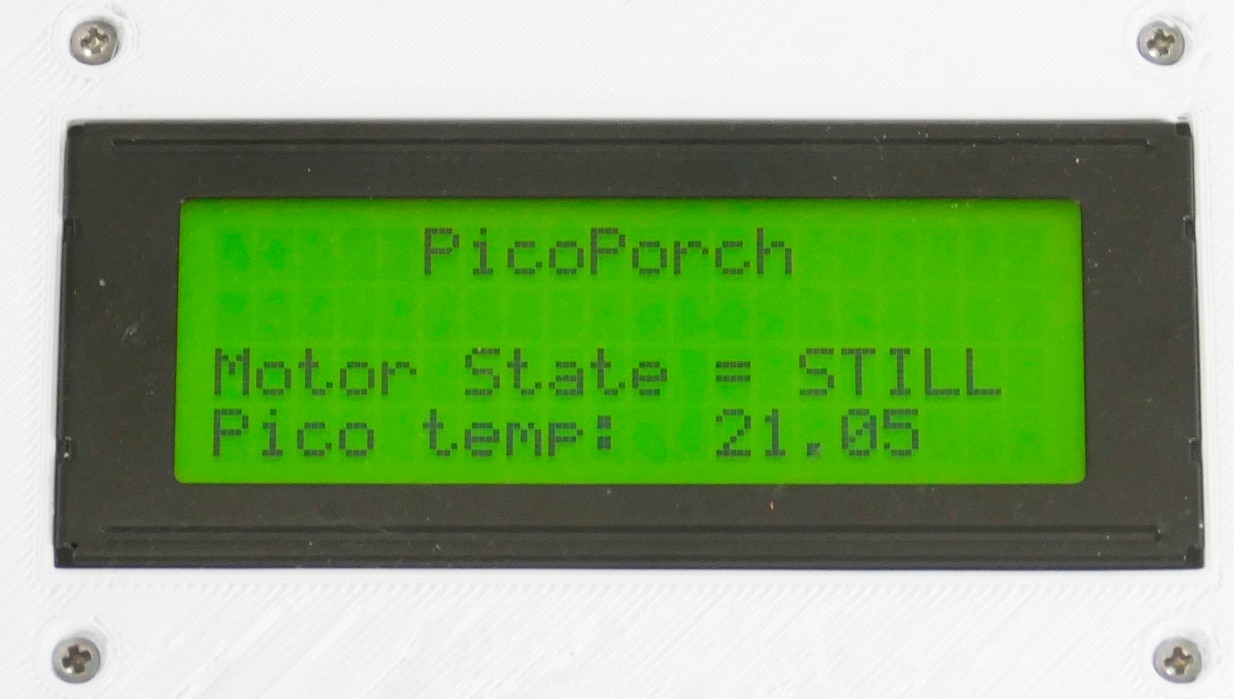
Point 13: Having an I2C interface makes hardware interfacing very simple and there are Arduino libraries available that work with this display. Having libraries available makes software development much easier and quicker.
Point 14: The display nominally uses 5 logic, but it works fine when connected to a 3.3V MCU with pullup resistors to 3.3 volts. The backlight needs 5 V to provide decent backlight intensity, but the signal lines can still be 3.3 V while the backlight gets 5V. The display consumes about 1mA, so it is useful for low power applications. If the backlight is used, it can draw 280 mA, so it may be useful to only turn it on when needed. It is readable with no backlight as long as there is ambient light around.
I like the low power of the LCD and the convenience of the I2C interface, especially that it works with either 3.3 or 5 V signals.
Molex 146153-0050 antenna
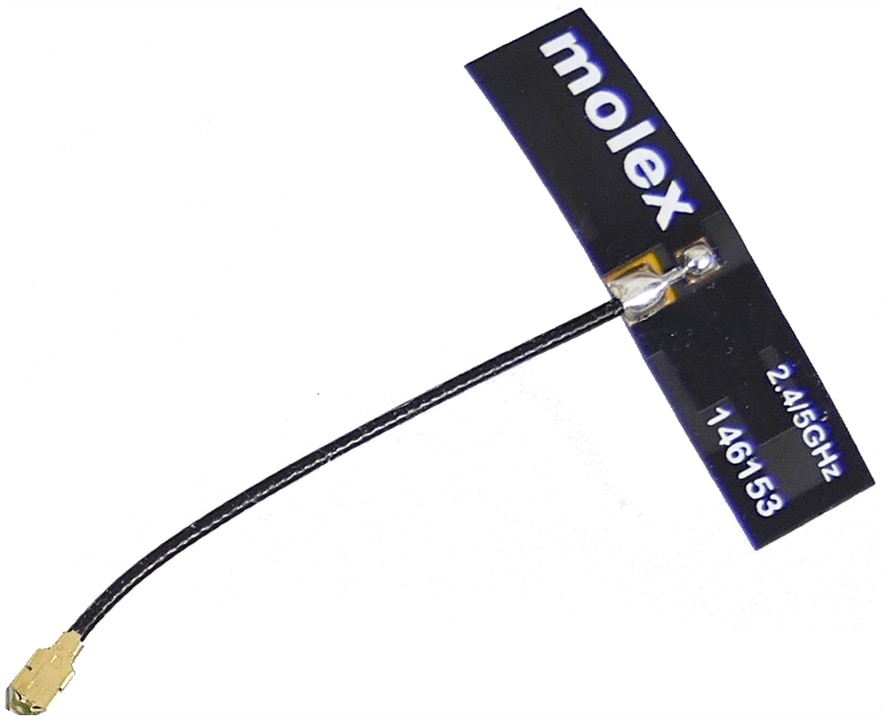
Point 15: This is a small (34.9 x 9mm) onmidirectional antenna that works for BLE, Wi-Fi, Zigbee, Thread and Hart. It has a peak gain of 32. in the 2.4GHz band and 4.25 in the 5 GHz band. It comes with a 50 mm cable and a UFL connector that plugs into the CM4 card. It seems to have great performance for such a small antenna.
Amphenol MRDBG04M17000
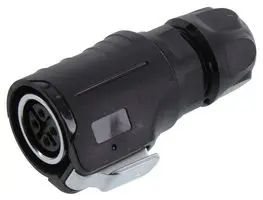
Point 16: This robust 4 pin cable receptacle connector is waterproof and it has a metal latch with button release. The connector has internal solder cups to connect wires to the receptacle pins that are nicely spaced for easy soldering and there are insulating dividers to prevent accidental shorts. The backshell has lots of room to accommodate wire that has had the outer jacket removed.
Point 17: The cable jacket is clamped by a screw-on ferrule/gasket arrangement that does not wind up the cable as it is tightened down. The whole connector is intuitively easy to assemble. Except possibly how to carry the shield connection through the metal shell. It looks like there is an internal plastic collar that would pinch a 360 degree shield to the metal shell as the backshell is screwed in.
Point 18: I like that the connector is a latching bayonet style while still being waterproof and easy to assemble.
Amphenol MRDBG04L13000
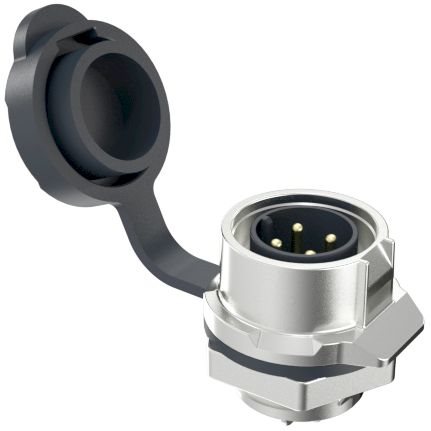
Point 19: This robust 4 pin metal plug bulkhead connector provides a sturdy panel mount mating connector to the above connector. It is waterproof and even comes with a captive rubber cap to keep crud out when there is no mating connector in place. The dust cap is integral to the rubber gasket. The panel mount threaded section has a flat so a corresponding “D” panel cutout prevents the connector from rotating while the nut is being tightened. This also ensures the latching button ends up in a convenient orientation.
Point 20: I am impressed that Amphenol managed to squeeze so many great features into a convenient bayonet style connector. Overall, this connector system is a high quality, high performance connector that ticks all the boxes for features and durability.
Discussion
This blog was only produced after I had a chance to try these components and form some opinions about their properties. All of them are excellent components which is one of the main reasons why I wanted to participate in this challenge.
The project status right now is that all subsystems are fully assembled, connected and fully functional. I just need to get them set up and start recording some video.
Links:
- Garden Secrets System
- ComputeCam and PicoPorch - Early Muddling
- PicoPorch and ComputeCam - The Motor System
- PicoPorch - LCD PCB & Bezel
- PicoPorch power wiring
- PicoPorch Motor Controller Demo
- PicoPorch System Demo
- PicoPorch Final Touches
- Deep Dive On Kit Components
- Backyard Secrets 1
- MotionEyeOS Tutorial
- Garden Secrets Project Summary

-

genebren
-
Cancel
-
Vote Up
0
Vote Down
-
-
Sign in to reply
-
More
-
Cancel
Comment-

genebren
-
Cancel
-
Vote Up
0
Vote Down
-
-
Sign in to reply
-
More
-
Cancel
Children