element14 Community
element14 Community
    Register Log In
  • Site
  • Search
  • Log In Register
  • About Us
  • Community Hub
    Community Hub
    • What's New on element14
    • Feedback and Support
    • Benefits of Membership
    • Personal Blogs
    • Members Area
    • Achievement Levels
  • Learn
    Learn
    • Ask an Expert
    • eBooks
    • element14 presents
    • Learning Center
    • Tech Spotlight
    • STEM Academy
    • Webinars, Training and Events
    • Learning Groups
  • Technologies
    Technologies
    • 3D Printing
    • FPGA
    • Industrial Automation
    • Internet of Things
    • Power & Energy
    • Sensors
    • Technology Groups
  • Challenges & Projects
    Challenges & Projects
    • Design Challenges
    • element14 presents Projects
    • Project14
    • Arduino Projects
    • Raspberry Pi Projects
    • Project Groups
  • Products
    Products
    • Arduino
    • Avnet Boards Community
    • Dev Tools
    • Manufacturers
    • Multicomp Pro
    • Product Groups
    • Raspberry Pi
    • RoadTests & Reviews
  • Store
    Store
    • Visit Your Store
    • Choose another store...
      • Europe
      •  Austria (German)
      •  Belgium (Dutch, French)
      •  Bulgaria (Bulgarian)
      •  Czech Republic (Czech)
      •  Denmark (Danish)
      •  Estonia (Estonian)
      •  Finland (Finnish)
      •  France (French)
      •  Germany (German)
      •  Hungary (Hungarian)
      •  Ireland
      •  Israel
      •  Italy (Italian)
      •  Latvia (Latvian)
      •  
      •  Lithuania (Lithuanian)
      •  Netherlands (Dutch)
      •  Norway (Norwegian)
      •  Poland (Polish)
      •  Portugal (Portuguese)
      •  Romania (Romanian)
      •  Russia (Russian)
      •  Slovakia (Slovak)
      •  Slovenia (Slovenian)
      •  Spain (Spanish)
      •  Sweden (Swedish)
      •  Switzerland(German, French)
      •  Turkey (Turkish)
      •  United Kingdom
      • Asia Pacific
      •  Australia
      •  China
      •  Hong Kong
      •  India
      •  Korea (Korean)
      •  Malaysia
      •  New Zealand
      •  Philippines
      •  Singapore
      •  Taiwan
      •  Thailand (Thai)
      • Americas
      •  Brazil (Portuguese)
      •  Canada
      •  Mexico (Spanish)
      •  United States
      Can't find the country/region you're looking for? Visit our export site or find a local distributor.
  • Translate
  • Profile
  • Settings
Experimenting with Thermal Switches
  • Challenges & Projects
  • Design Challenges
  • Experimenting with Thermal Switches
  • More
  • Cancel
Experimenting with Thermal Switches
Challenge Blog 3D Printer Thermal Runaway / Thermistor Tester #2 - Testing the OHD1-50B Thermal Sensor
  • Challenge Blog
  • Forum
  • Documents
  • Files
  • RoadTests
  • Mentions
  • Sub-Groups
  • Tags
  • More
  • Cancel
  • New
  • Share
  • More
  • Cancel
Group Actions
  • Group RSS
  • More
  • Cancel
Engagement
  • Author Author: guillengap
  • Date Created: 1 Feb 2022 3:51 AM Date Created
  • Views 1029 views
  • Likes 6 likes
  • Comments 2 comments
  • kemet
  • experimenting with Thermal Switches
Related
Recommended

3D Printer Thermal Runaway / Thermistor Tester #2 - Testing the OHD1-50B Thermal Sensor

guillengap
guillengap
1 Feb 2022

Table of Contents

  1. Project Introduction
  2. Testing the OHD1-50B Thermal Sensor
  3. Testing the OHD1-50B and M-TRS5-60B Thermal Sensors
  4. Detecting Transition From ON to OFF on Thermal Sensors
  5. Activation of a Fan with a OHD1-30B Thermal Sensor
  6. Cutting Power to the 3D Printer when Thermal Sensor Detects Thermal Runaway
  7. Project Report Updated
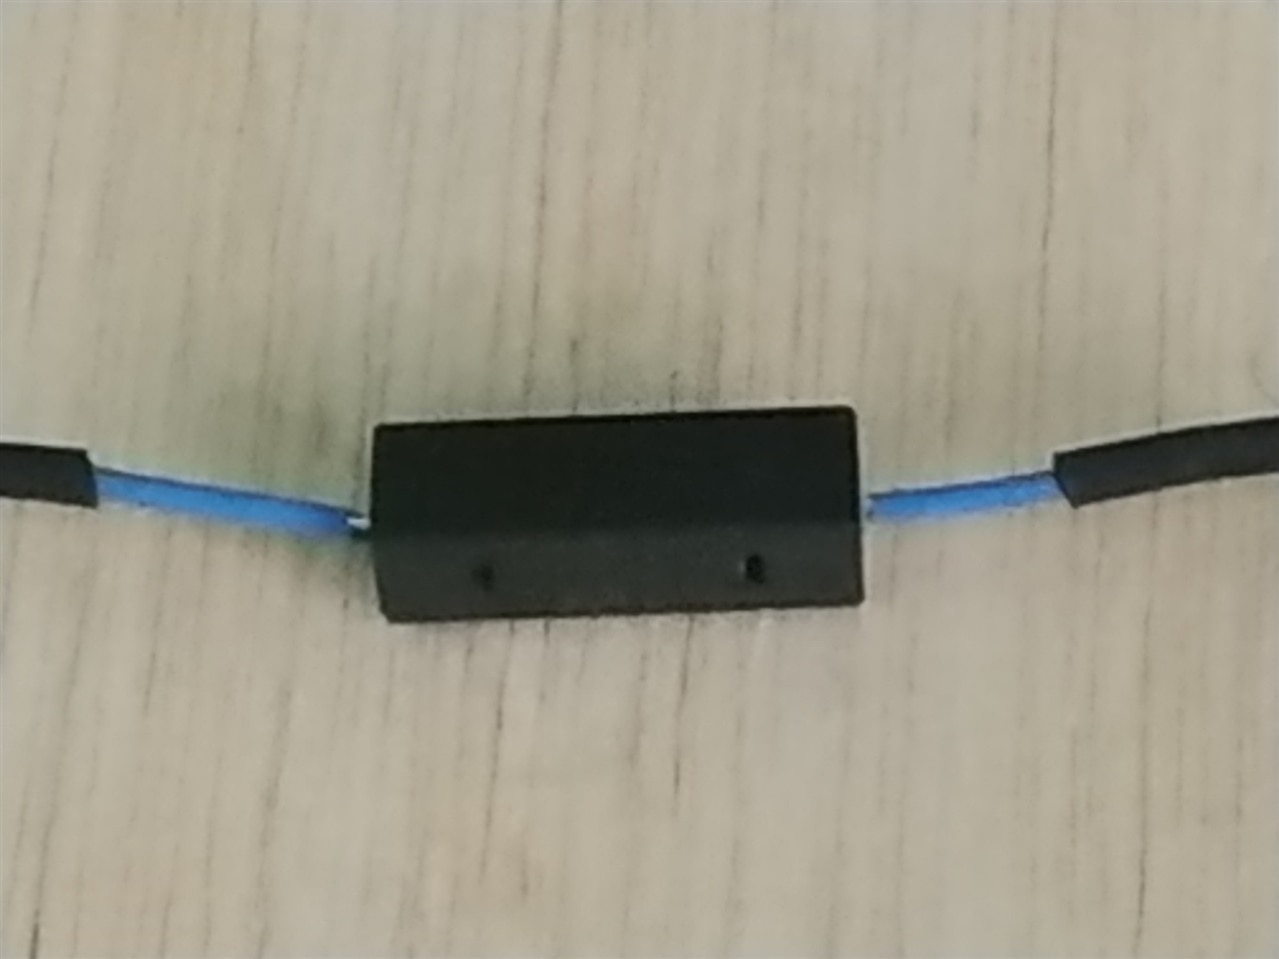
**********************************************************************************************************************

OHD1-50B Sensor

 According the datasheet KEMET, OHD1-50B is a Thermal Reed Switch, Axial, 5C Temperature Accuracy, High Reliability, High-Speed Response, Long Operational Life, Excellent Environmental Durability, High Temperature Accuracy, 50°C, Break.

image

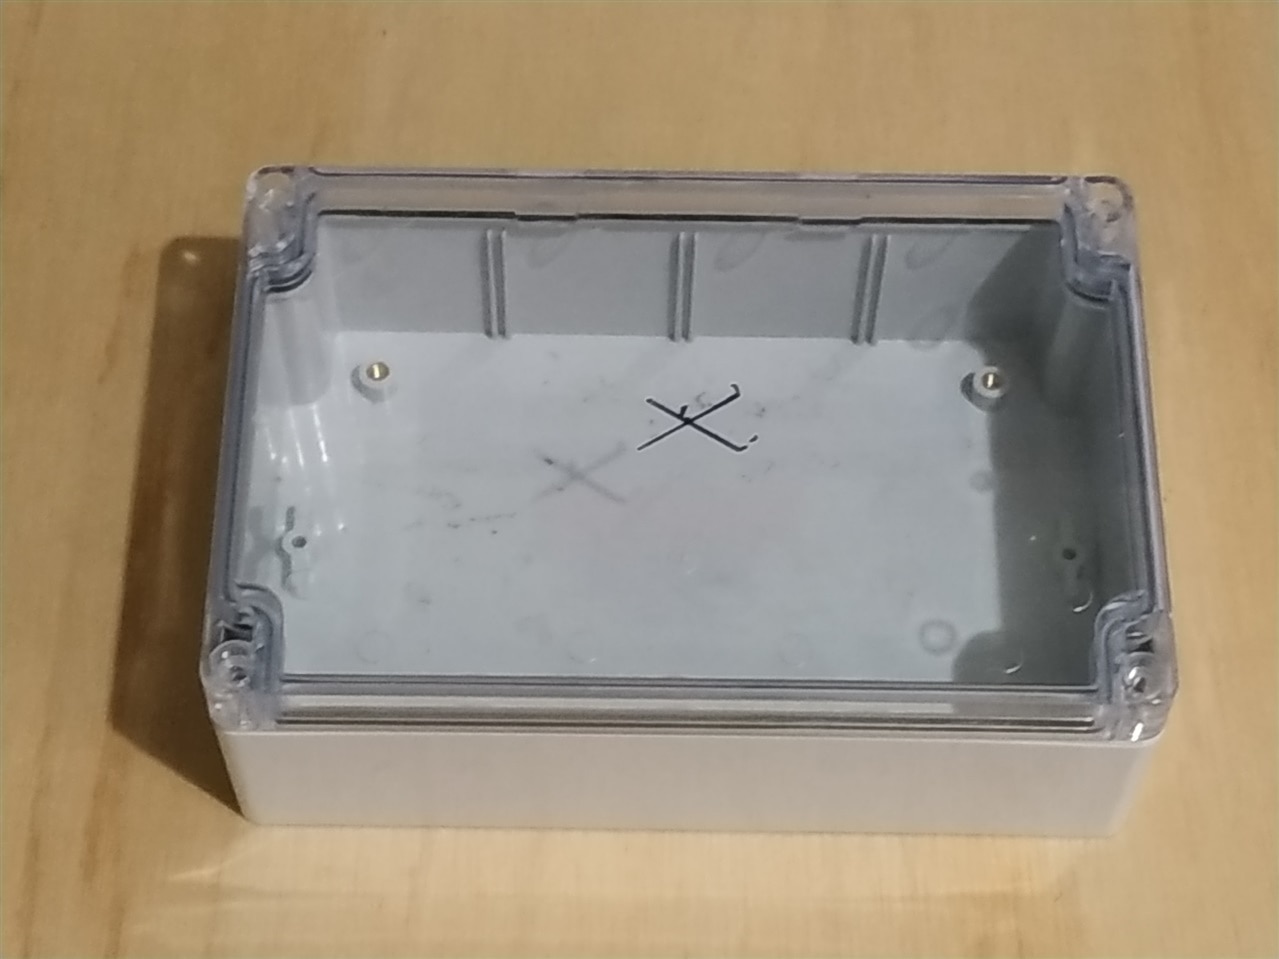
Assembling the Test Module

Below I show you the box that will be used as a test module.

image

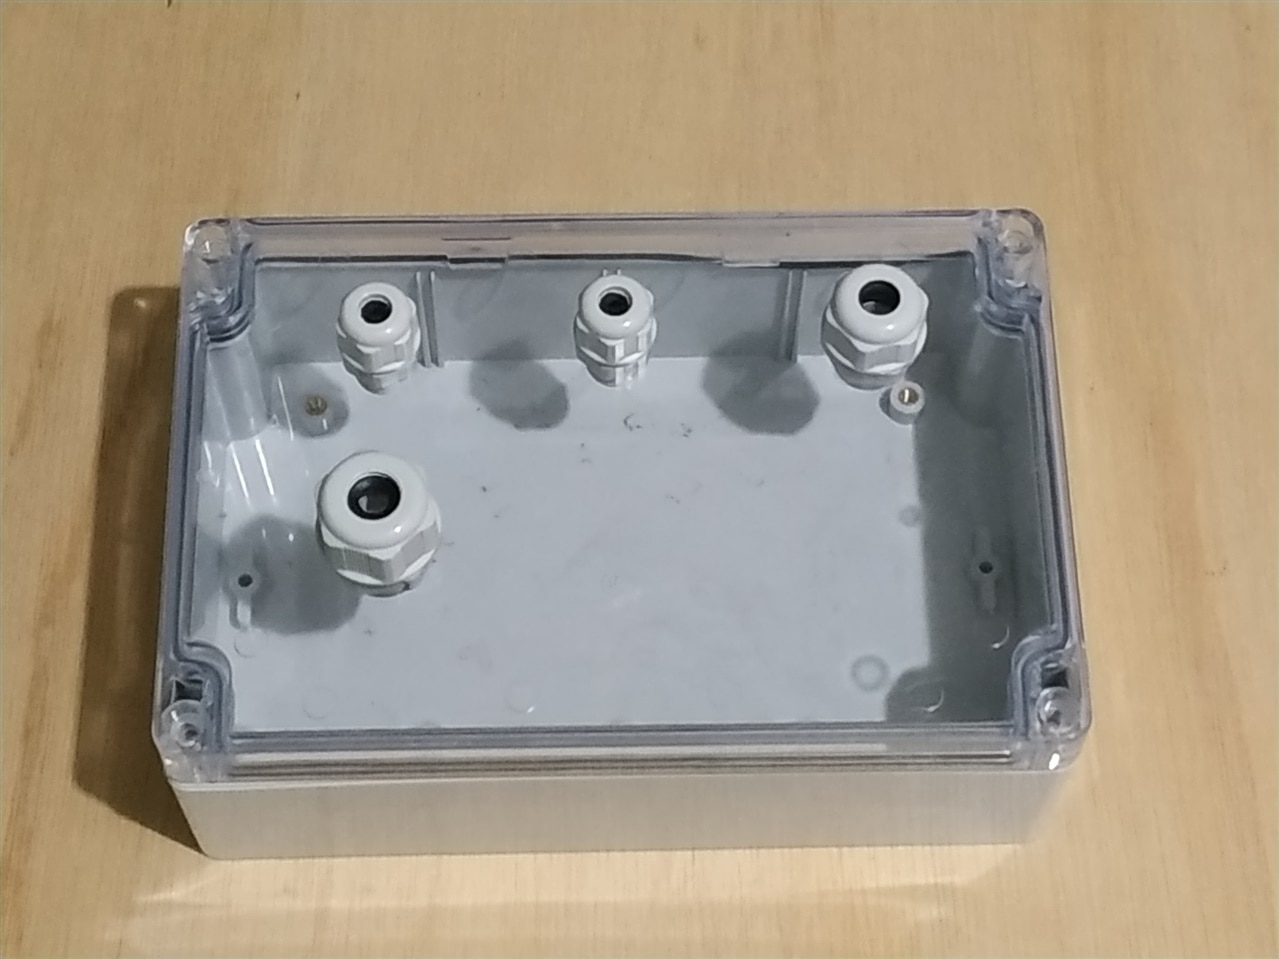
Next, we mark where we make the holes with the drill.

image

Once the holes are done, we put four connectors and we are ready to assemble our test module.
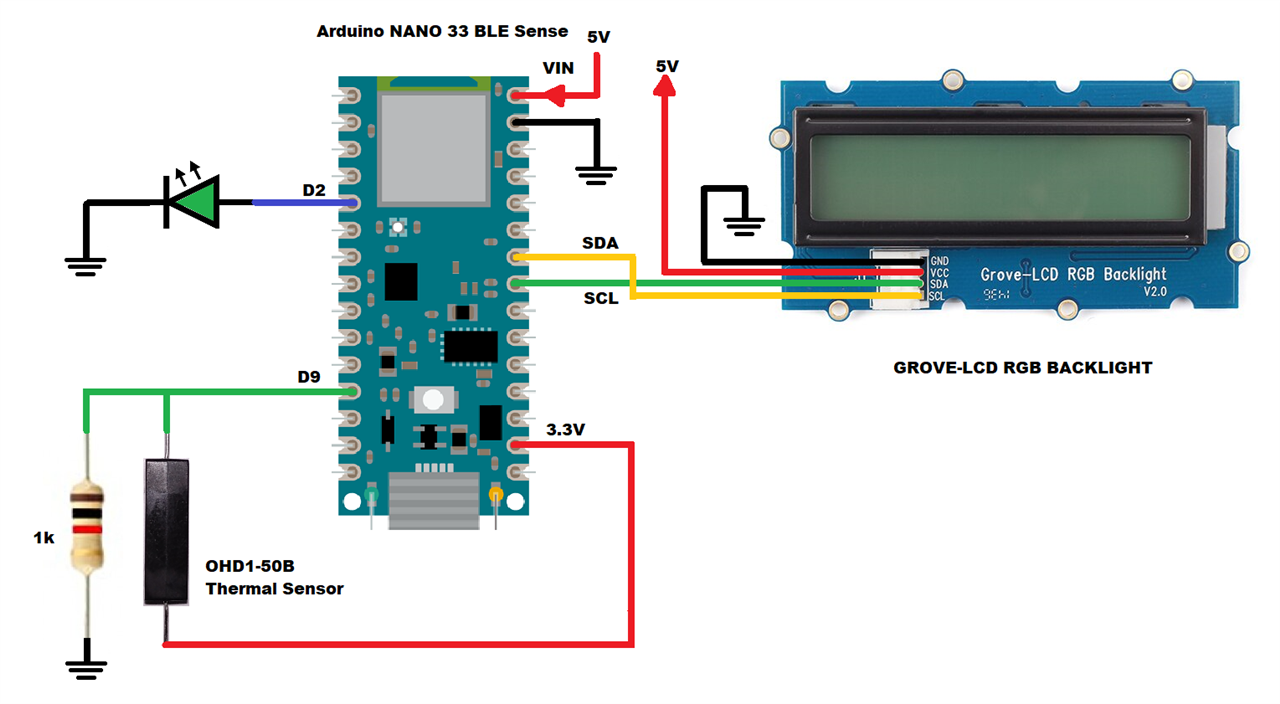
image

Schematic Diagram

Below you can see the electrical connections to test our OHD1-50B thermal sensor:

image

How does it work?

  • The OHD1-50B thermal sensor is normally closed at low temperature and the green LED is on; and
  • The OHD1-50B thermal sensor is open at 50 degrees Celsius and the green LED turns off.

Experiments:

  • The thermal sensor will be placed on the power module of the heated bed first to experiment and find out where is the right place to monitor the temperature of this module; and
  • Then the thermal sensor will be placed on the heated bed of the 3D printer to find the best place to monitor it.

In the figure below you can see the test module once it has been assembled.

image

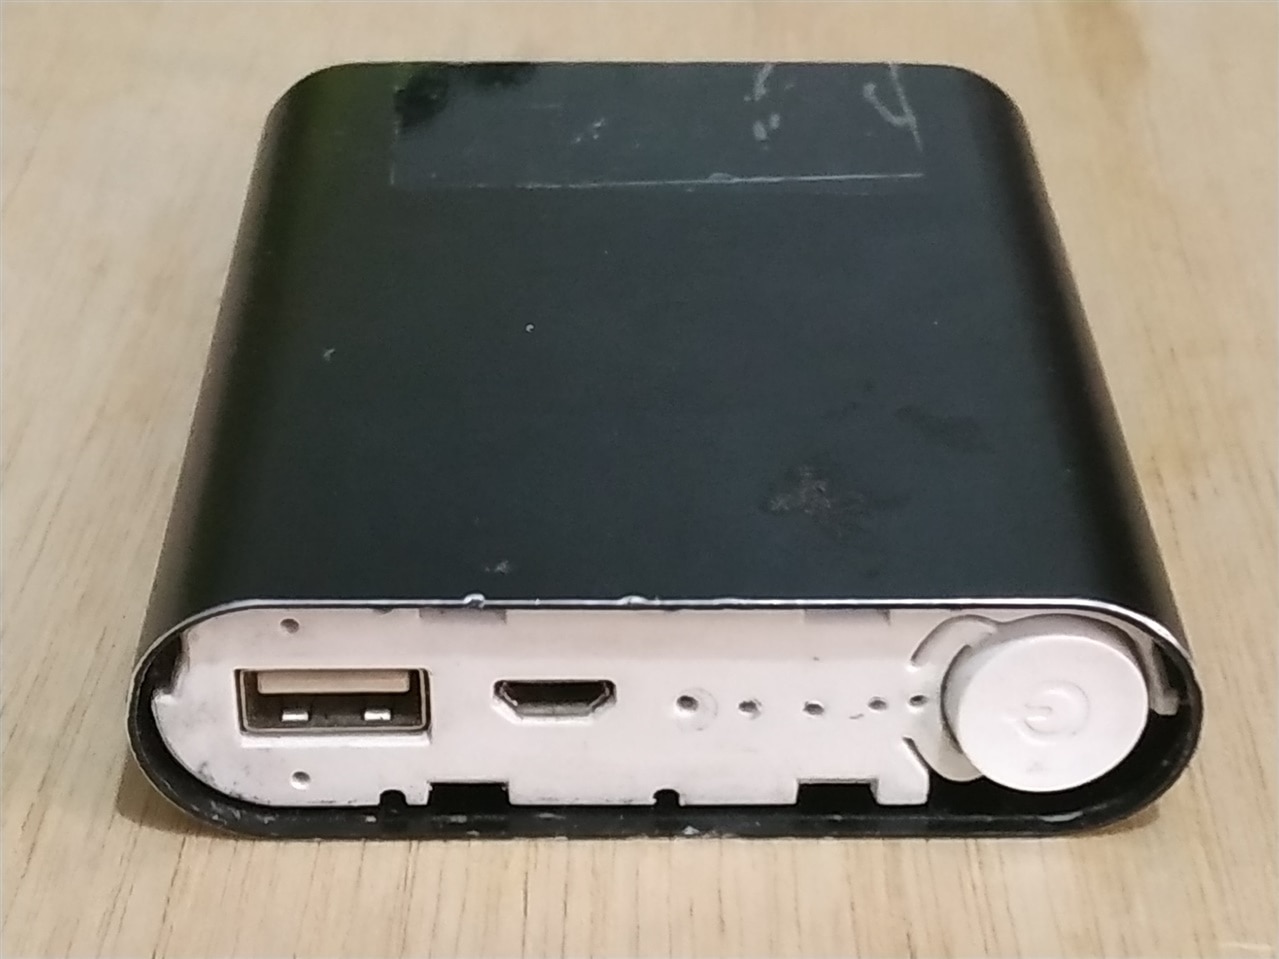
As a power supply I used a generic 5V Portable Charger Power Bank 16800 mAh. In addition to providing more accurate voltages, this device gave me better results since it has a power button, a voltage regulator and detects when a device is connected or not.

image

Software

Below I show you the code that we will upload to the Arduino NANO 33 BLE Sense board.

ThermalSensor_ver1.ino

// AUTHOR: GUILLERMO PEREZ GUILLEN

#include <Wire.h>
#include "rgb_lcd.h"
rgb_lcd lcd;
const int colorR = 0;
const int colorG = 125;
const int colorB = 0;

// constants won't change. They're used here to set pin numbers:
const int buttonPin = 9;     // the number of the thermal sensor pin
const int ledPin =  2;      // the number of the LED pin
int buttonState = 0;         // variable for reading the thermal sensor status
//int counter = 0;

void setup() {
    // set up the LCD's number of columns and rows:
    lcd.begin(16, 2);
    lcd.setRGB(colorR, colorG, colorB);
    delay(100);       
    pinMode(ledPin, OUTPUT);// initialize the LED pin as an output
    pinMode(buttonPin, INPUT);// initialize the thermal sensor pin as an input
}

void loop() {
  // read the state of the thermal sensor value:
  buttonState = digitalRead(buttonPin);
  lcd.clear();

  // check if the thermal sensor
  if (buttonState == HIGH) {   
    digitalWrite(ledPin, HIGH);
    lcd.setCursor(0, 0);
    lcd.print("Thermal Switches");    
    lcd.setCursor(0, 1);
    lcd.print("T = LOW");
  } else {     
    digitalWrite(ledPin, LOW);
    lcd.setCursor(0, 0);
    lcd.print("Thermal Switches");   
    lcd.setCursor(0, 1);
    lcd.print("T = HIGH");
  }
  delay(100);
}

Testing the OHD1-50B Thermal Sensor

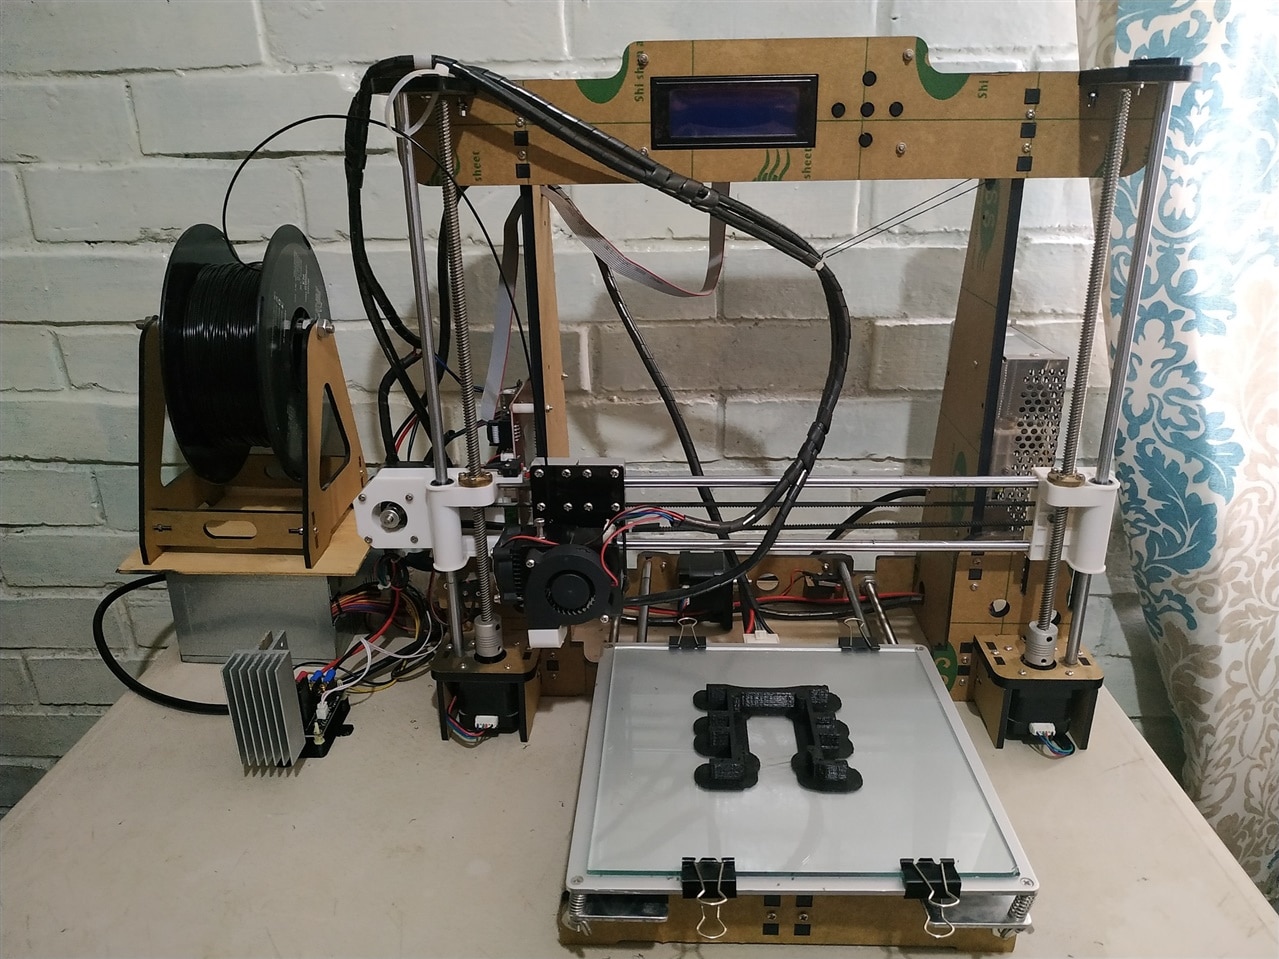
The tests will be carried out on an Anet A8 3D printer like the one shown in the image below.

image

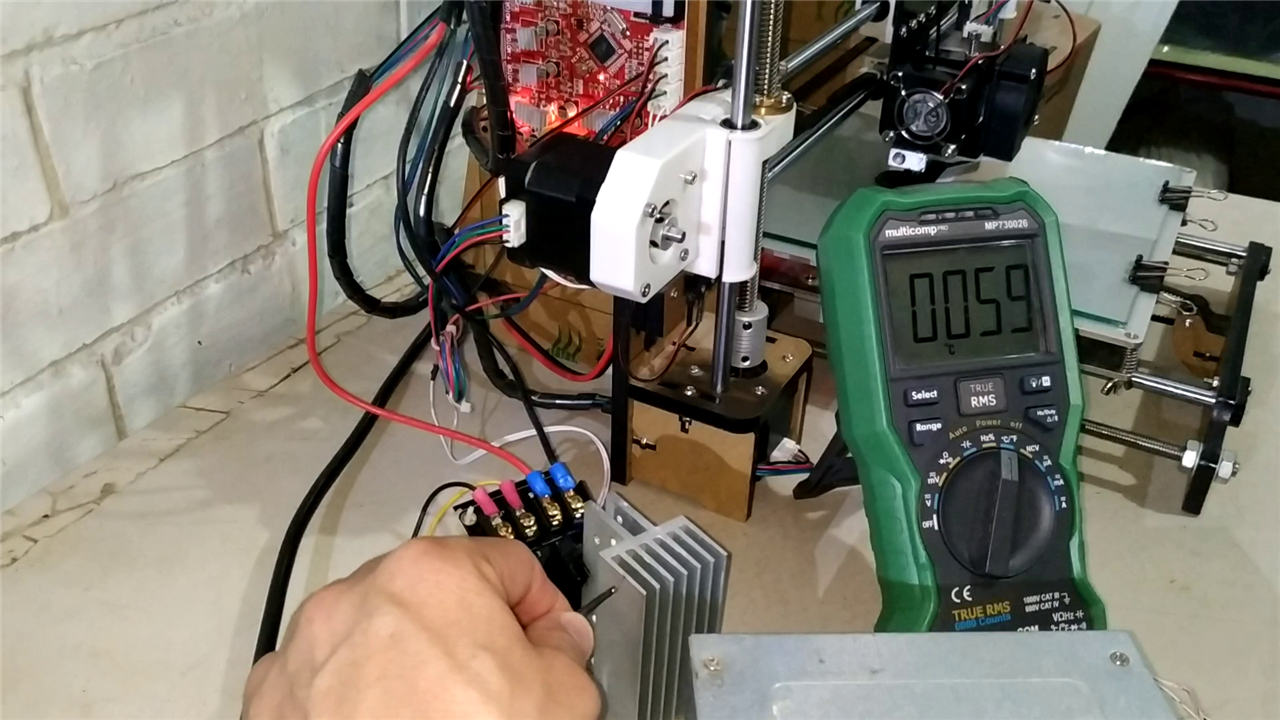
Before starting I did some basic temperature measurements on this device. For example, below I show you the maximum temperature I measured in the power module (MOSFET) of the heated bed (59 degrees Celsius).

image

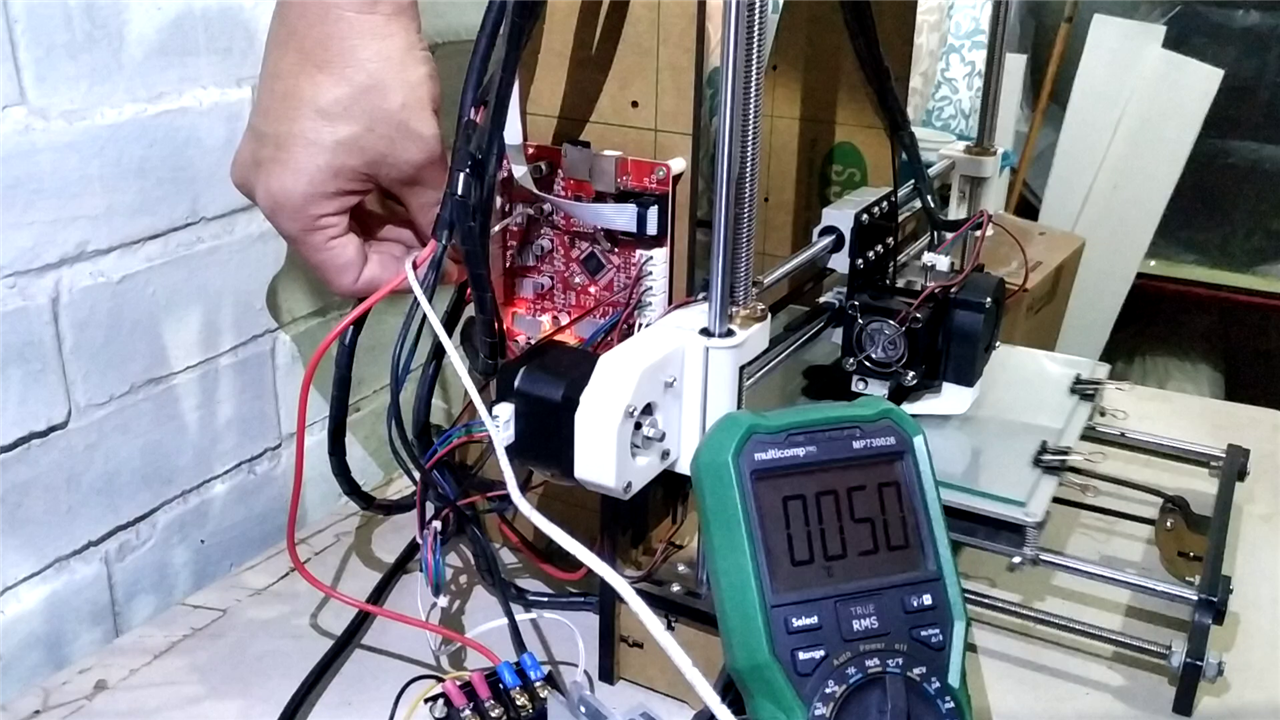
In the image below I show you the 50 degrees Celsius that I measured in a motor driver that is on the programming board of the 3D printer.

image

Finally, in the video below I show you the tests carried out with the OHD1-50B thermal sensor with the 3D printer working.

You don't have permission to edit metadata of this video.
Edit media
x
image
Upload Preview
image

Conclusion:

  • The most outstanding thing that I discovered with the OHD1-50B thermal sensor is that we must fix it in a place where it has the best contact surface;
  • The power module (MOSFET) of the heated bed reaches critical temperatures above 50 degrees Celsius when there is a high workload despite having a heat sink. The thermal sensor can be used to notify us with alerts of this problem; and 
  • On the other hand, the heated bed of the 3D printer maintains temperatures between 55 and 60 degrees Celsius during the entire workload, so its important to take care that the temperature doesnt rise too much because the thermistor and the thermostat burn out. Also with temperatures below 50 degrees Celsius the filament could not adhere to the heated bed and the 3D printing would be dirty. The thermal sensor plays an important role in taking care about this issue.
  • Sign in to reply
  • guillengap
    guillengap over 3 years ago in reply to DAB

    Thanks for the idea, I'll try it in later posts. These sensors have secrets to discover ...  ​may the force be with you

    • Cancel
    • Vote Up 0 Vote Down
    • Sign in to reply
    • More
    • Cancel
  • DAB
    DAB over 3 years ago

    Have you considered hooking the thermal switch to the A/D input to see if there is a clean transistion from on to off?

    • Cancel
    • Vote Up 0 Vote Down
    • Sign in to reply
    • More
    • Cancel
element14 Community

element14 is the first online community specifically for engineers. Connect with your peers and get expert answers to your questions.

  • Members
  • Learn
  • Technologies
  • Challenges & Projects
  • Products
  • Store
  • About Us
  • Feedback & Support
  • FAQs
  • Terms of Use
  • Privacy Policy
  • Legal and Copyright Notices
  • Sitemap
  • Cookies

An Avnet Company © 2025 Premier Farnell Limited. All Rights Reserved.

Premier Farnell Ltd, registered in England and Wales (no 00876412), registered office: Farnell House, Forge Lane, Leeds LS12 2NE.

ICP 备案号 10220084.

Follow element14

  • X
  • Facebook
  • linkedin
  • YouTube