


Table of Contents
- Project Introduction
- Testing the OHD1-50B Thermal Sensor
- Testing the OHD1-50B and M-TRS5-60B Thermal Sensors
- Detecting Transition From ON to OFF on Thermal Sensors
- Activation of a Fan with a OHD1-30B Thermal Sensor
- Cutting Power to the 3D Printer when Thermal Sensor Detects Thermal Runaway
- Project Report Updated
**********************************************************************************************************************
M-TRS5-60B Sensor
According the datasheet KEMET, M-TRS5-60B is a Thermal Reed Switch, Axial, 2.5C Temperature Accuracy, High Reliability, High-Speed Response, Long Operational Life, Excellent Environmental Durability, High Temperature Accuracy, 60°C, Break.

Schematic Diagram
Below you can see the electrical connections to test ours OHD1-50B and M-TRS5-60B Thermal Sensors.

How does it work?
- The first sensor is an OHD1-50B thermal sensor is normally closed at low temperature and the green LED is on, and is open at 50 degrees Celsius and the green LED turns off and the buzzer is activated;
- The second sensor is an OHD1-50B thermal sensor is normally closed at low temperature and the blue LED is on, and is open at 50 degrees Celsius and the blue LED turns off; and
- The third sensor is a M-TRS5-60B thermal sensor is normally closed at low temperature and the red LED is on, and is open at 50 degrees Celsius and the red LED turns off and the buzzer is activated.
Experiments:
- The first sensor (OHD1-50B) will be fixed on the power module of the heated bed to warn us of overheating of this module;
- The second sensor (OHD1-50B) will be fixed on the heated bed to warn us that it is over 50 degrees Celsius;
- The third sensor (M-TRS5-60B) will be fixed on the heated bed to warn us that it is at 60 degrees Celsius; and
- In all the experiments, new solutions will be sought to improve and increase the contact surface of the thermal sensors.
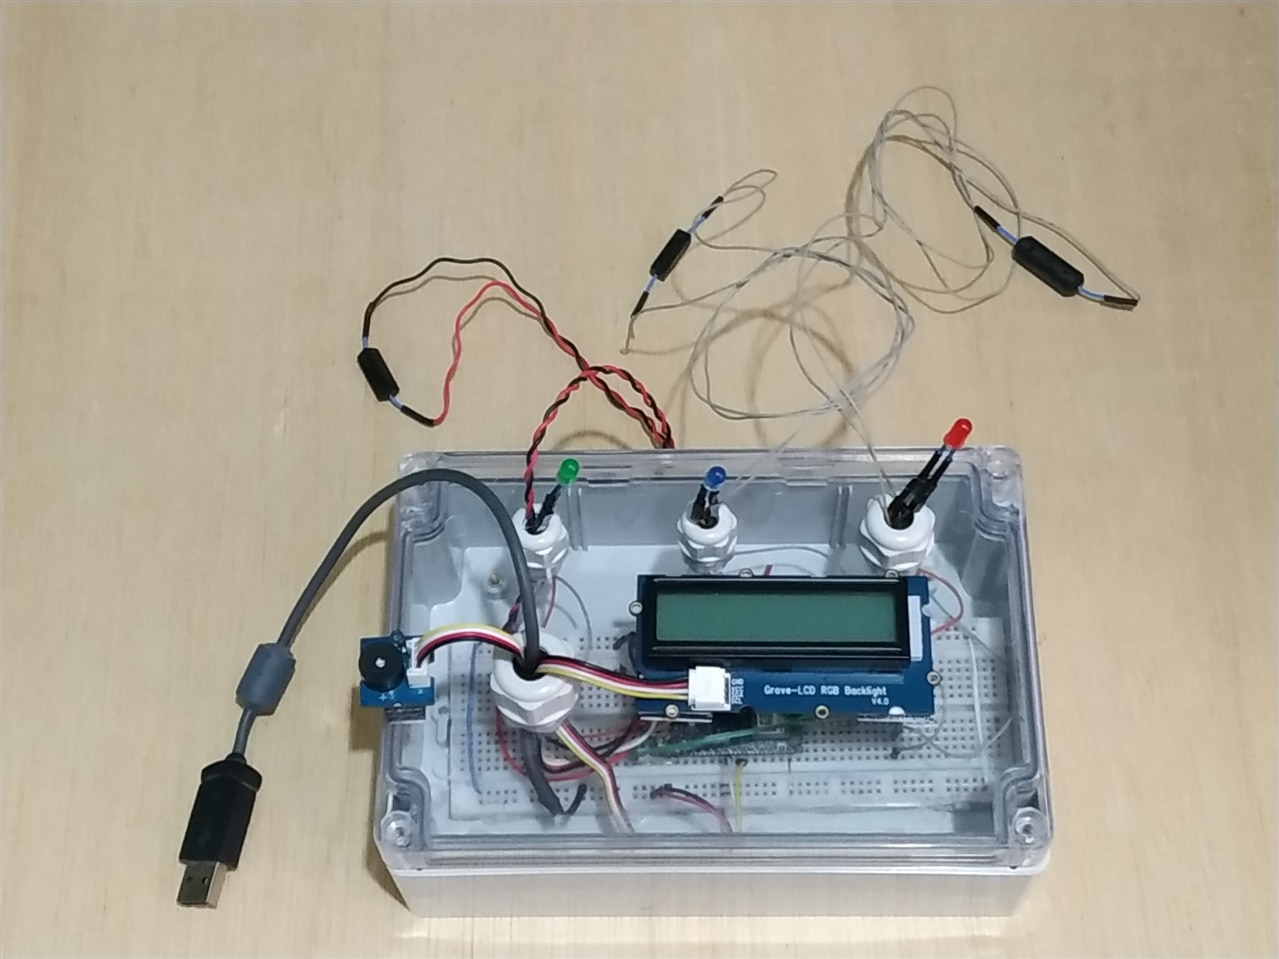
Assembling the Test Module
In the image below you can see the test module once it has been assembled.
Software
Below I show you the code that we will upload to the Arduino NANO 33 BLE Sense board.
ThermalSensor_ver2.ino
// AUTHOR: GUILLERMO PEREZ GUILLEN

#include <Wire.h>
#include "rgb_lcd.h"
rgb_lcd lcd;
const int colorR = 0;
const int colorG = 125;
const int colorB = 0;

// SENSOR1: OHD1-50B -> MOSFET MODULE
const int buttonPin_s1 = 9;     // the number of the pushbutton pin for the OHD1-50B
const int ledPin_s1 =  2;      // the number of the LED pin for the OHD1-50B
int buttonState_s1 = 0;         // variable for reading the pushbutton status for the OHD1-50B

// SENSOR2: M-OHD1-50B -> HEATED BED
const int buttonPin_s2 = 8;     // the number of the pushbutton pin for the M-OHD1-50B
const int ledPin_s2 =  3;      // the number of the LED pin for the M-OHD1-50B
int buttonState_s2 = 0;         // variable for reading the pushbutton status for the M-OHD1-50B

// SENSOR3: M-TRS5-60B -> HEATED BED
const int buttonPin_s3 = 7;     // the number of the pushbutton pin for the M-TRS5-60B
const int ledPin_s3 =  4;      // the number of the LED pin for the M-TRS5-60B
int buttonState_s3 = 0;         // variable for reading the pushbutton status for the M-TRS5-60B

void setup() {
    // set up the LCD's number of columns and rows:
    lcd.begin(16, 2);
    lcd.setRGB(colorR, colorG, colorB);
    delay(100);
    pinMode(ledPin_s1, OUTPUT);
    pinMode(buttonPin_s1, INPUT);
    pinMode(ledPin_s2, OUTPUT);
    pinMode(buttonPin_s2, INPUT);
    pinMode(ledPin_s3, OUTPUT);
    pinMode(buttonPin_s3, INPUT);
    pinMode(6, OUTPUT); // buzzer
}

void loop() {
  // read the state of the pushbutton value:
  buttonState_s1 = digitalRead(buttonPin_s1);
  buttonState_s2 = digitalRead(buttonPin_s2);
  buttonState_s3 = digitalRead(buttonPin_s3);
  lcd.clear();
  lcd.setCursor(0, 0);
  lcd.print("T-S1  T-S2  TS-3");
  // SENSOR1
  if (buttonState_s1 == HIGH) { //SENSOR 1 - LOW TEMP
    digitalWrite(ledPin_s1, HIGH);
    lcd.setCursor(0, 1);
    lcd.print("LOW");
  }
  if (buttonState_s1 == LOW) { //SENSOR 1 - HIGH TEMP
    digitalWrite(ledPin_s1, LOW);
    lcd.setCursor(0, 1);
    lcd.print("HIGH");
    digitalWrite(6, HIGH); // buzzer
    delay(500);
    digitalWrite(6, LOW); // buzzer
    delay(500);
  }
  // SENSOR2
  if (buttonState_s2 == HIGH) { // SENSOR 2 - LOW TEMP
    digitalWrite(ledPin_s2, HIGH);
    lcd.setCursor(6, 1);
    lcd.print("LOW");
  }
  if (buttonState_s2 == LOW) { // SENSOR 2 - HIGH TEMP
    digitalWrite(ledPin_s2, LOW);
    lcd.setCursor(6, 1);
    lcd.print("HIGH");
  }
  // SENSOR3
  if (buttonState_s3 == HIGH) { // SENSOR 3 - LOW TEMP
    digitalWrite(ledPin_s3, HIGH);
    lcd.setCursor(12, 1);
    lcd.print("LOW");
  }
  if (buttonState_s3 == LOW) { // SENSOR 2 - HIGH TEMP
    digitalWrite(ledPin_s3, LOW);
    lcd.setCursor(12, 1);
    lcd.print("HIGH");
    digitalWrite(6, HIGH); // buzzer
    delay(700);
    digitalWrite(6, LOW); // buzzer
    delay(300);
  }
  delay(100);
}
Testing the OHD1-50B and M-TRS5-60B Thermal Sensors
Once the previous steps are done, it is time to test our thermal sensor testing module. In the video below I show you some simple tests to verify that the hardware and software are working well.
In the image below you can see everything ready to start testing on the 3D printer.

Once the simple tests have been passed, its time to use the test module in the 3D printer as shown below.
Conclusion
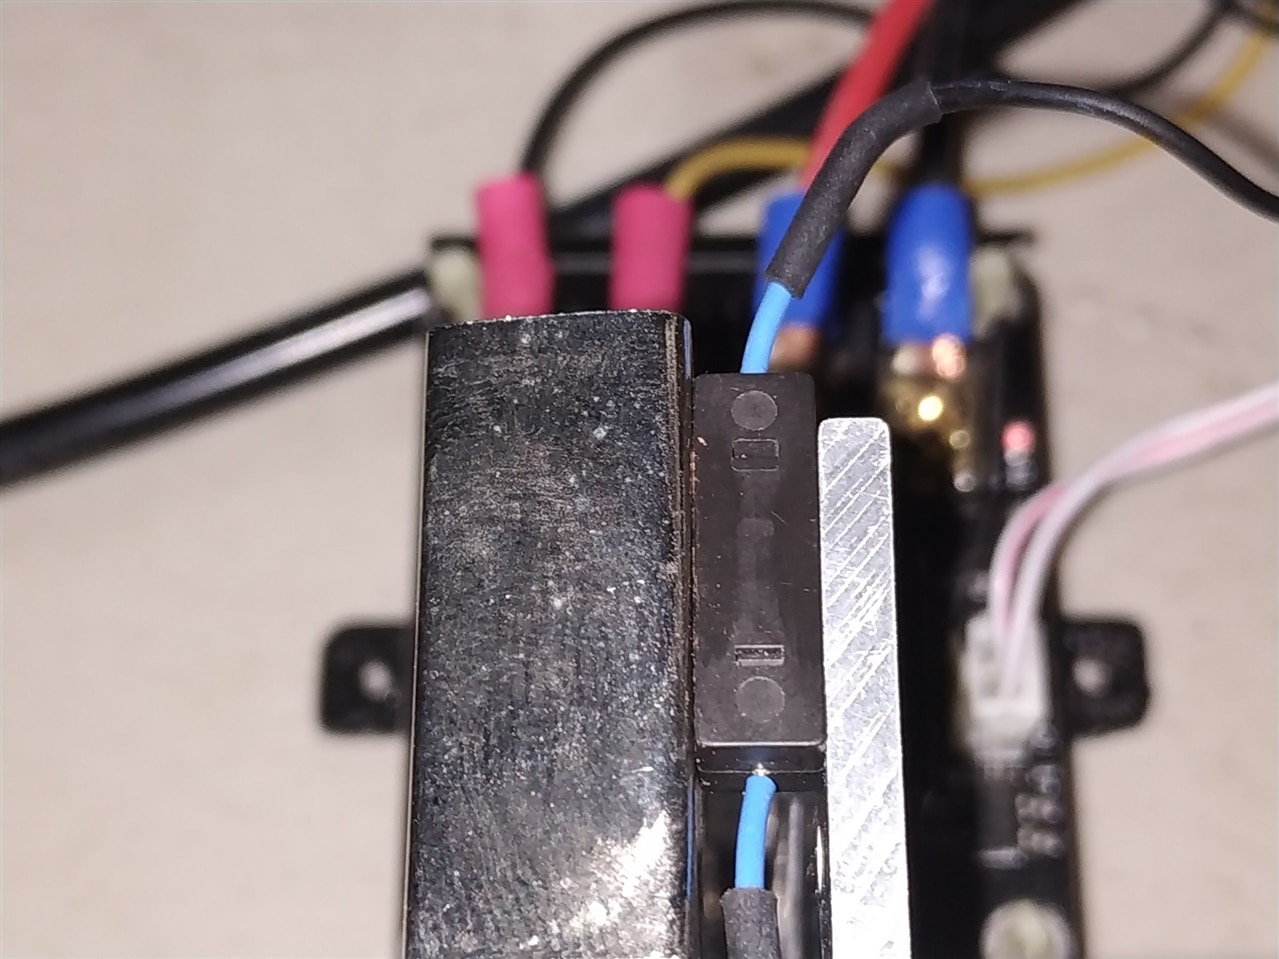
- The first thermal sensor (OHD1-50B) worked well when the contact surface was improved. On this occasion, bring the thermal sensor as close as possible to the heat source and use a small sheet of foil to fix the sensor.
- On the second thermal sensor (OHD1-50B) I used a tie clip to hold it down and attach it to the heated bed. This sensor worked fine and opened between 51 and 53 degrees Celsius; and
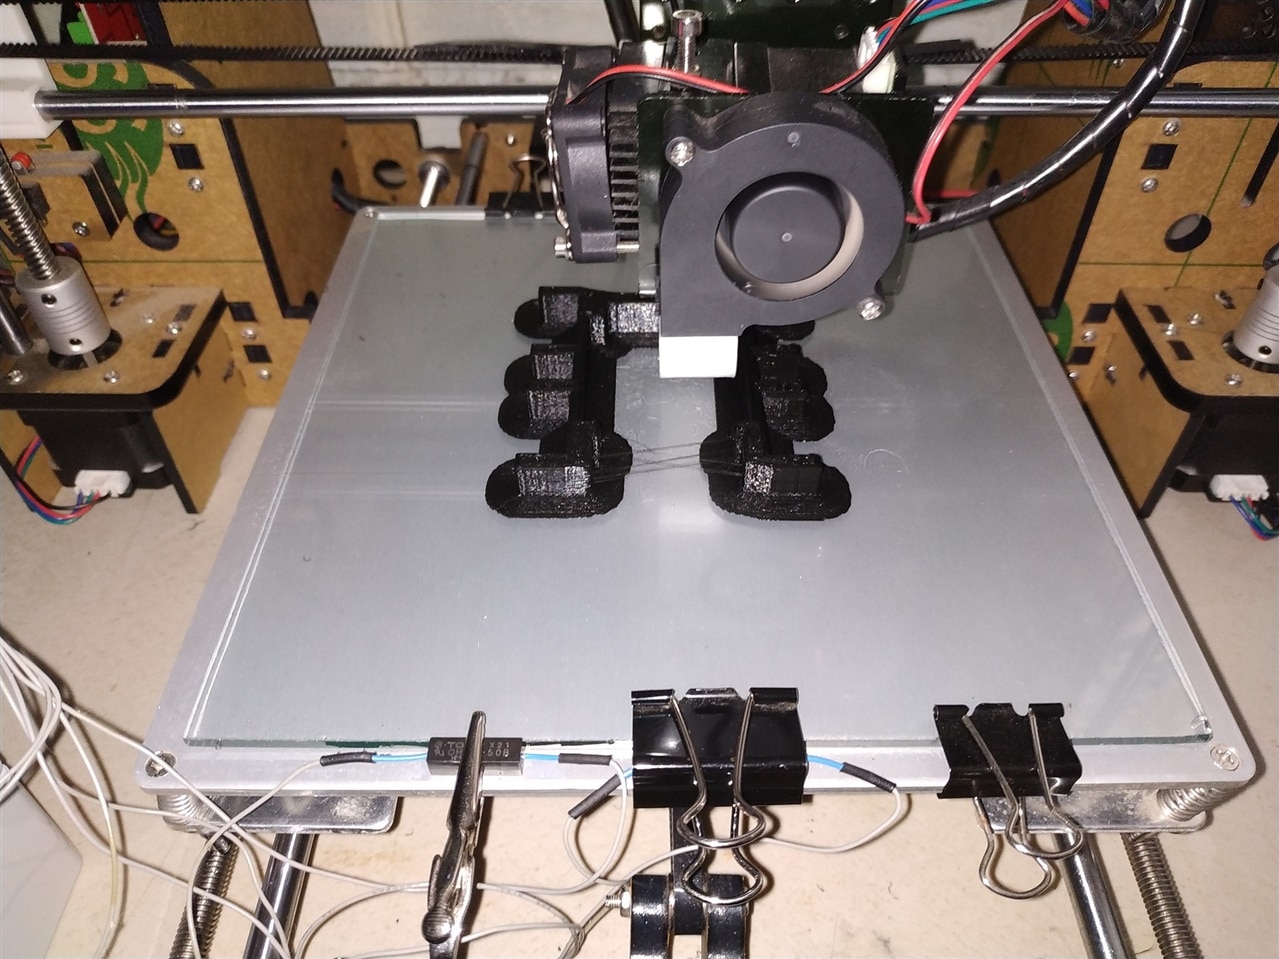
- On the third thermal sensor (M-TRS5-60B) I used a binder clip to hold it down and attach it to the heated bed, however this sensor showed difficulty opening since it doesnt have a flat surface like the OHD1-60B thermal sensor. which is not in the Kemet Gift Kit. In the section below I will design a sheet of foil that embraces it as you can see in the thermal sensor TRS5-30BLR00.
Improving the Contact Surface of the M-TRS5-60B Thermal Sensor
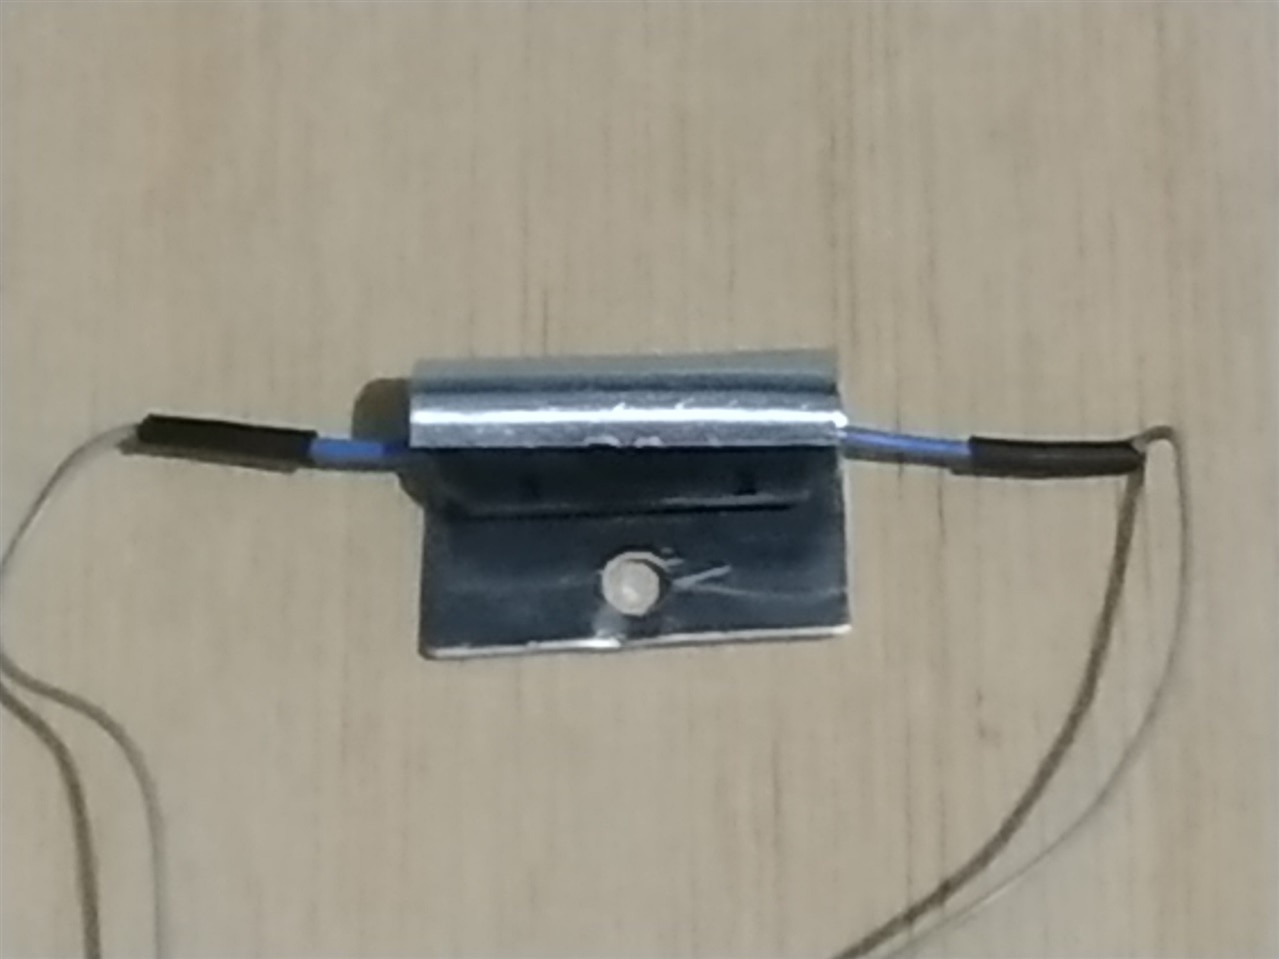
Finally I have solved this problem in the following way: I have removed the metal plate from the TRS5-30BLR00 thermal sensor and fixed it to the M-TRS5-60B thermal sensor as shown in the image below.
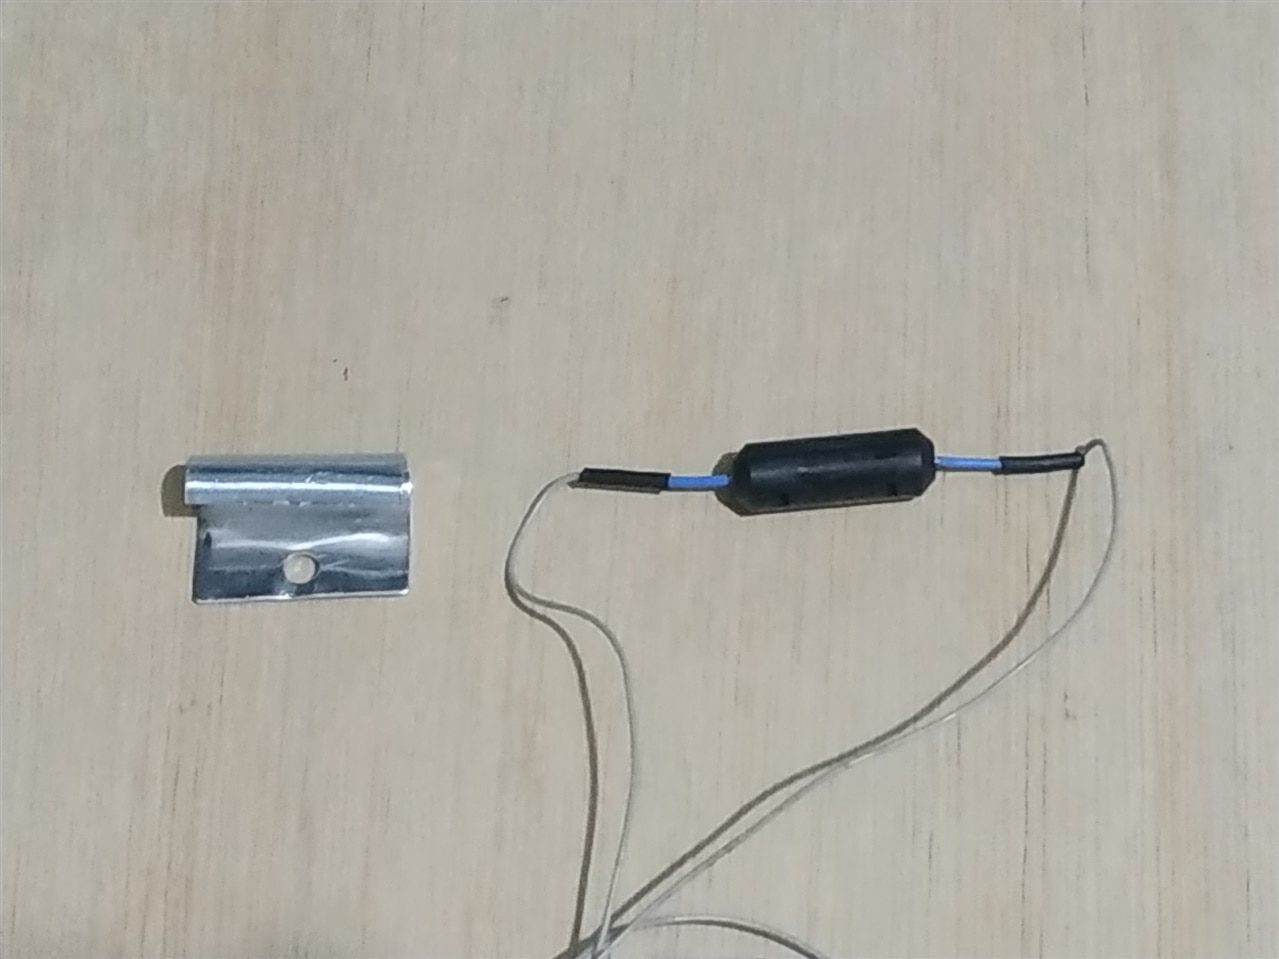
In the image below I have fixed both pieces. Although the metal plate is smaller than the sensor, it does cover a sufficient area of the thermal sensor.
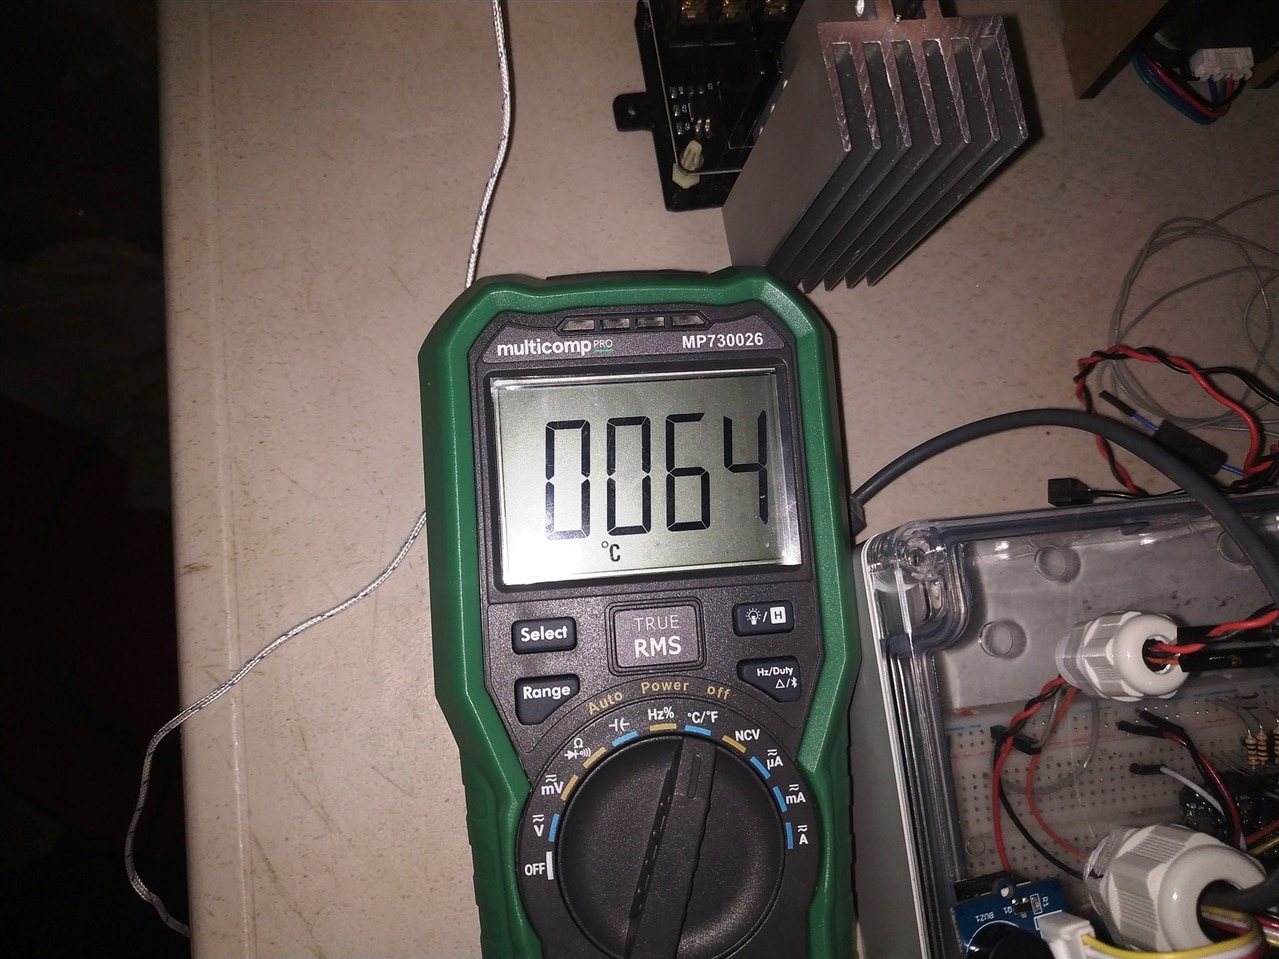
I have checked the temperature of the power module of the heated bed and it is approximately 64 degrees Celsius, which is ideal for testing this thermal sensor.
In the image below I show you the place where I have fixed the M-TRS5-60B thermal sensor.

Finally I show you the test performed successfully in the video below.

