element14 Community
element14 Community
    Register Log In
  • Site
  • Search
  • Log In Register
  • About Us
  • Community Hub
    Community Hub
    • What's New on element14
    • Feedback and Support
    • Benefits of Membership
    • Personal Blogs
    • Members Area
    • Achievement Levels
  • Learn
    Learn
    • Ask an Expert
    • eBooks
    • element14 presents
    • Learning Center
    • Tech Spotlight
    • STEM Academy
    • Webinars, Training and Events
    • Learning Groups
  • Technologies
    Technologies
    • 3D Printing
    • FPGA
    • Industrial Automation
    • Internet of Things
    • Power & Energy
    • Sensors
    • Technology Groups
  • Challenges & Projects
    Challenges & Projects
    • Design Challenges
    • element14 presents Projects
    • Project14
    • Arduino Projects
    • Raspberry Pi Projects
    • Project Groups
  • Products
    Products
    • Arduino
    • Avnet Boards Community
    • Dev Tools
    • Manufacturers
    • Multicomp Pro
    • Product Groups
    • Raspberry Pi
    • RoadTests & Reviews
  • Store
    Store
    • Visit Your Store
    • Choose another store...
      • Europe
      •  Austria (German)
      •  Belgium (Dutch, French)
      •  Bulgaria (Bulgarian)
      •  Czech Republic (Czech)
      •  Denmark (Danish)
      •  Estonia (Estonian)
      •  Finland (Finnish)
      •  France (French)
      •  Germany (German)
      •  Hungary (Hungarian)
      •  Ireland
      •  Israel
      •  Italy (Italian)
      •  Latvia (Latvian)
      •  
      •  Lithuania (Lithuanian)
      •  Netherlands (Dutch)
      •  Norway (Norwegian)
      •  Poland (Polish)
      •  Portugal (Portuguese)
      •  Romania (Romanian)
      •  Russia (Russian)
      •  Slovakia (Slovak)
      •  Slovenia (Slovenian)
      •  Spain (Spanish)
      •  Sweden (Swedish)
      •  Switzerland(German, French)
      •  Turkey (Turkish)
      •  United Kingdom
      • Asia Pacific
      •  Australia
      •  China
      •  Hong Kong
      •  India
      •  Korea (Korean)
      •  Malaysia
      •  New Zealand
      •  Philippines
      •  Singapore
      •  Taiwan
      •  Thailand (Thai)
      • Americas
      •  Brazil (Portuguese)
      •  Canada
      •  Mexico (Spanish)
      •  United States
      Can't find the country/region you're looking for? Visit our export site or find a local distributor.
  • Translate
  • Profile
  • Settings
In the Air Design Challenge
  • Challenges & Projects
  • Design Challenges
  • In the Air Design Challenge
  • More
  • Cancel
In the Air Design Challenge
Blog In the Air Design Challenge - Pollen & Allergen Sensing – Post 6 (HDC1000 Sensor)
  • Blog
  • Forum
  • Documents
  • Polls
  • Files
  • Events
  • Mentions
  • Sub-Groups
  • Tags
  • More
  • Cancel
  • New
  • Share
  • More
  • Cancel
Group Actions
  • Group RSS
  • More
  • Cancel
Engagement
  • Author Author: tomaja
  • Date Created: 2 Jan 2015 5:13 PM Date Created
  • Views 1399 views
  • Likes 2 likes
  • Comments 7 comments
  • iot_pollen
  • texas
  • hdc1000
  • instruments
  • hdc1000evm
  • in_the_air
  • bus_pirate
Related
Recommended

In the Air Design Challenge - Pollen & Allergen Sensing – Post 6 (HDC1000 Sensor)

tomaja
tomaja
2 Jan 2015

Previous posts:

In the Air Design Challenge - Pollen & Allergen Sensing

In the Air Design Challenge - Pollen & Allergen Sensing – Post 1 (Pollen Sensor)

In the Air Design Challenge - Pollen & Allergen Sensing – Post 2

In the Air Design Challenge - Pollen & Allergen Sensing – Post 3 (AirVantage Intro)

In the Air Design Challenge - Pollen & Allergen Sensing – Post 4 (Preparing the InTheAir Power Board)

In the Air Design Challenge - Pollen & Allergen Sensing – Post 5 (InTheAir Power Board)


Interfacing with HDC1000 Temperature and Humidity sensor


Thanks to Texas Instruments I received my HDC1000EVM - TEXAS INSTRUMENTS - EVAL BOARD, HDC1000 TEMP/HUMIDITY SENSOR | Farnell element14 UK evaluation module.

image

Figure 1. HDC1000 Evaluation module


This small module is based on a USB<->I2C interface made using MSP430 MCU. It also contains a HDC1000 chip soldered to specially designed board that can be broken into three separate pieces so that you can use the same HDC1000 chip in your own test circuit. I think that this is really great because you don’t have to make a breakout board to test it in your circuit – it’s already provided.


This module can be used out-of-the-box by just connecting to a Windows PC USB port and running the Qt based sample GUI application. The sample application features nice interface for HDC1000 configuration and data acquisition and display. Temperature and humidity values are shown on two separate charts. Data sampling rate can also be easily changed using this GUI app.

image

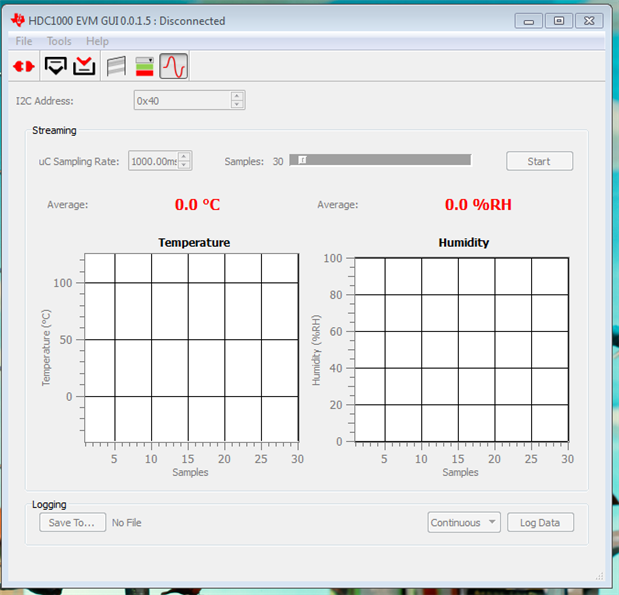
Figure 2. HDC1000 Windows GUI Application (Board was already broken so the app is not connected to it)


Under the hood, this application is using serial port to send and receive data. I couldn’t find source code or any additional details about this application so I did my own research. It turned out that the application sends very simple and short commands to the USB module. For example, sending ‘1’ over serial port will result in module sending back the temperature value in hexadecimal format, ‘2’ is used to request humidity. ‘3’ is used to request continuous updates with both temperature and humidity values and ‘4’ stops that. I didn't really have to inspect this but I was curious and it was fun image.

It would be even better if this application was provided with source code so that it can be built for other OSs too.


The next step was to test the sensor without the USB motherboard. For this, I used the Bus Pirate 4.0 (nice little tool that can be used to test different devices).

I soldered the male headers to the broken board so that I can easily hook up the probes.

PSBmZhT.jpg

Figure 3. Bus Pirate 4.0 with HDC1000 broken off the evaluation module


HiZ>m                          <- Choose mode
…
(3)I2C
…
HiZ>3                          <- I2C
I2C>2                          <- Hardware version
I2C>1                          <- 100KHz
I2C>W                          <- Enable PSU
I2C>P                          <- Enable Pull-Up resistors
I2C>v                          <- Check voltage levels
I2C>(1)                        <- Scan I2C bus
Searching I2C address space. Found devices at:
0x80(0x40 W) 0x81(0x40 R)      <- This is HDC1000 with the address 0x40


So, our sensor is configured to use 0x40 address (0x80 write address and 0x81 read address). BTW, you can use Bus Pirate to convert value between binary, decimal and hexadecimal:

I2C>=0x40
0x40 = 64 = 0b01000000

Address can be changed by adding the 0R resistors (shorting pins). Check the datasheet for details, I’m fine with this address at the moment.


At this point I have the Bus Pirate set to send/receive over I2C.

According to datasheet, HDC1000 can be used to retrieve both temperature and humidity simultaneously or to retrieve them separately. I chose to acquire both simultaneously.

For that, you first have to configure the sensor by writing the configuration data into configuration register (0x02).

I chose to use 14bit precision for both temperature and humidity so I had to write 0x1000 to the configuration register.

I2C>[0x80 0x02 0x10 0x00


After the sensor is configured, you need to issue the measurement command by writing 0x00.

I2C>[0x80 0x00


After the data is ready you can read it (read 4 consecutive bytes from sensor). You can just give the sensor enough time to do the conversion or wait for DRDYn signal. Since I’m entering addresses and data manually, it gives the sensor more than enough time to prepare the data between commands.

I2C>[0x81 rrrr
I2C START BIT
WRITE: 0x81 ACK
READ: 0x62
READ: ACK 0x34
READ: ACK 0x8D
READ: ACK 0xE0


The first two bytes are for temperature and the bytes 3 and 4 are the humidity value.


Temperature in Celsius degrees is calculated like this:

(0x6234 / 0x10000) * 165 - 40 = (25140 / 65536) * 165 - 40 = 23.295°C


Humidity is calculated like this:

(0x8DE0 / 0x10000) * 100 = 55.4%


For my project, I will use the broken board as it is now. This way I will have a small sensor module that has a small thermal mass and can be placed away from the board and battery.

That's all for this update image


Have a Happy New Year!


Dragan

  • Sign in to reply

Top Comments

  • xever
    xever over 10 years ago +1
    Great post! I myself am using this module for my design. IMHO, the HDC1000 is one of the best digital temperature and humidity sensor out there, from a price-performance perspective and integration (both…
  • DAB
    DAB over 10 years ago +1
    Nice update. Did you notice any performance difference after you broke the board in two pieces? DAB
  • Former Member
    Former Member over 10 years ago +1
    thanks Its working on linux first find the port an then "screen /dev/ttyACM0 115200"
Parents
  • Former Member
    Former Member over 10 years ago

    hi

    nice work..

    ai want to connect this HDC1000 to desktop through Putty bt i didnt get any information abt baudrate an flow control

    Can Anyone tell me how to proceed


    regards,

    Mahi

    • Cancel
    • Vote Up 0 Vote Down
    • Sign in to reply
    • More
    • Cancel
  • tomaja
    tomaja over 10 years ago in reply to Former Member

    Thanks, Mahi.

    Baud rate is 115200. I used the default values for flow control.

    From Macbook I connected like this:

    screen /dev/tty.usbmodem1421 115200


    When you get connected, start sending digits and read the response, it's self-explanatory.


    Dragan

    • Cancel
    • Vote Up 0 Vote Down
    • Sign in to reply
    • More
    • Cancel
Comment
  • tomaja
    tomaja over 10 years ago in reply to Former Member

    Thanks, Mahi.

    Baud rate is 115200. I used the default values for flow control.

    From Macbook I connected like this:

    screen /dev/tty.usbmodem1421 115200


    When you get connected, start sending digits and read the response, it's self-explanatory.


    Dragan

    • Cancel
    • Vote Up 0 Vote Down
    • Sign in to reply
    • More
    • Cancel
Children
No Data
element14 Community

element14 is the first online community specifically for engineers. Connect with your peers and get expert answers to your questions.

  • Members
  • Learn
  • Technologies
  • Challenges & Projects
  • Products
  • Store
  • About Us
  • Feedback & Support
  • FAQs
  • Terms of Use
  • Privacy Policy
  • Legal and Copyright Notices
  • Sitemap
  • Cookies

An Avnet Company © 2025 Premier Farnell Limited. All Rights Reserved.

Premier Farnell Ltd, registered in England and Wales (no 00876412), registered office: Farnell House, Forge Lane, Leeds LS12 2NE.

ICP 备案号 10220084.

Follow element14

  • X
  • Facebook
  • linkedin
  • YouTube