


After quite a bit of hard work during the last days, the project reached its end. Of course many improvements can be made, and other features can be added, but that is for later, after the challenge. I had the plan to add humidity, pressure and temperature measurements with the SenseHat, but unfortunately SenseHat, Wi-Pi and PiFace digital were missing from my kit. I this post I will briefly explain the ndvicam.py python code which mainly does all the work. I will finish with a number of example images.
Previous posts:
[Pi IoT] Plant Health Camera #10 - connecting the Master and Slave Pi
[Pi IoT] Plant Health Camera #9 - calculating BNDVI and GNDVI
[Pi IoT] Plant Health Camera #8 - Aligning the images
[Pi IoT] Plant Health Camera #7 - Synchronizing the cameras
[Pi IoT] Plant Health Camera #6 - Putting the slave Pi to work
[Pi IoT] Plant Health Camera #5 - OpenCV
[Pi IoT] Plant Health Camera #4 - Putting the parts together
[Pi IoT] Plant Health Camera #3 - First steps
[Pi IoT] Plant Health Camera #2 - Unboxing
[Pi IoT] Plant Health Camera #1 - Application
Software to capture the NDVI image
Below is the source code of ndvicam.py. I added comments for each step so the code is self explaining. After some initializations an endless loop is started
While True:
in which first a live image is shown until a key is pressed. There are five options:
- q: Quit
- c: Show Color Image
- o: Show NoIR Image
- n: Show NDVI Image
- g: Show GNDVI Image
- b: Show BNDVI Image
After pressing q the program terminates, after pressing any other key, an image is captured from the camera and a trigger is send to the slave so that this also captures an image, see [Pi IoT] Plant Health Camera #7 - Synchronizing the cameras for details.
Then also this image is loaded from the share which was mounted from the slave pi (details can be found in [Pi IoT] Plant Health Camera #6 - Putting the slave Pi to work). Then the images of the two cameras are aligned, as described in [Pi IoT] Plant Health Camera #8 - Aligning the images. I tested the options TRANSLATION, AFFINE and HOMOGRAPHY, by commenting out the specific setting. After the images are aligned, the NVDI, GNDVI and BNDVI are calculated, and depending on which key was pressed, one of them is displayed. After a key is pressed, or after ten seconds all images (noir, color, nevi, gndvi and bndvi) are saved, with a timestamp in the filename.
ndvicam.py
# import the necessary packages
from picamera.array import PiRGBArray
from picamera import PiCamera
import RPi.GPIO as GPIO
import time
import numpy
import readchar
import datetime
import cv2


# initialize the camera and grab a reference to the raw camera capture
camera = PiCamera()
camera.ISO = 100
camera.resolution = (800, 480)
rawCapture = PiRGBArray(camera)


# Define the motion model
warp_mode = cv2.MOTION_TRANSLATION
#warp_mode = cv2.MOTION_AFFINE
#warp_mode = cv2.MOTION_HOMOGRAPHY
# Define 2x3 or 3x3 matrices and initialize the matrix to identity
if warp_mode == cv2.MOTION_HOMOGRAPHY :
  warp_matrix = numpy.eye(3, 3, dtype=numpy.float32)
else :
  warp_matrix = numpy.eye(2, 3, dtype=numpy.float32)
# Specify the number of iterations.
number_of_iterations = 5000;
# Specify the threshold of the increment
# in the correlation coefficient between two iterations
termination_eps = 1e-10;
# Define termination criteria
criteria = (cv2.TERM_CRITERIA_EPS | cv2.TERM_CRITERIA_COUNT, number_of_iterations, termination_eps)


# allow the camera to warmup
time.sleep(0.1)


# GPIO Setup
GPIO.setmode(GPIO.BCM)
GPIO.setup(18, GPIO.OUT)
GPIO.output(18, 0)


while True:
  print("Usage:")
  print(" q: Quit")
  print(" c: Show Color Image")
  print(" o: Show NoIR Image")
  print(" n: Show NDVI Image")
  print(" g: Show GNDVI Image")
  print(" b: Show BNDVI Image")

  camera.start_preview()
  c = readchar.readchar()
  camera.stop_preview()


  if c=='q':
  print('quit ndvicam.py')
  break


  # grab an image from the camera
  camera.capture(rawCapture, format="bgr")
  noir_image = rawCapture.array

  # trigger camera on slave and load
  GPIO.output(18, 1)
  time.sleep(1)
  GPIO.output(18, 0)
  time.sleep(1)
  color_image = cv2.imread('pi1iot_share/slave_image.jpg',cv2.IMREAD_COLOR)


  # extract nir, red green and blue channel
  nir_channel = noir_image[:,:,0]/256.0
  green_channel = noir_image[:,:,1]/256.0
  blue_channel = noir_image[:,:,2]/256.0
  red_channel = color_image[:,:,0]/256.0

  # align the images
  # Run the ECC algorithm. The results are stored in warp_matrix.
  # Find size of image1
  sz = color_image.shape
  (cc, warp_matrix) = cv2.findTransformECC (color_image[:,:,1],noir_image[:,:,1],warp_matrix, warp_mode, criteria)
  if warp_mode == cv2.MOTION_HOMOGRAPHY :
  # Use warpPerspective for Homography
  nir_aligned = cv2.warpPerspective (nir_channel, warp_matrix, (sz[1],sz[0]), flags=cv2.INTER_LINEAR + cv2.WARP_INVERSE_MAP)
  else :
  # Use warpAffine for nit_channel, Euclidean and Affine
  nir_aligned = cv2.warpAffine(nir_channel, warp_matrix, (sz[1],sz[0]), flags=cv2.INTER_LINEAR + cv2.WARP_INVERSE_MAP);

  # calculate ndvi
  ndvi_image = (nir_aligned - red_channel)/(nir_aligned + red_channel)
  ndvi_image = (ndvi_image+1)/2
  ndvi_image = cv2.convertScaleAbs(ndvi_image*255)
  ndvi_image = cv2.applyColorMap(ndvi_image, cv2.COLORMAP_JET)

  # calculate gndvi_image
  gndvi_image = (nir_channel - green_channel)/(nir_channel + green_channel)
  gndvi_image = (gndvi_image+1)/2
  gndvi_image = cv2.convertScaleAbs(gndvi_image*255)
  gndvi_image = cv2.applyColorMap(gndvi_image, cv2.COLORMAP_JET)


  # calculate bndvi_image
  bndvi_image = (nir_channel - blue_channel)/(nir_channel + blue_channel)
  bndvi_image = (bndvi_image+1)/2
  bndvi_image = cv2.convertScaleAbs(bndvi_image*255)
  bndvi_image = cv2.applyColorMap(bndvi_image, cv2.COLORMAP_JET)


  # display the image based on key pressed on screen
  if c == 'o':
  cv2.imshow("Image", noir_image)
  elif c == 'c':
  cv2.imshow("Image", color_image)
  elif c == 'n':
  cv2.imshow("Image", ndvi_image)
  elif c == 'b':
  cv2.imshow("Image", bndvi_image)
  elif c == 'g':
  cv2.imshow("Image", gndvi_image)

  # wait at most 10 seconds for a keypress
  cv2.waitKey(10000)

  # cleanup
  cv2.destroyAllWindows()
  rawCapture.truncate(0)

  # get current date and time to add to the filenames
  d = datetime.datetime.now()
  datestr = d.strftime("%Y%m%d%H%M%S")


  # save all images
  cv2.imwrite("./images/" + datestr + "_noir.jpg",noir_image)
  cv2.imwrite("./images/" + datestr + "_color.jpg",color_image)
  cv2.imwrite("./images/" + datestr + "_ndvi.jpg",ndvi_image)
  cv2.imwrite("./images/" + datestr + "_gndvi.jpg",gndvi_image)
  cv2.imwrite("./images/" + datestr + "_bndvi.jpg",bndvi_image)
The prove of the pudding
The prove of the pudding is the eating, so here are the images you have been waiting for so long.
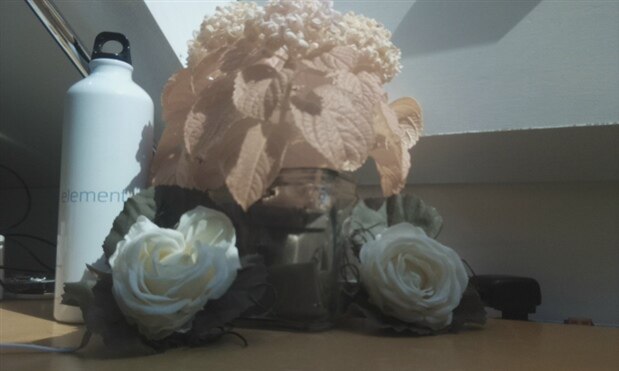
Here is a video of the setup. In front of the camera are a hydrangea plant and two roses.
This results in the following images:
The color image.

The NoIR image, which is the NoIR camera with the infra-blue filter attached. Note the different perspective on this small distance.
The two images are aligned using the HOMOGRAPHY algorithm, which you can clearly see in the blue border below.
A drawback of the HOMOGRAPHY is that it is quite time consuming. In this case, the ECC algorithm took almost 15 minutes  .
.
The NDVI image clearly shows healthy plant parts in read, while other stuff is in the blue-green range.
Note that the roses looks like very unhealthy! This is true, because they are fake.
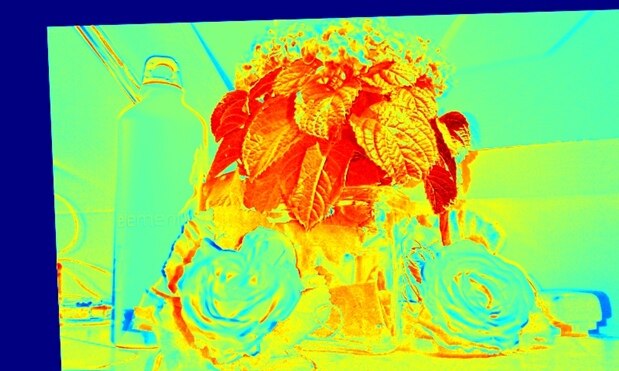
The BNDVI and GNDVI doesn't look very promising, I will investigate in this later.
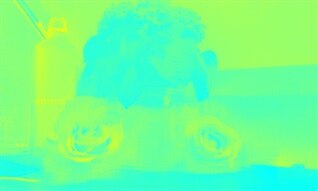

I also took my camera outside, powered by a USB power bank.
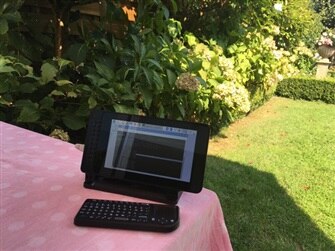
With the following results:
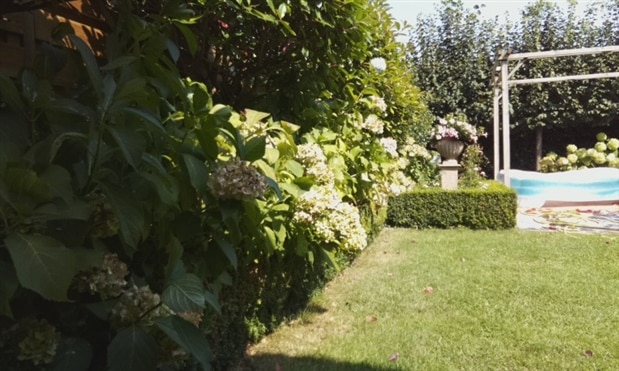
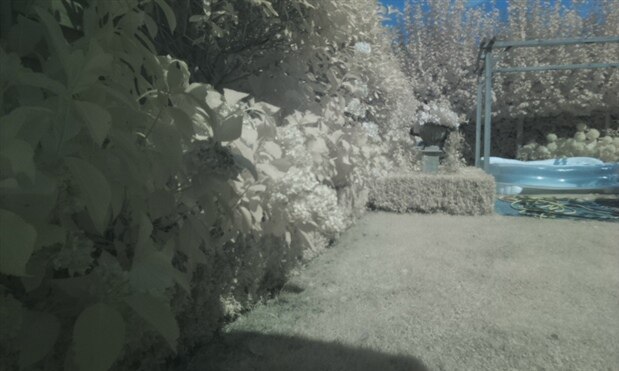

Here I used TRANSLATION for the alignment which works pretty well for objects at larger distance from the camera. It also is much faster, less than 30 s computation time in this case.
This finalizes more or less my project. I will try to make a summary blog on Monday, but yet I'm not sure I will have time for that.
I hope you enjoyed my posts and it inspired you to use the Pi for agricultural applications and plant phenotyping.
Feel free to comment or ask questions, I will try to answer them all.
Top Comments