element14 Community
element14 Community
    Register Log In
  • Site
  • Search
  • Log In Register
  • Community Hub
    Community Hub
    • What's New on element14
    • Feedback and Support
    • Benefits of Membership
    • Personal Blogs
    • Members Area
    • Achievement Levels
  • Learn
    Learn
    • Ask an Expert
    • eBooks
    • element14 presents
    • Learning Center
    • Tech Spotlight
    • STEM Academy
    • Webinars, Training and Events
    • Learning Groups
  • Technologies
    Technologies
    • 3D Printing
    • FPGA
    • Industrial Automation
    • Internet of Things
    • Power & Energy
    • Sensors
    • Technology Groups
  • Challenges & Projects
    Challenges & Projects
    • Design Challenges
    • element14 presents Projects
    • Project14
    • Arduino Projects
    • Raspberry Pi Projects
    • Project Groups
  • Products
    Products
    • Arduino
    • Avnet Boards Community
    • Dev Tools
    • Manufacturers
    • Multicomp Pro
    • Product Groups
    • Raspberry Pi
    • RoadTests & Reviews
  • Store
    Store
    • Visit Your Store
    • Choose another store...
      • Europe
      •  Austria (German)
      •  Belgium (Dutch, French)
      •  Bulgaria (Bulgarian)
      •  Czech Republic (Czech)
      •  Denmark (Danish)
      •  Estonia (Estonian)
      •  Finland (Finnish)
      •  France (French)
      •  Germany (German)
      •  Hungary (Hungarian)
      •  Ireland
      •  Israel
      •  Italy (Italian)
      •  Latvia (Latvian)
      •  
      •  Lithuania (Lithuanian)
      •  Netherlands (Dutch)
      •  Norway (Norwegian)
      •  Poland (Polish)
      •  Portugal (Portuguese)
      •  Romania (Romanian)
      •  Russia (Russian)
      •  Slovakia (Slovak)
      •  Slovenia (Slovenian)
      •  Spain (Spanish)
      •  Sweden (Swedish)
      •  Switzerland(German, French)
      •  Turkey (Turkish)
      •  United Kingdom
      • Asia Pacific
      •  Australia
      •  China
      •  Hong Kong
      •  India
      •  Korea (Korean)
      •  Malaysia
      •  New Zealand
      •  Philippines
      •  Singapore
      •  Taiwan
      •  Thailand (Thai)
      • Americas
      •  Brazil (Portuguese)
      •  Canada
      •  Mexico (Spanish)
      •  United States
      Can't find the country/region you're looking for? Visit our export site or find a local distributor.
  • Translate
  • Profile
  • Settings
Pi Chef Design Challenge
  • Challenges & Projects
  • Design Challenges
  • Pi Chef Design Challenge
  • More
  • Cancel
Pi Chef Design Challenge
Blog KCON - Pi Chef AIY build
  • Blog
  • Forum
  • Documents
  • Polls
  • Files
  • Events
  • Mentions
  • Sub-Groups
  • Tags
  • More
  • Cancel
  • New
  • Share
  • More
  • Cancel
Group Actions
  • Group RSS
  • More
  • Cancel
Engagement
  • Author Author: jkutzsch
  • Date Created: 29 Mar 2018 2:56 AM Date Created
  • Views 1412 views
  • Likes 6 likes
  • Comments 6 comments
  • pi chef design challenge
  • kitchen
Related
Recommended

KCON - Pi Chef AIY build

jkutzsch
jkutzsch
29 Mar 2018
  1. Intro Blog
  2. Unboxing
  3. Setup
  4. Gourmet Install
  5. Load up some Recipes!
  6. Enclosure Planning.
  7. 7inch Touchscreen Time
  8. AIY Build / Google Voice  <<<---
  9. AIY API & Certs
  10. Succes with Google AIY!


Welcome to the next part of this project where I look at seeing how well Google AIY will integrate with our KCON:


I really have no idea how much can be pulled into Google AIY but I thought having as much hands free interaction would be ideal with a KitchenCONsole setup. 


So let's take a look at incorporating Google AIY into this project.


image

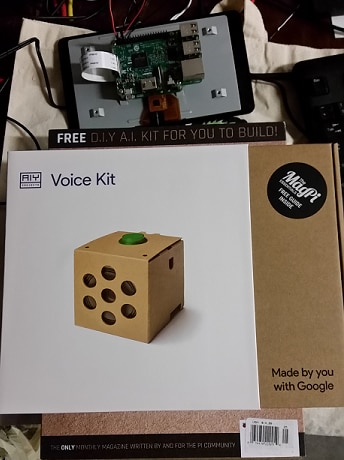
So way, way back with the May 2017 edition of The MagPi (Issue 57) the magazine had packaged a "free" AIY kit with their magazine.


Of course I had to scour the local places and find a copy or two to add this neat item into my inventory.


As such when I submitted my idea for the KCON I knew I had on hand an AIY kit just waiting to find a new home.


image


Interestingly enough I received an email from MicroCenter mentioning they had Raspberry Pi Zero W for $3.14 and even the new Google AIY kit for $3.14.


Well of course I had to snap out some of this.  The new kit had made some minor changes and it was $3.14!


The issue of course being that MicroCenter is 250 miles away and you can only get that pricing in store.  So I ordered/reserved my Pi Zero and a kit or 5 of the AIY and then Mother Nature shut down the Interstate over the Rocky Mountains...


Luckily I have family in Denver and was able to have them take my reservation and pickup everything for me.


So what this means is that now we are running with the latest AIY kit!


image


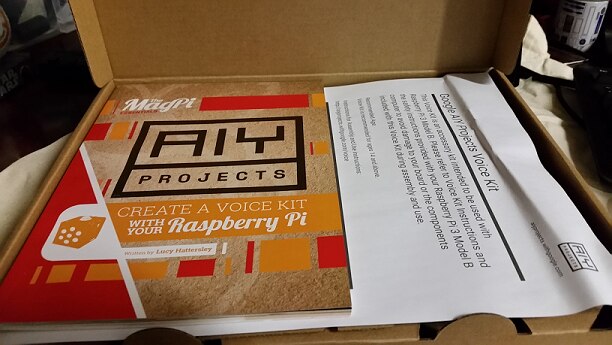
Instead of a magazine you have a handy dandy Projects book. 


We will see how helpful this is with assembly.


image


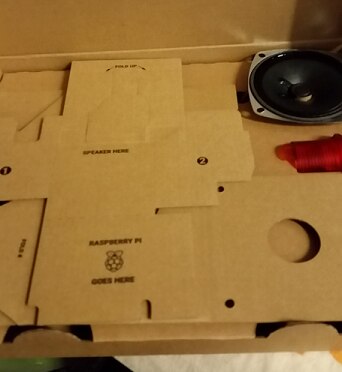
Next we have the neat little cardboard box that you can assemble to hold your Raspberry Pi and AIY kit.


We will set this aside since it doesn't really fit the Kitchen install plan.


image


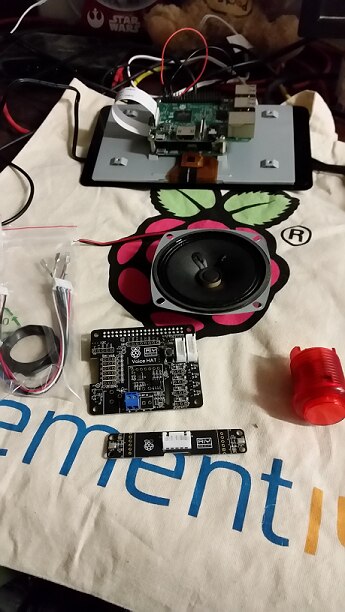
Now for the good stuff. 


You can see the cabling, speaker, voice hat, LED button and the microphone.


From some of what I read they made changes to the LED button allowing everything to be all in one instead of a bunch of different switches that had to be cobbled together.


Regardless, we are trying the newest kit I could get a hold of for this project.


image


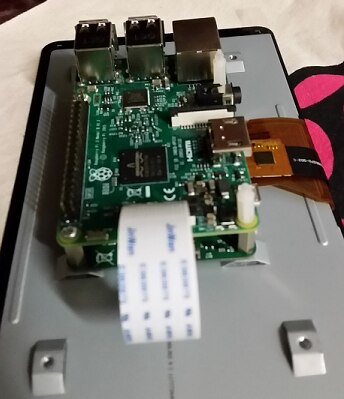
The first things that need to be done is the removal of the screws on the right side in this picture.


Then we place the 2 plastic standoffs in there to help support the VoiceHat.


image


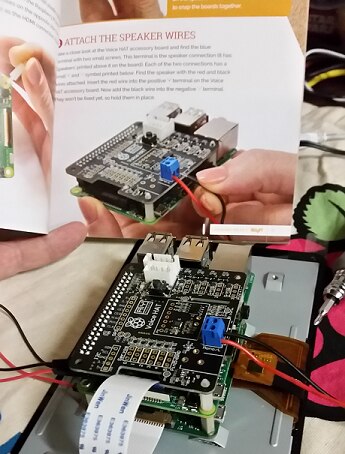
Next we put the VoiceHat on.


Then referring to the included book we can see how to connect the Speaker up.


You can see my phillips screwdriver just finished with securing the speaker cables.

image


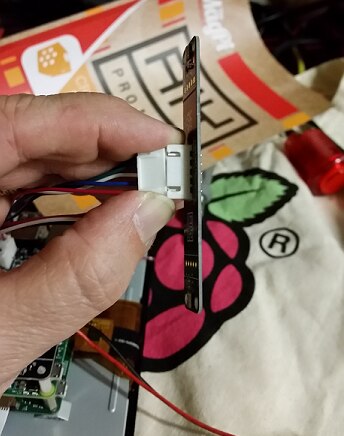
The book made a point to let readers know that each connector could only be connected one way and each connector was different per cable as you can see here on the cable that goes to the microphone board.


image


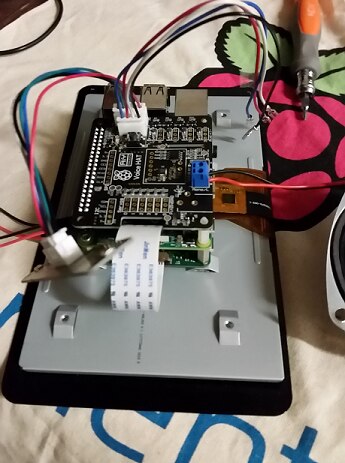
Here we have the microphone and the speaker connected.


image


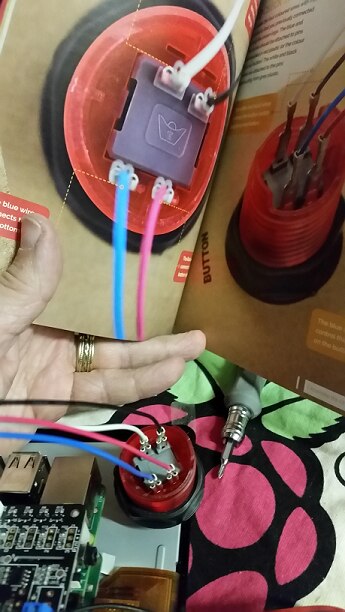
Okay as you can see with the book we are now connection our button. 


Pretty simple so far!


Next step is to plug in power to our KCON and let's see what happens...


...


...


..


..


.


.


Sadly a successful boot of the KCON did NOT happen.


I rechecked connections and everything looked good.


I removed the hat and retried and instantly the RPI booted up correctly through the LCD screen.


I reconnected the AIY kit again and same thing.  No display to screen.


At this point I believe it is power related since I was trying to run power through one input cable so I am going to have to research this more.


A quick search showed others asking if the AIY kit can be used with the 7" touchscreen and people saying they believe so but I didn't find any actual people experienced in doing so.


So the next step will be more involved searching and checking of pins on the AIY Kit.


I look forward to sharing soon what I find!

  • Sign in to reply

Top Comments

  • dougw
    dougw over 7 years ago +2
    The AIY kit worked fine with the 7" touch screen for me - automatically.
  • three-phase
    three-phase over 7 years ago +1
    Nice update, hopefully the fault finding goes well for you. Kind regards
  • jkutzsch
    jkutzsch over 7 years ago in reply to dougw +1
    Did you power your screen through the GPIO or through a separate microusb power source? I found another build that was using both screen and AIY kit but they used a separate power source. That is what…
  • jkutzsch
    jkutzsch over 7 years ago in reply to jkutzsch

    Looking at my power supplies they are both Raspberry Pi supplies with 5.1v 2.5a. 

    • Cancel
    • Vote Up 0 Vote Down
    • Sign in to reply
    • More
    • Cancel
  • jkutzsch
    jkutzsch over 7 years ago in reply to dougw

    Interesting.  I was able to use a second power supply for the screen and it was good to go.  Now I will have to look at my power supplies and try swapping out a larger one and see if that helps.


    Were you using pins 2 & 6?  Shouldn't matter.  But always nice to know verified. 


    Someone else in another group had suggested that the AIY Hat had something I could jumper off of as well but nothing concrete than they thought it could.

    • Cancel
    • Vote Up 0 Vote Down
    • Sign in to reply
    • More
    • Cancel
  • dougw
    dougw over 7 years ago in reply to jkutzsch

    I powered it from the GPIO connector.

    I did need to select a low impedance USB cable and a good strong power supply module.

    • Cancel
    • Vote Up +1 Vote Down
    • Sign in to reply
    • More
    • Cancel
  • jkutzsch
    jkutzsch over 7 years ago in reply to dougw

    Did you power your screen through the GPIO or through a separate microusb power source?  I found another build that was using both screen and AIY kit but they used a separate power source.  That is what I am testing today.  Pretty confident that should resolve it since I have read other comments on the screen liking it's own power source.

    • Cancel
    • Vote Up +1 Vote Down
    • Sign in to reply
    • More
    • Cancel
  • dougw
    dougw over 7 years ago

    The AIY kit worked fine with the 7" touch screen for me - automatically.

    • Cancel
    • Vote Up +2 Vote Down
    • Sign in to reply
    • More
    • Cancel
>
element14 Community

element14 is the first online community specifically for engineers. Connect with your peers and get expert answers to your questions.

  • Members
  • Learn
  • Technologies
  • Challenges & Projects
  • Products
  • Store
  • About Us
  • Feedback & Support
  • FAQs
  • Terms of Use
  • Privacy Policy
  • Legal and Copyright Notices
  • Sitemap
  • Cookies

An Avnet Company © 2025 Premier Farnell Limited. All Rights Reserved.

Premier Farnell Ltd, registered in England and Wales (no 00876412), registered office: Farnell House, Forge Lane, Leeds LS12 2NE.

ICP 备案号 10220084.

Follow element14

  • X
  • Facebook
  • linkedin
  • YouTube