


Recap: I am building a wireless vitals sensor node (heart rate, SpO₂, temperature) that reports over BLE into Home Assistant as your smart way to keep watch over our loved ones, built up in three phases — DK bring-up, a custom miniaturized nRF52832 PCB, then a Matter over Thread proof of concept.
Past Posts
- VitaRF - Part 1 - The Plan
- VitaRF - Part 2 - Interface MAX30102 on NRF52
- VitaRF - Part 3 - Interfacing MAX30208 on NRF52
In this post, I will be exploring how I paired Home assistant with the BLE beacon data. Post 3 closed with both sensors reading independently on the nRF52832 DK. I wanted to start with PCB Design, But I have to a little more research before it. The obvious next step is BLE into Home Assistant.
UNO Q is all the rage now
The UNO Q is a Linux-capable board (aarch64, Debian 13 trixie under the hood) with Docker and Docker Compose already on it, so spinning up an Home Assistant Container should be easy, and With Qualcomm investing quite a lot on marketing for Uno Q, I should ride the wave.
There's also a practical reason to lean on the UNO Q here rather than my Radxa: I've got a handful of UNO Qs but only one Radxa Q6A, and I'd rather keep that one free for something that actually needs its extra power punch. tech_nickk's Hackster writeup on running Home Assistant on the UNO Q via Docker plus MQTT was good confirmation that UNO Q is up for the job. But instead of a command, I went with a compose file
Commands, in order:
mkdir -p ~/homeassistant/config
cd ~/homeassistant
nano docker-compose.yml # docker-compose.yml content below
docker compose pull
docker compose up -d
services:
  homeassistant:
    container_name: homeassistant
    image: ghcr.io/home-assistant/home-assistant:stable
    volumes:
      - ./config:/config
      - /etc/localtime:/etc/localtime:ro
      - /run/dbus:/run/dbus:ro
    restart: unless-stopped
    privileged: true
    network_mode: host
I relied on AI to generate the compose file. Also I saw the first 10minutes of Ultimate Home Assistant Beginner’s Guide! at https://www.youtube.com/watch?v=Z4gvkmJ8q48. Just enough to get an understanding of the Home assistant. It seemed pretty straightforward to me.
network_mode: host and privileged: true apparently is needed in the compose file so that the container gets direct access to the board's onboard Bluetooth adapter. It's importance came to me in hindsight.
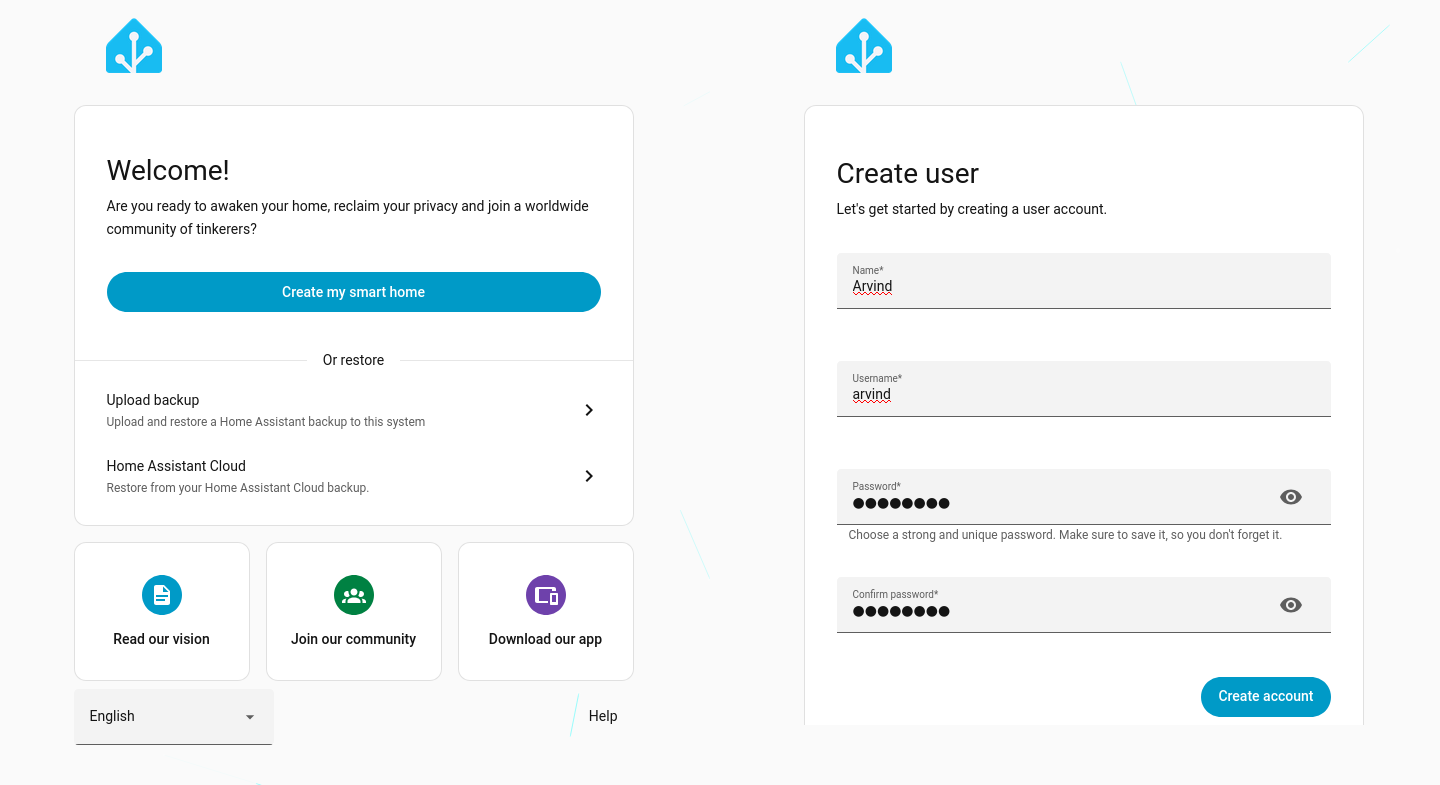
Once the pull finally finished, docker compose up -d came back in about a second and onboarding started right away - welcome screen, then account setup:
Then this, still inside onboarding, before I'd touched any integration settings myself:
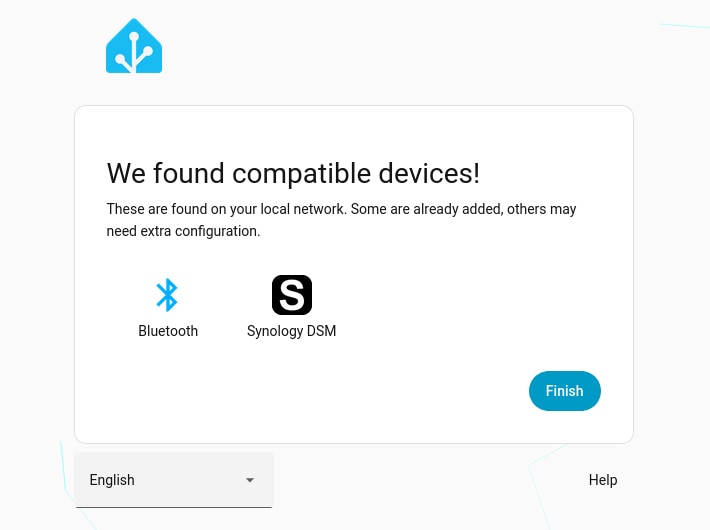
HA had already found the Bluetooth integration as a compatible device on its own, off the UNO Q's onboard adapter. Perfecto
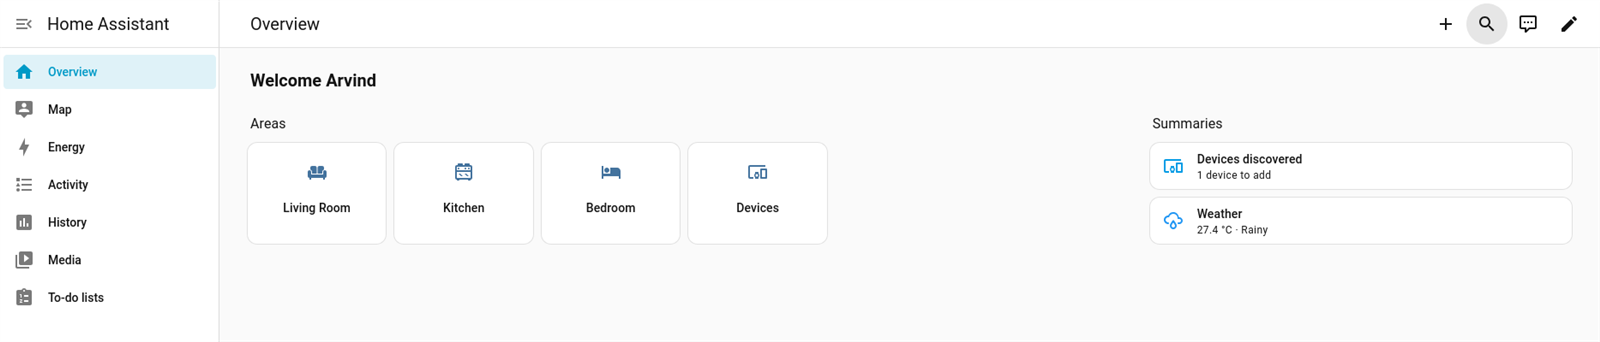
That's Home Assistant installed. Now to give it something real to talk to. One problem was that the disk went from 4.2GB free to 1.6GB free, though memory was only around 800gb. I still have to see the memory usage after some time of usage. I also am pretty sure the linux will soon eat up the remaining 1.6Gb.
BTHome instead of a connectable GATT service
Home Assistant's Bluetooth integration has built-in, zero-config support for BTHome-formatted advertisements (bthome.io) - it should auto-discovers the device from the broadcast alone, no pairing, no custom integration.
I am quite familiar with the nRF5 SDK which has ble_app_hrs example for the standard Bluetooth Heart Rate Service (GATT, UUID 0x180D), which I can simply paste into my existing sensor integration code and flashed it, but Home Assistant core has no built-in integration - that would mean writing a custom HA component just to get the data out of the BLE beacon.
Getting the wire format right
With no previous experience, I went through the bthome.io/format page. Temperature property existed but not SPO2 or Heart rate, I thought it would be based on GATT services.
The Service Data UUID should be 0xFCD2 to be recognized as BTHome Compliant beacon. The temperature object id is 0x02, signed int16, factor 0.01, degrees C. I googled the nativity of the developer of BTHome - Ernst Klamer, He is from Netherlands and hence the SI units of Temperature.
HR value will have to go out as BTHome's generic "count" object (0x09, uint8, factor 1, range 0-255) - bpm fits the range exactly
I also came across bthome-ble on GitHub and there too in theirconst.py no heart rate was mentioned.
The firmware
I simply took the nRF5 SDK's ble_app_beacon example (examples/ble_peripheral/ble_app_beacon, PCA10040) and swapped the manufacturer-specific-data AD structure for a BTHome service-data AD structure, and add an app_timer driven refresh every 5s.
Building the actual BTHome payload is just this - device info byte, then (object id, value) pairs, straight out of the table I checked above:
/* BTHome service data payload: device info byte + (object id, value) pairs. */
#define BTHOME_PAYLOAD_LEN  (1 + (1 + 2) + (1 + 1))
static uint8_t m_bthome_payload[BTHOME_PAYLOAD_LEN];

static void bthome_payload_encode(void)
{
    uint8_t idx = 0;

    m_bthome_payload[idx++] = BTHOME_DEVICE_INFO_UNENCRYPTED_V2;

    m_bthome_payload[idx++] = BTHOME_OBJ_TEMPERATURE;
    m_bthome_payload[idx++] = (uint8_t) (m_dummy_temp_centidegrees & 0xFF);        /* LSB first (little-endian). */
    m_bthome_payload[idx++] = (uint8_t) ((m_dummy_temp_centidegrees >> 8) & 0xFF);

    m_bthome_payload[idx++] = BTHOME_OBJ_COUNT_U8;
    m_bthome_payload[idx++] = m_dummy_hr_bpm;
}
And the timer callback that walks the dummy values every 5s and pushes a fresh advertisement:
static void dummy_timer_handler(void * p_context)
{
    UNUSED_PARAMETER(p_context);

    int16_t temp_step = (int16_t) (next_rand() % 21) - 10;   /* +/- 0.10 degrees C. */
    m_dummy_temp_centidegrees += temp_step;
    if (m_dummy_temp_centidegrees < 3600) m_dummy_temp_centidegrees = 3600;  /* clamp 36.00 - 38.50 C */
    if (m_dummy_temp_centidegrees > 3850) m_dummy_temp_centidegrees = 3850;

    int8_t hr_step = (int8_t) (next_rand() % 5) - 2;          /* +/- 2 bpm. */
    int16_t new_hr = (int16_t) m_dummy_hr_bpm + hr_step;
    if (new_hr < 55) new_hr = 55;
    if (new_hr > 110) new_hr = 110;
    m_dummy_hr_bpm = (uint8_t) new_hr;

    bthome_payload_encode();
    advertising_data_set(false);
}
next_rand() is a tiny linear congruential generator which is quite fast.
I checked the beacon data using nRF Connect on my phone - the live scan on the left, the raw AD structure breakdown on the right, Sweet - Working on the first try. Well, Actually my first try was to send a static value, Only in the next step I added the random generator.
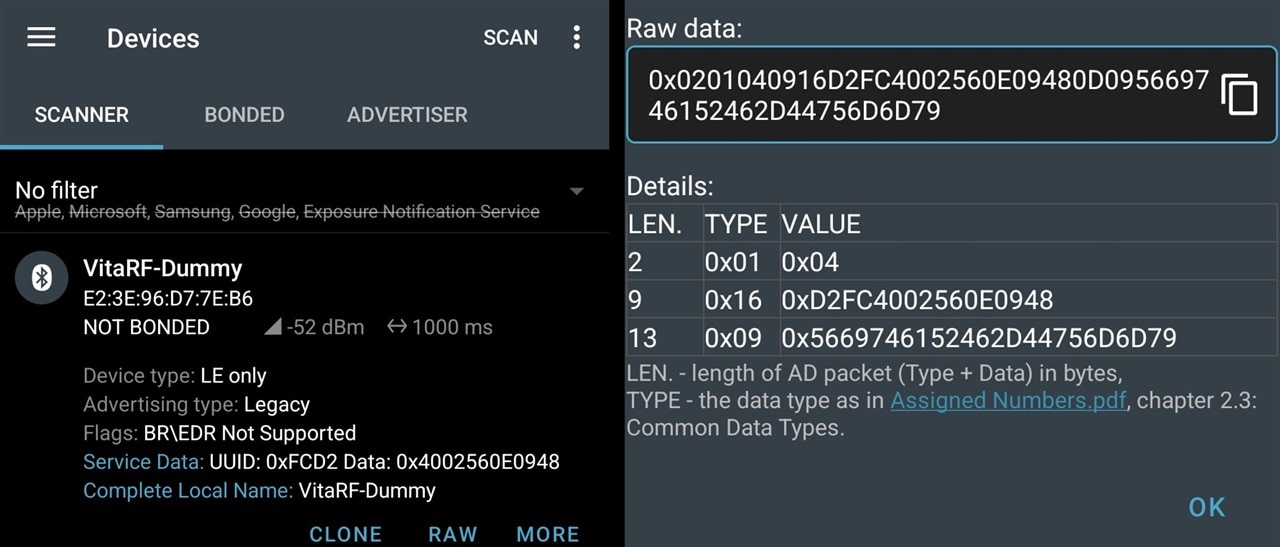
VitaRF-Dummy, MAC E2:3E:96:D7:7E:B6, service data UUID 0xFCD2, 1000ms advertising interval - matches the firmware source. Three AD structures, exactly as built: Flags (0x01, BR/EDR not supported), Service Data 16-bit UUID (0x16, UUID 0xFCD2 + payload 40 02 56 0E 09 48), and Complete Local Name (0x09, "VitaRF-Dummy"). Decoding that payload by hand: 0x40 is the device-info byte, 0x02 56 0E is the temperature object (little-endian 0x0E56 = 3670 = 36.70C), 0x09 48 is the count object (0x48 = 72). Matches the firmware's startup constants exactly.
It shows up in Home Assistant
Settings -> Devices and Services -> Integrations, under Discovered: VitaRF-Dummy 7EB6 under BTHome, sitting right next to the Bluetooth integration that was already configured. Hit Add, and it's a device with real sensor readings:
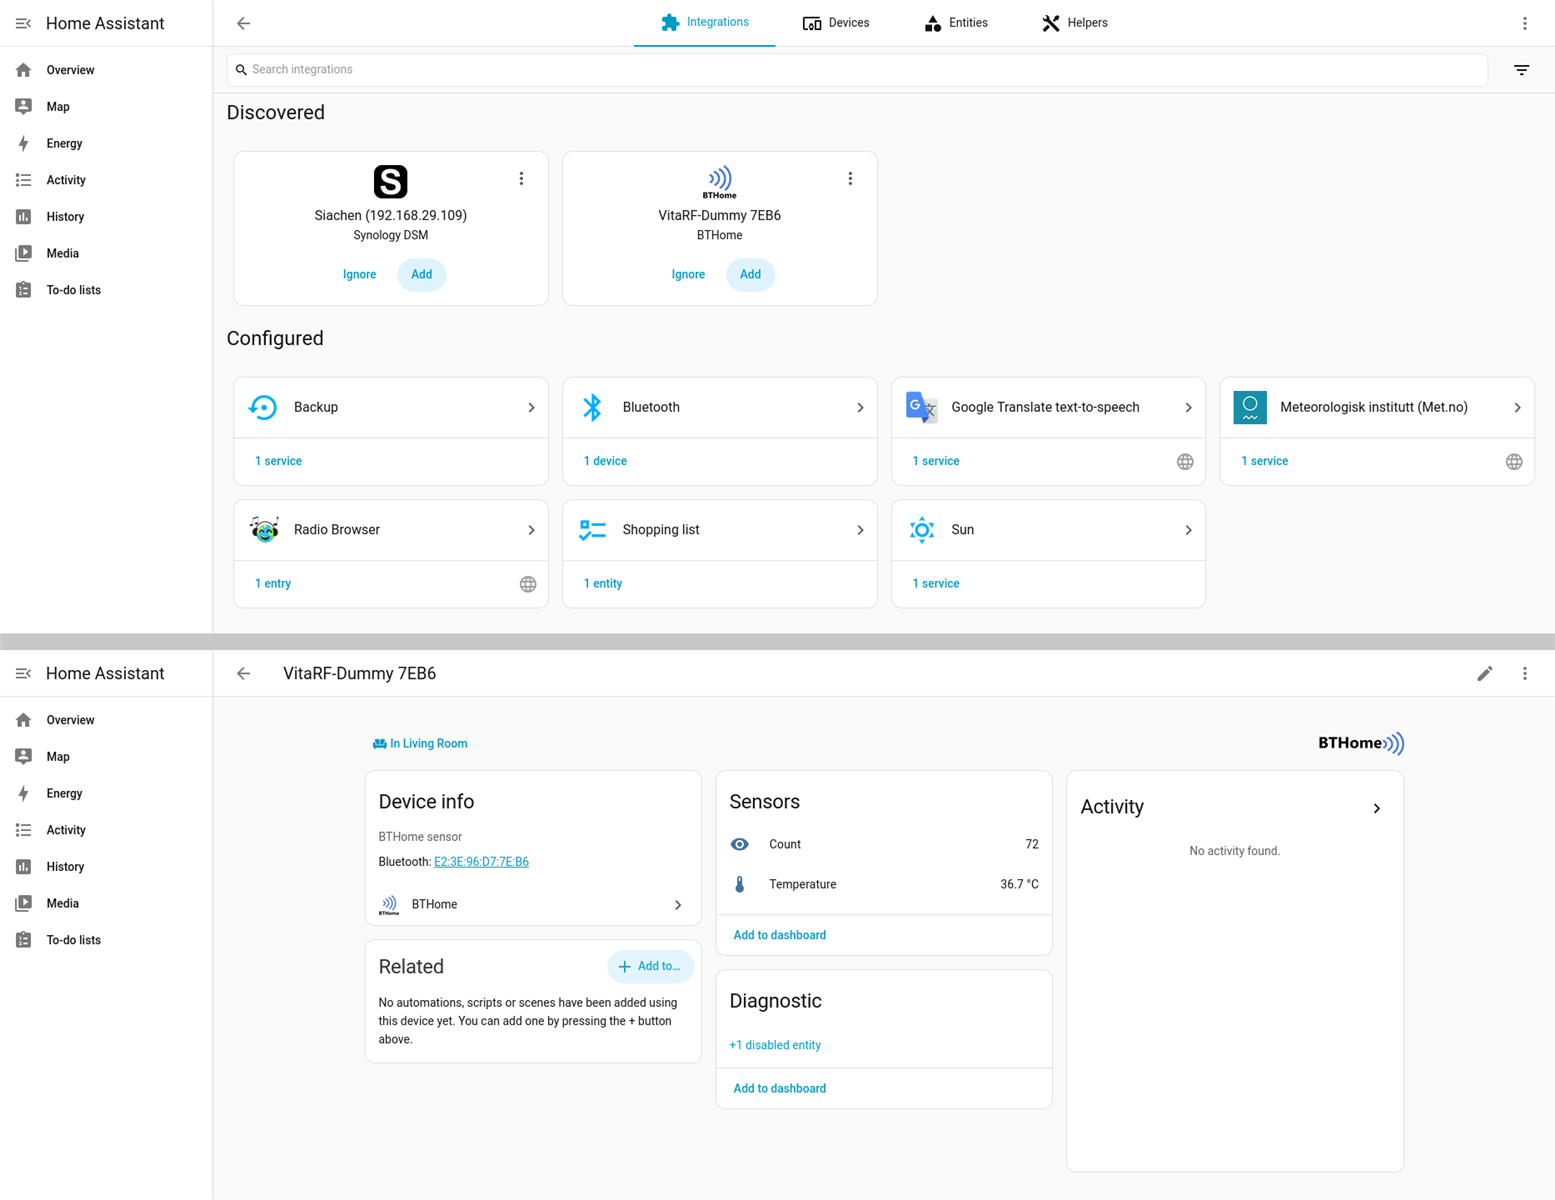
Temperature 36.7C, Count 72. Straight out of the box picked up by the UNO Q's onboard hci0
Left it running for a bit and checked the history graphs afterward, Count on the left and Temperature on the right:
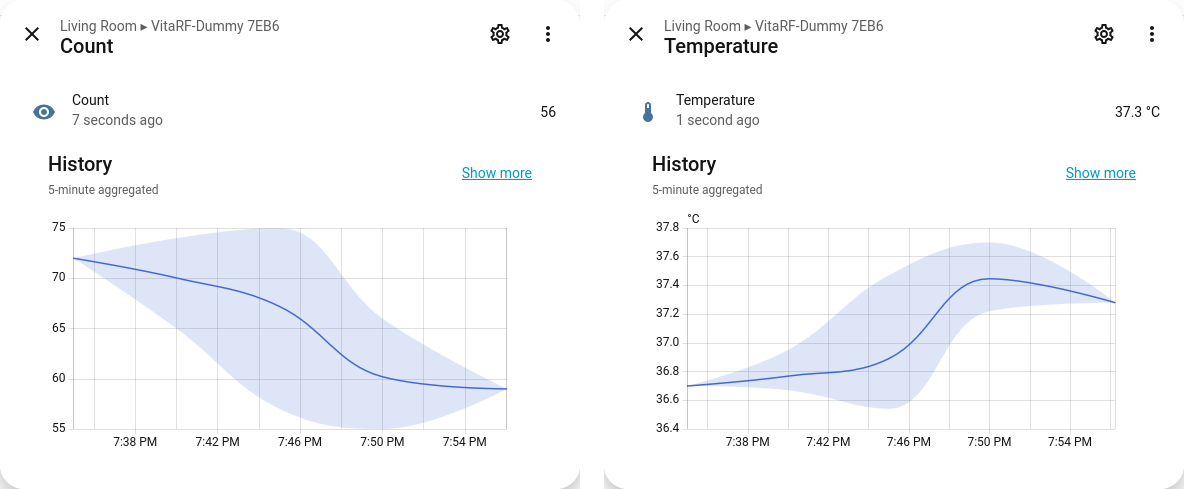
The Graph above shows Count (heart Rate) walking 72 down to 56, Temperature walking 36.7C up to 37.4C and then down. Now for a longer 2-hour window:
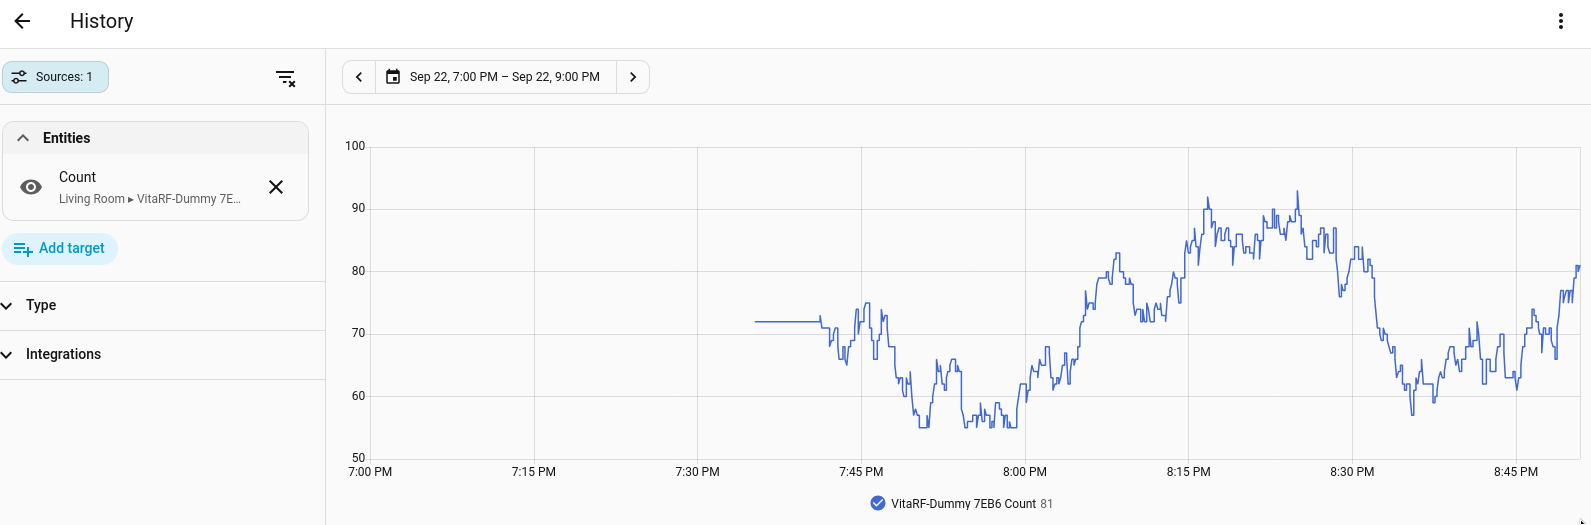
The Values kept changing regularly for the full two hours, no flatlines, no gaps
Code
The Full code for all the posts till now will be at https://gitlab.com/arvindsa/vitarf-e14
Final notes
Home Assistant is running on the Arduino UNO Q with Docker, and a dummy BLE broadcaster on the nRF52832 DK proved the whole path end to end: nRF52832 -> BTHome advertisement -> UNO Q's onboard Bluetooth adapter -> Home Assistant. This was an easy post. With major time went solely to understand the BTHome format.

