


 | Enter Your Project for a chance to win a Nano Grand Prize bundle for the most innovative use of Arduino plus a $400 shopping cart! Back to homepage | Project14 Home |
| Monthly Themes | ||
| Monthly Theme Poll |
Overview
In the previous example, the Arduino Nano 33 BLE Sense LSM9DS1 IMU motion, vibration and orientation sensor was used to gather movement data and transform that into a TensorFlow Lite model to identify specific movements. In this post, the on board APDS9960 Gesture sensor will be used to gather object identification data which will be used to create a TensorFlow Lite model that can be use to identify specific objects; fruit in this case. The proximity sensor feature of the board will be used to identify when an object is near the board and the RGB sensor is used to first collect color data of the objects and then to properly id the objects. This is a simple example but does show the potential of both TinyML running on a small device as well as the power of the sensor rich Arduino Nano 33 BLE Sense.
Related Posts:
TinyML on Arduino Nano 33 BLE Sense - Gesture Recognition
TinyML on Arduino Nano 33 BLE Sense - Person Detection with BLE
References:
Fruit Identification - Arduino and TensorFlow
https://blog.arduino.cc/2019/11/07/fruit-identification-using-arduino-and-tensorflow/
TinyML Classify objects by color Colab project
FruitToEmoji Examples
https://github.com/arduino/ArduinoTensorFlowLiteTutorials/
- FruitToEmoji-GIT.ipynb
Hardware
- Arduino Nano 33 BLE Sense
https://store.arduino.cc/usa/nano-33-ble-sense
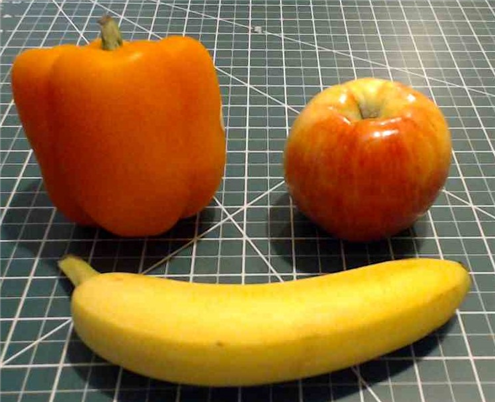
Fruitware
- Apple
- Banana
- Orange (Using an Orange Bell Pepper instead)
Prepare Arduino IDE
- See Gesture Recognition example posted previously for Arduino Libraries to install
Capturing training data
1. Download the object_color_capture.ino file from the following link to capture the fruit data
https://create.arduino.cc/editor/TensorFlowExamples/ca761558-13ed-4190-baee-89ced06147c3/preview
2. Load the object_color_capture.ino sketch into the Arduino IDE; or just use the Arduino Create IDE.
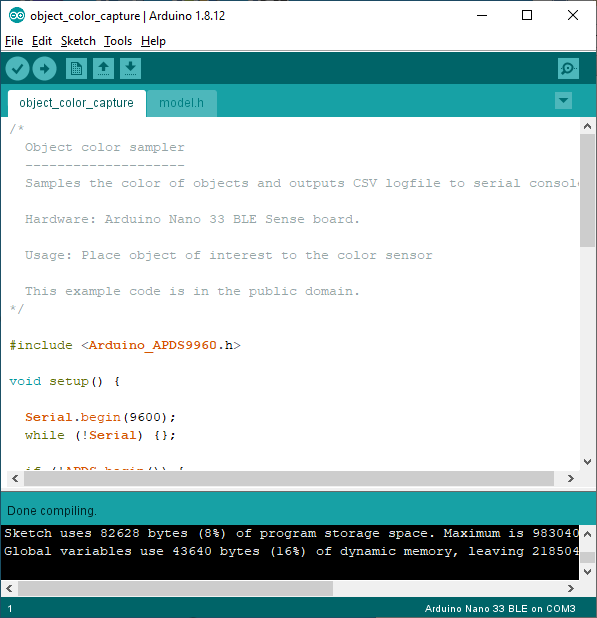
3. Open the Serial Monitor and select a fruit to collect data from.
NOTE: Ensure the board is close to the fruit and the fruit is well lit for better data collection.
Move the board over the fruit or the fruit over the board
Ex: Banana
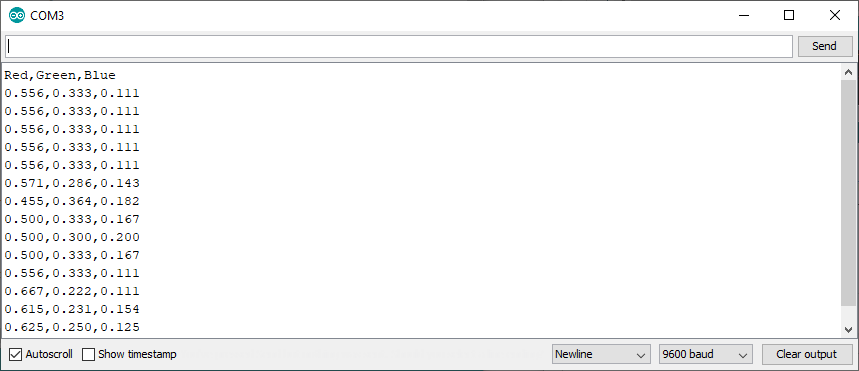
4. Copy the data from the Serial Monitor and place it in a CSV file.
Ex:
banana.csv
NOTE: Ensure the top line of the file includes the following:
Red,Green,Blue
5. Repeat for the other fruit.
NOTE: Press the white Reset button at the top of the Nano 33 BLE Sense to reset the output.
Apple, Orange (Orange Bell Pepper in this case)
Training the model
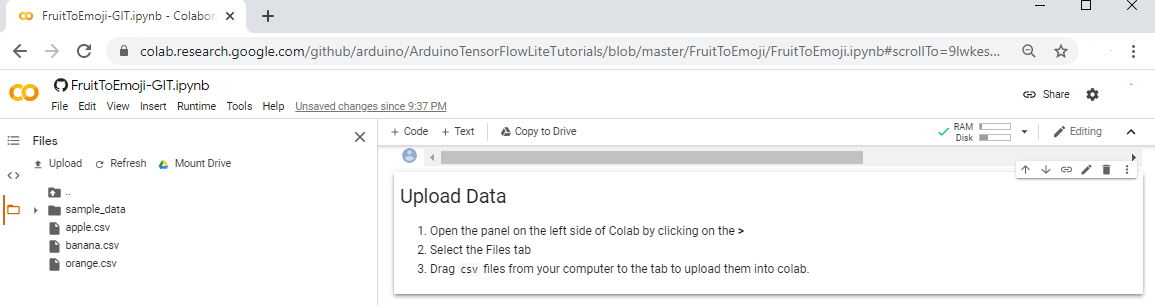
1. Open the link to the FruitToEmoji-GIT.ipynb Jupyter Notebook to Train the Model
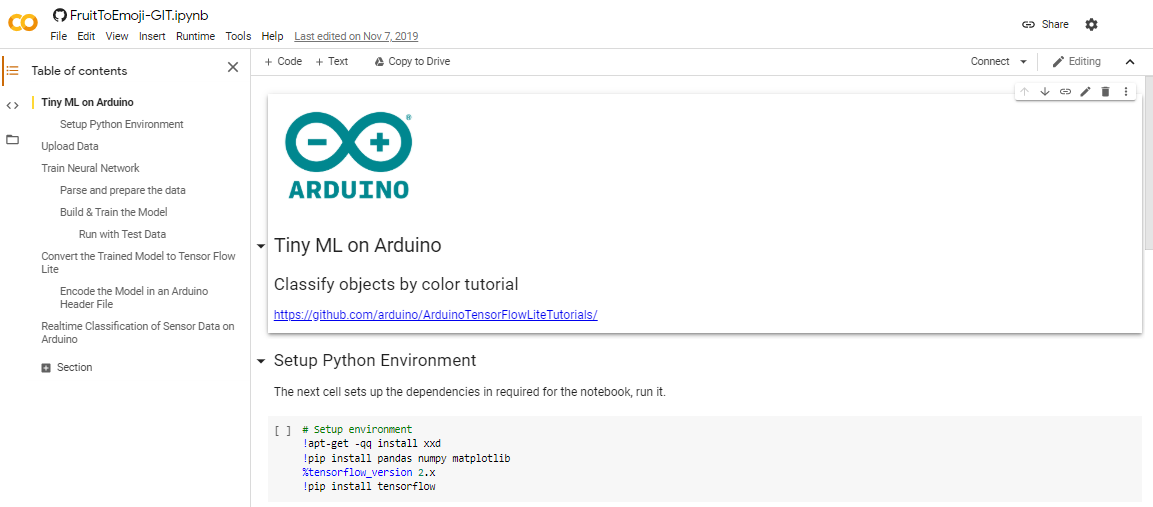
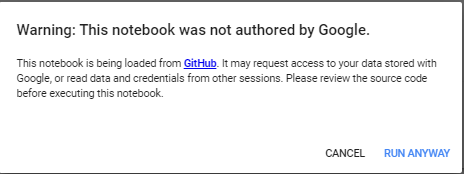
NOTE: A Warning may pop up. Just click RUN ANYWAY.
2. Click the Arrow button next to Setup Python Environment to config the environment with the appropriate dependencies.
Note any errors that are seen which may impact the session.
3. Upload the banana, apple, and orange CSV files data to the Upload Data area in the Left Window Pane.
Train Neural Network
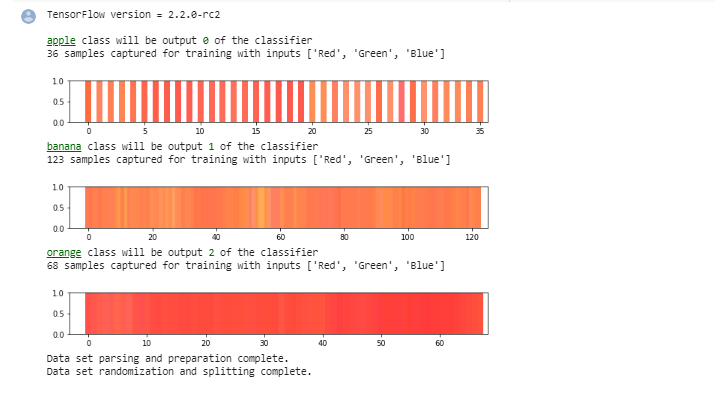
1. Run the Parse and prepare the data cell from the CSV files to a format that can be used to train the connected neural network
2. Run the Build & Train the Model cell to build and train a TensorFlow model using the high-level Keras API.
Output:
Epoch 394/400 34/34 [==============================] - 0s 2ms/step – loss:
 0.0825 - mae: 0.1781 - val_loss: 0.0611 - val_mae: 0.1435 Epoch 395/400 34/34
 [==============================] - 0s 2ms/step - loss: 0.0834 - mae: 0.1794 -
 val_loss: 0.0620 - val_mae: 0.1445 Epoch 396/400 34/34
 [==============================] - 0s 2ms/step - loss: 0.0826 - mae: 0.1779 -
 val_loss: 0.0606 - val_mae: 0.1426 Epoch 397/400 34/34
 [==============================] - 0s 2ms/step - loss: 0.0823 - mae: 0.1780 -
 val_loss: 0.0554 - val_mae: 0.1357 Epoch 398/400 34/34
 [==============================] - 0s 2ms/step - loss: 0.0830 - mae: 0.1786 -
 val_loss: 0.0575 - val_mae: 0.1385 Epoch 399/400 34/34
 [==============================] - 0s 2ms/step - loss: 0.0826 - mae: 0.1780 -
 val_loss: 0.0558 - val_mae: 0.1359 Epoch 400/400 34/34
 [==============================] - 0s 2ms/step - loss: 0.0820 - mae: 0.1763 -
 val_loss: 0.0616 - val_mae: 0.1437
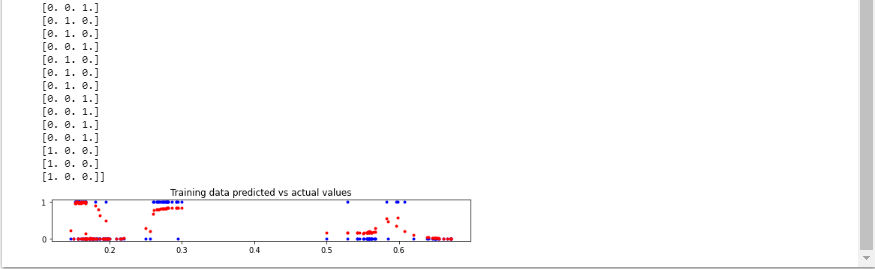
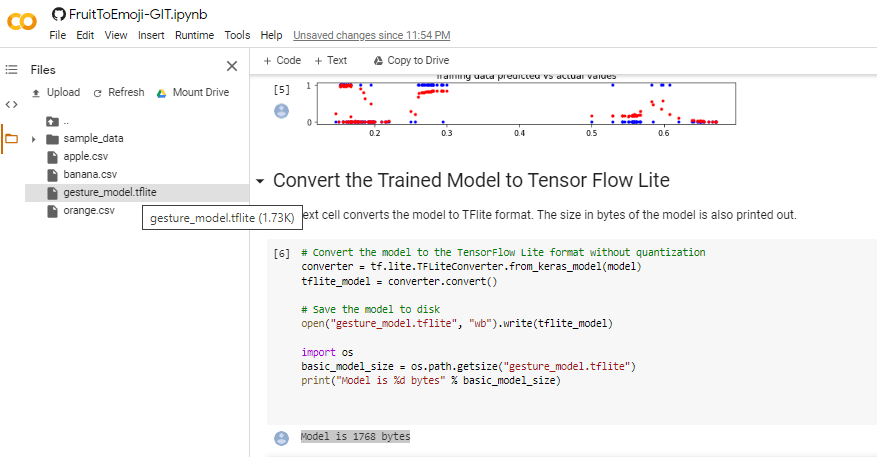
3. Run with Test Data to put the data into the model and plot the predictions
4. Convert the Trained Model to Tensor Flow Lite and show model size in bytes.
Output
Model is 1768 bytes
Refresh files to view the gesture file that is created:
File Created: gesture_model.tflite
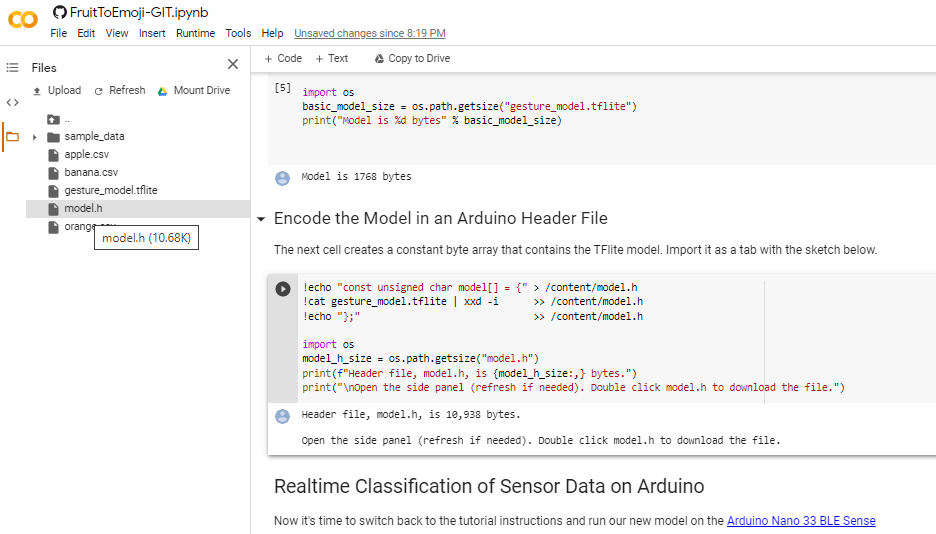
5. Encode the Model in an Arduino Header File
This cell will create a byte array into the model.h file.
NOTE: Previously this was not working but looks like it has been corrected.
Refresh files to see the model.h file.
Run the TensorFlow Lite Model on the Arduino Nano 33 BLE Sense
1. Download and load the object_color_classifier.ino file into the Arduino IDE or run it from Arduino Create
https://create.arduino.cc/editor/TensorFlowExamples/8508c70f-5155-4e3b-b982-c5f6bd36ea5c/preview
2. Add a model.h tab to the Arduino IDE Project and add the model.h code from the Colab session into the new file.

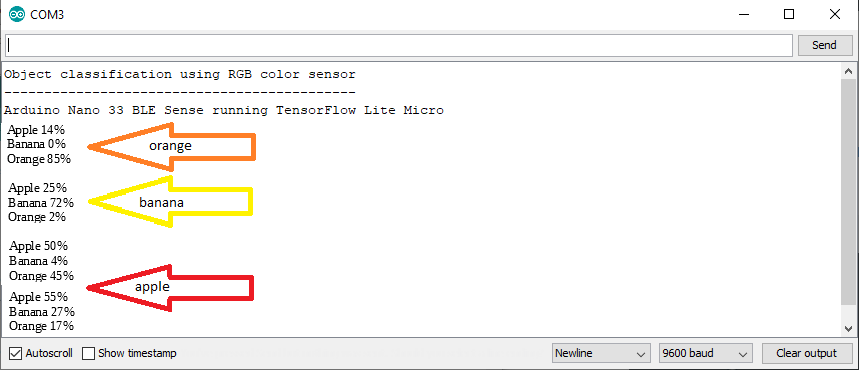
3. Compile and Upload to Arduino Nano 33 BLE Sense
4. Open the Arduino IDE Serial Monitor and present a well lit fruit to the Nano sensors to observe the identification data
Fruit Emoji Version
1. The same object_color_classifier.ino sketch can be used to print fruit emojis via the serial output but requires some code modifications.
Edit 1
- At line 50, change the code to the following:
// array to map gesture index to a name
const char* CLASSES[] = {
   u8"\U0001F34E", //"Apple", // Apple
   u8"\U0001F34C", //"Banana",  // Banana
   u8"\U0001F34A" //"Orange"  // Orange
};
Edit 2
- At line 127, add a carriage return "\r" to the print output:
// output results
 for (int i = 0; i < NUM_CLASSES; i++) {
 Serial.print(CLASSES[i]);
 Serial.print(" ");
 Serial.print(int(tflOutputTensor->data.f[i] * 100));
 Serial.print("%\n\r");
 }
 Serial.println();
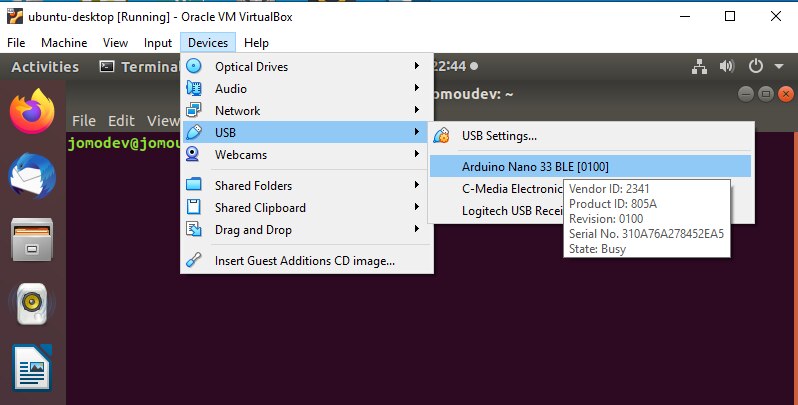
2. Connect the Nano to either a MacOS or Linux system to view the emoji output.
Note: I am not sure how to do this on Windows.
An Ubuntu 18.04 VM was used for this.
3. Install emoji fonts and cu.
sudo apt install fonts-emojione
sudo apt-get install cu
4. Connect the USB connection from the Nano to the VM
5. Use 'dmesg' from a terminal to get the Nano tty device
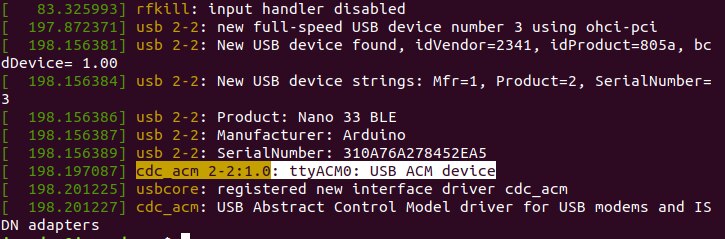
6. Use 'cu' to connect to the Nano and open a serial connection.
cu -l ttyACM0
NOTE: To exit 'cu' use '~.'
7. Present a well lit fruit to the Nano sensor to view the data represented with emojis.
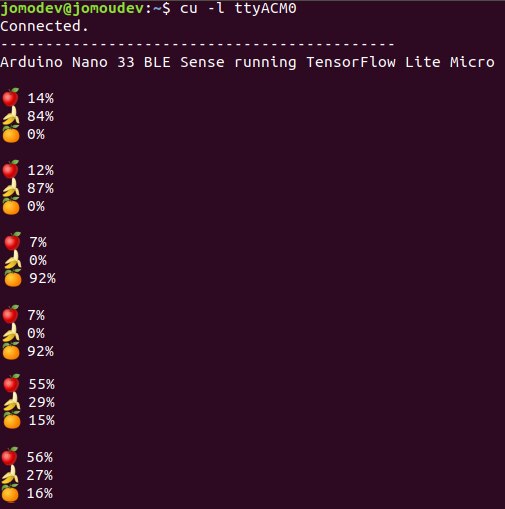
That is pretty much it for this example.
This was an interesting example of the use of the on board Arduino Nano 33 BLE Sensors to create a TensorFlow (TinyML) model for object identification. It really shows the power of TinyML on a small device.
Next: Either ArduCam connection or Fruit ID Data over BLE
Top Comments
-

hyemi
-
Cancel
-
Vote Up
0
Vote Down
-
-
Sign in to reply
-
More
-
Cancel
Comment-

hyemi
-
Cancel
-
Vote Up
0
Vote Down
-
-
Sign in to reply
-
More
-
Cancel
Children