


Before the Keysight Smart Bench Essentials kit can be pressed into service, there are a few tasks that must be completed to configure the equipment for operation and ensure that it has the latest firmware that improves instrument functionality and software to control it.
Mains Voltage Configuration

During unboxing, it was identified that two of the instruments require manual configuration of mains voltage input. To do this for the DMM requires prying out the fuse holder by depressing both tabs simultaneously and sliding out the holder. The insert can be removed from the holder and rotated until the correct voltage appears in the window at the rear of the fuse holder.
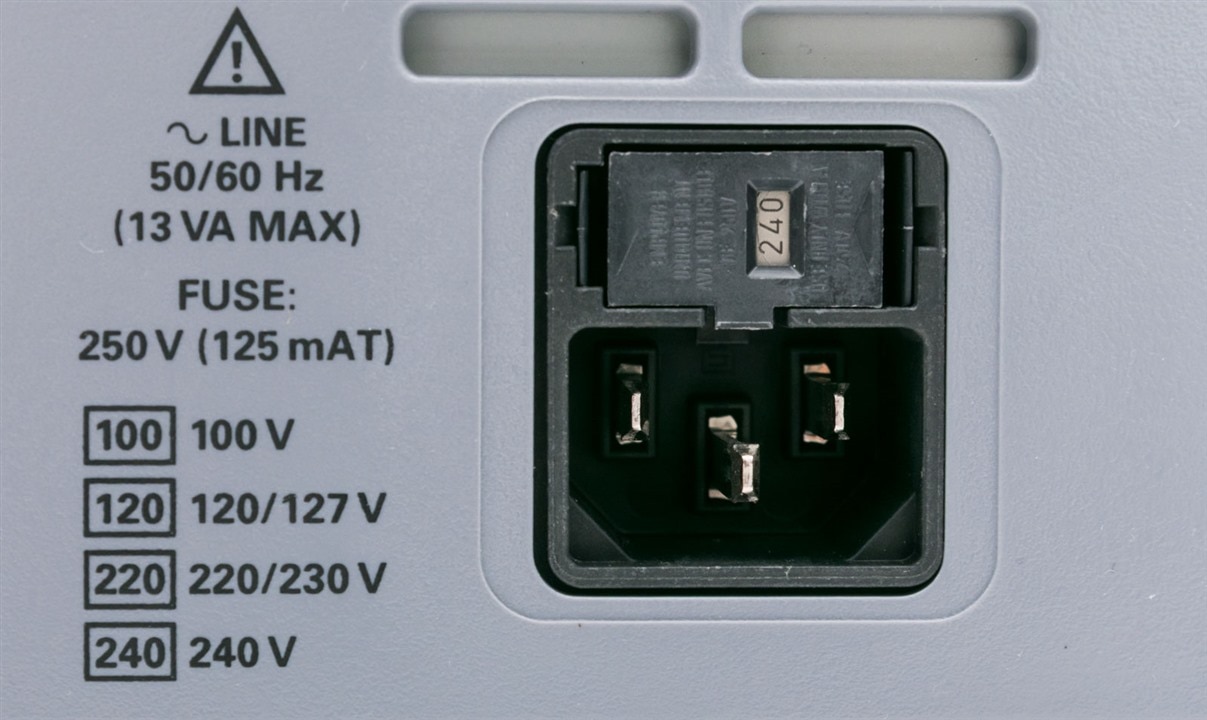
The holder can then be slid back into its compartment and pushed until it clicks into place. In this case, it has been reconfigured to meet the 240V mains available in Australia.
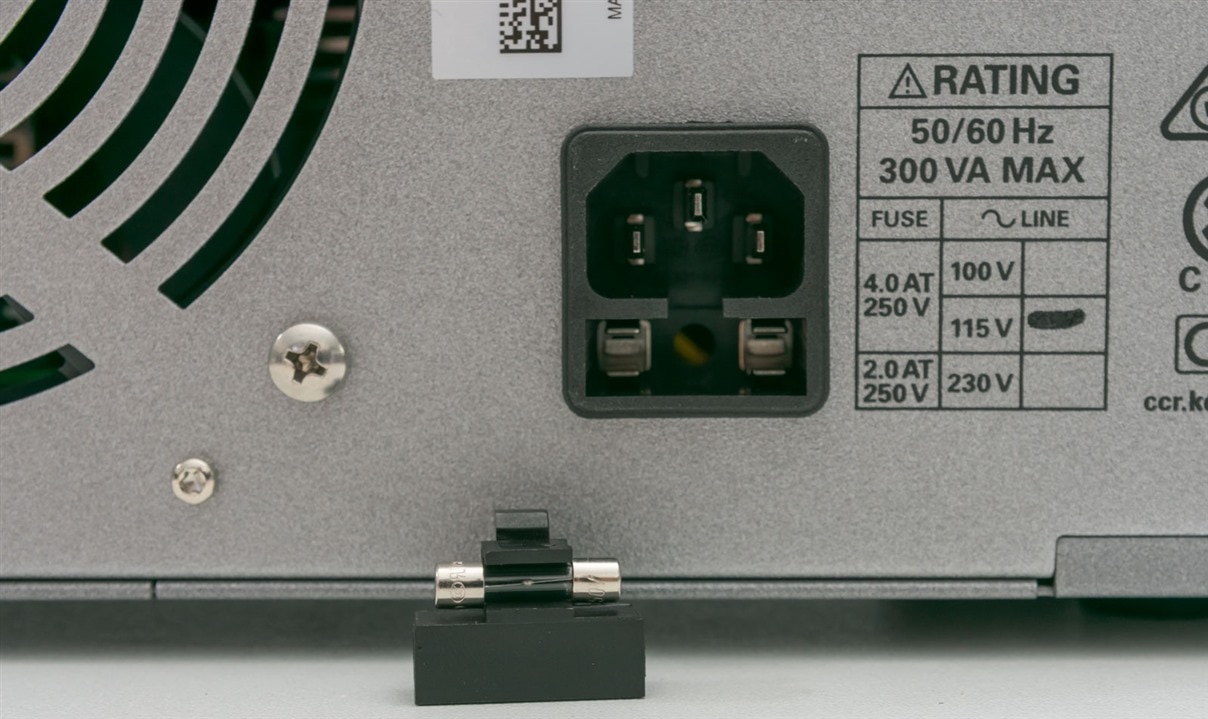
The situation with the power supply is a little different, with the voltage configured through two slide switches above. However, changing the voltage may also require fuse replacement – in this case, moving up to 230V requires changing the fuse to a time-delay 2A fuse. As a result, the original fuse must be replaced with a customer-provided fuse, or else there is a risk of fire or excessive damage to equipment in case of a fault.
Once completed, the instruments can be connected to power safely, as the other instruments are universal voltage.
Bench Siting
The next thing to consider is the bench itself – how would you arrange these units on the bench?
A particular difference from traditional lab instruments is the lack of stackability of most of the elements. The power supply has a recess which allows for one instrument to be stacked above, but the other oscilloscope-like instruments do not sit on one another happily. As a result, the arrangement may have to spread laterally across the bench, assuming you have enough space to accommodate it.
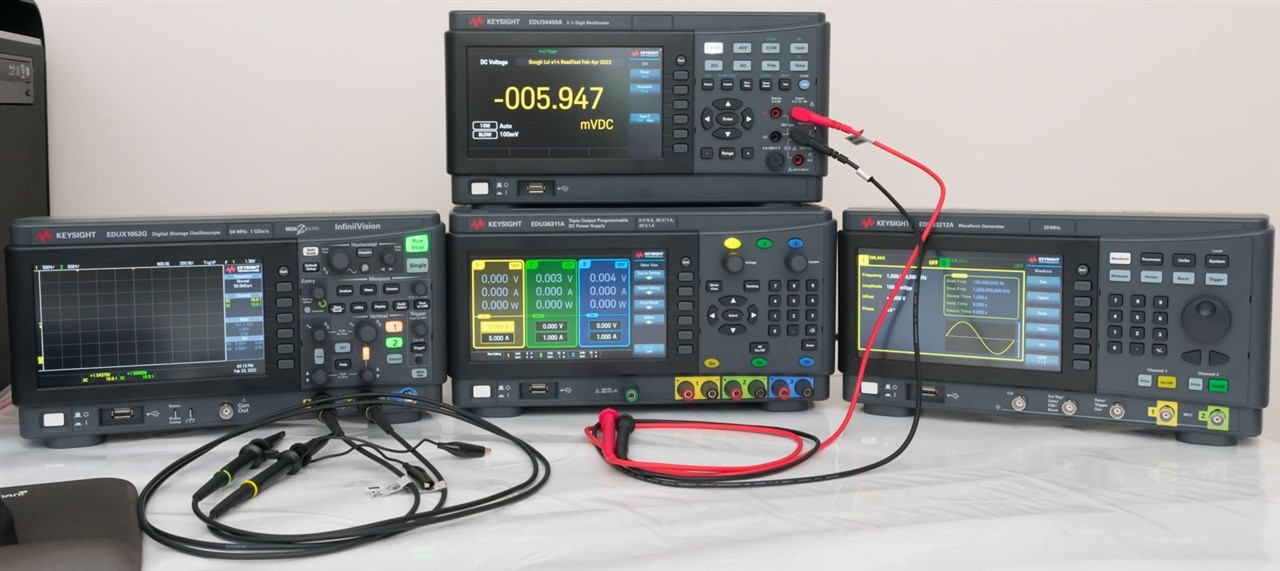
That being said, in many of the images, the Smart Bench Essentials kit can be seen to be stacked into a 2x2 grid arrangements, looking smart. In order to achieve this, the EDU190A Instrument Stacking Kit is required. At the point of publication, it lists for AU$154 including GST from element14 AU, but is subject to a multi-month backorder delay which would push its arrival past the end of the review timeline.
Being somewhat unsatisfied with this situation and lacking in bench space, I decided to use Tinkercad and my 3D printers to print a shelf that would take the place of the EDU190A.
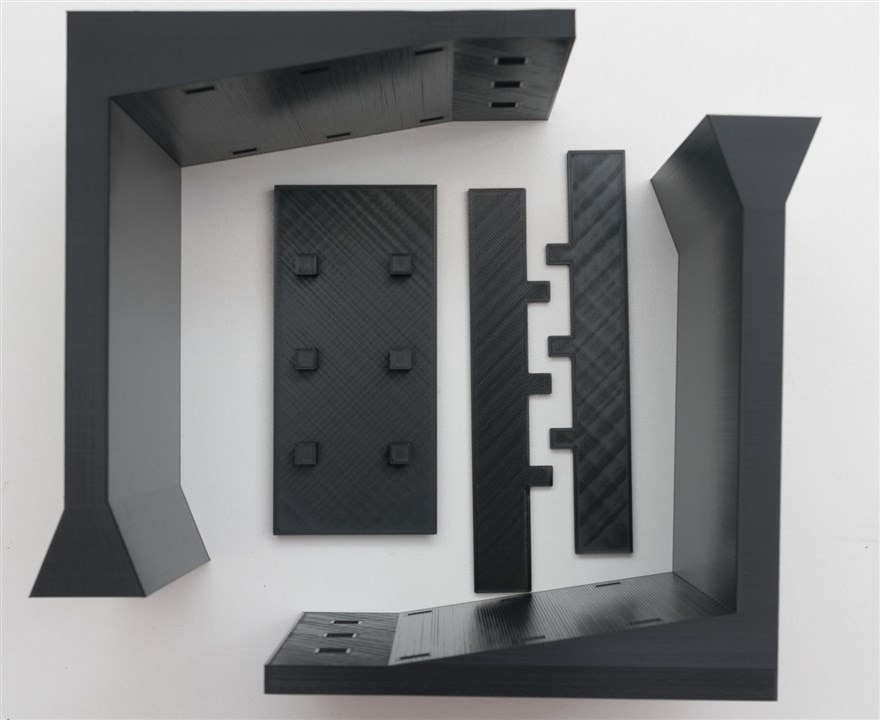
My initial design parts looked as above – the front retainer lip was later redesigned to reduce the height to avoid interfering with front panel jacks and remove sharp corners. Assembly used copious amounts of super glue (cyanoacrylate) resulting in the foggy appearance. Printing was at 100% infill except for the vertical large parts which were printed at 20% quarter-cubic infill. The design costs quite a bit of plastic, so I used the cheapest (AU$12/kg) PLA I could get my hands on. I still highly recommend the purchase of the EDU190A stacking kit where it is available simply because it is neater, stronger and designed to be used with the Smart Bench Essentials.
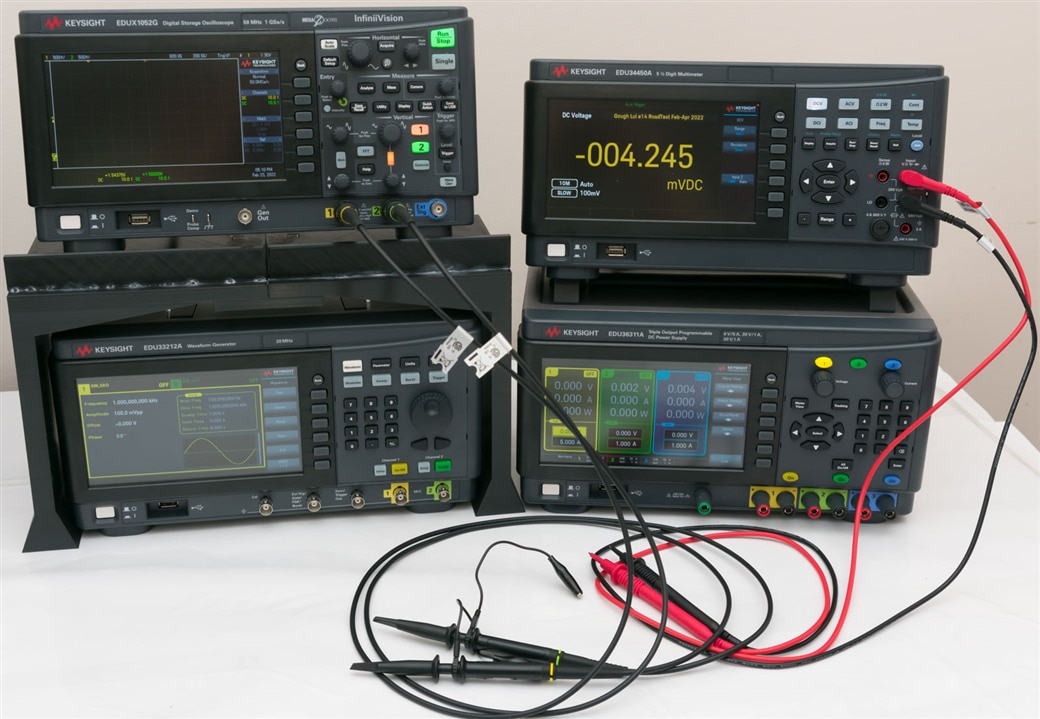
Being able to stack the instruments makes a significant difference to the instrument footprint on the bench and is definitely recommended. This does, however, remind us that integrating these instruments in a phased approach into a bench that has mainly “rectangular” stackable instruments may involve the need for some creative solutions to ensure bench space is conserved.
Probe Labelling & Frequency Compensation
As with every oscilloscope that comes in with a 10:1 probe, it’s important to label each probe using the coloured snap rings to match them to a given channel.
Then, by using the 1kHz square wave signal, the compensation trimmer needs to be adjusted to ensure that the wave has a “flat” top so as not to be over- or under-compensated which would affect your results.
This process was relatively quick, as I tested each probe only to find that the compensation seemed spot-on out-of-the-bag which is excellent, especially as I’ve encountered many labs where no care is taken to match probes or to properly compensate them prior to use.
PC Connectivity
In order to take full advantage of the Smart Bench Essentials kit, it is important to be able to connect them to a PC of some sort.
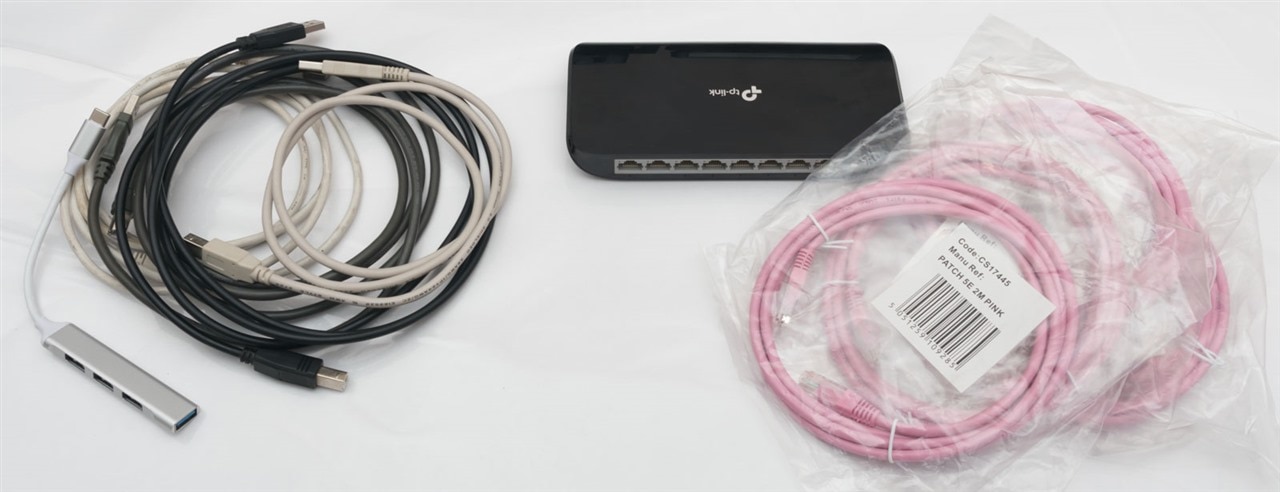
For this, you have two choices – either you use USB which means providing your own USB-A to USB-B cables and a USB hub in case you have insufficient ports on the intended computer. Or alternatively you can use Ethernet to connect them to a network using Cat5 or higher 8p8c (RJ-45) cables, perhaps using an Ethernet switch in case of not having sufficient ports.
The use of USB means a more direct means of connection with usually higher levels of performance due to lower latency. However, this option gives up the possibility of using the instrument’s web-based remote front-panel capabilities and also may make it less convenient to centrally manage the instruments without Keysight’s special tools.
Using Ethernet means that the instruments could potentially be shared around between benches or even across labs – the network is the limit. It does, however, open up potential cybersecurity concerns and may require additional support from IT departments to approve, properly provision ports, avoid potential network loops which could cause outages and ensure the correct security settings are in place. Compared to USB, Ethernet usually has higher latency, but this is not usually critical for non-demanding applications.
Installing the right BenchVue
It might not be initially apparent why I’ve been emphasising PathWave BenchVue Individual Apps over Keysight BenchVue Platform, but the fact both are called BenchVue has led to some confusion during this review process.
The Keysight BenchVue Platform looks like this –
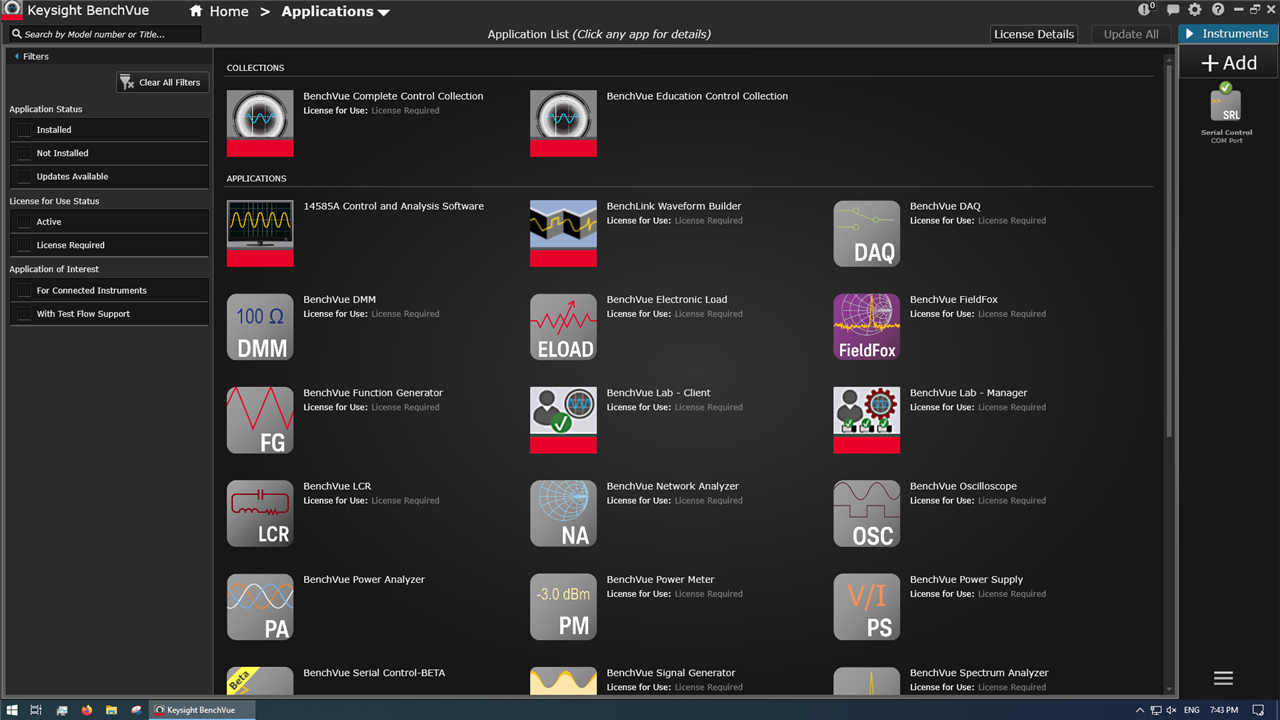
It is one integrated environment featuring multiple apps within it that can support many different models of Keysight instruments. This is what I traditionally have known to be BenchVue and is a hefty multi-gigabyte download in itself.

Imagine my confusion when I had installed it only to find two of the four instruments showing up as unsupported, and only one of the two instruments which appear supported actually worked.
The reason is that the Keysight BenchVue Platform with version 2020.x is now considered old, being replaced by the Keysight PathWave BenchVue Individual Apps instead which have versions beginning with 2021 or newer.
For the Smart Bench Essentials, this means you need to install:
- BV0001B PathWave BenchVue Digital Multimeter App
- BV0002B PathWave BenchVue Function Generator App
- BV0003B PathWave BenchVue Power Supply App
- BV0004B PathWave BenchVue Oscilloscopes App
Each of the installers may seem small initially, however, they are stub installers which will survey your system for installed elements …

… and then start to download the various packages necessary to complete your install. This process eventually involved multiple gigabytes of further downloads, through which I did experience one or two time-outs that necessitated restarting the download (as it doesn’t seem to support resumption). This could pose a challenge in places with unreliable connectivity.

If you open the app and find the PathWave branding, congratulations, you’ve got the right BenchVue!

At this time, these individual apps do not yet integrate with TestFlow, which is the reason why I was not able to evaluate TestFlow integration in the way I had originally proposed. However, I have been advised by Keysight that they are very much working towards a future release of these apps which support TestFlow integration, however, this may require you to also have the older Keysight BenchVue Platform installed to gain access to TestFlow until it becomes a standalone app of its own. As a result, to have a fully functional install may consume quite a bit of bandwidth and disk space.
Updating Instrument Firmware
Having ironed out PathWave BenchVue, it’s probably time to upgrade the instrument firmware. You can think of this as the embedded software on the instrument itself. Upgrades usually provide improved functionality and resolve issues. In my case, all instruments had firmware upgrades applicable which can be downloaded from the support section of each instrument’s webpage.
For all instruments except the oscilloscope, the upgrade should be initiated from the computer using the Keysight Basic Firmware Update Utility.
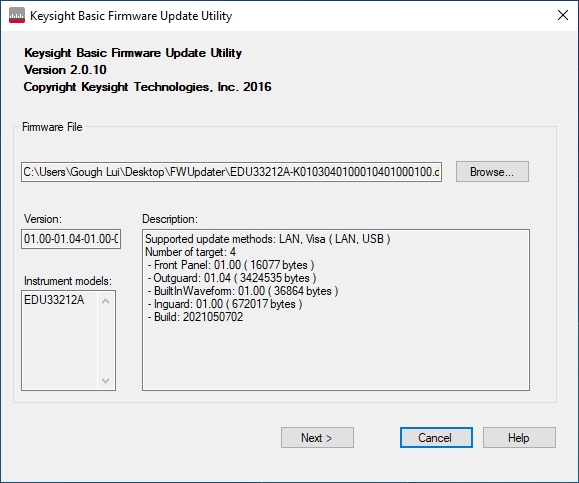
The process begins with selecting the firmware update .dfu file.
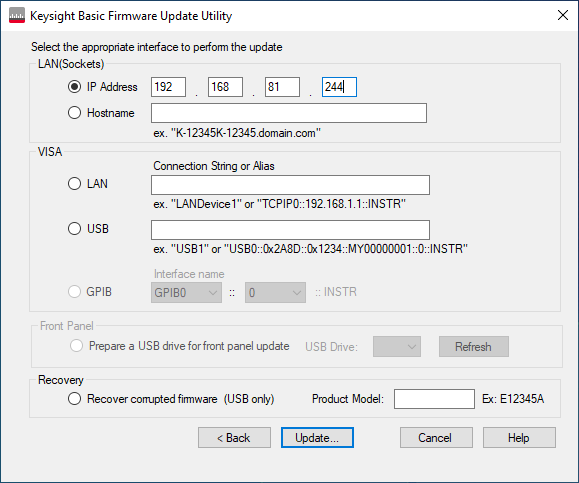
The target then needs to be specified.
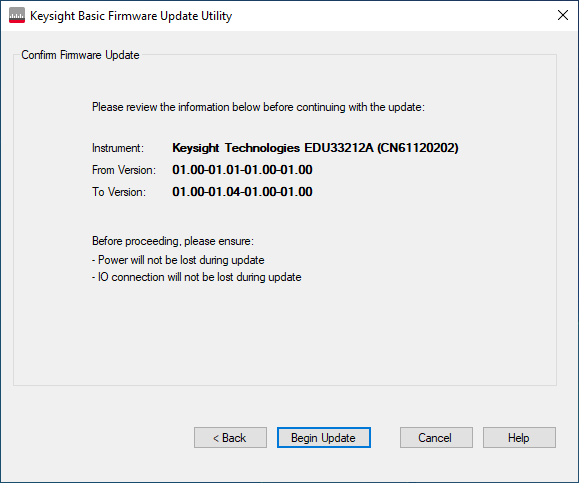
The process can then be started …
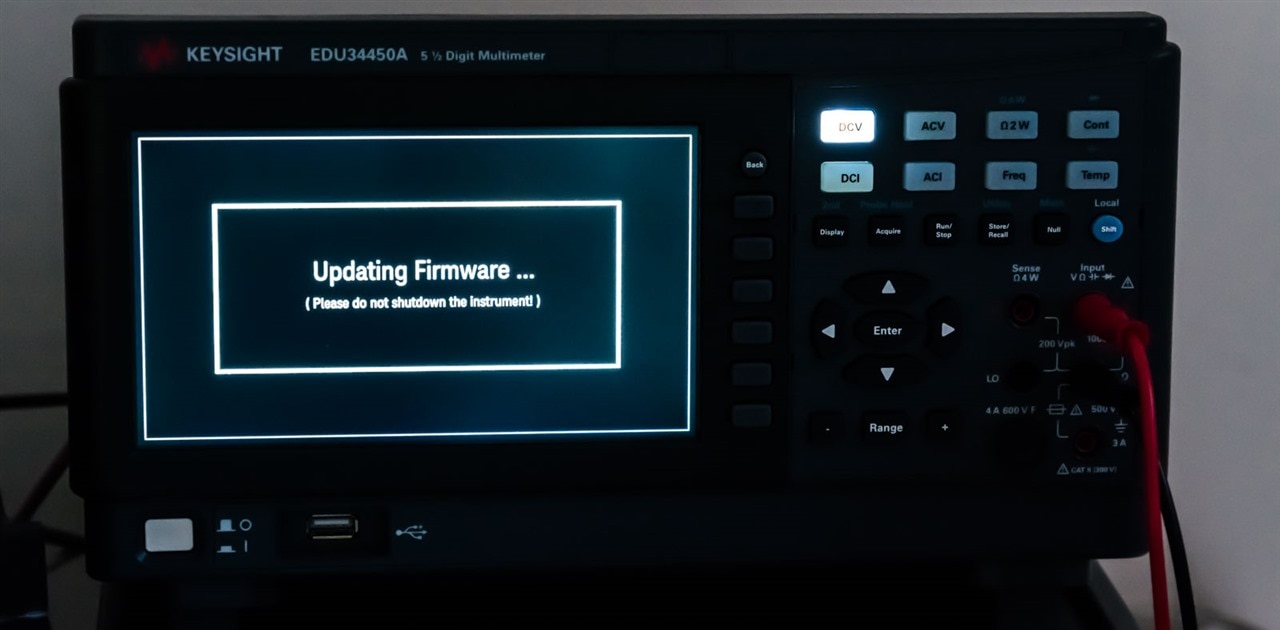
… which will then have the instrument put into the firmware update mode.
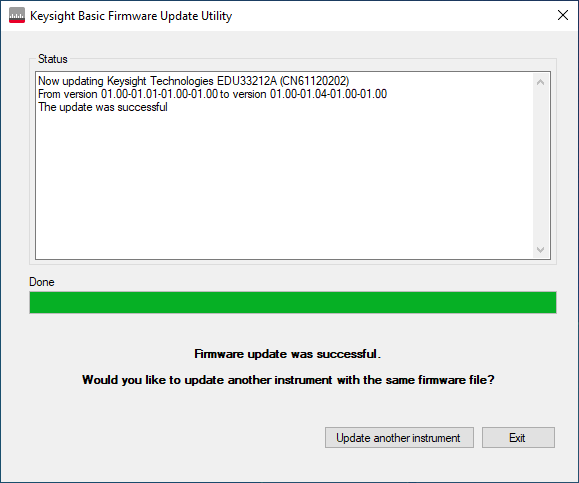
After a few minutes, the process should complete and the instrument firmware would be updated.
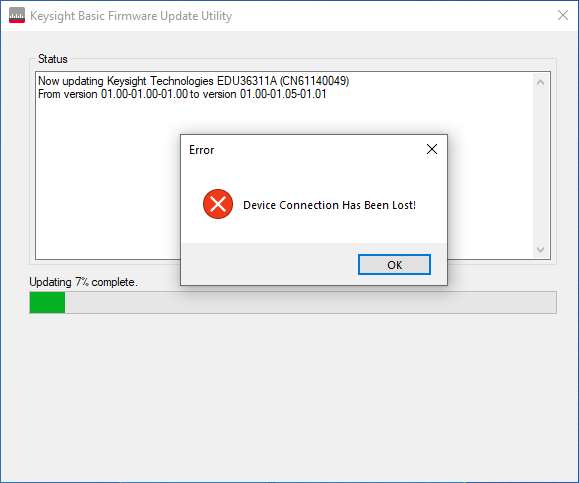
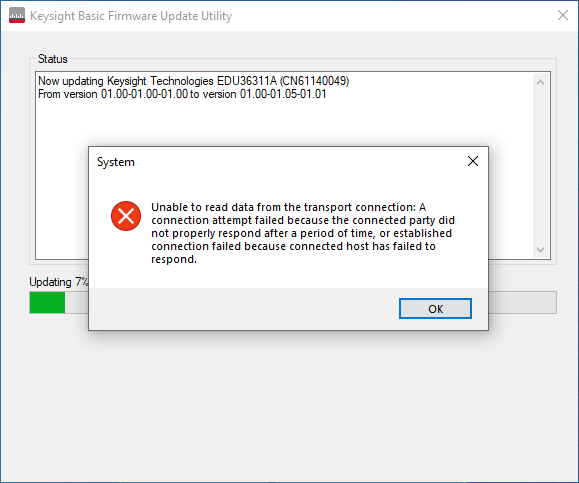
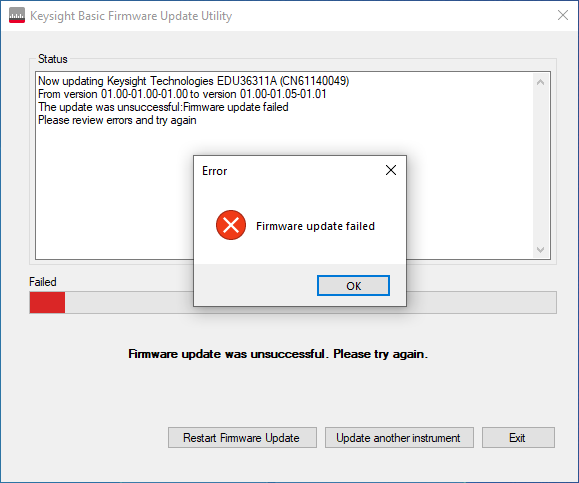
However, the process is a little more complicated than it needs to be as at the time of the review, the power supply’s webpage linked to an older version of the update utility which does not work –


Luckily, no harm came to the instrument. Using the latest V2.0.10, I did encounter instability updating the power supply, but after a few attempts, it did complete successfully –
Should firmware updating not be successful, there is also a recovery bootloader process which can be initiated using a USB flash drive in the front-panel, but I did not want to resort to this method in case I were to be loading an invalid firmware by force, which could result in an instrument that has to be returned for service.
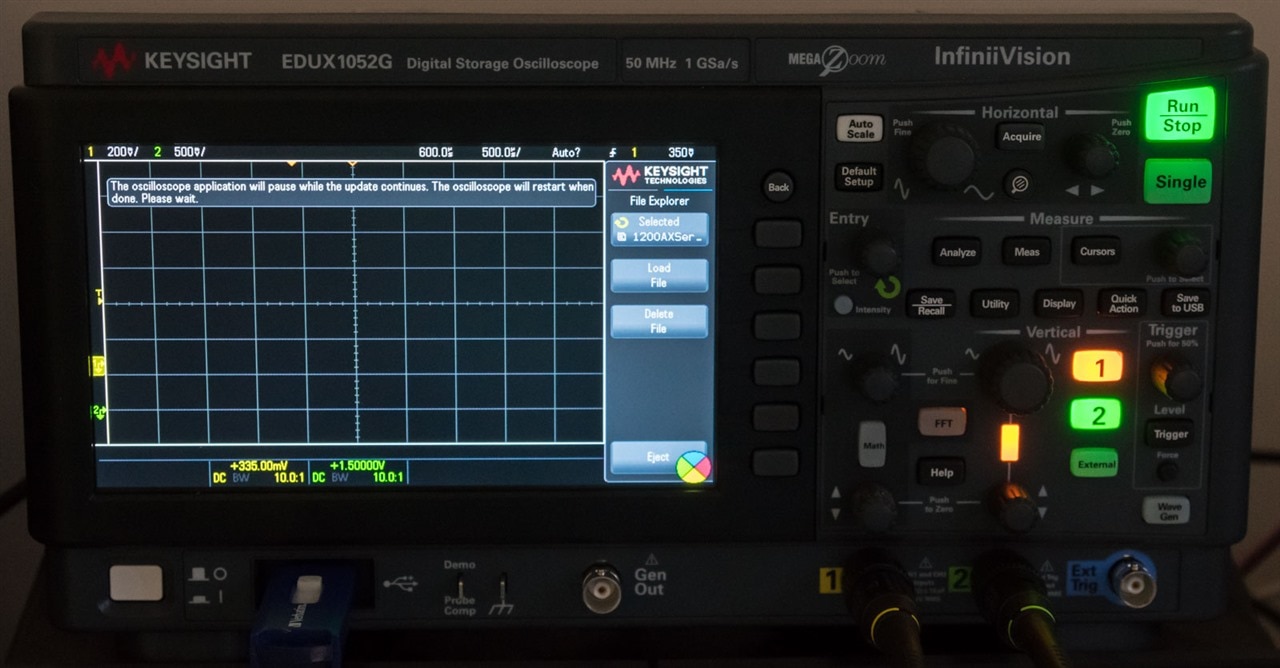
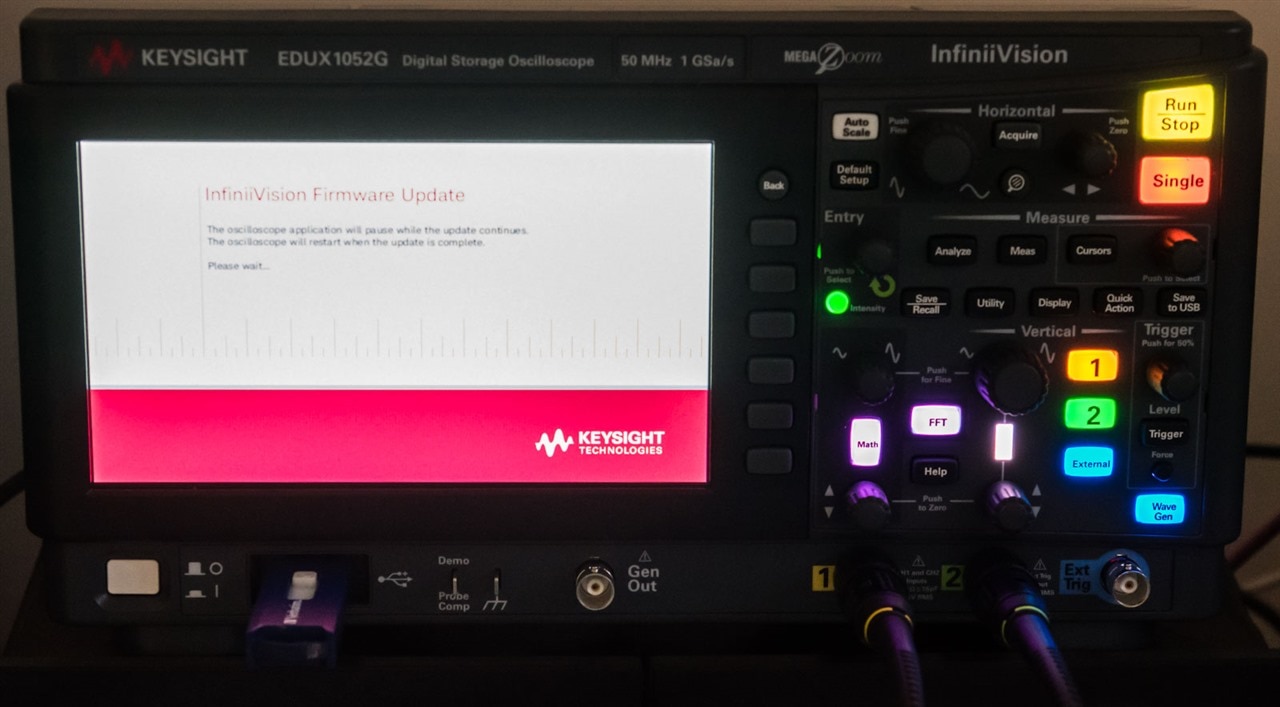
The oscilloscope, based on a separate platform, distributes its firmware updates as .ksx files that are to be loaded from the file browser on the front panel.
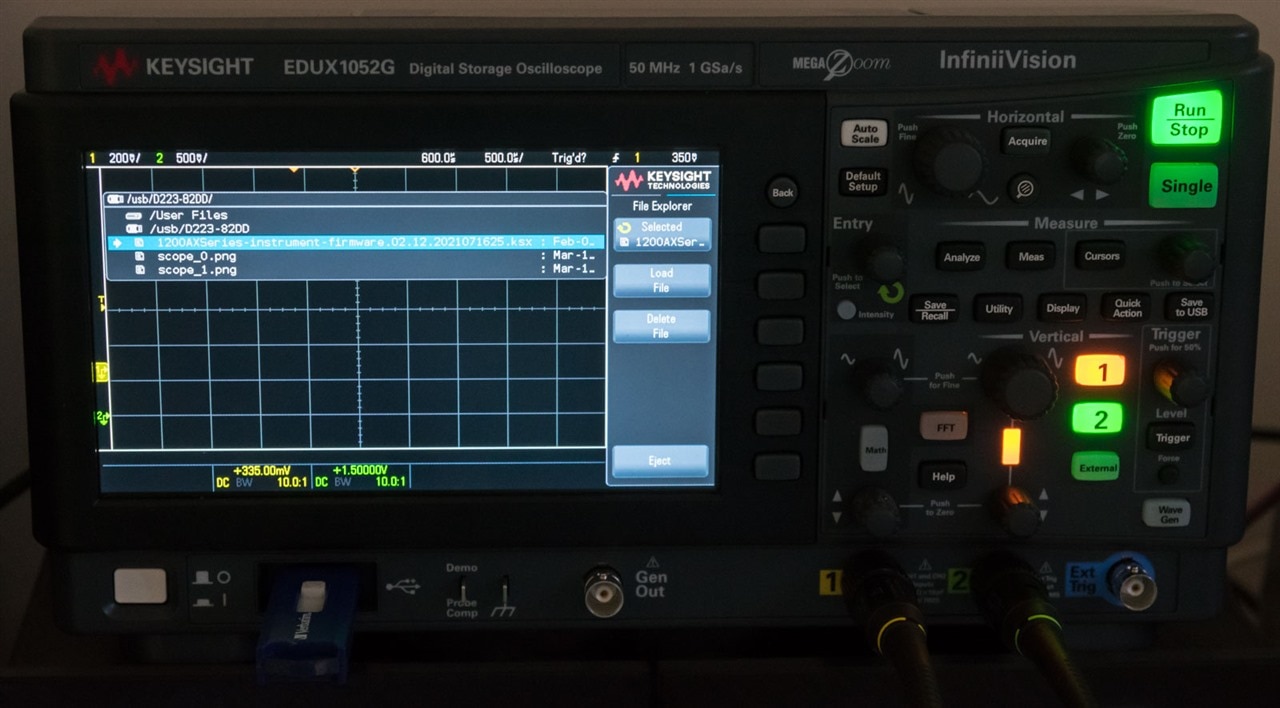
Once the file is selected and a firmware update is confirmed, it will load the file and the screen will change as the update is applied.
A second update may be required in case you wish to use the VNC-based remote front panel on the oscilloscope, as a matching VNC server software needs to be installed using the same method.
Unfortunately, as I was not licensed for the lab management features, I was not able to evaluate whether the firmware updates could be centrally and automatically applied, especially given the difference with the oscilloscope compared to the other devices. This would be a great convenience, especially if you imagine a fleet of 30-or-so sets of instruments in an ordinary electronics lab.
Documentation
Documentation regarding the Smart Bench Essentials kit could have been improved. While the concept is well communicated, some of the finer points listed inside their FAQ document were not precisely communicated leading to misconceptions. The text seemed to indicate that all instruments could be integrated on one interface which led me to expect them to be supported by Keysight BenchVue Platform rather than PathWave BenchVue Individual Apps, which was an incorrect deduction. Furthermore, it seemed to allude to the inclusion of lab management and remote learning features as part of the package, when it seems to be a separately licensed option. In some other documentation, the presence of courseware seemed to be alluded to, however, aside from the publicly available Keysight University content, I have not identified any Smart Bench Essentials-specific courseware at this time. I have provided this feedback to Keysight and they are looking to improve communication around this.
Documentation specific to instruments maintained the high standard set by Keysight, with separate datasheets, user manuals, programming manuals and associated maintenance procedures. I found this documentation relatively complete and easy to use, although at times, cross-referencing was necessary. They are available for download from Keysight’s website, although their insistence on collecting my e-mail address and name on a repeated basis does get annoying quickly.
Conclusion
To ready the Smart Bench Essentials kit for use, a number of setup tasks must be performed. This includes configuring the mains voltage, which in the case of the power supply, also necessitated a fuse replacement due to different values used for different mains voltages. The next was to consider how to site the units on the bench, as the oscilloscope-like units do not stack well without the EDU190A Instrument Stacking Kit which was not provided and is available for AU$154 including GST but with a long lead time. Owing to restrictive bench space, I designed a simple 3D printed shelf to substitute for now, however, this does raise concerns in case of a partial bench upgrade as conserving bench space when mixing instruments of different form factors could be tricky. Labelling probe cables and adjusting the compensation trimmer is another task which is usually necessary, however, I found the probes already well matched out-of-the-bag which is a bonus.
To best make use of the connected nature of the kit, connection to a PC will be necessary. This can be achieved via USB which would necessitate the use of USB-A to USB-B cables and a USB hub in case there are insufficient ports. This would establish a low-latency, one-to-one connection, however, eschews the possibility of using the web-browser based remote front panel interface. Alternatively, Ethernet can also be used with four Cat5 or above 8p8c (RJ-45) cables and an Ethernet switch in case of insufficient ports. Such a configuration would make centralised configuration and updating easier, providing access to remote front panel functionalities through a web browser. However, such a configuration is necessarily more complex to provision and may require IT staff to be involved to approve, provision and meet cybersecurity best practices.
Installing the supporting software was also somewhat tricky as there are two BenchVues – the older Keysight BenchVue Platform and the newer PathWave BenchVue Individual Apps. Only the latter supports the Smart Bench Essentials instruments, necessitating the download of four separate apps - BV0001B PathWave BenchVue Digital Multimeter App, BV0002B PathWave BenchVue Function Generator App, BV0003B PathWave BenchVue Power Supply App, BV0004B PathWave BenchVue Oscilloscopes App. The downloads themselves will download all necessary dependencies which totals multiple gigabytes and seems vulnerable to connection interruptions. Unfortunately, the software do not yet have TestFlow integration which is expected to be released soon, however, the use of TestFlow in the future may also require the older Keysight BenchVue Platform to be installed alongside, increasing the size of the installation significantly.
Instrument firmware also needs to be updated using the Keysight Basic Firmware Update Utility from a computer. I noted the presence of an incorrect version of this tool on the Power Supply’s download page which led to firmware upgrade failures, however, no harm came about of this. Upgrading the power supply required multiple attempts while others were happy to take the upgrade first time. The oscilloscope is another exception, requiring firmware upgrades to be performed via front panel and separate updating of the firmware and the VNC server software. Due to a lack of licensing, I was not able to evaluate whether their mass firmware update utility would be able to perform all these upgrades automatically, unattended.
Documentation regarding the Smart Bench Essentials was found to be a bit imprecise and led to confusions regarding what to expect. Keysight are working to improve this. Documentation on the instruments, however, is top-notch and a pleasure to use with datasheets, user manuals, programming manuals and maintenance procedures all documented to a high standard.
---
This post is part of the Keysight Smart Bench Essentials RoadTest Review.
Direct links to detailed blogs:
- Keysight SBE In-Depth – Ch1: The Need for Smarter Benches?
- Keysight SBE In-Depth – Ch2: Unboxing^4 & Design Features
- Keysight SBE In-Depth – Ch3: Initial Setup & Documentation
- Keysight SBE In-Depth – Ch4: On-the-Bench User Experience
- Keysight SBE In-Depth – Ch5: Connected to the LAN
- Keysight SBE In-Depth – Ch6: PathWave BenchVue Oscilloscope, Power Supply, Digital Multimeter & Function Generator
- Keysight SBE In-Depth – Ch7: Keysight BenchVue Test Flow Automation
- Keysight SBE In-Depth – Ch8: Instrument Performance Tests
- Keysight SBE In-Depth – Ch9: Peeking Under the Covers


