


![]()
Hi all. Hope everyone is well.
This is the forth blog of my series of the Road Test for the AMD Xilinx Kria KV260 Vision AI Starter Kit .
The ultimate goal is to recognize my license plates and open the garage door automatically.
On this post, I'm going to do the same as in the third post, but using YOLOv7 .
Xilinx Kria KV260 supports deploying both YOLO and TensorFlow models for AI. That's why I've tried both . They have strengths and weaknesses and I'll try to explain that through my point of view.
Object Detection
Before we can have the KV260 recognizing license plates, we need to have a model ready so that we can deploy it there. The training and model creation are done in a desktop computer and then quantized for the KV260.
Quantized means transforming the model from used in a desktop computer with almost no constrains to work with a less powerfull device (edge devices) where memory, processor and power are restricted.
I've already talked about this in a previous post, from another project here on Element14's website. Read more here - /challenges-projects/design-challenges/pi-fest/b/blog/posts/songspire---tinyml
What is object detection ?
Object detection is a computer vision task that has seen massive improvement because of Machine Learning. It involves identiying and locating objects within an image or video and drawing bounding boxes around each object.
How does it work ?
A dataset of images that are annotated with bounding boxes and class labels for the objects we want to detect are used my a machine learning framework, such as TensorFlow, PyTorch or scikit-learn, to build and train a model to detect the objects.
When building a model, data is key. With more data, more accurate will the model be. The are always challenges when trying to build a model from scratch:
- Lack of data: It's time consuming to create a high-quality dataset that's ready to use. Further down you'll see how this is done and the time it takes. This is more true if the objects we're trying to detect are unsual.
- Data augmentation: objects can and will vary their appearence, shape, color and size. This is challenging for object dection models .
- Scale: objects size and perspective will vary from image to image. Consistency is key.
What can we do to overcame this ? Transfer learning
Transfer learning
Transfer Learning is a ML technique that uses pre-trained models as a starting point for a new detection task . We use an already trained model, insted of creating a new one from scratch, for building a new custom object detection model. This will save resources and time and will allow us to use the knowledge learned from a larger dataset that can help improve the performance of our model.
YOLO
YOLO (You Only Look Once) is a popular object detection model known for its speed and accuracy. It was first introduced by Joseph Redmon et al. in 2016 and has since undergone several iterations, the latest being YOLO v8.
Following a fundamentally different approach to object detection, YOLO achieved state-of-the-art results, beating other real-time object detection algorithms by a large margin.
While algorithms like Faster RCNN work by detecting possible regions of interest using the Region Proposal Network and then performing recognition on those regions separately, YOLO performs all of its predictions with the help of a single fully connected layer.
Methods that use Region Proposal Networks perform multiple iterations for the same image, while YOLO gets away with a single iteration.
YOLO v7, the latest version of YOLO, has several improvements over the previous versions. One of the main improvements is the use of anchor boxes.
Anchor boxes are a set of predefined boxes with different aspect ratios that are used to detect objects of different shapes.
Let's get started.
First create a directory to hold everything
mkdir yolov7CustomDetect
cd yolov7CustomDetect
Now, create a Python Virtual Environment
python -m venv yolov7cd
Activate the enviroment
source yolov7cd/bin/activate
Now, let's clone the Yolov7 repository
git clone https://github.com/WongKinYiu/yolov7.git
Let's enter the yolov7 direcotry
cd yolov7
And now, let's install all the requirements using pip
pip install -r requirements.txt
This will take a while
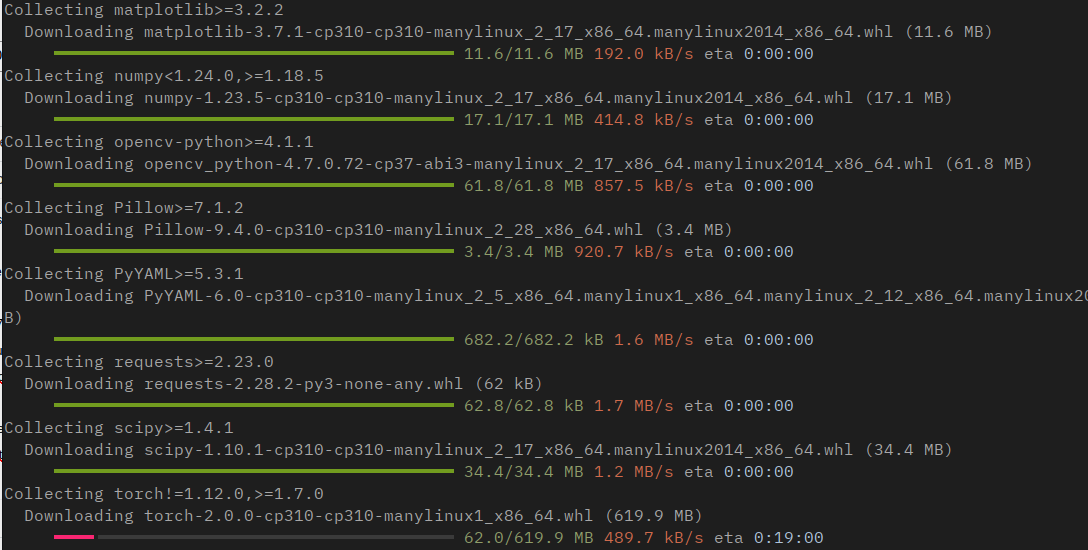
After a while, everything is installed
Next, we need data.
Dataset
I already have the images from the TensorFlow version, so I'm going to use those.
Inside the yolov7CustomDetect directory, let's create another one to hold all the data.
mkdir license_data
If you don't have the data already, I've taken the images of the license plates from Kaggle
https://www.kaggle.com/datasets/andrewmvd/car-plate-detection
This is a dataset with 433 images already annotated in PASCAL VOC format.
This dataset has the images with the license plates and a XML file with the same name.
Let's create a directory to hold our data
mkdir license_data
Download it and unzip it in the license_data directory
unzip archive.zip
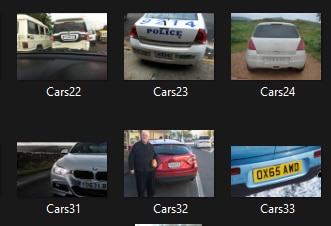
This should have created two directories: annotations and images
In the annotations directory, you should see the XML files that define the bounding boxes for each image (same filename, different extension).

In the images directory you'll see all the images with the license plates.
Convert Annotations
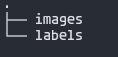
First, let's rename the annotations directory to labels
mv annotations labels
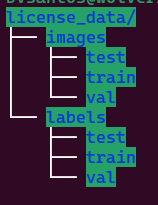
We now have the following structure inside the license_data
Next, let's convert the annotations
This XML files are annotated in PASCAL VOC format, whereas YOLO uses txt files and the content is simple text
Here's an example of an annotation in PASCAL VOC
<annotation>
    <folder>data_plus</folder>
    <filename>Cars433.jpg</filename>
    <path>/home/feiticeir0/data_plus/Cars433.jpg</path>
    <source>
        <database>Unknown</database>
    </source>
    <size>
        <width>640</width>
        <height>427</height>
        <depth>3</depth>
    </size>
    <segmented>0</segmented>
    <object>
        <name>licence</name>
        <pose>Unspecified</pose>
        <truncated>0</truncated>
        <difficult>0</difficult>
        <bndbox>
            <xmin>189</xmin>
            <ymin>133</ymin>
            <xmax>506</xmax>
            <ymax>228</ymax>
        </bndbox>
    </object>
</annotation>
The above code describes an annotation for image Cars433.jpg that has a dimensions of 640x 427 x 3. The class is specified by the name tag, whereas the details of the bounding box are represented by the bndbox tag. A bounding box is described by the coordinates of its top-left (xmin, ymin) corner and its bottom-right (xmax, ymax) corner.
The label file for YOLOv7 has the following format (i'm guessing it's same for all versions):
class x_center y_center width height
This is an example for the Cars433.txt label
0 0.543 0.423 0.495 0.222
0 is because we only have one label - licence - and the next 4 values are x_center, y_center width and height
The following image explains this very well:
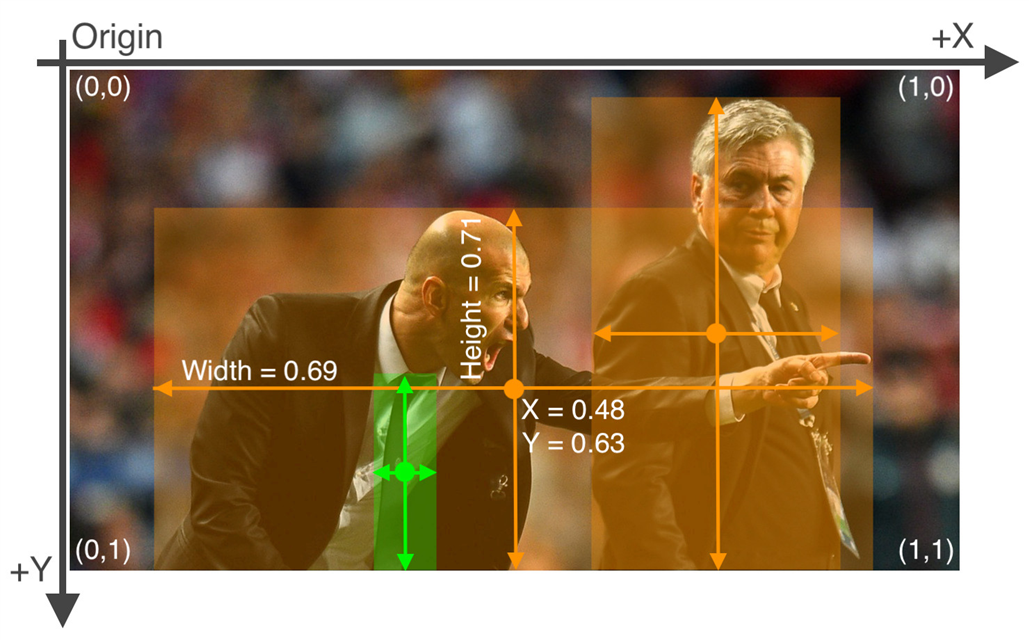
(image from https://blog.paperspace.com/train-yolov5-custom-data/)
Because we have the annotations in XML, let's convert them to the format YOLO expects.
Here's a script that will convert all the XML files to txt in the YOLO format
Taken from https://blog.paperspace.com/train-yolov5-custom-data/
In yolov7CustomDetect, create the following script
vi convert_xml_yaml.py
"""
Functions got form
https://blog.paperspace.com/train-yolov5-custom-data/

"""

import os
from tqdm import tqdm
import xml.etree.ElementTree as ET

# Dictionary that maps class names to IDs
class_name_to_id_mapping = {"licence": 0}
"""
class_name_to_id_mapping = {"licence": 0,
                           "stop": ,
                           "speedlimit": 2,
                           "crosswalk": 3}

"""


# Convert the info dict to the required yolo format and write it to disk
def convert_to_yolov5(info_dict):
    print_buffer = []

    # For each bounding box
    for b in info_dict["bboxes"]:
        try:
            class_id = class_name_to_id_mapping[b["class"]]
        except KeyError:
            print("Invalid Class. Must be one from ", class_name_to_id_mapping.keys())

        # Transform the bbox co-ordinates as per the format required by YOLO v5
        b_center_x = (b["xmin"] + b["xmax"]) / 2
        b_center_y = (b["ymin"] + b["ymax"]) / 2
        b_width    = (b["xmax"] - b["xmin"])
        b_height   = (b["ymax"] - b["ymin"])

        # Normalise the co-ordinates by the dimensions of the image
        image_w, image_h, image_c = info_dict["image_size"]
        b_center_x /= image_w
        b_center_y /= image_h
        b_width    /= image_w
        b_height   /= image_h

        #Write the bbox details to the file
        print_buffer.append("{} {:.3f} {:.3f} {:.3f} {:.3f}".format(class_id, b_center_x, b_center_y, b_width, b_height))

    # Name of the file which we have to save
    save_file_name = os.path.join(annotations_path, info_dict["filename"].replace("png", "txt"))

    # Save the annotation to disk
    print("\n".join(print_buffer), file= open(save_file_name, "w"))

# Function to get the data from XML Annotation
def extract_info_from_xml(xml_file):
    root = ET.parse(xml_file).getroot()

    # Initialise the info dict
    info_dict = {}
    info_dict['bboxes'] = []

    # Parse the XML Tree
    for elem in root:
        # Get the file name
        if elem.tag == "filename":
            info_dict['filename'] = elem.text

        # Get the image size
        elif elem.tag == "size":
            image_size = []
            for subelem in elem:
                image_size.append(int(subelem.text))

            info_dict['image_size'] = tuple(image_size)

        # Get details of the bounding box
        elif elem.tag == "object":
            bbox = {}
            for subelem in elem:
                if subelem.tag == "name":
                    bbox["class"] = subelem.text

                elif subelem.tag == "bndbox":
                    for subsubelem in subelem:
                        bbox[subsubelem.tag] = int(subsubelem.text)
            info_dict['bboxes'].append(bbox)

    return info_dict


annotations_path = 'yolov5/data/images/train'
# Get the annotations
annotations = [os.path.join(annotations_path, x) for x in os.listdir(annotations_path) if x[-3:] == "xml"]
annotations.sort()

# Convert and save the annotations
for ann in tqdm(annotations):
    info_dict = extract_info_from_xml(ann)
    convert_to_yolov5(info_dict)

annotations = [os.path.join(annotations_path, x) for x in os.listdir(annotations_path) if x[-3:] == "txt"]

print (annotations)
The only thing you must do is change the path in annotations_path to license_data/images/<test | train | val>
Run the script
python convert_xml_yaml.py
And you'll have all the XML files converted to txt in the correct format
In this case:
annotations_path = 'license_data/labels'
Let's run the script and convert all the xml files to txt
python convert_xml_yaml.py
If you go into the license_data/labels directory, you'll see the txt files alongside the xml ones
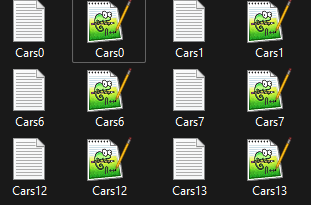
If you open a txt file (Cars0.txt), here's the content:

Great. We now have the labels in YOLO expected format. We can now remove the xml files.
This is the structure we have so far

Splitting the data
Let's now split the data into train, test and validation - 80%, 10% and 10%
Inside the images and labels directory, create three directories
mkdir {train,test,val}
We now have the following structure
Let's move files to the directories
We have 432 images (alongside the txt files) and this will be roughly:
Train - 80% - 345 files
Val - 10% - 43 files
test - 10% - 43 files
Since we're missing 1 file, let's add it to testing.
test - 10% - 44 files
Move manually the number of files - AND THE RESPECTIVE TXT FILES - to the directories
Remember: If we move the Cars100.png file to train, we must also move the Cars100.txt file to train . DON'T FORGET.
Im going to move from Cars0 to Cars344 to test, Cars345 to Cars388 to test and the remaining files to val
Training
The details for the dataset we want to train need to be defined and saved to a file.
Now we're ready to star training our custom dataset.
Create a file named license_plates.yaml (the name is at your discretion) in the license_data directory with the following content:
train: ../license_data/images/trainval: ../license_data/images/valtest: ../license_data/images/test#number classesnc: 1#classes namesnames: ['license']
This will set where to find the images, the number of classes (nc parameter), the class names (names parameter - the class name is in a list)
YOLO will expect to find the labels for the images on the same directory by replacing images with labels . Since we have the same structure, we don't need to change or add anything. YOLO will do it for us.
Hyperparameter config file
This file will help us define the hyperparameters for our network. We will use the default one that's located at yolov7/cfg/training. We're going to use the yolov7-tiny.yaml
Copy it to yolov7_license-tiny.yaml
cp yolov7/cfg/training/yolov7-tiny.yaml yolov7/cfg/training/yolov7_license-tiny.yaml
Edit it and just change the number of classes from 80 to 1 .
nc: 1

Next, the weights. For this, we're going to use yolo7-tiny weights. If you want to use none, just use --weights ' '
Let's download the file and put it on our yolov7CustomDetect directory
wget https://github.com/WongKinYiu/yolov7/releases/download/v0.1/yolov7-tiny.pt
And now, we're ready to get start training our model
cd yolov7
python train.py --epochs 100 --workers 8 --batch-size 32 --data ../license_data/license.yaml --img 640 640 --cfg cfg/training/yolov7_license-tiny.yaml --weights ../yolov7-tiny.pt --name yolo7License_plate --hyp data/hyp.scratch.tiny.yaml
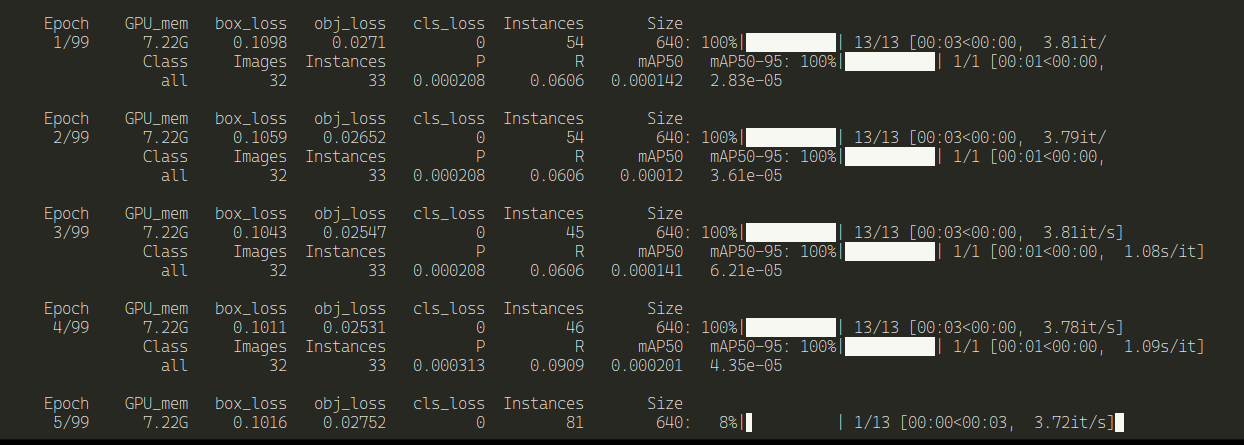
And it will start training .
Depending on your machine, this can take a while
Parameters:
- epochs : The number of training epochs. An epoch (iteration) is when the algorithm goes through all the samples.
- workers : How many processors it will use
- batch-size : the batch size
- data : YAML file containing information about the dataset
- cfg : model architecture
- weights : pretrained weights we want to start training from.
- hyp : the hyperparameter choices .
- name : the name used in the folder to save logs and other important files.
- img : define input image size
Yolo using the GPU it's really fast
Not using the CPU's, but using the GPU. The GPU temperature is rising and the GPU frequency is at maximum
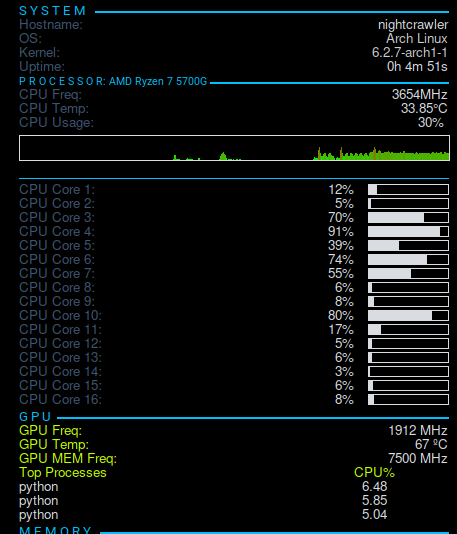
Using GPU of a NVIDIA RTX3060 with 12GB it took almost 8 minutes

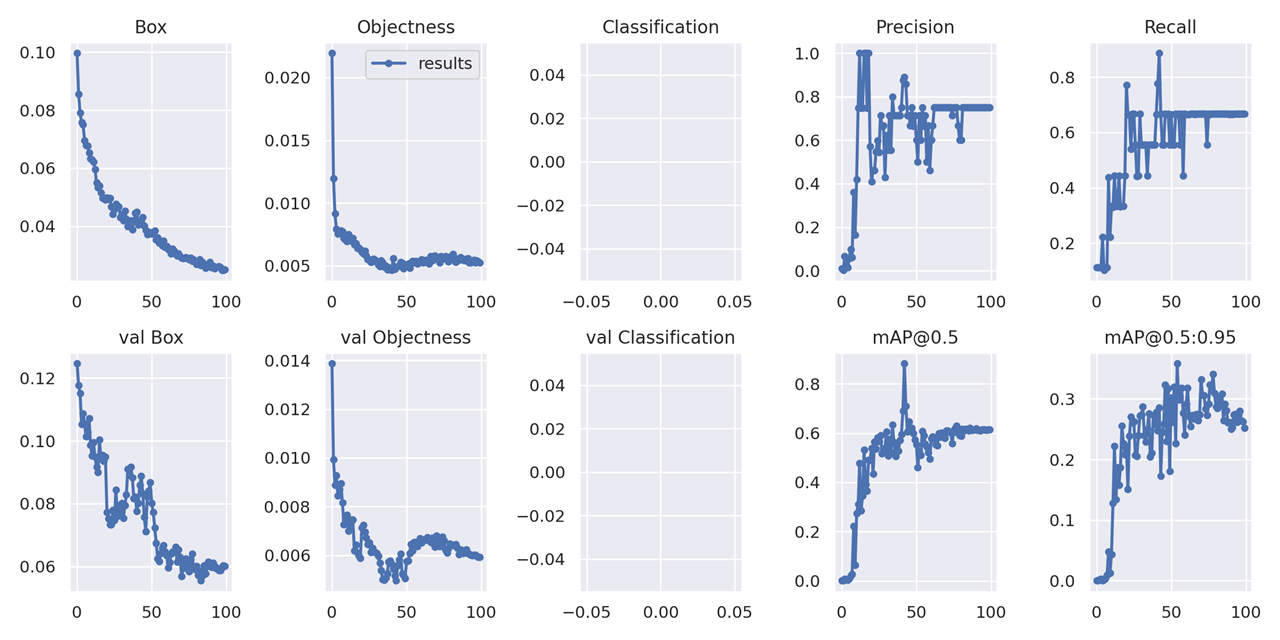
Here's some graphics created during the training phase
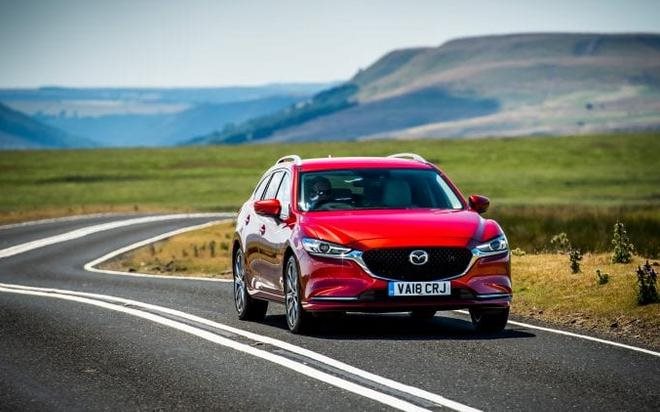
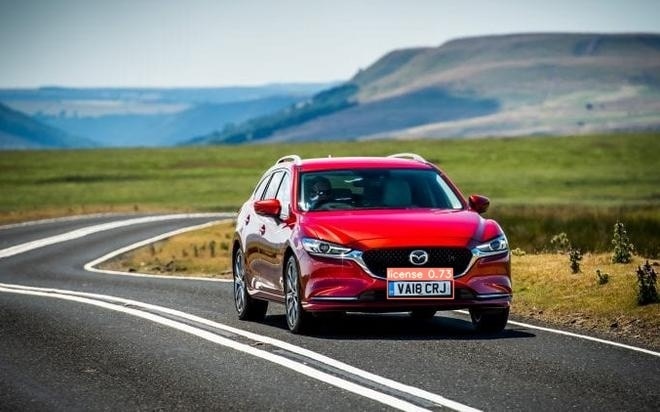
And some images

even small license plates, it did got it right.
Testing
Now, let's test the results
python test.py --weights runs/train/yolo7License_plate/weights/best.pt --task test --data ../license_data/license.yaml
Here's the result of testing


I'm confident on the results.
Let's run inference just for kicks.
Inference
In a traffic video of Bangkok from Pixbay
python detect.py --source ../license_data/Road_traffic2.mp4 --weights runs/train/yolo7License_plate/weights/best.pt --view-img
All the inference results are stored in yolo7customLicense/yolov7/runs/detect/exp?? - the ?? are incremented according to the times we run the inference.
We can also use an image as source.
python detect.py --source ../license_data/testImage1.jpg --weights runs/train/yolo7License_plate/weights/best.pt --view-img
Export
Because Vitis-AI supports Yolo, let's export the model to onnx format
python export.py --weights runs/train/yolo7License_plate/weights/best.pt --grid --end2end --simplify --topk-all 100 --iou-thres 0.65 --conf-thres 0.35 --img-size 640 640 --max-wh 640
For more information visit the github page.
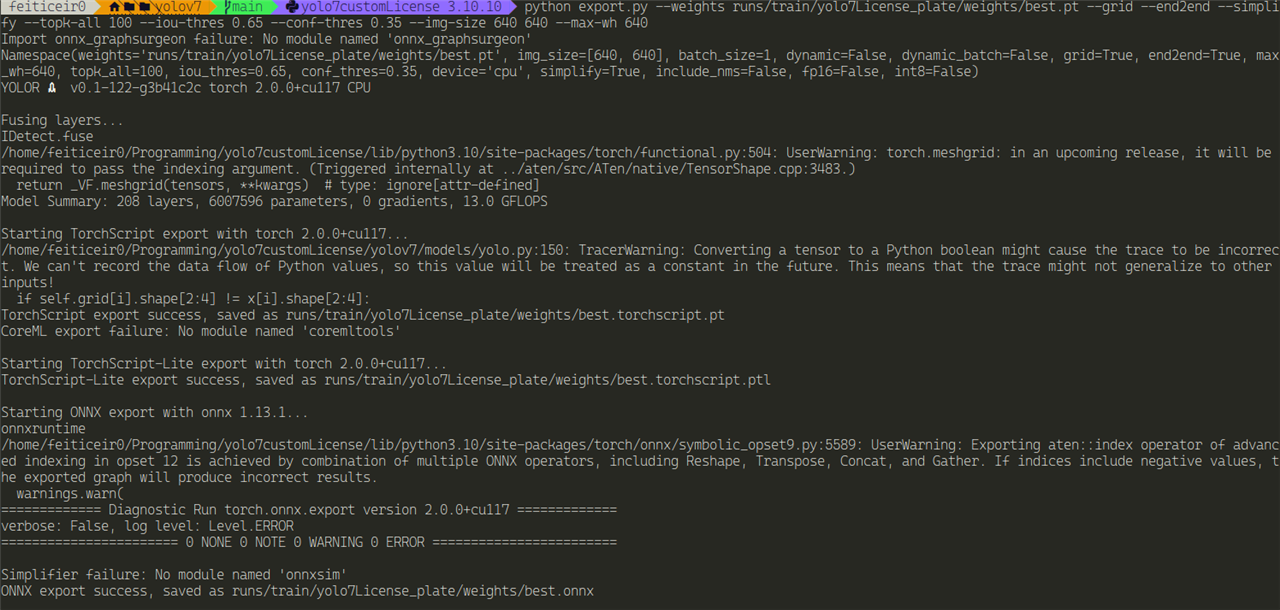
And all the files should be in our train/yolo7Licence_plate/weights
Convert to TFLite
We can convert a onnx file to TFLite if we want. The steps involve converting to TensorFlow and then converting to TfLite.
Let's install the converter
pip install onnx-tf tensorflow tensorflow_probability
Create a directory to hold the converted model
mkdir tfmodel
onnx-tf convert -i best.onnx -o tfmodel/
And you should have a message of success.
Now, inside the tfmodel you should have the pb model
Now, let's convert to TfLite
TfLite
Here's the code:
import tensorflow as tfconverter = tf.lite.TFLiteConverter.from_saved_model('tfmodel/')tflite_model = converter.convert()with open('tfmodel/yolov7_model.tflite', 'wb') as f: f.write(tflite_model)
Save the file and run it in the weights directory (where we have the tfmodel directory)
python convert_tflite.py
After it completes, you should have the file yolov7_model.tflite in the tfmodel directory
Conclusion
Training a YOLO model is much simpler than a Tensorflow one. Less preparation and less confusion. Let's now discover how to use this on the Xilinx KV260.
References
https://blog.paperspace.com/train-yolov5-custom-data/
https://learnopencv.com/fine-tuning-yolov7-on-custom-dataset/
https://learnopencv.com/yolov7-object-detection-paper-explanation-and-inference/
https://learnopencv.com/pothole-detection-using-yolov4-and-darknet/