


Intro
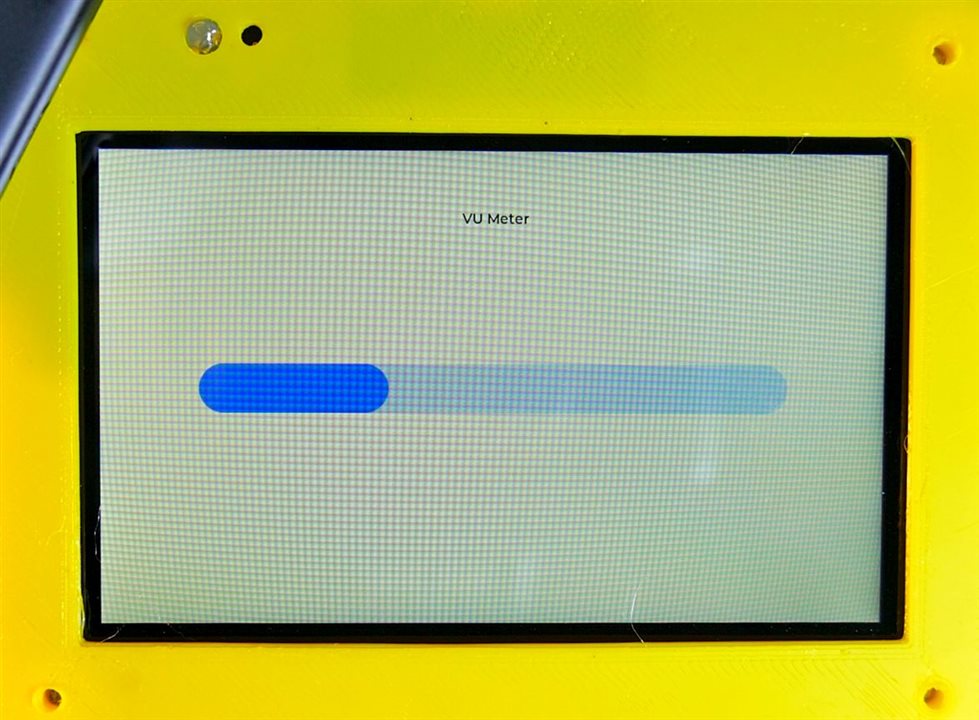
The Arduino GIGA R1 kit I am road testing has a display with built in microphone. To test the microphone I am starting with using it to create a VU meter (volume unit meter). All the hardware necessary for this VU meter is included in this plug-and-play kit. It just needed a little adaptation of some example firmware.
Here is a short video demonstrating VU meter capability:
VU Meter Video
This demo used the LVGL library (light and versatile graphics library). Unfortunately this instance of the library would not accept larger fonts, so the label is pretty small.
VU Meter Firmware
/*
  VU Meter - Arduino GIGA Display - Microphone Demo
  Requires PDM, Arduino_H7_Video and lvgl libraries
  Code modified from code provided by Arduino
  By Doug Wong 2025
*/

// Include libraries
#include <PDM.h>
#include "Arduino_H7_Video.h"
#include "lvgl.h"

// Create display object
Arduino_H7_Video Display(800, 480, GigaDisplayShield);

// Slider
static void set_slider_val(void *bar, int32_t val) {
  lv_bar_set_value((lv_obj_t *)bar, val, LV_ANIM_ON);
}

// Default number of output channels
static const char channels = 1;

// Default PCM output frequency
static const int frequency = 16000;

// Buffer to read samples into, each sample is 16-bits
short sampleBuffer[512];

// Number of audio samples read
volatile int samplesRead;

lv_obj_t *obj;
lv_anim_t a;
int micValue;
long tot = 0;
float av;

void setup() {
  // Initialize Display
  Display.begin();

  // Setup callback
  PDM.onReceive(onPDMdata);

  // Start PDM
  if (!PDM.begin(channels, frequency)) {
    Serial.println("Failed to start PDM!");
    while (1)
      ;
  }

  // Create the bar
  obj = lv_bar_create(lv_scr_act());
  lv_obj_set_size(obj, 600, 50);
  lv_obj_center(obj);
  lv_bar_set_value(obj, 500, LV_ANIM_OFF);

  // Create the animation for the bar
  lv_anim_init(&a);
  lv_anim_set_exec_cb(&a, set_slider_val);
  lv_anim_set_time(&a, 300);
  lv_anim_set_playback_time(&a, 300);
  lv_anim_set_var(&a, obj);

// add title
  create_title(lv_scr_act());

}

void loop() {

  // Wait for samples to be read
  if (samplesRead > 256) {
    micValue = 0;
    for (int i = 0; i < 129; i++) {
      if (micValue < sampleBuffer[i]) micValue = sampleBuffer[i];
    }
      int dv = micValue / 4 - 20;
      if (dv > 0) {
        micValue = 20 + dv/4;
      }
      else {
        micValue = 20 - 18 / micValue;
      }
      micValue = micValue;
      if (micValue > 500) {
        micValue = 500;
      }
      lv_anim_set_values(&a, 0, micValue);
      lv_anim_start(&a);

    // Clear the read count
    samplesRead = 0;
    delay(80);
  }
  lv_timer_handler();
}

// Callback function to process the data from the PDM microphone.

void onPDMdata() {
  // Query the number of available bytes
  int bytesAvailable = PDM.available();

  // Read into the sample buffer
  PDM.read(sampleBuffer, bytesAvailable);

  // 16-bit, 2 bytes per sample
  samplesRead = bytesAvailable / 2;
}

void create_title(lv_obj_t *parent) {
  // Create a label
  lv_obj_t *label = lv_label_create(parent);

  // Set the label text
  lv_label_set_text(label, "VU Meter");

  // Set a large font (make sure the font is available in your project)
  lv_obj_set_style_text_font(label, &lv_font_montserrat_14, LV_PART_MAIN);

  // Align the label to the top center of the screen
  lv_obj_align(label, LV_ALIGN_TOP_MID, 0, 60); // 60 pixels from the top
}
Spectrum Analyzer
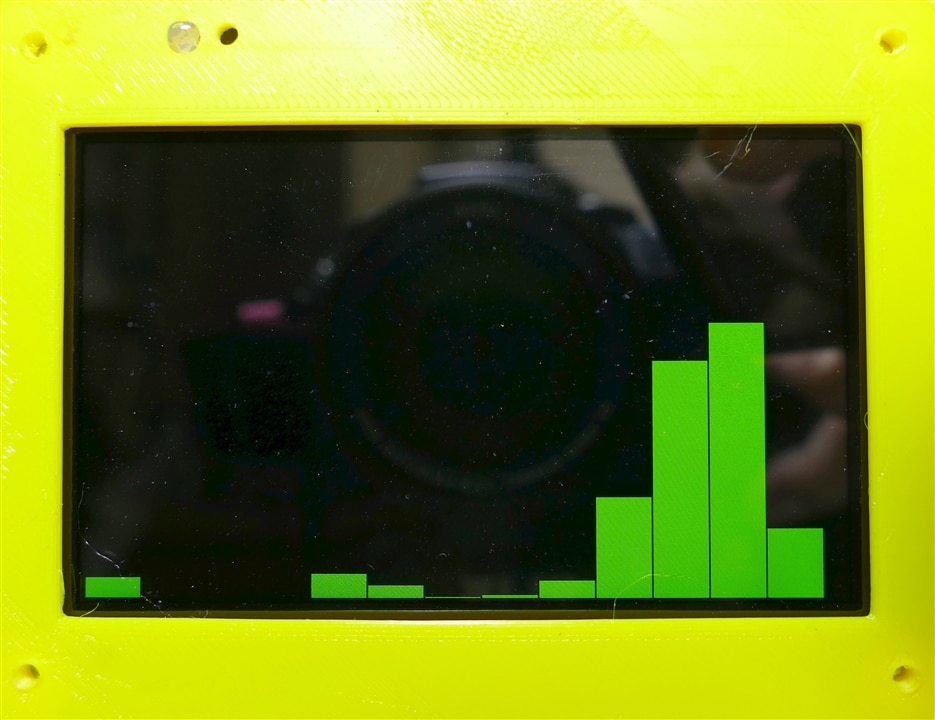
Another microphone application I want to demonstrate is an audio spectrum analyzer, because the kit has all the hardware as well as the computing horsepower needed.
Here is an even shorter video demonstrating a simple spectrum analyzer:
Spectrum Analyzer Demo Video
The green bars are showing up as white in the video. The software is a long way from good, but the objective is to show that the hardware is capable.
Spectrum Analyzer Firmware
/*
	Example of an audio spectrum analyzer display using the Arduino Giga Display and its microphone
  by Doug Wong 2025
  This program uses th FFT library by Enrique Condes
*/

#include "Arduino_GigaDisplay.h"
#include "arduinoFFT.h"
#include "Arduino_GigaDisplay_GFX.h"
#include <PDM.h>

GigaDisplay_GFX display; // Create the display object

#define SAMPLES 128           // Number of audio samples
#define BARS 16               // Number of spectrum bars
#define SAMPLING_FREQUENCY 16000  // Hz
#define GREEN 0x07E0
#define BLACK 0x0000
#define BLUE 0x001E

/*
These values can be changed in order to evaluate the functions
*/
const uint16_t samples = 128; //This value MUST ALWAYS be a power of 2
const double signalFrequency = 1000;
const double sampleFrequency = 16000;
static const int frequency = 16000;
static const char channels = 1;
const uint8_t amplitude = 100;
// static const int channels = 1;

short sampleBuffer[samples];

double vReal[samples];      //audio samples array
double vImag[samples];      //spectrum amplitudes
int iBar = SAMPLES / BARS;  //number of data points per bar
int barWidth = 2 * display.width() / BARS;  //number of pixels per bar
int barHeight;
int BarAmp;

int bytesAvailable = 128;   //in microphone buffer

/* Create FFT object */
ArduinoFFT<double> FFT = ArduinoFFT<double>(vReal, vImag, samples, sampleFrequency);

#define SCL_INDEX 0x00
#define SCL_TIME 0x01
#define SCL_FREQUENCY 0x02
#define SCL_PLOT 0x03

void setup()
{
  delay (400);
 // Serial.begin(115200);
  display.begin();
  display.setRotation(1);
  PDM.setBufferSize(samples);
  delay (400);
  display.fillScreen(BLACK);
  PDM.onReceive(onPDMdata);
    // Start PDM microphone
  if (!PDM.begin(channels, frequency)) {
    //Serial.println("Failed to start PDM!");
    while (1)
      ;
  }
}

void loop()
{
//  PDM.read(sampleBuffer, bytesAvailable);
  for (int i = 0; i < SAMPLES; i++) {
    vReal[i] = sampleBuffer[i];
    vImag[i] = 0.0;
  }

  FFT.windowing(vReal, samples, FFT_WIN_TYP_HAMMING, FFT_FORWARD);	/* Weigh data */
  FFT.compute(vReal, vImag, SAMPLES, FFT_FORWARD); /* Compute FFT */
  FFT.complexToMagnitude(vReal, vImag, SAMPLES); /* Compute magnitudes */

// Draw spectrum bars
  for (int i = 0; i < BARS; i++) {
    BarAmp = 0;
    for(int j = 0; j < iBar; j++) {
//       if (BarAmp < vImag[i * BARS + j]) BarAmp = vImag[i * BARS + j];
      BarAmp = BarAmp + vImag[i * BARS + j];    // total amplitude in each bar
    }
    if (i == 8) BarAmp = BarAmp / 20;           // to reduce an anomolously high bar
    BarAmp =  BarAmp / BARS;                    // average amplitube in this bar
    barHeight = BarAmp / 16;                    // adjustment for overall volume
    if (barHeight > display.height()) barHeight = display.height();
    display.fillRect(i * barWidth, 0, barWidth - 2, display.height() - barHeight, BLACK);
    display.fillRect(i * barWidth, display.height() - barHeight, barWidth - 2, barHeight, GREEN);
  }
  delay(80);
}

void onPDMdata() {
  // query the number of bytes available
  int bytesAvailable = PDM.available();

  // read into the sample buffer
  int bytesRead = PDM.read(sampleBuffer, bytesAvailable);

  // 16-bit, 2 bytes per sample
  int samplesRead = bytesRead / 2;
}
Discussion
The Arduino Giga kit has so many features these applications can be implemented with no extra hardware. The VU meter uses the MCU, the PDM microphone and the Giga Display. The Spectrum analyzer uses the same set of hardware but also uses the arduinoFFT library. This GIGA and display kit not only allows an extensive array of applications to be implemented with little or no extra hardware, the fact that so many features are built-in allows standard demo software to be developed that does all the heavy lifting in making features work together. This kit by itself could be the basis for an extensive course on microcontrollers.
Links:
Touch Screen and USB memory demo
GIGA display of an Arducam video camera


