


|
shabaz designed a development kit for the recent Texas Instruments MSPM0 microcontroller series.
|
Required hardware and software
- EasyL1105 kit, with headers soldered to the programmer interface J5
- a version of Code Composer Studio that supports MSPM0. I use ccstudio 20
- a ccstudio and MSPM0 compatible debugger. I use TI's XDS110
Software install
You only need to install ccstudio. And that's lighter than what it used to be in the Eclipse days. Current versions are based on VS Code. When asked, you only need to select one device family: MSPM0. That's it. There will be other requirements, but they are installed on demand when needed.
Hardware install
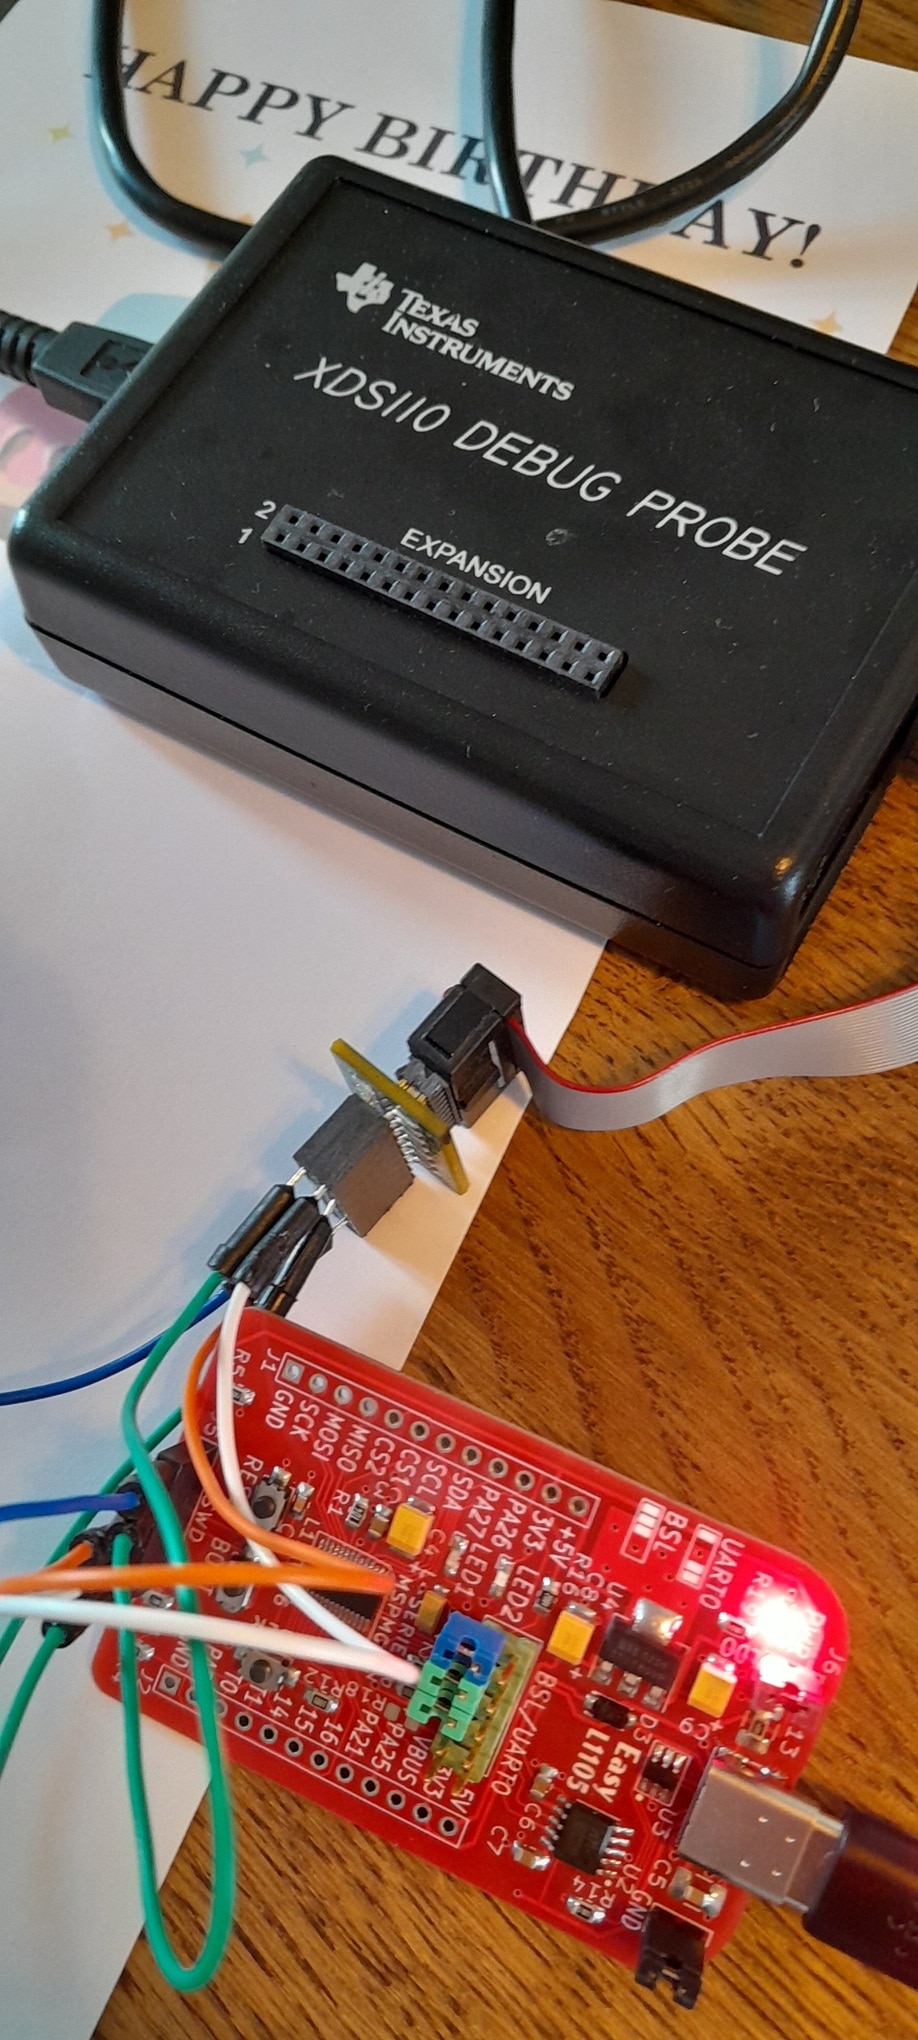
Most TI debuggers have a TI specific 14 pin connector. I used that one, and connected the necessary signals to the debug connector of the kit:
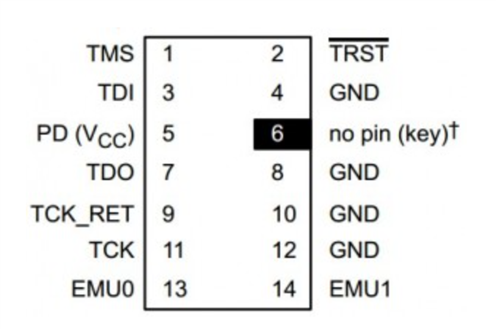
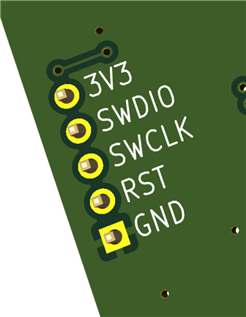
image source: TI forum and EasyL1105: A Dev Board for the TI ARM Cortex-M0+ L-Series
| TI 14pin | EasyL1105 |
| 1 SWDIO/TMS | 4 SWDIO |
| 2 TRSTn | 2 *RST |
| 5 VTREF (sense) | 5 +3V3 |
| 8 GND | 1 0V |
| 11 SWCLK/TCK | 3 SWCLK |
Power for the EasyL1105 comes from its own USB, so mount PWR and GND. In this first test, I don't use the USB data lines. Remove all jumpers from the BLS/UART J3.

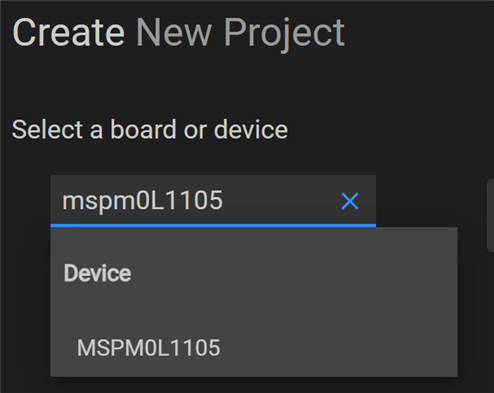
First project
Start ccstudio, and create a new project. Select the mspm0L1105 device:
The only available template is the "empty" example. Let's use it.
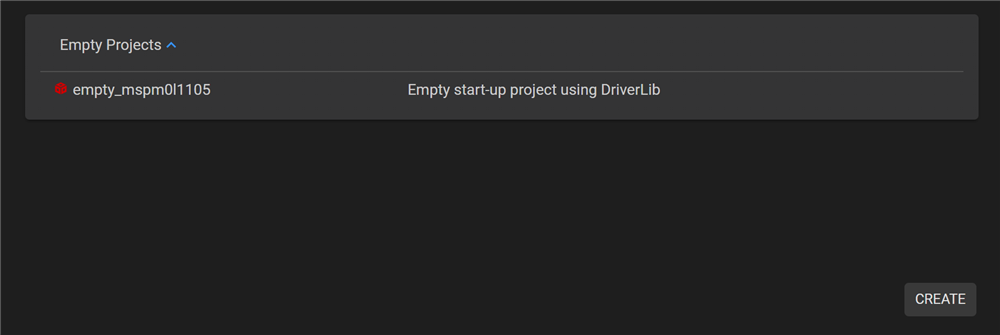
Press CREATE. ccstudio will now download the MSPM0 SDK for you. When all is done, the project opens in the configurator view:
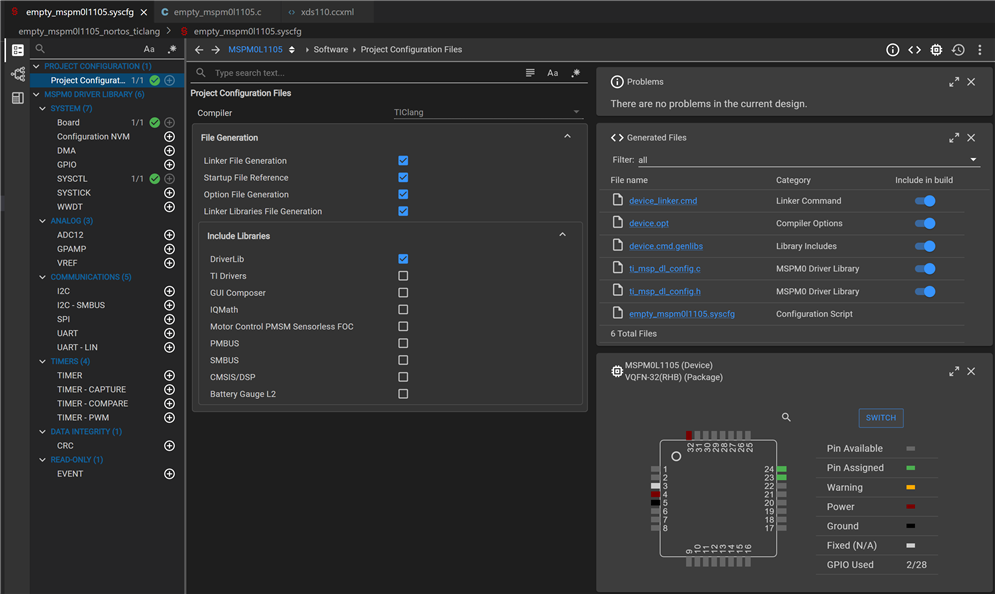
The controller type is correct. Just change the package to VSSOP-28(DGS28) via the SWITCH button.
We don't need to change anything else. We 'll use GPIO only, and that's already enabled by default in the config.
The example does nothing at all. Let's replace its code by shabaz ' demo code for the board. Open empty_mspm0l1105.c.
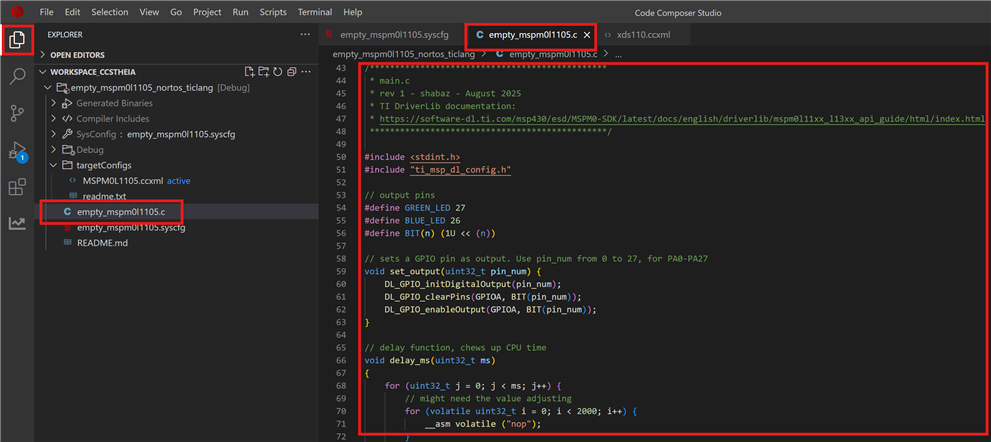
Replace the content by the kit's example code, available on github. This code is a double! blinky. It 'll blink the two user LEDs.
Program and Debug
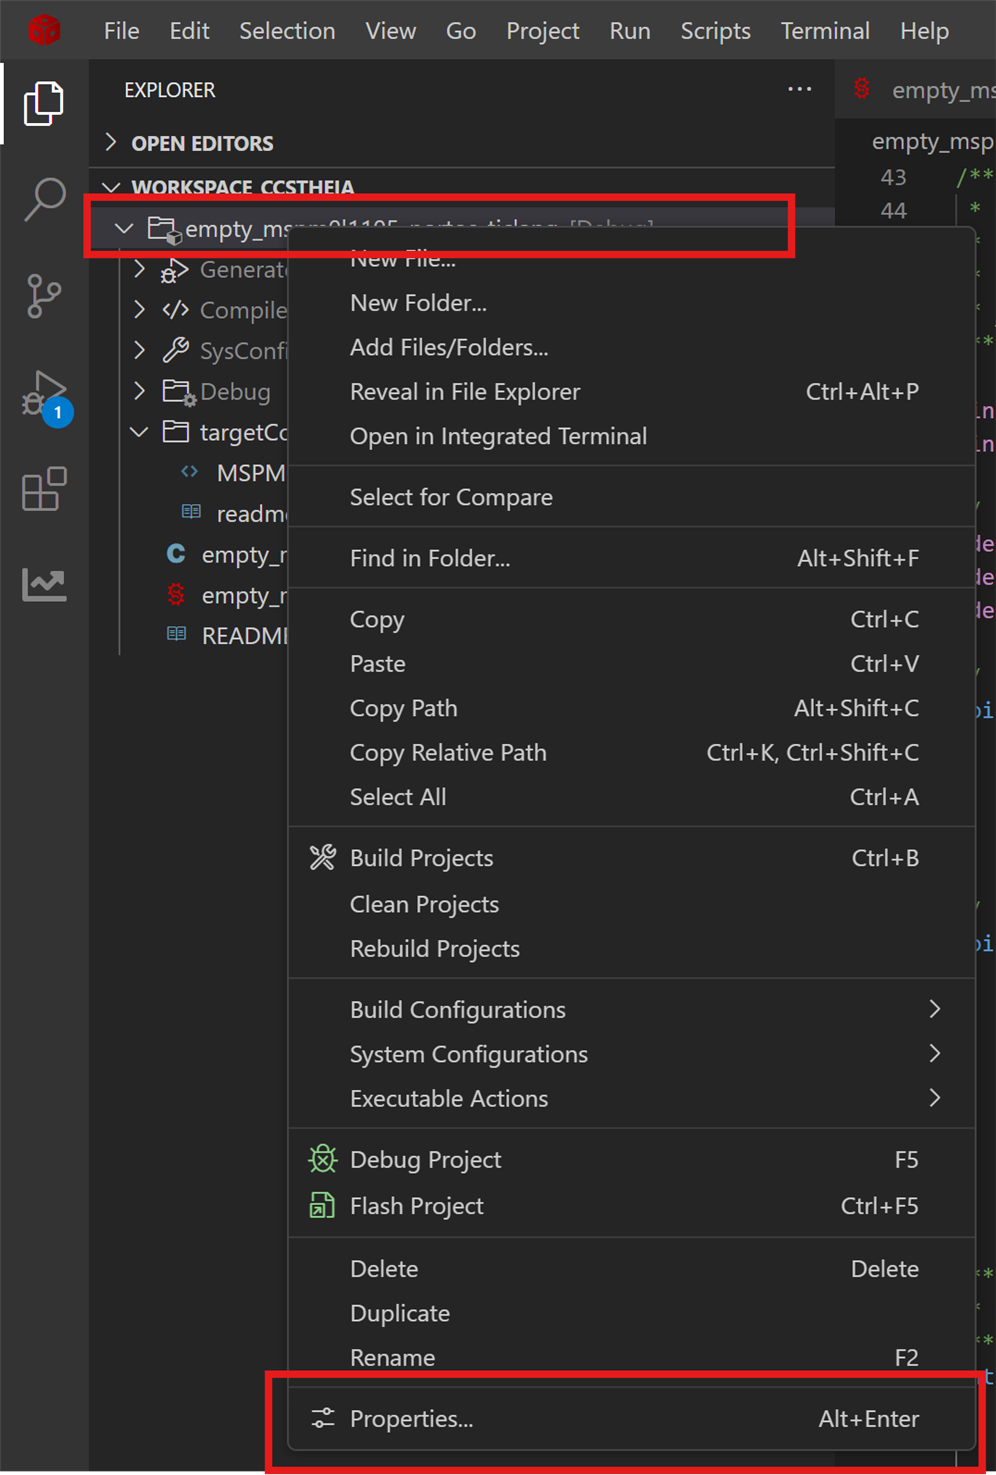
To have the best debug experience, let's tell ccstudio to not optimise our code when using the debug profile. Right click on the project and select Properties
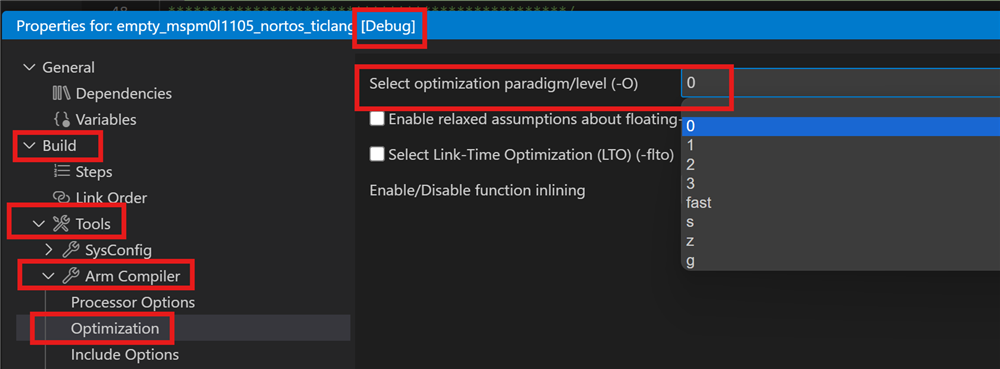
Set Build -> Tools -> Arm Compiler -> Optimization - W level to 0 (default: 2). This will take care that nothing gets optimised, and you can put a breakpoint on every executable line of source code.
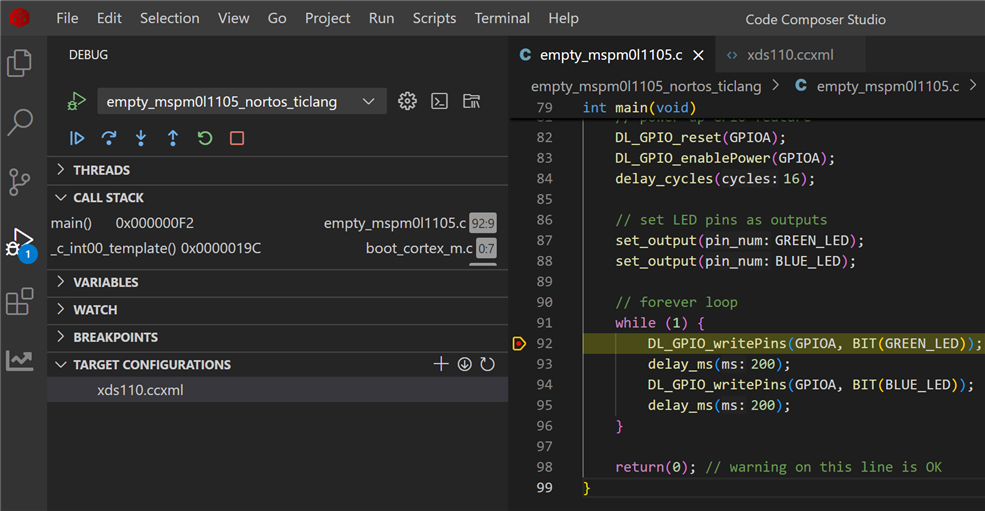
Now start a debug session: Run -> Debug Project
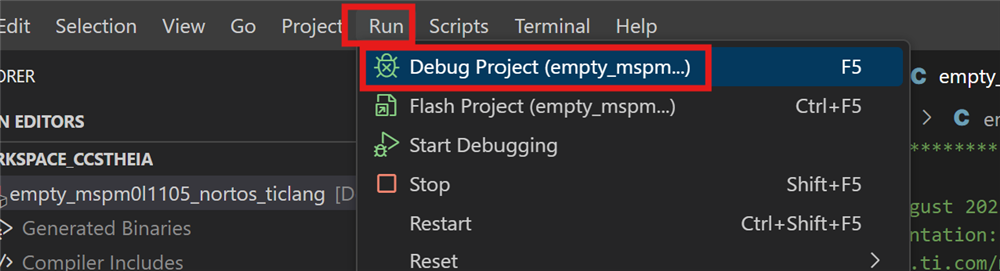
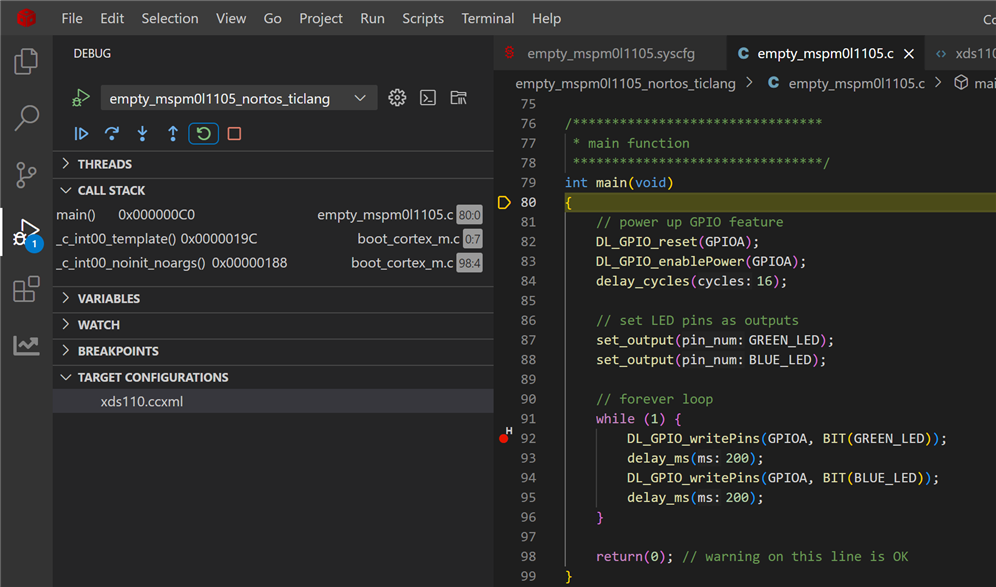
ccstudio will ask you to select what debugger (or dev board) you use. I selected the XDS110. If this is your first debug session with ccstudio v20, it will download new firmware for your debugger, and install it. A little bit later, you are in business:
That's it. Thank you for reading. Alternative: MSPM0 SDK QuickStart Guide for Keil.
|
If you want to use Code Composer Studio, but don't have a debugger, check these 2 posts: |
Top Comments