


1. Introduction
In the previous article, we looked at how we can upgrade the Kria SOM firmware to make it able to boot Ubuntu 22.04 (without the firmware, it can only boot Ubuntu 20.04). In this article, we will build on that and boot the OS. Booting into Ubuntu is a reasonably straightforward process: we will download the Ubuntu OS, flash it into a microSD card, and then use UART or an external monitor to connect to the board.
2. Flashing the microSD card with Ubuntu 22.04 image
We can get the Ubuntu 22.04 image from their official site listed below.
Link: https://ubuntu.com/download/amd-xilinx
Once on that page, the file can be downloaded just by clicking the “Download 64-bit” button, and your download will start. For example, as of April 7, 2023, the following file will be downloaded. The name might change in the future.

Once the download has been completed, we can use balenaEtcher (https://www.balena.io/etcher) to write the file to the SD card. Downloading and installing balenaEtcher is a simple process, so I assume you already have this installed. Now, you can insert the microSD card into your computer. Then, run balenaEtcher, and the following screen will be displayed.

You can see that the SDHC Card (15.9 GB) is selected by default. If your screen does not show this, it might be that you started balenaEtcher before you inserted the microSD card, so close the program and re-run it.
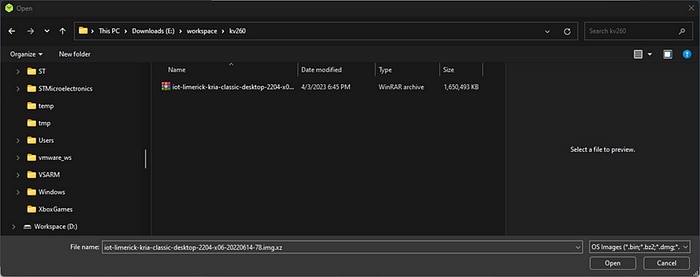
Do the following: click on the “Flash from file” option, browse your downloaded file, select it, and click Open.
balenaEtcher screen will change as it will show the partial image name, as shown in the image below.
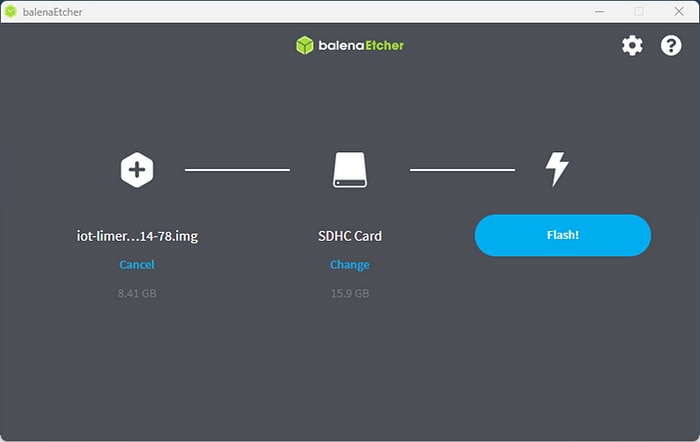
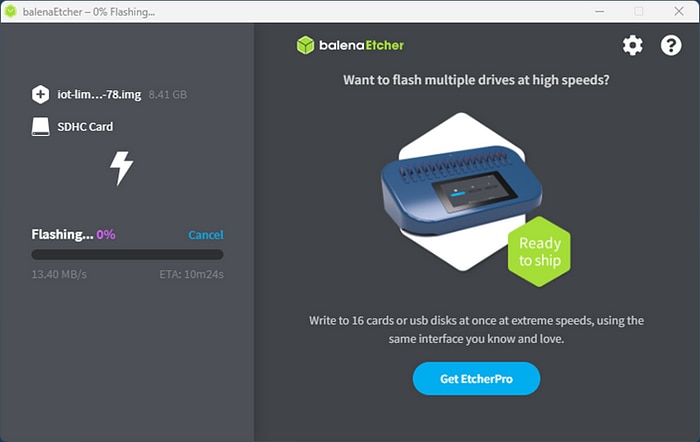
All that is left to do is click on “Flash!” but before you do that, double-check the SD card and make sure that it is the one that you want to write. When the process starts, you will see the flashing screen shown below.
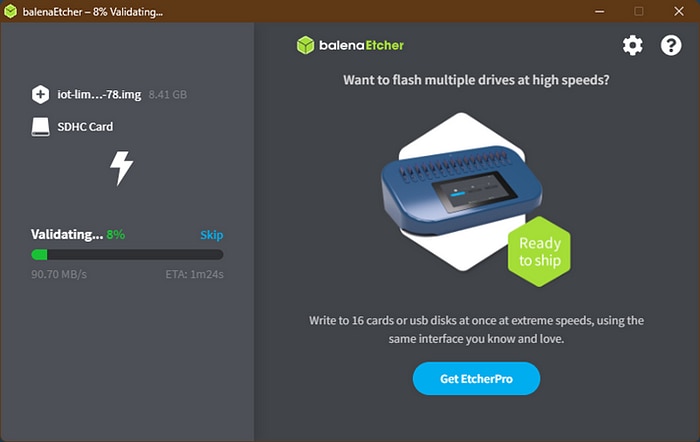
Once the flashing is done, the program will validate the written image, and you will see something like the following.
When the process is done, the following screen will appear.
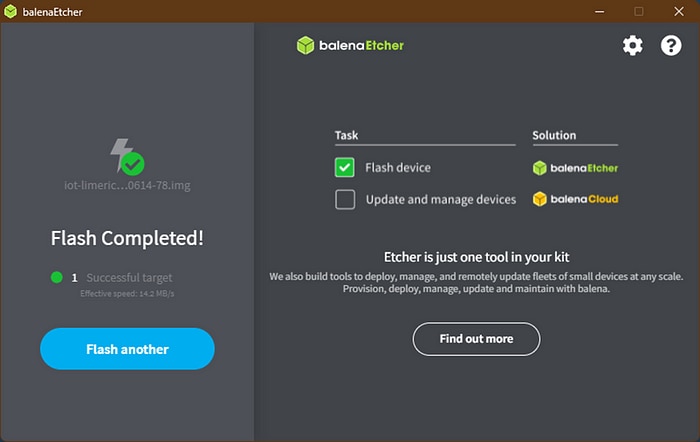
Now we can safely close the window and remove the microSD card from the computer.
3. Booting into Ubuntu 22.04 (external Monitor and/or UART)
Then, we can insert the card into the microSD card slot in the Kria Starter Kit.
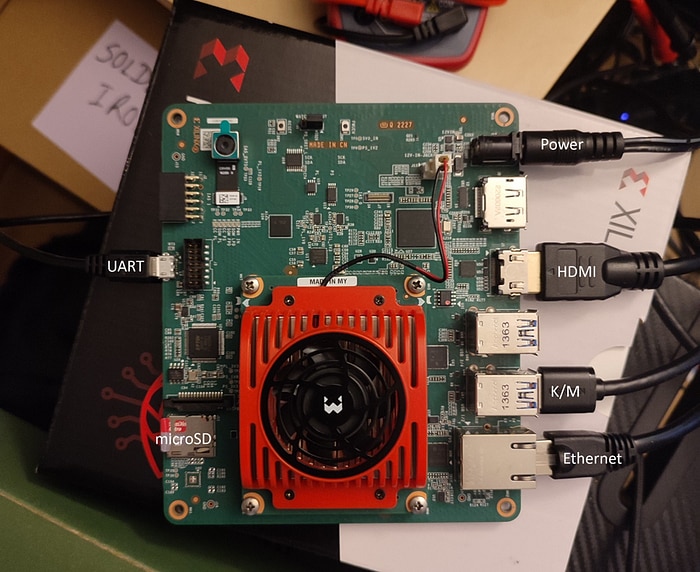
Before we start the board up, we have to have the following connection ready.
1. Connected to an external monitor through either the HDMI or DisplayPort (optional if you want the terminal interface).
2. Connected to the internet through Ethernet port (optional for just booting the OS)
3. Keyboard and mouse connected through the USB port
4. UART connected through the microUSB (optional if you have the monitor connected).
I have all the four connections that I listed above and that can be seen in the image below.
If you have connected through the microUSB-UART then you will need to set the UART communication in your computer. Follow all the instructions from 1. If you have connected the external monitor, then you can jump ahead to 3.
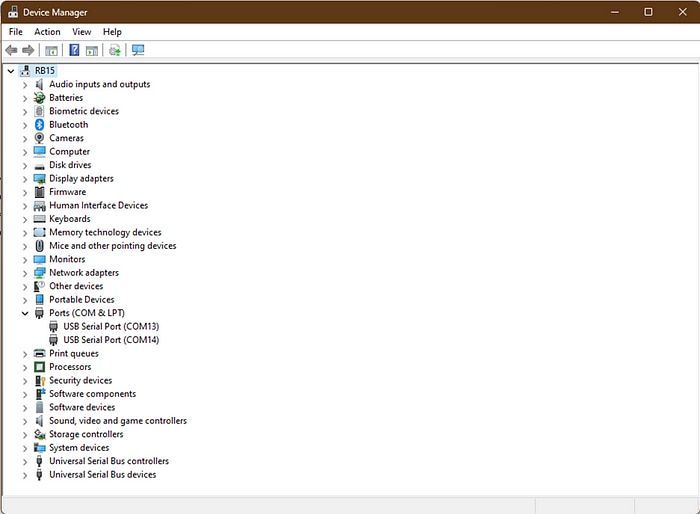
- Go to the device manager through your Windows settings and you will see two COM ports listed under Ports (COM & LPT). Both COM ports are for the Kria board. For the UART communication, we will use the lower-numbered COM-port (COM-13, for example) as that is the port used by the processor for debugging information.
2. Open your favorite serial communication manager (PuTTY or MobaXTerm) and set the following settings and click Open.
Speed (baud) : 115200
Data bits: 8
Stop bits: 1
Parity: None
Flow control: None

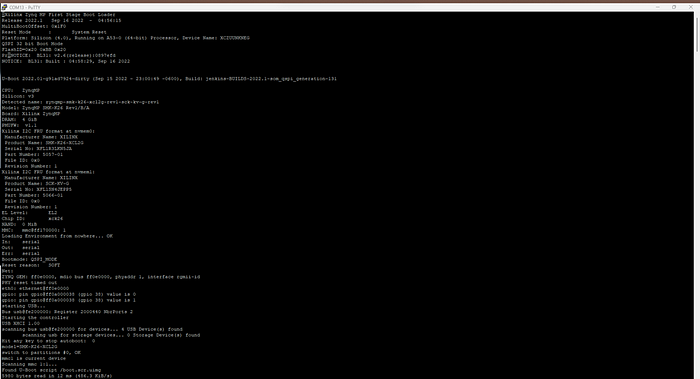
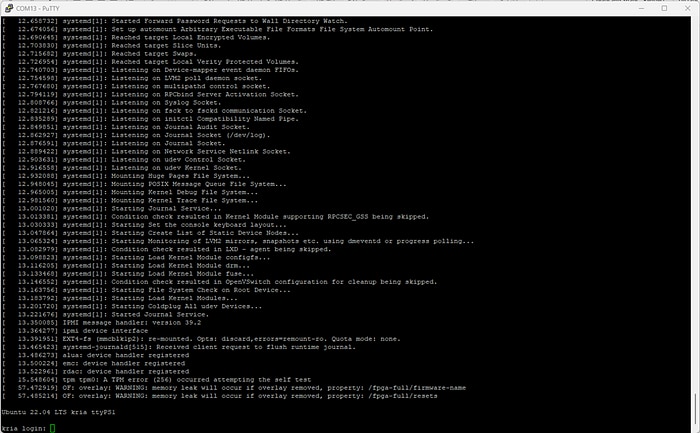
Following screen should be displayed as soon as you click Open.
3. When all the messages are displayed, you will be prompted for a login, as shown below. For setup with monitor, after all the messages a GNOME screen will appear.
The default username and password for the first-time login are:
Username: ubuntu
Password: ubuntu
However, you are required to change the password when you login for the first time. Remember to set a password that is at least 8 characters long, or else you will get a BAD password error (just like me) as shown in the screenshot below.

And, if connected through a monitor, you can see the full desktop as below.
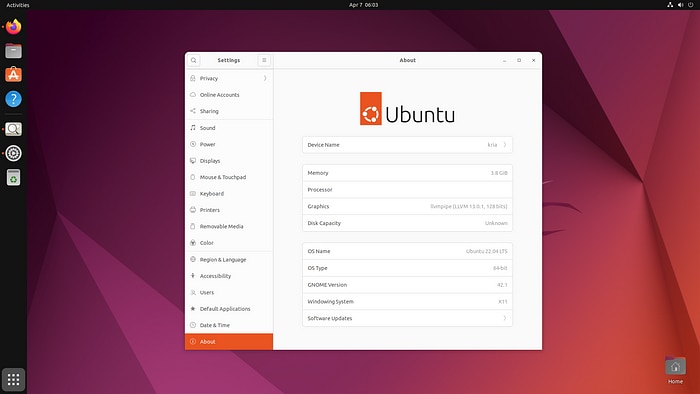
With this, we have successfully booted into Ubuntu 22.04 in our KV260 board.
4. Conclusion
In today’s lesson, we flashed our microSD card with the Ubuntu 22.04 boot image file and then successfully booted into Ubuntu 22.04. We used both the UART command line interface and external monitor interface to start our board up. In the next article, we will get started with running actual demos.