


Hello!
Here goes my second tutorial on Minized this time with PYNQ 
This is my first take on PYNQ and in future I will try to use different overlays and use FPGA based kernels for acceleration.
Story
A step by step take how to create working PYNQ system for Minized.
Minized as low-cost board provides an entry point for new developers to try new features or learn how FPGA's work. This tutorial focuses how to use existing tools to create PYNQ image for Minized, so you can modify it, create overlays and learn!
So, let's get started!
Preparing the environment
First step is creating BSP for our PYNQ project. For this you could download pre-built BSP for Minized or follow my other tutorial.
Note: I have skipped some steps while creating this tutorial. If you feel lost look at my previous project and If you don't find a solution write a comment.
Note: If you need clean Ubuntu you can download one here: https://1drv.ms/u/s!As37uPW_18jehTkymDK5EiuWbuC1?e=JBEgII password is "root". Just open it with oracle virtual box. Run "setup_host.sh"(In PYNQ scripts folder) and install Xilinx tools.
You will need to create some working directory. Call it for example Avnet. Now download repositories for Minized and create template project.
mkdir Avnet;
cd Avnet;
git clone https://github.com/Avnet/bdf.git --branch master;
git clone https://github.com/Avnet/hdl.git --branch 2019.1;
git clone https://github.com/Avnet/petalinux.git --branch 2019.1;
And download PYNQ image from Xilinx GitHub.
git clone https://github.com/Xilinx/PYNQ.git -b image_v2.5.4
Modify Vivado project
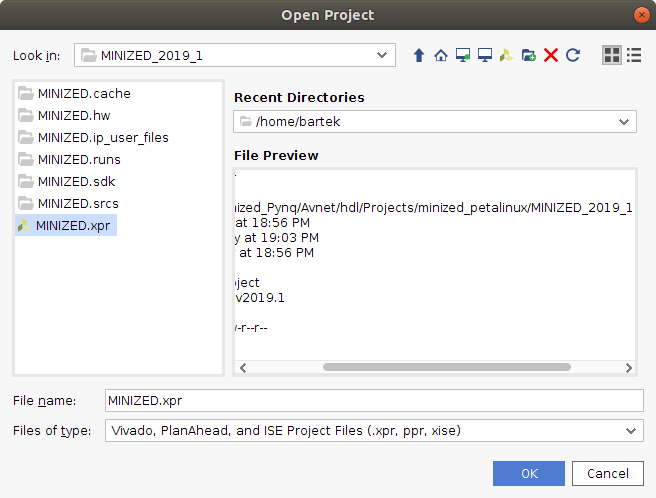
Open project with Vivado 2019.1
Open block design
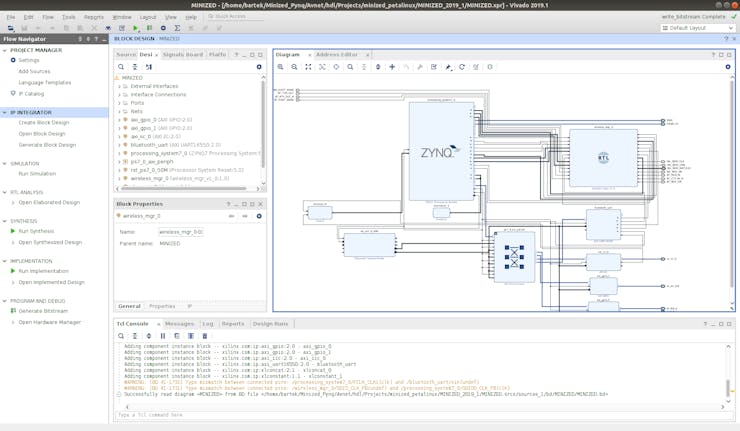
Remove unnecessary IP-Cores and Disable unused Zynq interfaces (Not necessary).
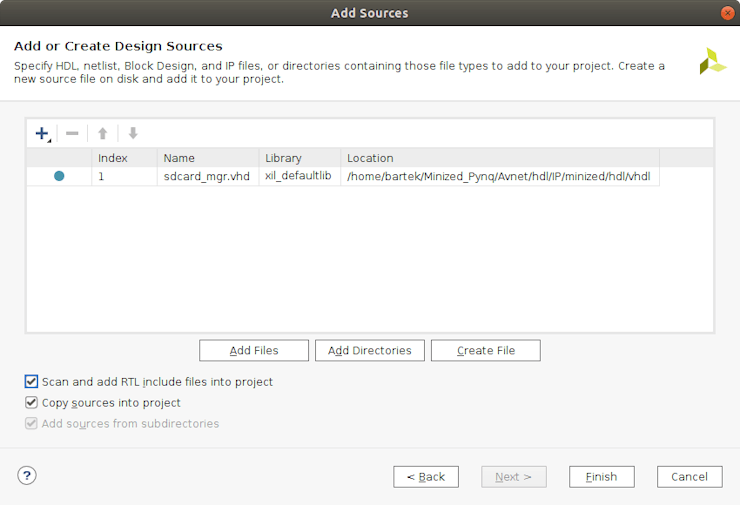
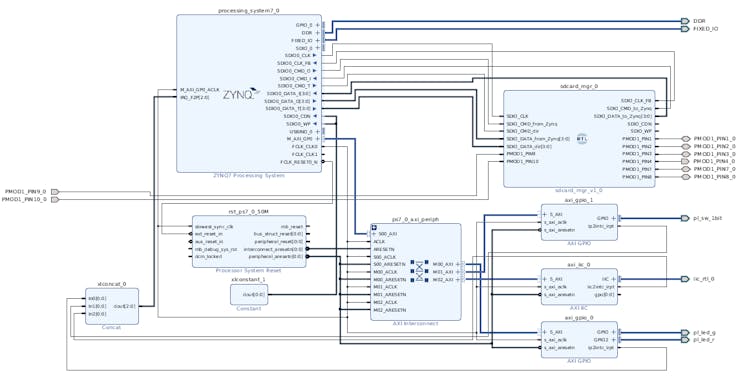
Add "sdcard_mgr" IP-core to block design.
Connect "sdcard_mgr" to Zynq EMIO interface.
And Modify constrains:
Open "minized_petalinux.xdc" and add:
#SD - CARD
set_property PACKAGE_PIN L15 [get_ports PMOD1_PIN1_0]
set_property IOSTANDARD LVCMOS33 [get_ports PMOD1_PIN1_0]

set_property PACKAGE_PIN M15 [get_ports PMOD1_PIN2_0]
set_property IOSTANDARD LVCMOS33 [get_ports PMOD1_PIN2_0]

set_property PACKAGE_PIN L14 [get_ports PMOD1_PIN3_0]
set_property IOSTANDARD LVCMOS33 [get_ports PMOD1_PIN3_0]

set_property PACKAGE_PIN M14 [get_ports PMOD1_PIN4_0]
set_property IOSTANDARD LVCMOS33 [get_ports PMOD1_PIN4_0]

set_property PACKAGE_PIN K13 [get_ports PMOD1_PIN7_0]
set_property IOSTANDARD LVCMOS33 [get_ports PMOD1_PIN7_0]

set_property PACKAGE_PIN L13 [get_ports PMOD1_PIN8_0]
set_property IOSTANDARD LVCMOS33 [get_ports PMOD1_PIN8_0]

set_property PACKAGE_PIN N13 [get_ports PMOD1_PIN9_0]
set_property IOSTANDARD LVCMOS33 [get_ports PMOD1_PIN9_0]

set_property PACKAGE_PIN N14 [get_ports PMOD1_PIN10_0]
set_property IOSTANDARD LVCMOS33 [get_ports PMOD1_PIN10_0]
Save block design and generate new bitstream.
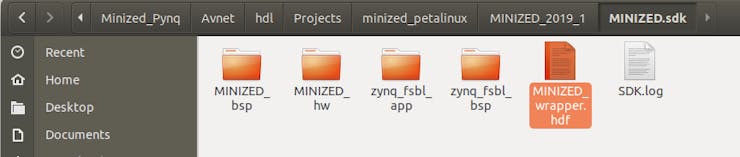
Click File → export → Hardware to export project HDF.
This will create new "MINIZED_wrapper.hdf"
Note: I have deleted previous.hdf file
Modify Petalinux project
Note: You can skip this whole part if you don't want to play with petalinux. Just download one of Avnet's BSP and use it for creating PYNQ rootfs, program EMMC memory with it (use minimal petalinux image and USB stick and copy files to EMMC). Use some other BOOT.bin that boots to EMMC. Later PYNQ will download overlay and override bitstream that is programmed by BOOT.bin.
Go to petalinux project created by Avnet script or BSP
petalinux-create -t project -n MzPynq --template zynqChange referenced HDF for petalinux project.
This command will search for.hdf file in MINIZED.sdk folder. If there are two.hdf files petalinux will return an error.
petalinux-config --get-hw-description=../../../hdl/Projects/minized_petalinux/MINIZED_2019_1/MINIZED.sdk/(Optional) Enable FPGA Manager.
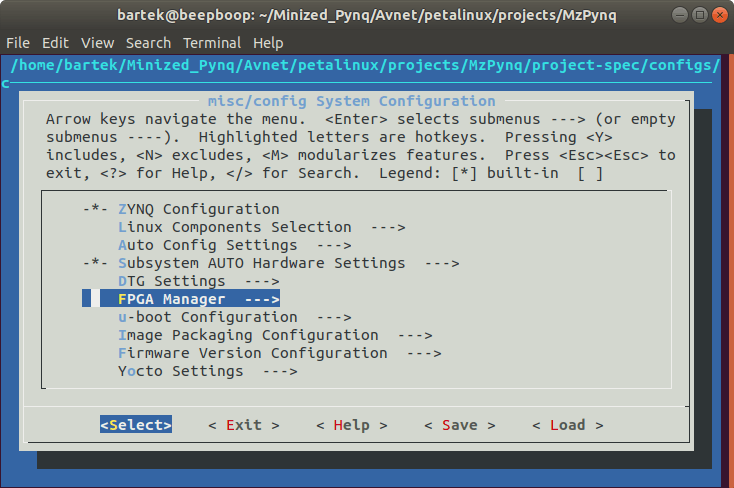
1 / 2
Go to Image Packaging Configuration and change root file system to SD-card. Image.ub will search for rootfs on /dev/mmcblk0p2 partition.
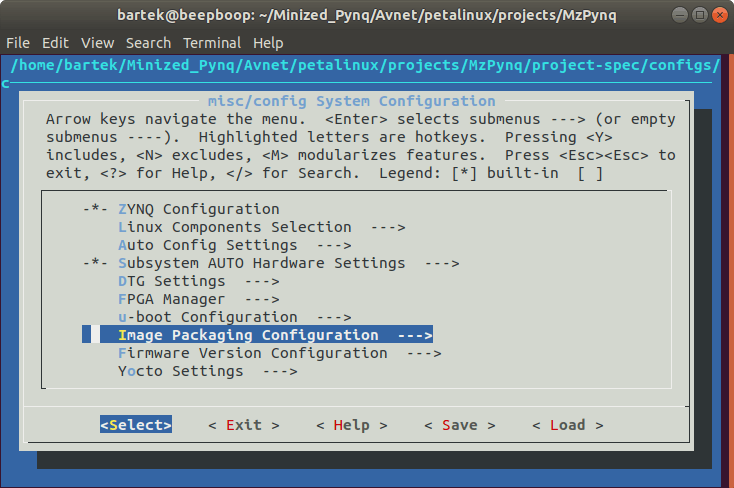
1 / 2
Modify boot sequence to look for "image.ub" on primary sd
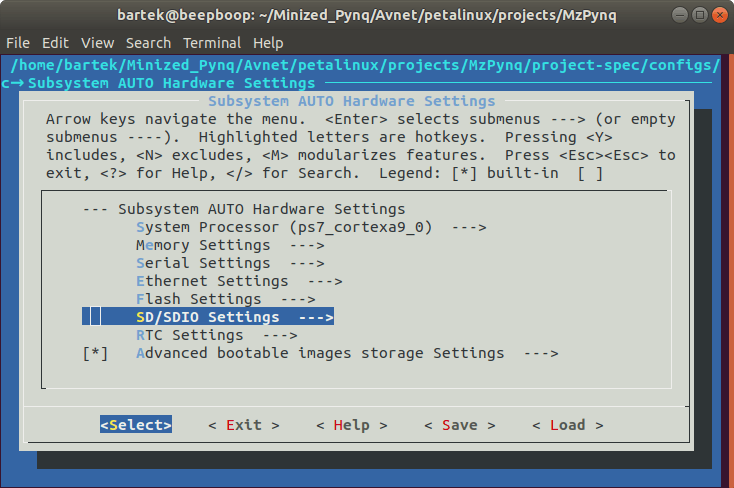
1 / 4
Save and exit.
Go to MzPynq → project-spec → meta-user → recipes-bsp → device-tree → system_user.dtsi
cd project-spec/meta-user/recipes-bsp/device-tree/
gedit system_user.dtsi
And change device-tree
/include/ "system-conf.dtsi"
/ {

     aliases {
          serial0 = &uart1;
          serial1 = &uart0;
     };

};

&flash0 {
     compatible = "micron,n25q128", "jedec,spi-nor";
};

/{
     usb_phy0: usb_phy@0 {
          compatible = "ulpi-phy";
          #phy-cells = <0>;
          reg = <0xe0002000 0x1000>;
          view-port = <0x0170>;
          drv-vbus;
     };
};

&usb0 {
     dr_mode = "otg";
     usb-phy = <&usb_phy0>;
} ;

&qspi {
     #address-cells = <1>;
     #size-cells = <0>;
     flash0: flash@0 {
          compatible = "micron,m25p80";
          reg = <0x0>;
          #address-cells = <1>;
          #size-cells = <1>;
          spi-max-frequency = <50000000>;
     };
};

/* SD Interface for PMOD */
&sdhci0 {
     status = "okay";
     non-removeable;
     bus-width= <4>;
     xlnx,has-cd = <0x0>;
     xlnx,has-power = <0x0>;
     xlnx,has-wp = <0x0>;

     mmccard: mmccard@0 {
          reg = <0>;
          compatible = "mmc-card";
          /* broken-hpi; */
     };
};

/ {

};
Save and
petalinux-buildIf build passes with FPGA manager turned on, that means build in PYNQ should too.
You can turn off FPGA manager and create new BSP based on modified hardware
petalinux-config
petalinux-build;
petalinux-package --bsp -p /home/bartek/Minized_Pynq/Avnet/petalinux/projects/MzPynq -o Minized_Pynq
Program Minized with packaged BOOT.bin
cd ../../../../images/linux/;
petalinux-package --boot --fpga --fsbl --u-boot --force;
program_flash -f BOOT.BIN -fsbl zynq_fsbl.elf -flash_type qspi-x4-single;
Modifications to PYNQ
Note: If you are building Minized PYNQ on EMMC memory from Avnet BSP's. You should change pynq_bootargs.dtsi to "/dev/mmcblk1p2".


Go to PYNQ → sdbuild → scripts and run "setup_host.sh"
This is used to download all necessary files and programs to build PYNQ image.
cd PYNQ/sdbuild/scripts/
bash setup_host.sh
After script is finished you can source Vivado and SDK for building:
source /home/bartek/petalinux20191/settings.sh;
source /home/bartek/Xilinx/Vivado/2019.1/settings64.sh;
source /home/bartek/Xilinx/SDK/2019.1/settings64.sh;
Go to PYNQ → sdbuild folder and try:
make BOARDS=Pynq-Z1 To see if PYNQ is set up properly.
I'm going to use existing PYNQ 2.5 imagerootfs for arm
Note: Follow this link for quick porting Image to PYNQ.
Go to PYNQ → sdbuild and type:
bash scripts/image_from_prebuilt.sh MinizedPynq Minized_Pynq.bsp arm bionic.arm.2.5.img;After build finished you will have output folder in PYNQ → sdbuild → output
With your Minized PYNQ image.
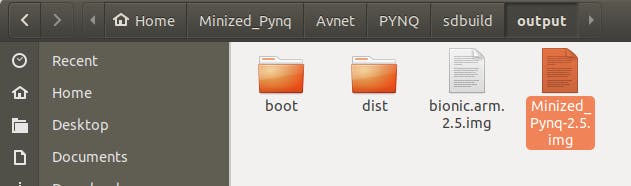
Double-click on it and restore disk image on SD-CARD.
After flash is finished type
sudo gpartedAnd resize second partition to use all the free space left on device.
Password for PYNQ is "xilinx"

Now we can connect USB HUB with Camera and WI-FI adapter.

Use nano to generate "wpa_supplicant.conf"
sudo nano /etc/wpa_supplicant/wpa_supplicant.confand write:
network={
ssid="SSID"
psk="PASSWORD"
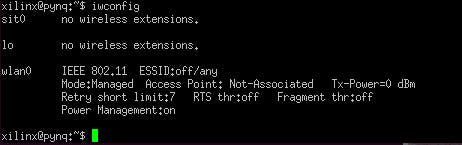
}Now load "wpa_supplicant" and wait for ip-address
sudo wpa_supplicant -c /etc/wpa_supplicant/wpa_supplicant.conf -i wlan0 -B
sudo dhclient wlan0
Jupyter notebook should be running on your Minized.

Open your browser and connect to PYNQ. Use IP listed in wlan0 interface.
http://192.168.0.102:9090Success!

Create new file named "Testing.ipynb". This script will take 10 frames and show them in Jupyter notebook, each with 1-second delay.
import os
import cv2
import time
from matplotlib import pyplot as plt
from IPython.display import clear_output

cap = cv2.VideoCapture(0)
if cap.isOpened():
    print("Camera opened")
else:
    print("Failed to open camera")

i = 1
while (i < 10):
    check, frame = cap.read()
    if check == False:
        print(f"Error reading frame! {i}")
    else:
        plt.imshow(cv2.cvtColor(frame, cv2.COLOR_BGR2RGB))
    i += 1
    time.sleep(1)
    clear_output(wait=True)
Now let's try if PYNQ overlay is working.
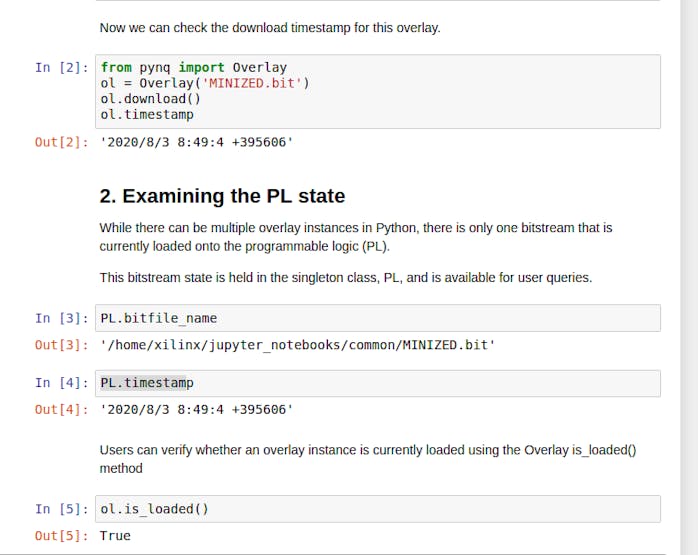
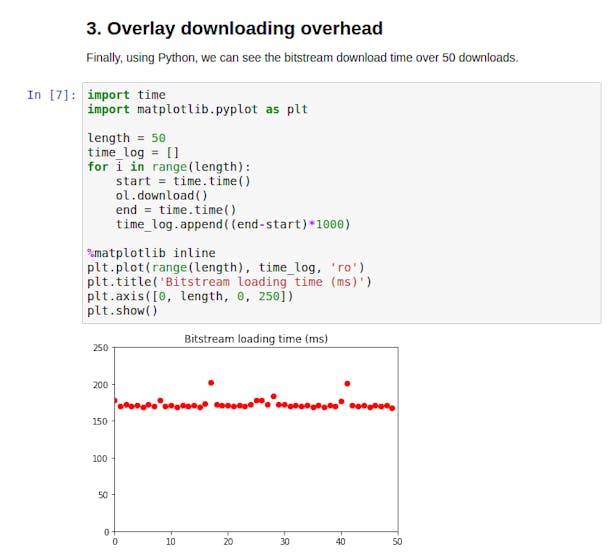
Open common folder and run "overlay_download"
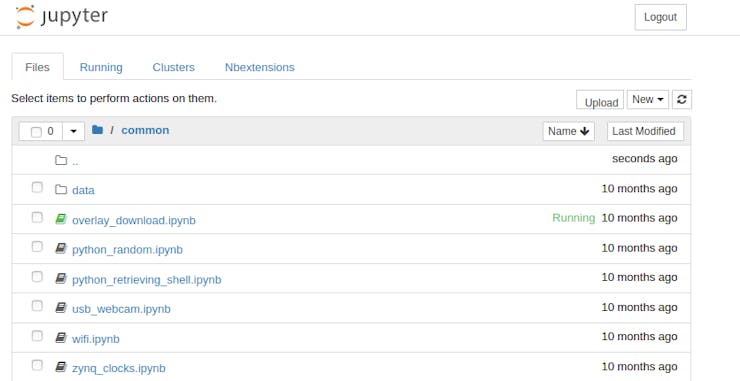
Run first cell in script
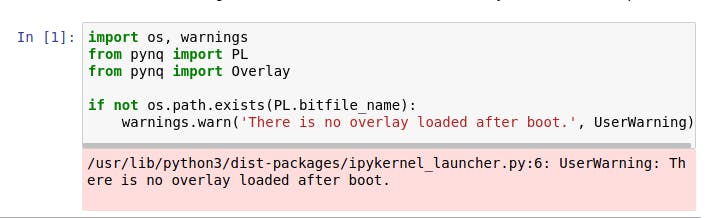
As you can see there is no default overlay loaded, we are using bitstream from BOOT.BIN.
Let's load an overlay. For this I will use files generated by Vivado.
cd /Avnet/hdl/Projects/minized_petalinux/MINIZED_2019_1/And look for "hw_handoff" folder
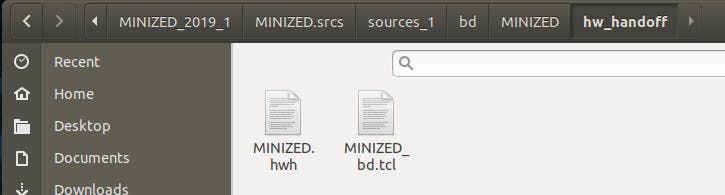
Also, we will need bitstream. Just search in Vivado project folder.
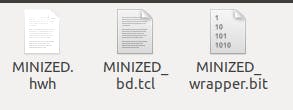
Rename these files, so PYNQ knows they are referencing to the same overlay.
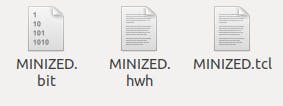
Upload these files to Jupyter Notebook
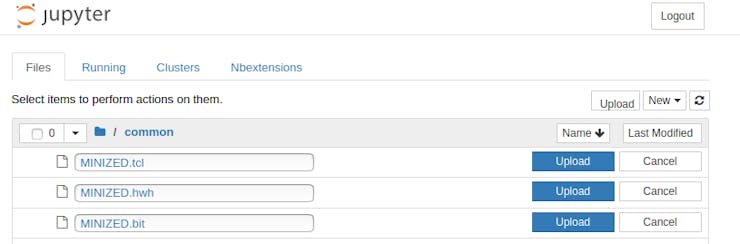
Modify script to load new overlay.
Summary
So these are the basics how to create PYNQ for Minized.
In next tutorial I will try to show you how to create PYNQ for EMMC memory.
If you find it useful or any have suggestions please leave some feedback.
Take Care!