| Previous blogs | Description |
|---|---|
| #1 - Introduction, the plan and materials preparation | In this blog post we describe the project's main concept and some initial high-level design of it. |
| #2 - Materials and casing assembly | Our journey with selecting proper materials, cutting and assembling the drawer and its casing! |
| Next blogs | Description |
|---|---|
| #4 - Plants, harvests, and fertilisers | First harvest, problems with plants and used fertilisers. All that went off-script for our plants in the artificial environment. |
| #5 - Piping and pumping - water and liquid fertiliser delivery system | Design and development of water supply system. |
| #6 - Mix of fixes | Final touches to water supply system and small redesigns/fixes. |
| #7 - Ride the lightning - Wiring diagram, pinout and components discussion | Diagram of the circuit, pinout for most components, wire choices and their connections |
| #8 - Pulling the strings | LED and Fan control circuit, overview of BJTs and MOSFETs with a handful of useful general information |
| Detailed description of 3D printed components, their presentation and some tips | |
| #10 - Software, architecture and the benefits of good preparation | Big explanation of the software and its architecture |
| #11 - Summary | Our final post before the end of the challenge! |
Intro
It's been a while since our last post, but don't think we forgot about our project! We were actually pretty busy working on it and now its time to tell you about it! Over the last 3 weeks (it really has been a while!) we have continuously been improving the design, did some more wood cutting, planting and 3D printing. As I am writing this post, our veggies are already slowly growing and we will soon be moving them to their permanent home, under Jakub's bed  ! So without further-ado, let's get to it!
Cutting
Before moving onto any planting or fitting it with foil, we had to cut some holes for the fans and the driving motors. First we played around in fusion360 to decide where we want the holes and what size they should be.
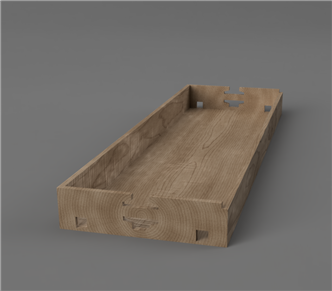
Below is a sneak peek of how the 3D model:
Since the motors we are going to use have a diameter of 32mm we decided to cut square holes with a side length of around 40mm. This way we will have some wiggle space when deciding how high and in what orientation will the motors be fixed. Also we had to cut the holes close to the bottom of the drawer as we will need to raise it a few cm in the air. That's because the drawer itself might get quite heavy so to decrease the shearing forces on the motors' shafts we will be adding additional supports underneath (hence the increase in height). This may sound quite complex for now, but it will all make sense in future posts, so bare with us 
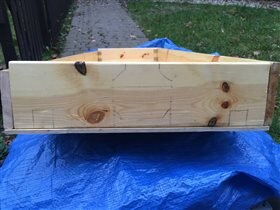
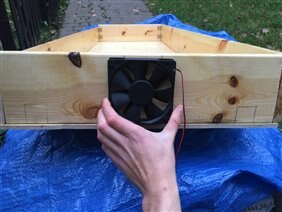
Additionally we had to secure the fans in a way so they would be the most effective and so that the wood will keep its integrity. Initially we wanted to cut circular holes, but after fiddling a bit with the 3D model we concluded that it could cause the entire drawer to break apart. So we came up with this more complex shape, with 4 trapeziums to secure the fan's corners to along with a horizontal bar to improve the plank's structure.
Now here is our attempt at copying the 3D model to the real world, and I must say I am quite pleased with the results 
Based on the lighting you might think it took us the whole day and it did feel like it (given the fact that we are newbies when it comes to woodworking), but it actually took us 1.5 hours. After cutting it, we filed it to get rid of the rough edges and splinters. We also screwed the fans in place, which will manage air circulation in the system, sucking fresh air on one end and pushing the humid air outside.
Planting
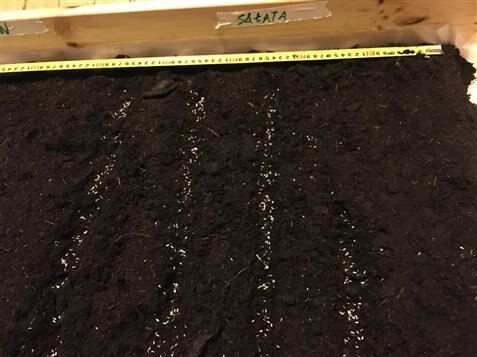
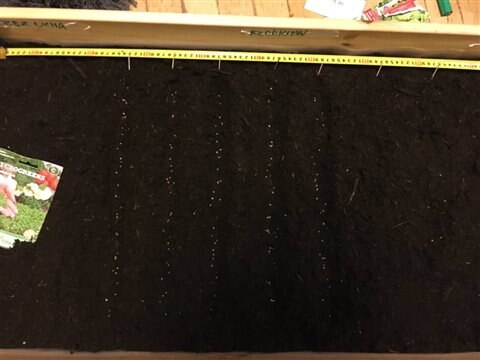
After the cutting was done, it was finally time to fit the drawer with foil, fill it with soil and plant the seeds! To separate the soil from the drawer we placed some plastic foil inside and then laid out the soil leaving some space on each side for the electronics and other stuff. Then we started planting the seeds! We selected 3 plants to use - lettuce, radish and cress (as a control sample, as it grows real quick compared to others). We set out a space for each plant, a 40cm long plot for lettuce with 4 rows, 50 cm long plot for radish with 5 rows and the rest (30-40 cm) for cress, evenly spread out across it. Each row was marked with a toothpick, and the general area was annotated by a beautiful label stuck on the side of the drawer  .
.
After planting we watered it and left it to grow!
Summary
Initially I wanted to summarise everything we have done in the past three weeks but this post is already getting quite long, so I we are splitting it into a few separate posts.
Things to come in the next blog posts:
- aluminium foil fitting for the drawer's cover
- 3D modelling and printing
- Further assembly of the drawer
- Testing electronic components
- software design
- electric circuit design
So stay tuned, more content soon to come!
Szymon & Jakub
| Previous post | Next post |
|---|---|
| #2 - Materials and casing assembly | #4 - Plants, harvests, and fertilisers |




Top Comments
-

przemduc
-
Cancel
-
Vote Up
+1
Vote Down
-
-
Sign in to reply
-
More
-
Cancel
Comment-

przemduc
-
Cancel
-
Vote Up
+1
Vote Down
-
-
Sign in to reply
-
More
-
Cancel
Children